102
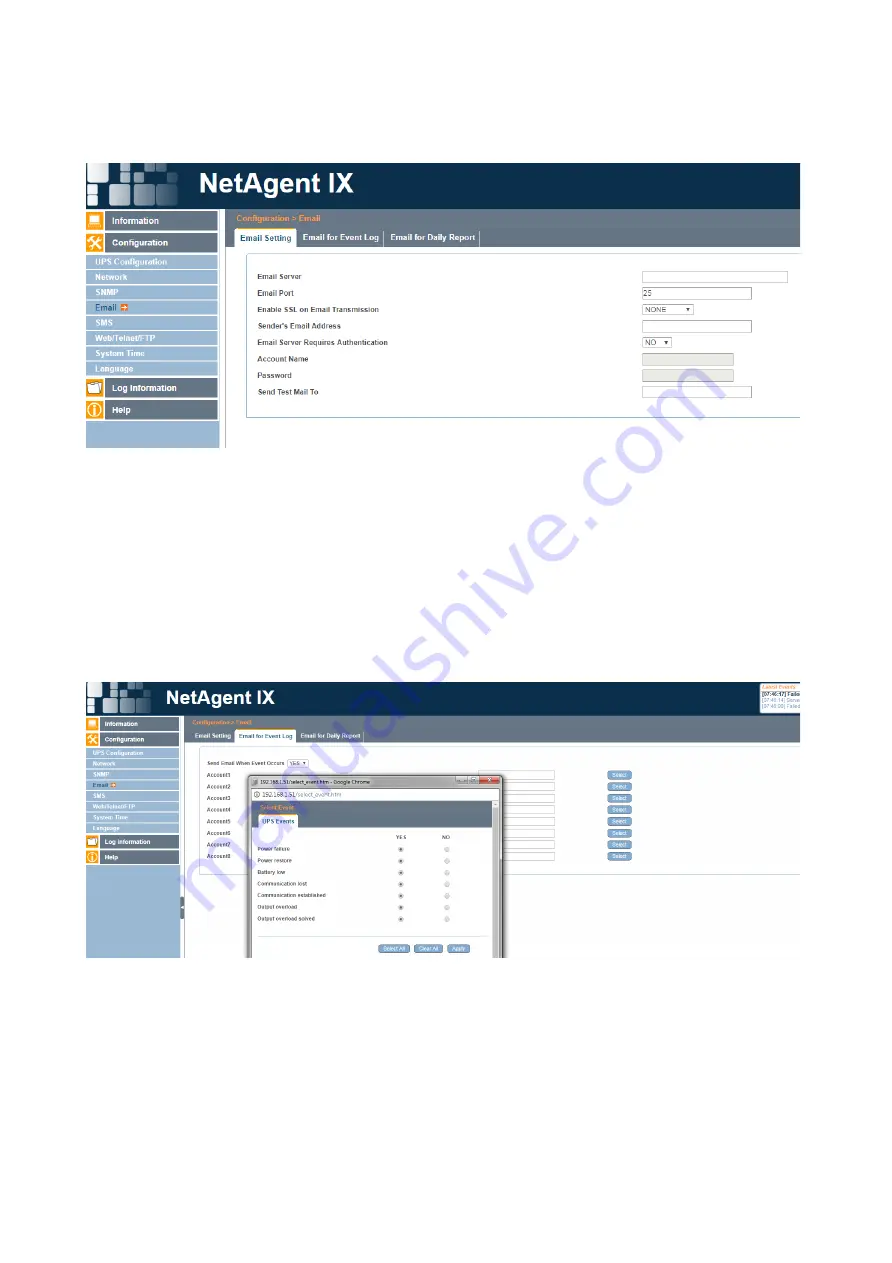
Figure 6-66 shows the E-mail Setting Screen.
Figure 6-66: Email Settings Screen
After entering data, click the “Apply” button to save the information. Once the
information has been saved, click the “Test” button to send a test e-mail to the e-mail
address in the From field.
To receive Emails on events click the upper tab labeled “Email for Event Log”.
Change “Send Email When Event Occurs” to “YES”, then add the recipients Email to
the list. To select which events the recipient will be Emailed about, click “Select”
button next to their Email and a pop up box will appear with a list to select from
(Figure 6-
67). Once done click “Apply” in the pop up window then again on the main
Email for Event Log page.
Figure 6-67: Email for Event Log Screen
To enable daily reports, click the last upper tab in the Email section labeled “Email
for Daily Report”. Change the setting for “Send Email for Daily Report” to “YES”, then
add the recipients Email address to the list and select “Apply” to save.
Содержание MP Series
Страница 3: ...III ...
Страница 20: ...20 STEP 1 Connect CONTROL Wires ...
Страница 22: ...22 Installation and Troubleshooting Guide Figure 9 ...
Страница 30: ...30 MP2000E System Battery Backup System Section 2 Operator s Manual ...
Страница 49: ...49 Figure 21 Note See Section 2 2 14 For details on Event Log View under Maintenance submenu ...
Страница 51: ...51 2 2 8 Status Submenu CONT D ...
Страница 70: ...70 2 3 3 Main Menu ...
Страница 72: ...2 3 4 1 RS232 USB Menu Tree ...
Страница 74: ...74 ...
Страница 104: ...104 Figure 6 70 SMS for Event Log Screen ...
Страница 126: ...126 ...
Страница 148: ...148 ...


