ioLogik E2200 Series
Initial Setup
2-5
Activating ioAdmin and Connecting to the ioLogik
1.
Open ioAdmin:
Click
Start
Program Files
MOXA
IO Server
Utility
ioAdmin.
2.
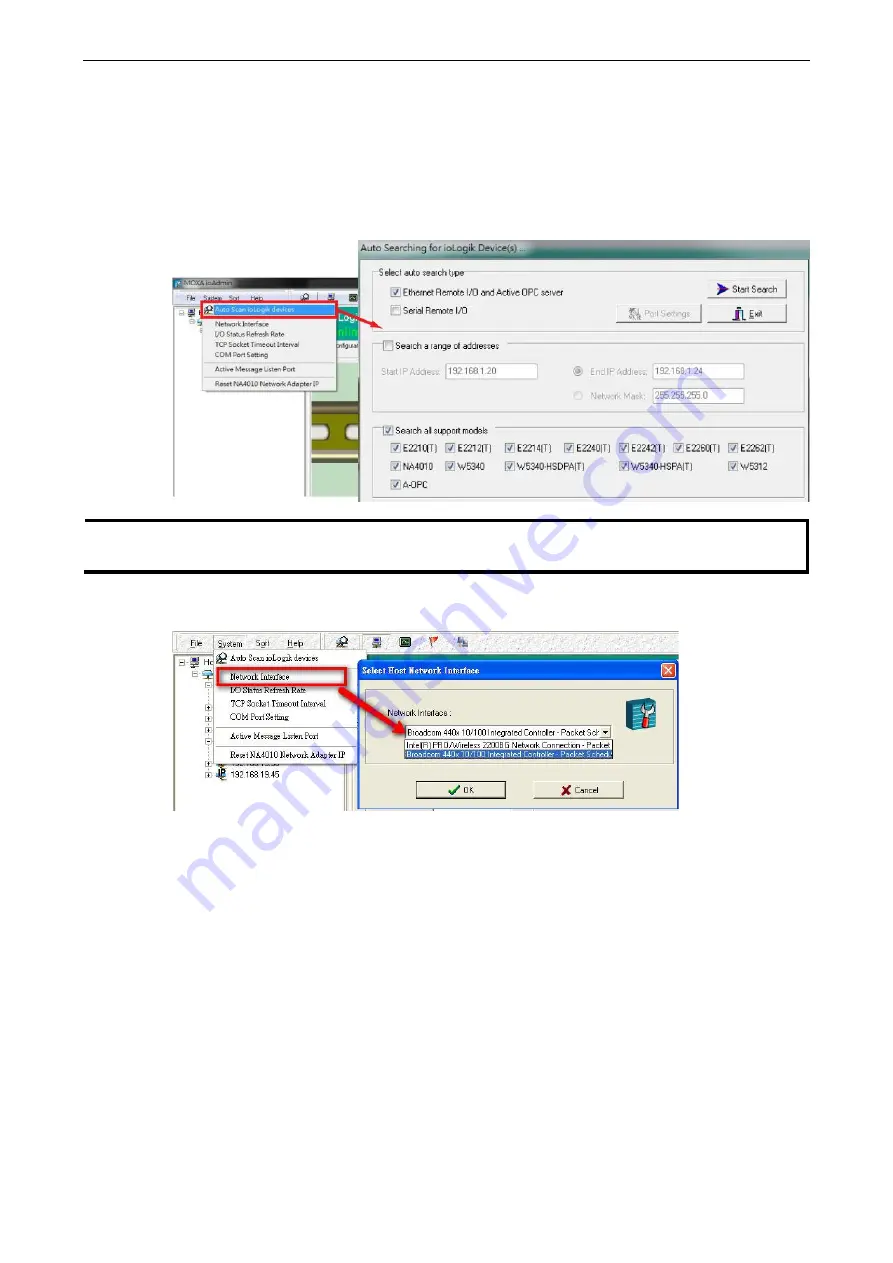
Search the network for the ioLogik:
When ioAdmin is started, it will automatically run the auto search
program. You may also click
System
Auto Scan ioLogik device
on the menu bar.
A dialog window will
appear. Click
Start
Search
to begin searching for your unit. Once the ioLogik has been detected, modify
the settings as needed for your network environment, and then restart the device.
NOTE
When setting up a previously configured ioLogik, first restore it to factory default settings by using the RESET
button (see
Chapter 1
for details). Then use the ioAdmin utility to configure the ioLogik device.
3.
If the host computer supports multiple network interfaces, be sure to select the correct interface before
searching the network.
Содержание ioLogik E2210
Страница 17: ...ioLogik E2200 Series Introduction 1 12 Physical Dimensions Without LCM Unit mm With LCM Unit mm...
Страница 138: ...ioLogik E2200 Series Cable Wiring D 4 Digital Output Sink Type...
Страница 139: ...ioLogik E2200 Series Cable Wiring D 5 RTD Input Wiring Structure 2 wire 3 wire...
Страница 140: ...ioLogik E2200 Series Cable Wiring D 6 Thermocouple Input Wiring Structure 2 wire...
Страница 144: ...ioLogik E2200 Series Input and Output Terminal E 4 ioLogik E2262 I O left to right...


