Mountain Models Tantrum
9
Be careful to keep your fingers as far away from the glue as possible; otherwise,
you might become a part of the model permanently. If you do get stuck,
remove yourself as carefully as possible, trying to avoid taking any of the wood
with you. Once separated, remove the CA glue from your fingers using nail
polish remover, or acetone, making sure you wash your hands thoroughly when
done.
4.
Once the parts are dry, carefully remove them from the wax paper.
5.
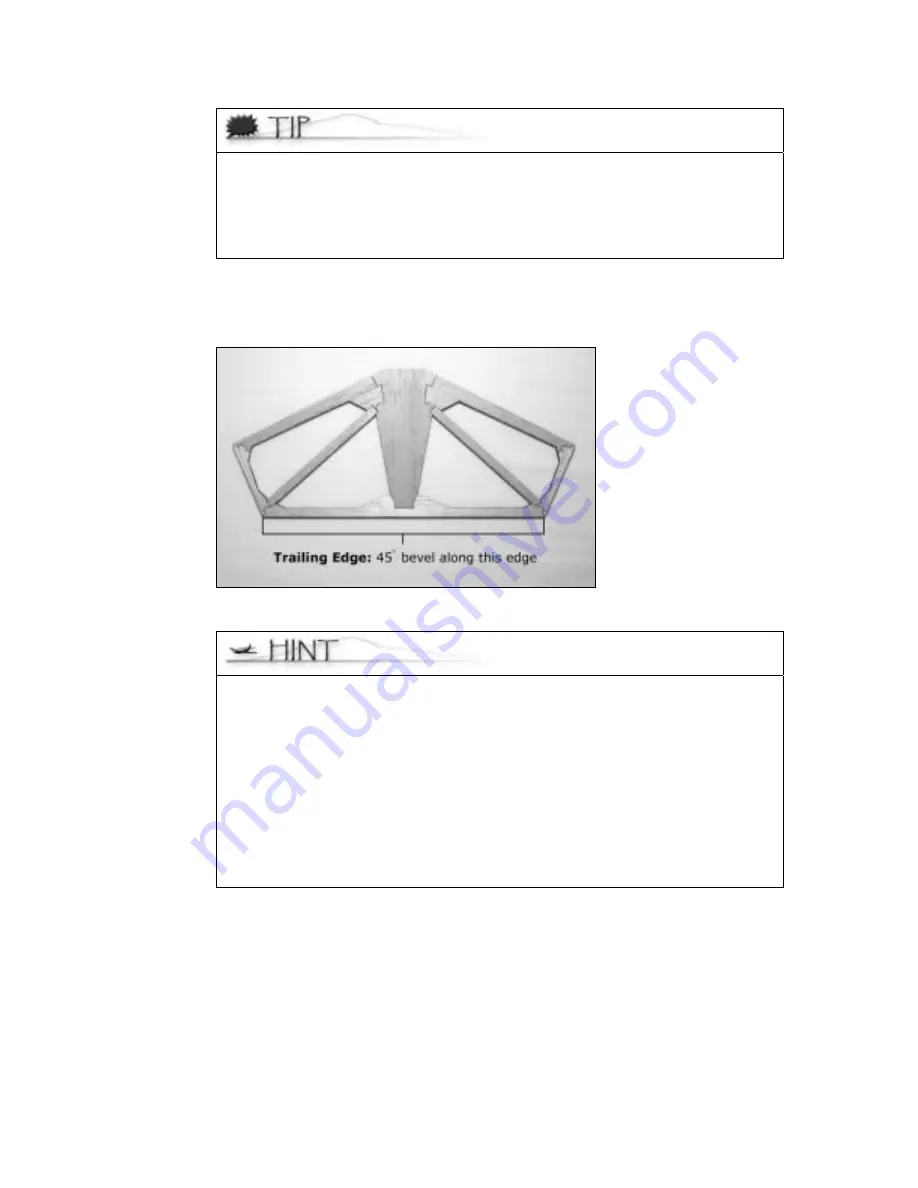
Bevel the trailing edge 45
°
. This should ONLY be done on one side of the piece, and
only for the bottom edge.
Horizontal Stabilizer with Bevel Guide
•
To bevel or taper the piece, place it on your worktable with the edge you
are working on lining up with the edge of the table. Using one bar
sander to hold the piece down, use another bar sander to do the actual
sanding.
•
While sanding, try to go over the entire edge in a sweeping motion,
avoiding any part of the assembly that is to remain non-beveled. This
will make sure that your bevel angle is even across the entire way.
•
Make sure that you sand lengthwise with the grain and not across it, as
this will cause less strain on the wood and less chance of breaking the
pieces.
•
Using a tack cloth, carefully remove the balsa dust once you are done
sanding.
Assembling the Vertical Stabilizer
The process for the vertical stabilizer is pretty much the same as for the horizontal
stabilizer; therefore, the following section is mostly for reference purposes, so you can
refer to the pictures as necessary.


