Lower Feeder Units (Trays 3 and 4)
158
17
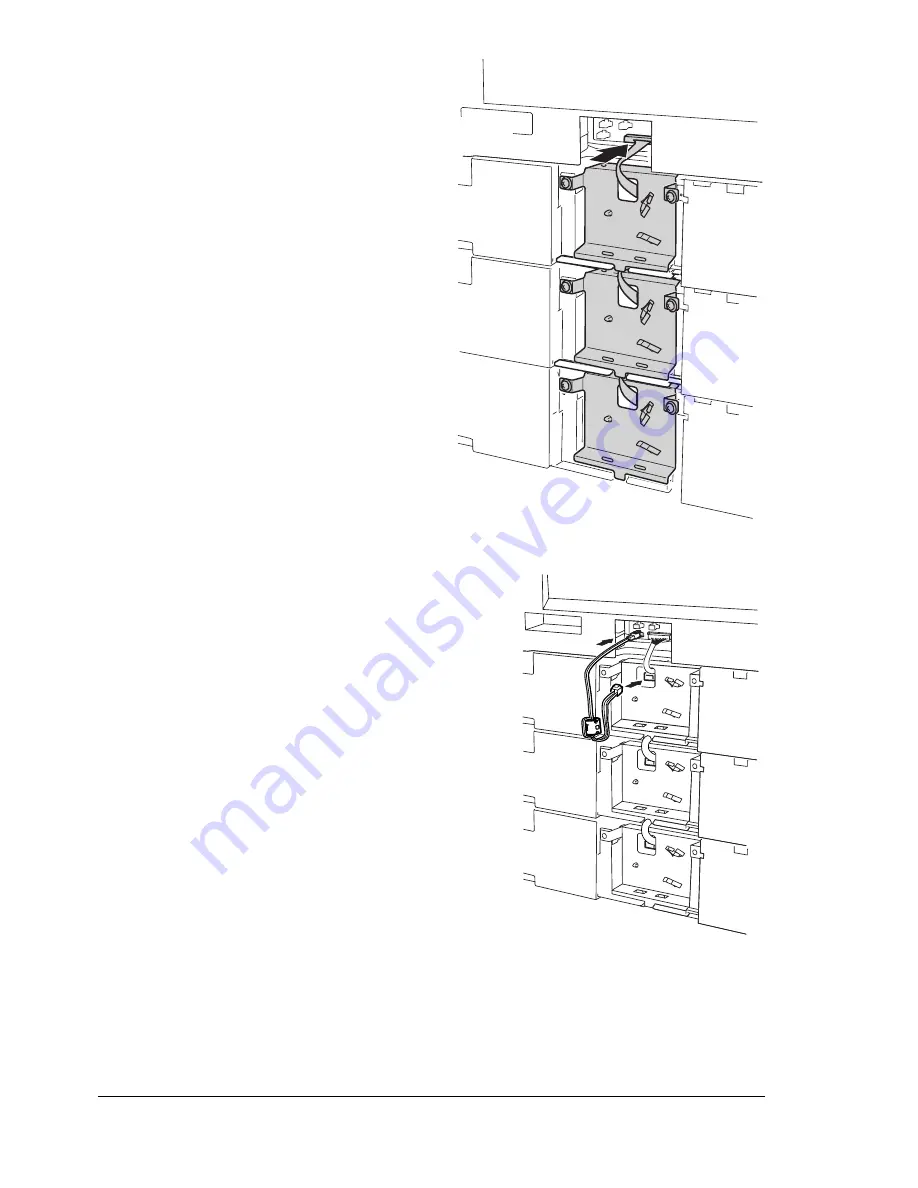
Connect the other end of the
control harness connected to
Tray 2’s upper connector to the
connector on the back of the
printer.
18
Plug the black 3-pin connector of power
supply harness A (with the core
attached) into a black socket at the
back of the printer, and then plug the
power supply harness A’s white 2-pin
connector into the white PJ6 socket on
Tray 2’s unit.
The 3-pin connector (black) can
be plugged into any of the three
sockets on the printer. As an
example, the illustration at the
right shows the connector
plugged into the lower-left
connector.
Содержание magicolor 7300
Страница 1: ...magicolor 7300 User s Guide 1800698 001A...
Страница 8: ...Contents vi...
Страница 9: ...1 Software Installation...
Страница 17: ...2 Using Media...
Страница 40: ...Loading Media 32 Envelopes Postcards...
Страница 46: ......
Страница 47: ...3 Working with the Printer...
Страница 64: ......
Страница 65: ...4 Working with the Printer Driver...
Страница 75: ...5 Working with Color...
Страница 82: ......
Страница 83: ...6 Working with the Status Monitor...
Страница 87: ...7 Replacing Consumables...
Страница 126: ......
Страница 127: ...8 Maintaining the Printer...
Страница 133: ...9 Installing Accessories...
Страница 172: ......
Страница 173: ...10 Troubleshooting...
Страница 218: ......
Страница 219: ...A Technical Specifications...


