


Step 2: Solder on the Bullet
Connectors
Th is step is somewhat optional, but it can make the install a lot
easier. Bullet connectors allow you to plug and unplug the ESCs
and motors into each other rather than soldering them directly.
The pros to using them include ease of use during maintenance,
troubleshooting, and upgrades. The cons include failure due to
loss of contact. If a bullet connector fails, it can cause a crash on
a quad (one motor out of four stops spinning and you fall like a
rock). With this list of pros and cons, you can understand why
people have sharp opinions about these connectors in both
directions. We will let you decide for yourself if you want to use
them, but this book will assume that the user has them
installed. If you decide not to use them, we recommend that you
directly solder your connections and seal them with heat shrink.
Just make sure your connections are right before you fire up
that iron!
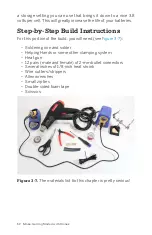
Pull out the third-hand helper and turn on your soldering iron—
it’s time to get to work!
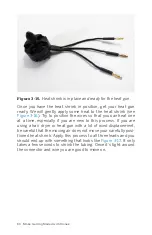
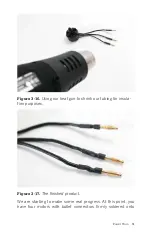
Bullet connectors, like almost every other type of connector on
the face of the earth, are made up of a pair of connectors: one
female and one male. We will be installing the male ends on our
motors and the female versions on the ESCs. This is considered
a best practice, as the ESC is the end providing the power and
the female bullet will be shielded to provide protection when
things are not plugged in.
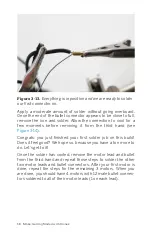
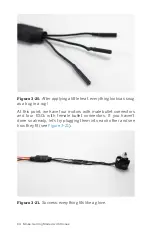
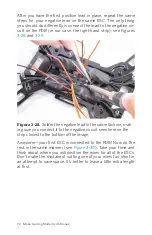
Begin by taking one of your four motors and stripping away
about 1/8 inch of the insulation from each of the three motor
leads. Next, tin the wire tips by adding just a bit of solder to the
tip of your iron and coating the outside of your motor leads with
it (see
56 Make: Getting Started with Drones
Содержание Belinda Kilby
Страница 1: ......
Страница 3: ...Make Getting Started with Drones Terry Kilby and Belinda Kilby...
Страница 25: ...Figure 1 5 Basic quadcopter showing how the stick commands would move the craft Introduction 13...
Страница 26: ......
Страница 90: ......
Страница 126: ......
Страница 142: ...Figure 8 7 Mobius camera next to the quick release camera mount 130 Make Getting Started with Drones...
Страница 146: ...Figure 9 4 Firmware upload has begun Figure 9 5 Firmware verification in progress 134 Make Getting Started with Drones...
Страница 153: ...Figure 9 10 Compass setup Figure 9 11 Compass calibration ArduPilot Mega APM Setup 141...
Страница 198: ......


