


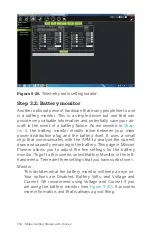


Sensor
This menu allows you to select the type of battery monitor
sensor you are using. If you purchased your kit from the
Maker Shed, you want to use the 3DR Power Module option.
If you bought your monitor elsewhere, consult the store you
purchased it from and find out exactly what type of monitor
they sold you, then select that from the list. If you don’t
know and have no way of finding out, the Other option will
usually work.
APM Version
This is pretty self-explanatory. For this build, select the APM
2.5+ 3DR Power Module option. If you purchased a different
flavor of APM (such as the Pixhawk or PX4), then find your
model in the options and select it.
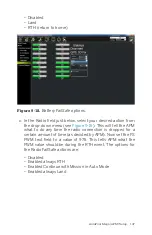
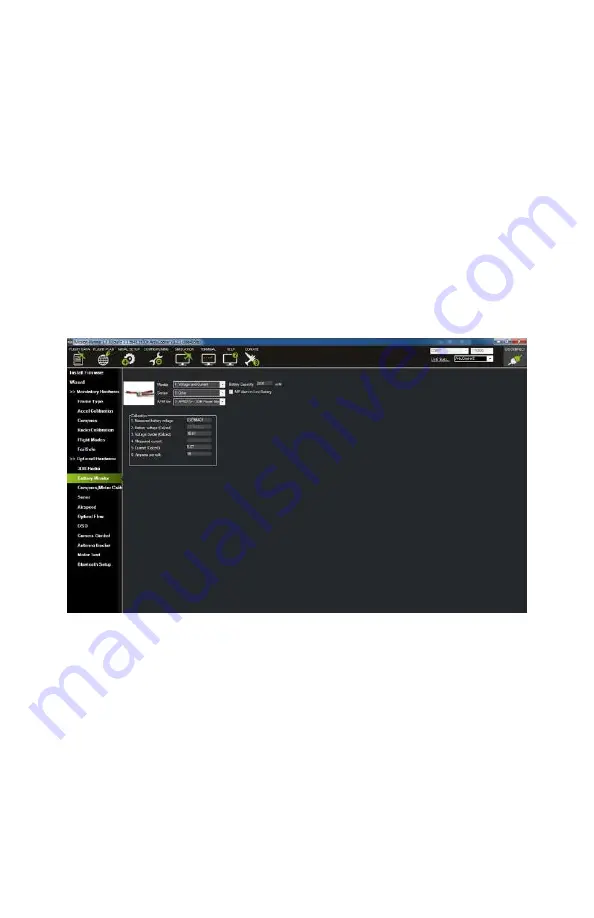
Figure 9-21.
Battery monitor settings page.
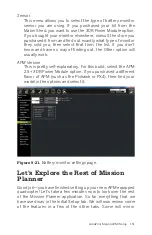
Let’s Explore the Rest of Mission
Planner
Good job—you have finished setting up your new APM equipped
quadcopter! Let’s take a few minutes now to look over the rest
of the Mission Planner application. So far, everything that we
have used was in the Initial Setup tab. We will now review some
of the features in a few of the other tabs. Some will mirror
ArduPilot Mega (APM) Setup 151
Содержание Belinda Kilby
Страница 1: ......
Страница 3: ...Make Getting Started with Drones Terry Kilby and Belinda Kilby...
Страница 25: ...Figure 1 5 Basic quadcopter showing how the stick commands would move the craft Introduction 13...
Страница 26: ......
Страница 90: ......
Страница 126: ......
Страница 142: ...Figure 8 7 Mobius camera next to the quick release camera mount 130 Make Getting Started with Drones...
Страница 146: ...Figure 9 4 Firmware upload has begun Figure 9 5 Firmware verification in progress 134 Make Getting Started with Drones...
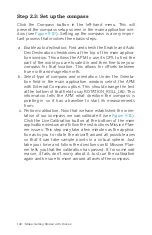
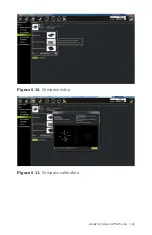
Страница 153: ...Figure 9 10 Compass setup Figure 9 11 Compass calibration ArduPilot Mega APM Setup 141...
Страница 198: ......