


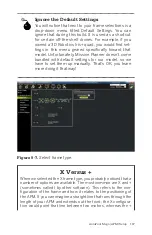


Ignore the Default Settings
You will notice that next to your frame selections is a
drop-down menu titled Default Settings. You can
ignore that during this build. It is used as a shortcut
for certain off-the-shelf drones. For example, if you
owned a 3D Robotics Iris+ quad, you would find set-
tings in this menu geared specifically toward that
model. Unfortunately, Mission Planner doesn’t come
bundled with default settings for our model, so we
have to set them up manually. That’s OK; you learn
more doing it that way!
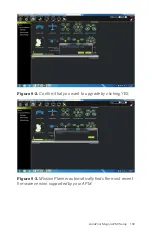
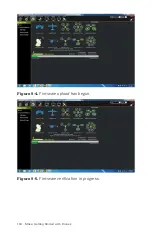
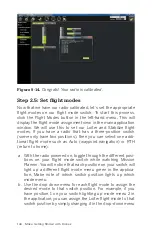
Figure 9-7.
Select frame type.
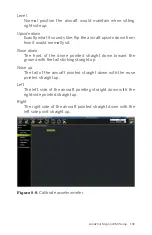
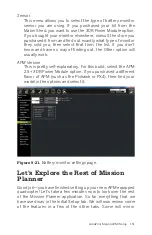
X
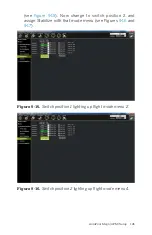
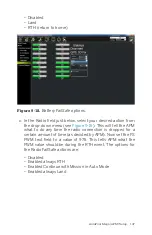
When we selected the X frame type, you probably noticed that a
number of options are available. The most common are X and +
(sometimes called I by other software). This refers to the con-
figuration of the frame and how it relates to the positioning of
the APM. If you can imagine a straight line that runs through the
length of your APM and extends out the front, the X configura-
tion would point that line between two motors, whereas the +
ArduPilot Mega (APM) Setup 137
Содержание Belinda Kilby
Страница 1: ......
Страница 3: ...Make Getting Started with Drones Terry Kilby and Belinda Kilby...
Страница 25: ...Figure 1 5 Basic quadcopter showing how the stick commands would move the craft Introduction 13...
Страница 26: ......
Страница 90: ......
Страница 126: ......
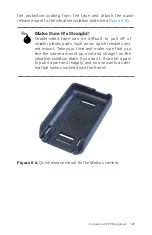
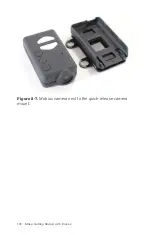
Страница 142: ...Figure 8 7 Mobius camera next to the quick release camera mount 130 Make Getting Started with Drones...
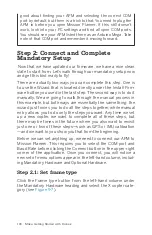
Страница 146: ...Figure 9 4 Firmware upload has begun Figure 9 5 Firmware verification in progress 134 Make Getting Started with Drones...
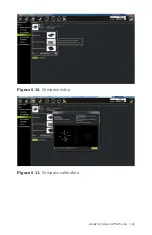
Страница 153: ...Figure 9 10 Compass setup Figure 9 11 Compass calibration ArduPilot Mega APM Setup 141...
Страница 198: ......


