


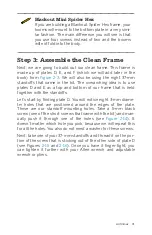
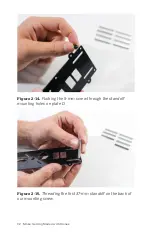


Figure 2-9.
The dirty frame fully assembled from plates A, B,
and C.
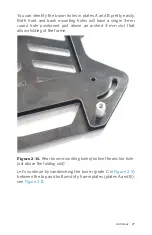
It is best to do this step one boom at a time. Begin by placing
plates A and B on top of each other with the standoffs on plate B
pointing up. Make sure that both plates are facing the same
direction. You can check this by locating the boom holes (shown
in
) and making sure that the arched half-moon holes
line up between both plates. If they don’t, flip one of the plates
(front to back) until the holes match up.
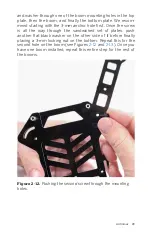
Why Are Those Holes Arched?
You may notice that the boom mounting holes shown in
are made up of one normal round 3-mm hole and
one arched slot. There is a simple reason for this design. The
combination allows our booms to fold back and allow for a more
compact design as well as to soften the impact in the event of a
crash. Folding arms will give way if you crash with any type of
forward motion, whereas solid arms are much more susceptible
to breaking.
26 Make: Getting Started with Drones
Содержание Belinda Kilby
Страница 1: ......
Страница 3: ...Make Getting Started with Drones Terry Kilby and Belinda Kilby...
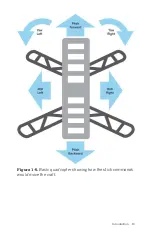
Страница 25: ...Figure 1 5 Basic quadcopter showing how the stick commands would move the craft Introduction 13...
Страница 26: ......
Страница 90: ......
Страница 126: ......
Страница 142: ...Figure 8 7 Mobius camera next to the quick release camera mount 130 Make Getting Started with Drones...
Страница 146: ...Figure 9 4 Firmware upload has begun Figure 9 5 Firmware verification in progress 134 Make Getting Started with Drones...
Страница 153: ...Figure 9 10 Compass setup Figure 9 11 Compass calibration ArduPilot Mega APM Setup 141...
Страница 198: ......


