Setup Guide for the RadioRA Chronos System Bridge
42
Section 3 - Button Programming
Use
and
to highlight a Phantom Button.
Press
“Select” (
button)
to enter Assignment Mode for
the highlighted button. The following screen will be
displayed when Assignment Mode is initiated:
Once Assignment Mode has been initiated, the follow-
ing screen will be displayed:
Note:
To use the Copy Button Feature, refer to pages
49-51.
Assigning Lighting Zone Controls to Phantom Buttons
Note:
If the Chronos
TM
System Bridge is not configured to bridge systems or to use RS-232, Phantom Buttons
are not available and this procedure does not apply.
Whole-home/Phantom Button Programming
Step 1
Go to Assign Zones
If bridging two systems:
Main Menu
Whole-home Button Setup
Phantom Button Setup
Assign Zones
If not bridging two systems:
Main Menu
Phantom Button Setup
Assign Zones
Select Button to Assign
1. RM - Home
2. RM - Btn 2
3. RM - Btn 3
4. RM - Btn 4
Exit
Select
Assign Zones
Entering Assignment
Mode...
Assign Zones
Turn on devices to be
assigned to Home.
Continue
Copy Button
Step 2
Assign Zones
Step 3
Assign Lighting Zone
Controls to the Phantom
Button
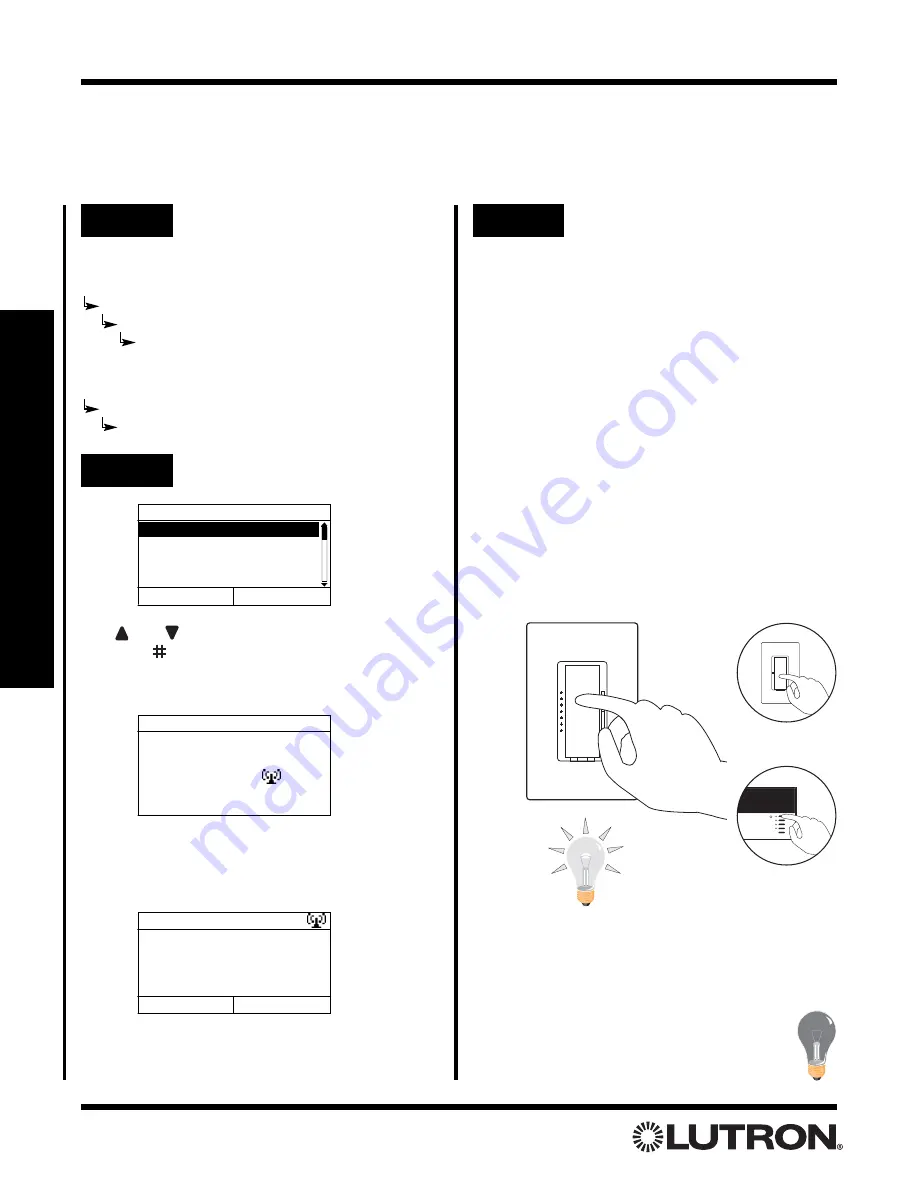
Assign Dimmers or Switches to the Phantom
Button by turning the Controls ON. Assign all
Dimmers and Switches to be affected by this
button. For SCENE Buttons, include Dimmers
and Switches which are to be turned OFF by
the button.
Assign a GRAFIK Eye
®
/GRAFIK RA
TM
Control
Unit to the Phantom Button by pressing one of
the
GRAFIK Eye/GRAFIK RA
Control Unit
scene buttons. Assign all
GRAFIK
Eye/GRAFIK RA
Control Units to be affected
by this button. For SCENE Buttons, include
GRAFIK Eye/GRAFIK RA
Control Units which
are to be turned OFF by the button.
Switch
Dimmer
OR
TRON
Notes:
• GRAFIK Eye/GRAFIK RA
Control Units will automati-
cally turn on to Scene 1 once assigned.
• If the wrong Lighting Zone Control is assigned to a
Phantom Button, turn the Lighting Zone Control OFF
to unassign it.
GRAFIK Eye
Control Unit


