background image


Learning Basic Features 


116 

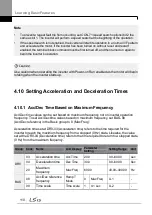
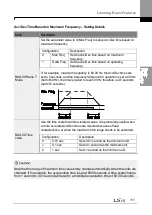
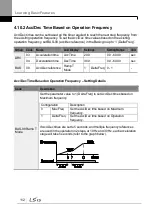
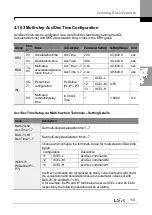
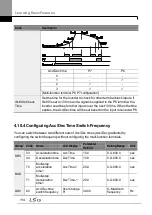
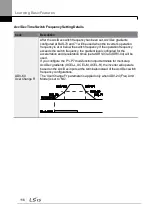
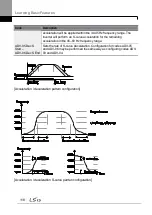
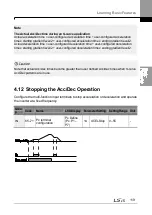
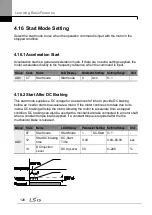
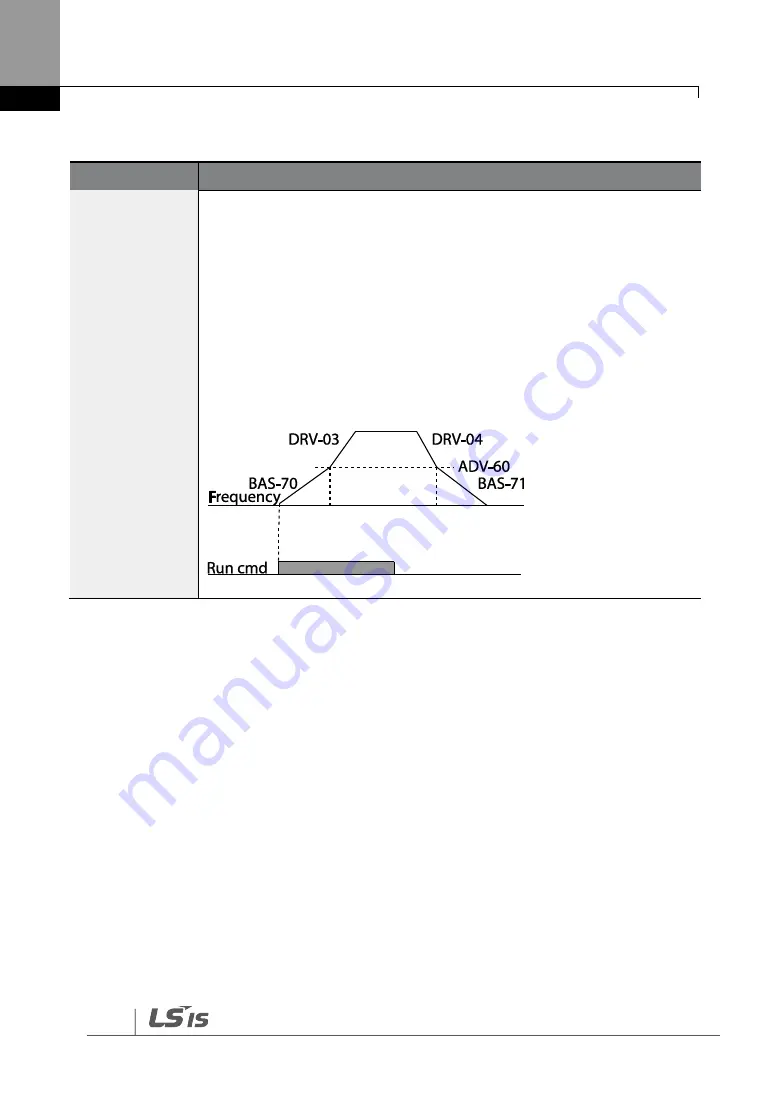
Acc/Dec Time Switch Frequency Setting Details 

Code 

Description 

ADV-60   
Xcel Change Fr 

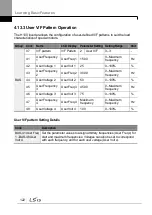
After the Acc/Dec switch frequency has been set, Acc/Dec gradients 
configured at BAS-

70 and 71 will be used when the inverter‘s operation 

frequency is at or below the switch frequency. If the operation frequency 
exceeds the switch frequency, the gradient level configured for the 
accelerration and deceleration times (set at DRV-03 and DRV-04) will be 
used. 
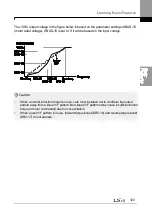
If you configure the P1

–P7 multi-function input terminals for multi-step 

Acc/Dec gradients (XCEL-L, XCEL-M, XCEL-H), the inverter will operate 
based on the Acc/Dec inputs at the terminals instead of the Acc/Dec switch 
frequency configurations. 
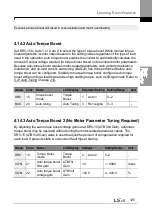
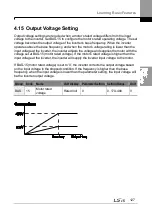
The ‗Xcel Change Fr‘ parameter is applied only when ADV-24 (Freq Limit 
Mode) is set to ‗NO‘.   


Содержание H100

Страница 1: ...nowledge of electricity and electric devices LSLV H100 is the official name for the H100 series inverters The H100 series software may be updated without prior notice for better performance To check the latest software visit our website at http www lsis com ...

Страница 2: ...ile the cover is open Exposure of high voltage terminals or charging area to the external environment may result in an electric shock Do not remove any covers or touch the internal circuit boards PCBs or electrical contacts on the product when the power is on or during operation Doing so may result in serious injury death or serious property damage Do not open the cover of the equipment even when ...

Страница 3: ... not place heavy objects on top of electric cables Doing so may damage the cable and result in an electric shock Note Maximum allowed prospective short circuit current at the input power connection is defined in IEC 60439 1 as 100 kA LSLV H100 is suitable for use in a circuit capable of delivering not more than 100kA RMS at the drive s maximum rated voltage depending on the selected MCCB RMS symme...

Страница 4: ...v 480V 50 60Hz 25 35kA 35 65 100kA 35 65 100kA 35 65 100kA Working Voltage ABS33c ABS53c ABS63c ABS103c ABS203c ABS403c 240V 50 60Hz 30kA 35kA 35kA 85kA 85kA 75kA 480V 50 60Hz 7 5kA 10kA 10kA 26kA 26kA 35kA ...

Страница 5: ...p 37 The motor is too noisy p 242 I want to apply PID control on my system p 159 What are the factory default settings for P1 P7 multi function terminals p 35 I want to view all of the parameters I have modified p 253 I want to review recent fault trip and warning histories p 54 I want to change the inverter s operation frequency using a potentiometer p 85 I want to install a frequency meter using...

Страница 6: ...ng to Use the Keypad 58 3 2 1 Display Mode Selection 58 3 2 2 Operation Modes 59 3 2 3 Switching between Groups in Parameter Display Mode 61 3 2 4 Switching between Groups in User Macro Mode 62 3 2 5 Navigating through the Codes Functions 63 3 2 6 Navigating Directly to Different Codes 65 3 2 7 Parameter Settings available in Monitor Mode 66 3 2 8 Setting the Monitor Display Items 68 3 2 9 Selecti...

Страница 7: ...ice 105 4 7 Forward or Reverse Run Prevention 105 4 8 Power on Run 107 4 9 Reset and Restart 109 4 10 Setting Acceleration and Deceleration Times 110 4 10 1 Acc Dec Time Based on Maximum Frequency 110 4 10 2 Acc Dec Time Based on Operation Frequency 112 4 10 3 Multi step Acc Dec Time Configuration 113 4 10 4 Configuring Acc Dec Time Switch Frequency 114 4 11 Acc Dec Pattern Configuration 117 4 12 ...

Страница 8: ...y References 144 5 2 Jog Operation 149 5 2 1 Jog Operation 1 Forward Jog by Multi function Terminal 149 5 2 2 Jog Operation 2 Forward Reverse Jog by Multi function Terminal 150 5 3 Up down Operation 151 5 4 3 Wire Operation 152 5 5 Safe Operation Mode 153 5 6 Dwell Operation 155 5 7 Slip Compensation Operation 158 5 8 PID Control 159 5 8 1 PID Basic Operation 160 5 8 2 Soft Fill Operation 174 5 8 ...

Страница 9: ... 246 5 32 Cooling Fan Control 247 5 33 Input Power Frequency and Voltage Settings 248 5 34 Read Write and Save Parameters 249 5 35 Parameter Initialization 250 5 36 Parameter View Lock 251 5 37 Parameter Lock 252 5 38 Changed Parameter Display 253 5 39 User Group 254 5 40 Easy Start On 256 5 41 Config CNF Mode 257 5 42 Macro Selection 258 5 43 Timer Settings 259 5 44 Multiple Motor Control MMC 260...

Страница 10: ...nce Protection 327 6 2 1 Open phase Protection 327 6 2 2 External Trip Signal 328 6 2 3 Inverter Overload Protection IOLT 329 6 2 4 Speed Command Loss 329 6 2 5 Dynamic Braking DB Resistor Configuration 333 6 2 6 Low Battery Voltage Warning 334 6 3 Under load Fault Trip and Warning 335 6 3 1 Fan Fault Detection 336 6 3 2 Low Voltage Fault Trip 337 6 3 3 Selecting Low Voltage 2 Fault During Operati...

Страница 11: ...Start 390 7 4 4 Protocol Implementation 392 7 4 5 Object Map 393 7 5 Metasys N2 Communication 400 7 5 1 Metasys N2 Quick Communication Start 400 7 5 2 Metasys N2 Communication Standard 400 7 5 3 Metasys N2 Protocol I O Point Map 402 8 Table of Functions 406 8 1 Drive Group DRV 406 8 2 Basic Function Group BAS 410 8 3 Expanded Function Group ADV 415 8 4 Control Function Group CON 423 8 5 Input Term...

Страница 12: ...1 3 Bi annual Inspection 537 10 2 Real Time Clock RTC Battery Replacement 538 10 3 Storage and Disposal 541 10 3 1 Storage 541 10 3 2 Disposal 541 11 Technical Specification 542 11 1 Input and Output Specifications 542 11 2 Product Specification Details 547 11 3 External Dimensions IP 20 Type 550 11 4 Peripheral Devices 552 11 5 Fuse and Reactors Specifications 554 11 6 Terminal Screw Specificatio...

Страница 13: ...uction 573 12 2 Power HP Input Current and Output Current 574 12 3 Input Frequency and Voltage Tolerance 575 12 4 Wiring 576 12 5 Precautions for 1 phase input to 3 phase drive 576 Product Warranty 577 UL mark 579 EAC mark 579 Index 583 ...

Страница 14: ......

Страница 15: ...nge of product groups based on drive capacity and power source specifications Product name and specifications are detailed on the rating plate Check the rating plate before installing the product and make sure that the product meets your requirements For more detailed product specifications refer to 11 1 Input and Output Specifications on page 542 Note Check the product name open the packaging and...

Страница 16: ...Preparing the Installation 2 Note The H100 75 90 kW 400 V inverters satisfy the EMC standard EN61800 3 without installation of optional EMC filters ...

Страница 17: ...Preparing the Installation 3 1 2 Part Names The illustration below displays part names Details may vary between product groups 0 75 30 kW 3 Phase ...

Страница 18: ...Preparing the Installation 4 37 90 kW 3 Phase ...

Страница 19: ...d above 2 5 Current Derating search 50 75 of the rated current of the drive if possible Ambient Humidity 90 relative humidity no condensation Storage Temperature 4 149 F 20 65 Environmental Factors An environment free from corrosive or flammable gases oil residue or dust Altitude Vibration Lower than 3 280 ft 1 000 m above sea level less than 0 6 G 5 9 m sec2 Air Pressure 70 106 kPa The ambient te...

Страница 20: ... can support the inverter s weight The location must be free from vibration Vibration can adversely affect the operation of the inverter The inverter can become very hot during operation Install the inverter on a surface that is fire resistant or flame retardant and with sufficient clearance around the inverter to allow air to circulate The illustrations below detail the required installation clea...

Страница 21: ...when it is installed If the inverter is to be installed inside a panel enclosure or cabinet rack carefully consider the position of the inverter s cooling fan and the ventilation louver The cooling fan must be positioned to efficiently transfer the heat generated by the operation of the inverter ...

Страница 22: ...e installed side by side Note The vent covers must be removed for side by side installations Side by side installation cannot be used for the H100 inverters rated for 37 kW and above For the H100 inverters rated for 37 kW and above if the installation site satisfies the UL Open Type requirements and there is no danger of foreign objects getting inside the inverter and causing trouble the vent cove...

Страница 23: ...on 9 If you are installing multiple inverters of different ratings provide sufficient clearance to meet the clearance specifications of the larger inverter The H100 inverters rated for up to 30 kW may be installed side by side ...

Страница 24: ...he inverters in the range between 15 and 90 kW must be grounded conveniently with fixed connections The inverters in the range between 5 5kW and 11kW must be grounded with and industrial connector according to IEC 60309 The minimum size of the protective earthing conductor shall comply with the local safety regulations for high protective earthing conductor current equipment Only one conductor per...

Страница 25: ...Wire Input Output Power Wire V 5 1 5 2 2 3 7 5 5 4 12 2 5 2 5 14 14 7 5 4 2 5 12 14 11 4 4 12 12 15 16 9 6 6 10 10 18 5 16 10 6 8 22 14 6 16 10 6 8 30 25 16 4 6 37 25 4 25 25 4 4 45 25 25 4 4 55 50 50 1 0 1 0 75 38 2 70 70 1 0 1 0 90 70 70 1 0 1 0 ...

Страница 26: ... Cable Specifications Use STP shielded twisted pair cables for signal wiring Terminals Wire thickness 1 mm2 AWG P1 P7 CM VR V1 I2 24 TI 0 33 1 25 16 22 AO1 AO2 CM Q1 EG 0 33 2 0 14 22 A1 B1 C1 A2 C2 A3 C3 A4 C4 A5 C5 0 33 2 0 14 22 S S SG 0 75 18 ...

Страница 27: ...Preparing the Installation 13 ...

Страница 28: ...to be followed to install the product correctly Installation Flowchart The following flowchart lists the sequence to be followed during installation The steps cover equipment installation and testing of the product More information on each step is referenced in the steps Power and Signal Wiring p 26 Post Installation Checks p 43 Turning on the Inverter Parameter Configuration p 56 Testing p 45 Mou...

Страница 29: ...circuit breakers before operating the inverter Operate the product according to the instructions in this manual Do not start or stop the inverter using a magnetic contactor installed on the input power supply If the inverter is damaged and loses control the machine may cause a dangerous situation Install an additional safety device such as an emergency brake to prevent these situations High levels...

Страница 30: ...the installation Refer to 11 3 External Dimensions IP 20 Type on page 550 and check the inverter s mounting bracket dimensions 1 Use a level to draw a horizontal line on the mounting surface and then carefully mark the fixing points 2 Drill the two upper mounting bolt holes and then install the mounting bolts Do not fully tighten the bolts at this time Fully tighten the mounting bolts after the in...

Страница 31: ...stalling the Inverter 4 Install the two lower mounting bolts Ensure that the inverter is placed flat on the mounting surface and that the installation surface can securely support the weight of the inverter ...

Страница 32: ...to the product Always support the inverter using the metal frames when moving it Hi capacity inverters are very heavy and bulky Use an appropriate transport method that is suitable for the weight Do not install the inverter on the floor or mount it sideways against a wall The inverter must be installed vertically on a wall or inside a panel with its rear flat on the mounting surface ...

Страница 33: ...ctronic components on the PCB Therefore be extremely careful not to touch the PCB or the components on the PCB with bare hands while you work on the I O PCB To prevent damage to the PCB from ESD touch a metal object with your hands to discharge any electricity before working on the PCB or wear an anti static wrist strap and ground it on a metal object Follow the instructions below to remove the pr...

Страница 34: ... 20 3 Remove the keypad from the inverter body 0 75 30 kW Models 37 90 kW Models 4 Loosen the screws securing the front cover and remove the front cover by lifting it The main PCB is exposed 0 75 30 kW Models 37 90 kW Models ...

Страница 35: ...90 kW Models 6 Reattach the front cover the power cover and the keypad back onto the inverter body 7 For detailed information on the RTC battery refer to the battery specifications on page 538 Ensure that the inverter is turned off and DC link voltage has dropped to a safe level before opening the terminal cover and installing the RTC battery ...

Страница 36: ... drops do not exceed 2 Use copper cables rated at 600 V 75 for power terminal wiring Use copper cables rated at 300 V 75 for control terminal wiring If you need to re wire the terminals due to wiring related faults ensure that the inverter keypad display is turned off and the charge lamp under the terminal cover is off before working on wiring connections The inverter may hold a high voltage elect...

Страница 37: ...23 Installing the Inverter following procedures to remove the covers and cable guide The steps to remove these parts may vary depending on the inverter model ...

Страница 38: ...he front 2 Push and hold the levers on both sides of the cable guide and then remove the cable guide by pulling it directly away from the front of the inverter In some models where the cable guide is secured by a bolt remove the bolt first 3 Connect the cables to the power terminals and the control terminals For cable specifications refer to 1 5 Cable Selection on page 10 ...

Страница 39: ... the instructions below to install the ground connection for the inverter 1 Locate the ground terminal and connect an appropriately rated ground cable to the terminals Refer to 1 5 Cable Selection on page 10 to find the appropriate cable specification for your installation 0 75 30 kW 3 Phase 37 90 kW 3 Phase ...

Страница 40: ...ure that the cables selected meet or exceed the specifications in 1 5 Cable Selection on page 10 before installing them Apply rated torques to the terminal screws Loose screws may cause short circuits and malfunctions Tightening the screw too much may damage the terminals and cause short circuits and malfuctions Use copper wires only with 600 V 75 rating for the power terminal wiring and 300 V 75 ...

Страница 41: ...limentation électrique doivent être connectés aux bornes R S et T Leur connexion aux bornes U V et W provoque des dommages internes à l onduleur Le moteur doit être raccordé aux bornes U V et W L arrangement de l ordre de phase n est pas nécessaire ...

Страница 42: ...Description R L1 S L2 T L3 AC power input terminal Mains supply AC power connections P1 DC link terminal DC voltage terminal Used for connecting an external reactor P2 DC link terminal Used for DC power inverter DC connection N DC link terminal DC voltage terminal Used for a DC power inverter DC connection ...

Страница 43: ... Name Description P2 B Brake resistor terminals Brake resistor wiring connection U V W Motor output terminals 3 phase induction motor wiring connections Note Apply a DC input to the P2 and N terminals to operate the inverter on DC current input ...

Страница 44: ...put terminal Mains supply AC power connections P2 DC link terminal DC voltage terminal Used for connecting an external reactor P3 DC link terminal Used for a DC power inverter DC connection N DC link terminal DC voltage terminal Used for a DC power inverter DC connection U V W Motor output terminals 3 phase induction motor wiring connections ...

Страница 45: ... cable runs Lowering the carrier frequency and installing a micro surge filter may also help to reduce voltage drop Distance 165 ft 50 m 330 ft 100 m 330 ft 100 m Allowed Carrier Frequency 15 kHz 5 kHz 2 5 kHz Do not connect power to the inverter until installation has been fully completed and the inverter is ready to be operated Doing so may result in electric shock Power supply cables must be co...

Страница 46: ...d ensure that the cables used meet the required specifications Switch Symbols and Description Switch Description Factory Default SW1 Terminating Resistor selection switch Left On Right Off Right OFF SW2 NPN PNP mode selection switch Left PNP Right NPN Right NPN SW3 V1 T1 PTC mode selection switch Left V1 Right T1 Left V1 SW4 analog voltage current input terminal selection switch Left I2 Right V2 L...

Страница 47: ...33 Installing the Inverter ...

Страница 48: ...Installing the Inverter 34 Input and Output Control Terminal Block Wiring Diagram ...

Страница 49: ... BX P4 RST P5 Speed L P6 Speed M P7 Speed H CM Common Sequence Common terminal for analog terminal inputs and outputs Analog input configuration VR Potentiometer power supply Used to setup or modify a frequency reference via analog voltage or current input Maximum Voltage Output 12 V Maximum Current Output 12 mA Potentiometer 1 10k Ω V1 Voltage input for frequency reference Used to setup or modify...

Страница 50: ...verter output information to external devices output frequency output current output voltage or a DC voltage Operate switch SW5 to select the signal output type voltage or current at theAO terminal Output Signal Specifications Output voltage 0 10 V Maximum output voltage current 12 V 10 mA Output current 0 20 mA Maximum output current 24 mA Factory default output Frequency Terminal Contacts Q1 Mul...

Страница 51: ... on page 349 for more details Note While making wiring connections at the control terminals ensure that the total cable length does not exceed 165 ft 50 m Ensure that the length of any safety related wiring does not exceed 100 ft 30 m Ensure that the cable length between the keypad and the inverter does not exceed 10 ft 3 04 m Cable connections longer than 10 ft 3 04 m may cause signal errors Use ...

Страница 52: ...alog inputs at the terminal and P24 is 24 V internal source If you are using an external 24 V source build a circuit that connects the external source and the CM terminal NPN Mode Sink Select NPN using the PNP NPN selection switch SW2 Note that the factory default setting is NPN mode CM is is the common ground terminal for all analog inputs at the terminal and P24 is 24 V internal source ...

Страница 53: ...ate grounding point on one phase of a delta connection TN Systems The end of a single phase is grounded TN Systems A 3 phase connection without grounding TN Systems Do not activate the EMC filter if the inverter uses a power source with an asymmetrical grounding structure corner earthed systems for example a grounded delta connection Personal injury or death by electric shock may result Wait at le...

Страница 54: ...ter on off terminal and replace the metal bolt with the plastic bolt If the EMC filter is required in the future reverse the steps and replace the plastic bolt with the metal bolt to reconnect the EMC filter If the EMC filter is required in the future reverse the steps and replace the plastic bolt with the metal bolt to enable the EMC filter ...

Страница 55: ...5 kW 1 Remove the EMC ground cover located at the bottom of the inverter 2 Remove the EMC ground cable from the right terminal EMC filter ON factory default and connect it to the left terminal EMC filter OFF for power sources with asymmetrical grounding If the EMC filter is required in the future reverse the steps and connect the EMC ground cable to the right terminal to enable the EMC filter ...

Страница 56: ...used to DISABLE the EMC filter for power sources with asymmetrical grounding Step 7 Re assembling the Covers and Routing Bracket Re assemble the cable routing bracket and the covers after completing the wiring and basic configurations Note that the assembly procedure may vary according to the product group or frame size of the product ...

Страница 57: ...ated p 552 Are the power source cables correctly connected to the R S T terminals of the inverter Caution connecting the power source to the U V W terminals may damage the inverter p 26 Are the motor output cables connected in the correct phase rotation U V W Caution motors will rotate in reverse direction if three phase cables are not wired in the correct rotation p 26 Are the cables used in the ...

Страница 58: ...ntrol wiring 165 ft 100 m p 37 Is the total length of safety wiring 100 ft 30 m p 37 Miscellaneous Are optional cards connected correctly Is there any debris left inside the inverter p 18 Are any cables contacting adjacent terminals creating a potential short circuit risk Are the control terminal connections separated from the power terminal connections Have the capacitors been replaced if they ha...

Страница 59: ...the input current 4 Set the acceleration and deceleration time 5 Start the motor and check the following Ensure that the motor rotates in the correct direction refer to the note below Ensure that the motor accelerates and decelerates according to the set times and that the motor speed reaches the frequency reference Note If the forward command Fx is on the motor should rotate counterclockwise when...

Страница 60: ...heck the parameter settings before running the inverter Parameter settings may have to be adjusted depending on the load To avoid damaging the inverter do not supply the inverter with an input voltage that exceeds the rated voltage for the equipment Before running the motor at maximum speed confirm the motor s rated capacity As inverters can be used to easily increase motor speed use caution to en...

Страница 61: ...47 Installing the Inverter ...

Страница 62: ...es the correct operation of the inverter before advancing to more complex applications Examples are provided to demonstrate how the inverter actually operates 3 1 About the Keypad The keypad is composed of two main components the display and the operation input keys Refer to the following illustration to identify part names and functions 3 1 1 Operation Keys The following table lists the names and...

Страница 63: ...er code registration ESC Key Used to cancel an input during parameter setup Pressing the ESC key before pressing the PROG ENT key reverts the parameter value to the previously set value Pressing the ESC key while editing the codes in any function group makes the keypad display the first code of the function group Pressing the ESC key while moving through the modes makes the keypad display Monitor ...

Страница 64: ...ional direction Fx or Rx 3 Command Source Frequency reference Displays a combination of a command source and a frequency reference Command source K Keypad O Optional Fieldbus module A Application option E Time event R Built in RS 485 communication T Terminal block Frequency reference source K Keypad V V1 terminal I I2 terminal P Pulse terminal U Up operation frequency Up down operation D Down oper...

Страница 65: ...ard command given Reverse command given DC DC output WAN Warning STL Stall SPS Speed search OSS S W over current protection is on OSH H W overcurrent protection TUN Auto tuning PHT Pre heat FIR Fire mode operation SLP Sleep mode operation LTS Load tuning CAP Capacity diagnostics PCL Pump clean 6 Status display item Status bar display item 7 Monitor mode item 1 Monitor mode display item 1 8 Monitor...

Страница 66: ...n Displays the motor s rotational direction Fx or Rx 3 Parameter group Displays one of the following parameter group names DRV Drive group BAS Basic group ADV Advanced group CON Control group IN Input terminal group OUT Output terminal group COM Communication group PID PID group EPI External PID group AP1 Application 1 group AP2 Application 2 group AP3 Application 3 group PRT Protection function g...

Страница 67: ...tuning PHT Pre heat FIR Fire mode operation SLP Sleep mode operation LTS Load tuning CAP Capacity diagnostics PCL Pump clean 6 Display item Displays the value of a monitor display item selected at CNF 20 Anytime Para 7 Parameter value Displays the parameter value of currently selected code 8 Setting range Displays the value range for the selected parameter 9 Set value Displays the currently set va...

Страница 68: ...Basic Operations 54 3 1 3 Display Modes The H100 inverter uses 5 modes to monitor or configure different functions The parameters in Parameter mode and User Macro mode are divided into smaller groups of relevant functions ...

Страница 69: ...he inverter to be grouped and managed in separate groups This mode is not displayed when you navigate through the modes if no user groups or Macro groups have been defined Trip mode TRP Used to monitor the inverter s fault trip information including the prevous fault trip history When a fault trip occurs during inverter operation the operation frequency output current and output voltage of the inv...

Страница 70: ...puts and analog inputs Output Terminal OUT Configures output terminal related features including digital multi functional outputs and analog outputs Communication COM Configures the USB related features and communication features for the RS 485 Modbus RTU LS Bus Metasys N2 and BACnet Optional communication module related features may be configured as well if one is installed PID process PID Config...

Страница 71: ...Learning to Perform Basic Operations 57 ...

Страница 72: ...ing to Use the Keypad The keypad enables movement between groups and codes It also enables users to select and configure functions At code level you can set parameter values to turn specific functions on or off or decide how the functions will be used For detaled information on the codes in each function group refer to 8 Table of Functions on page 406 Confirm the correct values or the correct rang...

Страница 73: ... control via communication On the other hand the inverter stops operating when it is in OFF mode Select one of the modes HAND AUTO OFF to operate the inverter or stop the operation Follow the examples below to learn how to switch between operation modes Operating the Inverter in HAND mode 1 Turn on the inverter The inverter enters OFF mode and the OFF LED turns on 2 Move to Parameter mode and set ...

Страница 74: ...ad is pressed 3 Press the Auto key again to stop the inverter operation using the keypad In AUTO mode the inverter begins or stops operating when the AUTO key is pressed Note You can stop the inverter operation by pressing the OFF key when the command source is set to Keypad In this case however the inverter enters OFF mode from AUTO mode If the network communication is set as the command source t...

Страница 75: ...the Left key to go back to the previous code The keypad OFF LED is turned OFF and the keypad displays Monitor mode Press the Mode key to change the mode Parameter mode is displayed The Drive group is currently selected Press the Right key The Basic group is selected Press the Right key TheAdvanced group is selected Press the Right key 9 times The Protection group is selected Press the Right key ...

Страница 76: ...roups on page 505 for details about user code registration or macro group selection After registering the user codes or selecting a macro group follow the examples below to access the User Macro group Monitor mode is displayed on the keypad Press the MODE key twice User USR group in User Macro mode is displayed Press the Right key The Macro MC2 group in User Macro mode is displayed Press the Right...

Страница 77: ...mode the cursor appears to the left of the frequency information Press the Down key Information about the second item in Monitor mode Output Current is displayed Wait for 2 seconds until the information on the display disappears Information about the second item in Monitor mode Output Current disappears and the cursor reappears to the left of the second item Press the Down key Information about th...

Страница 78: ...show you how to move through codes in different function groups Drive group and Basic group in Parameter mode In Parameter mode press the Up or Down key to move to the desired functions Display turns on when the inverter is powered on Monitoring mode is displayed Press the MODE key Drive group DRV in Parameter mode is displayed The first code in the Drive group DRV 00 Jump Code is currently select...

Страница 79: ...n group that has many codes The following example shows how to navigate directly to code DRV 09 from the initial code DRV 00 Jump Code in the Drive group The Drive group DRV is displayed in Parameter mode Make sure that the fist code in the Drive group DRV 00 Jump Code is currently selected Press the PROG ENT key The Code input screen is displayed and the cursor flashes A flashing cursor indicates...

Страница 80: ...r is in Hand or OFF mode the frequency reference can be entered directly from the monitor screen When the inverter is in AUTO mode press the PROG ENT key to access the input screen for a frequency reference Parameter setting in HAND OFF mode Ensure that the cursor is at the frequency reference item If not move the cursor to the frequency reference item When the cursor is at the frequency reference...

Страница 81: ...he cursor is at the frequency reference monitor item press the PROG ENT key to edit the frequency reference Detailed information is displayed and the cursor flashes at the input line A flashing cursor indicates that it is waiting for user input Press the Left or Right key to move the cursor Press the Up or Down key to increase or decrease the numbers When you are done changing the frequency refere...

Страница 82: ...ut frequency when the inverter is operating The following example shows how to configure the display items in HAND mode Monitor mode is displayed on the keypad The output frequency output current and output voltage are displayed factory default Go to the Config CNF mode In the Config mode codes CNF 21 23 are used to select the three monitoring display items The currently selected display item and ...

Страница 83: ...r is operating in Configure this monitoring item to display the type of information that suits your needs This item can be configured only when the inverter is operating in AUTO mode In HAND or OFF mode this monitoring item displays frequency reference only The following example shows how to configure this monitoring item in AUTO mode Monitor mode is displayed On the top right edge of the display ...

Страница 84: ...he Down key twice to move to 2 Output Current and then press the PROG ENT key to select it The currently selected item is highlighted at CNF 20 the display item is changed from Frequency to Output Current Press the MODE key to return to Monitor mode ...

Страница 85: ...ically and displays the type of fault trip that occurred Press the Down key to view the information on the inverter at the time of fault including the output frequency output current and operation type If there were any fault trips that occurred previously press the Right key to display the fault trip information at the times of previous fault trips When the inverter is reset and the fault trip is...

Страница 86: ...ips occurred is displayed on the right side of the fault trip type Press the PROG ENT key to view the list of all the fault trips The list of all the fault trips is displayed Press the Down key to view the types of fault trips that occurred Press the Right key to display the fault trip information When the inverter is reset and the fault trip is released the keypad display returns to the screen it...

Страница 87: ...or separate groups in Parameter mode as well Monitor mode is displayed Press the MODE key to move to the Config CNF mode Press the Down key to go to CNF 40 Parameter Init Press the PROG ENT key to configure the parameter initialization options In the list of options select 1 All Grp and then press the PROG ENT key to perform parameter initialization The parameter initialization option is displayed...

Страница 88: ...Learning to Perform Basic Operations 74 ...

Страница 89: ...ference p 92 Frequency reference source configuration for the terminal block input pulse Configures the inverter to allow input pulse at the terminal block TI and to setup or modify a frequency reference p 96 Frequency reference source configuration for RS 485 communication Configures the inverter to allow communication signals from upper level controllers such as PLCs or PCs and to setup or modif...

Страница 90: ... be turned on p 109 Acc Dec time configuration based on the Max Frequency Configures the acceleration and deceleration times for a motor based on a defined maximum frequency p 110 Acc Dec time configuration based on the frequency reference Configures acceleration and deceleration times for a motor based on a defined frequency reference p 112 Multi stage Acc Dec time configuration using the multi f...

Страница 91: ...put voltage to the motor when the power supply to the inverter differs from the motor s rated input voltage p 127 Accelerating start Accelerating start is the general way to start motor operation The typical application configures the motor to accelerate to a target frequency in response to a run command however there may be other start or acceleration conditions defined p 128 Start after DC braki...

Страница 92: ...ion modes according to your requirements p 137 Multi function input terminal control configuration Enables the user to improve the responsiveness of the multi function input terminals p 139 4 1 Switching between the Operation Modes HAND AUTO OFF The H100 series inverters have two operation modes the HAND and AUTO modes HAND mode is used for local control using the keypad AUTO mode is used for remo...

Страница 93: ...tion Used to enter the HAND operation mode Used to enter the OFF mode standby mode or to reset fault trips Used to enter the AUTO operation mode or to start or stop inverter operation inAUTO mode HAND LED Turns on green steady during HAND mode operation OFF LED Turns on red steady while the inverter is in OFF mode standby and flashes then a fault trip occurs The LED turns on red steady again when ...

Страница 94: ...features are not available PID EPID control Flow compensation Pump clean Load tuning Motor preheating Time scheduling PowerOn resume Multiple motor control Inverter monitoring and protection features are available in HAND mode OFF Mode Standby In OFF mode the inverter operation stops Pressing the OFF key during HAND AUTO mode operations will cause the OFF LED to turn on Then the inverter stops ope...

Страница 95: ...e that the inverter is in AUTO mode OUT 31 36 Relay 1 5 Set HANDState 37 to ensure that the inverter is in HAND mode Switching between the HAND AUTO OFF Modes Mode Description AUTO HAND Press the HAND key in AUTO mode to switch to HAND mode The inverter operates as follows based on the setting at DRV 26 Hand Ref Mode Settings Description 0 Hand Parameter The inverter operates based on the operatio...

Страница 96: ...ference set at DRV 25 HAND Cmd Freq Operation Mode at Power Recovery If a power interruption occurs during inverter operation in the OFF or HAND mode the inverter halts the operation with low voltage fault trip Then when the power is recovered the inverter turns on in OFF mode If the inverter was operating in AUTO mode at the time of the low voltage trip following the power interruption the invert...

Страница 97: ...nd modify a frequency reference for an operation The keypad analog inputs for example voltage V1 V2 and current I2 signals or RS 485 digital signals from higher level controllers such as PC or PLC can be used Group Code Name LCD Display Parameter Setting Setting Range Unit DRV 7 Frequency reference source Freq Ref Src 0 KeyPad 1 0 11 1 KeyPad 2 2 V1 4 V2 5 I2 6 Int 485 7 Field Bus 9 Pulse 10 V3 11...

Страница 98: ...2 2 Keypad as the Source KeyPad 2 setting You can use the UP and DOWN cursor keys to modify a frequency reference To use this as a second option set the keypad as the source of the frequency reference by going to DRV 07 Frequency reference source and change the parameter value to 1 Keypad 2 This allows frequency reference values to be increased or decreased by pressing the UP and DOWN cursor keys ...

Страница 99: ...urce VR application Group Code Name LCD Display Parameter Setting Setting Range Unit DRV 07 Frequency reference source Freq Ref Src 2 V1 0 11 IN 01 Frequency at maximum analog input Freq at 100 Maximum frequency 0 00 Max Frequency Hz 05 V1 input monitor V1 Monitor V 0 00 0 00 12 00 V 06 V1 polarity options V1 Polarity 0 Unipolar 0 1 07 V1 input filter time constant V1 Filter 10 0 10000 msec 08 V1 ...

Страница 100: ...Learning Basic Features 86 Group Code Name LCD Display Parameter Setting Setting Range Unit 17 V1 Quantizing level V1 Quantizing 0 04 0 00 0 04 10 00 Quantizing is disabled if 0 is selected ...

Страница 101: ...odes IN 01 IN 16 Motor will run at 30 00 Hz 50 of the default maximum frequency 60 Hz when a 10 V input is provided at V1 IN 05 V1 Monitor V Configures the inverter to monitor the input voltage at V1 IN 07 V1 Filter V1 Filter may be used when there are large variations between reference frequencies Variations can be mitigated by increasing the time constant but this requires an increased response ...

Страница 102: ...but increasing the value will reduce responsiveness and may cause pulsations ripples in the output frequency Parameter values for quantizing refer to a percentage based on the maximum input Therefore if the value is set to 1 of the analog maximum input 60 Hz the output frequency will increase or decrease by 0 6 Hz per 0 1 V difference When the analog input is increased an increase to the input equ...

Страница 103: ...89 Learning Basic Features Code Description V1 Quantizing ...

Страница 104: ...inal wiring Bipolar input voltage and output frequency Group Code Name LCD Display Parameter Setting Setting Range Unit DRV 07 Frequency reference source Freq Ref Src 2 V1 0 11 IN 01 Frequency at maximum analog input Freq at 100 60 00 0 Max Frequency Hz 05 V1 input monitor V1 Monitor 0 00 12 00 12 00 V V 06 V1 polarity options V1 Polarity 1 Bipolar 0 1 12 V1 minimum input voltage V1 volt x1 0 00 1...

Страница 105: ...ge 0 10 V 10 0 V FWD Forward Reverse REV Reverse Forward 10 10 V Voltage Input Setting Details Code Description IN 12 V1 volt x1 IN 15 V1 Perc y2 Sets the gradient level and off set value of the output frequency in relation to the input voltage These codes are displayed only when IN 06 is set to 1 bipolar As an example if the minimum input voltage at V1 is set to 2 V with 10 output ratio and the m...

Страница 106: ...Learning Basic Features 92 Code Description For details about the 0 10 V analog inputs refer to the code descriptions IN 08 V1 volt x1 IN 11 V1 Perc y2 on page 87 ...

Страница 107: ...req Ref Src 5 I2 0 11 IN 01 Frequency at maximum analog input Freq at 100 60 00 0 Maximum Frequency Hz 50 I2 input monitor I2 Monitor 0 00 0 00 24 00 mA 52 I2 input filter time constant I2 Filter 10 0 10000 ms 53 I2 minimum input current I2 Curr x1 4 00 0 00 20 00 mA 54 I2 output at minimum current I2 Perc y1 0 00 0 100 55 I2 maximum input current I2 Curr x2 20 00 0 00 24 00 mA 56 I2 output at max...

Страница 108: ...40 00 Hz If IN 56 is set to 50 00 and default settings are used for IN 01 60 Hz and IN 53 55 20 mA input current max to I2 will produce a frequency reference of 30 00 Hz 50 of 60 Hz IN 50 I2 Monitor Used to monitor input current at I2 IN 52 I2 Filter Configures the time for the operation frequency to reach 63 of target frequency based on the input current at I2 IN 53 I2 Curr x1 IN 56 I2 Perc y2 Co...

Страница 109: ...p Code Name LCD Display Parameter Setting Setting Range Unit DRV 07 Frequency reference source Freq Ref Src 4 V2 0 11 IN 35 V2 input display V2 Monitor 0 00 0 00 12 00 V 37 V2 input filter time constant V2 Filter 10 0 10000 msec 38 Minimum V2 input voltage V2 Volt x1 0 00 0 00 10 00 V 39 Output at minimum V2 voltage V2 Perc y1 0 00 0 00 100 00 40 Maximum V2 input voltage V2 Volt x2 10 00 0 00 10 0...

Страница 110: ...equency at maximum analog input Freq at 100 60 00 0 00 Maximum frequency Hz 91 Pulse input display TI Monitor 0 00 0 00 50 00 kHz 92 TI input filter time constant TI Filter 10 0 9999 mse c 93 TI input minimum pulse TI Pls x1 0 00 0 00 32 00 kHz 94 Output at TI minimum pulse TI Perc y1 0 00 0 00 100 00 95 TI Input maximum pulse TI Pls x2 32 00 0 00 32 00 kHz 96 Output at TI maximum pulse TI Perc y2...

Страница 111: ...t to 50 00 and codes IN 01 IN 93 95 are set at default 32 kHz input to the TI terminal yields a frequency reference of 30 00 Hz IN 91 TI Monitor Displays the pulse frequency supplied at TI IN 92 TI Filter Sets the time for the pulse input at TI to reach 63 of its nominal frequency when the pulse frequency is supplied in multiple steps IN 93 TI Pls x1 IN 96 TI Perc y2 Configures the gradient level ...

Страница 112: ...reference source Freq Ref Src 6 Int 485 0 11 COM 01 Integrated RS 485 communication inverter ID Int485 St ID 1 1 MaxComID 02 Integrated communication protocol Int485 Proto 0 ModBus RTU 0 6 2 LS Inv 485 4 BACnet 5 Metasys N2 6 Modbus Master 03 Integrated communication speed Int485 BaudR 3 9600 bps 0 8 04 Integrated communication frame configuration Int485 Mode 0 D8 PN S1 0 3 1 D8 PN S2 2 D8 PE S1 3...

Страница 113: ...he operation frequency will be fixed upon an analog input signal Group Code Name LCD Display Parameter Setting Setting Range Unit DRV 07 Frequency reference source Freq Ref Src 0 Keypad 1 0 11 1 Keypad 2 2 V1 4 V2 5 I2 6 Int 485 7 Fied Bus 9 Pulse 10 V3 11 I3 IN 65 71 Px terminal configuration Px Define Px P1 P7 23 Analog Hold 0 55 10 V3 11 I3 of DRV 07 are available when Extension IO option is eq...

Страница 114: ... or frequencies to the Px terminals Step 0 uses the frequency reference source set at DRV 07 Px terminal parameter values 7 Speed L 8 Speed M and 9 Speed H are recognized as binary commands and work in combination with Fx or Rx run commands The inverter operates according to the frequencies set with BAS 50 56 multi step frequency 1 7 and the binary command combinations Group Code Name LCD Display ...

Страница 115: ...en set to Speed L Speed M and Speed H respectively the following multi step operation will be available An example of a multi step operation Speed Fx Rx P7 P6 P5 0 1 2 3 4 5 6 7 IN 89 InCheck Time Set a time interval for the inverter to check for additional terminal block inputs after receiving an input signal After adjusting IN 89 to 100 ms and an input signal is received at P6 the inverter will ...

Страница 116: ...5 Time Event 4 6 1 The Keypad as a Command Input Device To use the keypad as the command source press the AUTO key to enter AUTO mode Set DRV 06 to 0 Keypad to select the keypad as the command source and set the operation direction at DRV 02 Keypad Run Dir Since the keypad is now the command source operation starts when the AUTO key is pressed and it stops when the AUTO key is pressed again The OF...

Страница 117: ...his application enables both terminals to be turned on or off at the same time constituting a stop command that will cause the inverter to stop operation Grou p Code Name LCD Display Parameter Setting Setting Range Uni t IN 02 Operation direction for Keypad Keypad Run Dir 0 Reverse 0 1 1 Forward DRV 06 Command source Cmd Source 1 Fx Rx 1 0 5 IN 65 71 Px terminal configuration Px Define Px P1 P7 1 ...

Страница 118: ...s IN 65 71 for P1 P7 to 1 Fx and 2 Rx respectively This application uses an Fx input as a run command and an Rx input to change a motor s rotation direction On Rx Off Fx Group Code Name LCD Display Parameter Setting Setting Range Unit DRV 06 Command source Cmd Source 2 Fx Rx 2 0 5 IN 65 71 Px terminal configuration Px Define Px P1 P7 1 Fx 0 55 2 Rx Run Command and Fwd Rev Change Command Using Mult...

Страница 119: ...grated communication inverter ID Int485 St ID 1 1 MaxComID 02 Integrated communication protocol Int485 Proto 0 ModBus RTU 0 6 03 Integrated communication speed Int485 BaudR 3 9600 bps 0 8 04 Integrated communication frame setup Int485 Mode 0 D8 PN S1 0 3 If AP1 40 is set to 4 Serve Drv MaxComID is 8 and if COM 02 is set to 4 BACnet MaxComID is 127 Otherwise MaxComID is 250 4 7 Forward or Reverse R...

Страница 120: ...Learning Basic Features 106 Grou p Cod e Name LCD Display Parameter Setting Setting Range Unit Prev ...

Страница 121: ...ter powering up based on the run commands by terminal inputs or communication if they are configured In AUTO mode the inverter starts operating at power on when the following conditions are met Terminal block input as the command source If they have been configured To enable power on run set DRV 06 command source to 1 Fx Rx 1 or 2 Fx Rx 2 in the Drive group and ADV 10 to 1 in the Advanced group Gr...

Страница 122: ...ng Range Unit DRV 06 Command source Cmd Source 3 Int 485 0 5 4 Field Bus COM 96 Power on resume PowerOn Resume 0 No 0 1 1 Yes Note To prevent a repeat fault trip from occurring set CON 71 speed search options bit 4 the same as bit 1 The inverter will perform a speed search at the beginning of the operation If the speed search is not enabled the inverter will start its operation in a normal V F pat...

Страница 123: ...t restarts The number of auto restarts PRT 09 refers to the number of times the inverter will try restarting its operation If fault trips occur again after restart the retry number counts down each time the inverter restarts until the number becomes 0 Once the inverter restarts successfully after the initial fault trip the inverter does not restart until the next fault trip occurs The number of au...

Страница 124: ...er operation frequency To set Acc Dec time values based on maximum frequency set BAS 08 Acc Dec reference in the Basic group to 0 Max Freq Acceleration time set at DRV 03 Acceleration time refers to the time required for the inverter to reach the maximum frequency from a stopped 0 Hz state Likewise the value set at the DRV 04 Deceleration time refers to the time required to return to a stopped sta...

Страница 125: ...me required to reach 30 Hz therefore is 2 5 seconds half of 5 seconds BAS 09 Time scale Use the time scale for all time related values It is particularly useful when a more accurate Acc Dec times are required because of load characteristics or when the maximum time range needs to be extended Configuration Description 0 0 01 sec Sets 0 01 second as the minimum unit 1 0 1 sec Sets 0 1 second as the ...

Страница 126: ...00 0 sec 04 Deceleration time Dec Time 30 0 0 0 600 0 sec BAS 08 Acc Dec reference Ramp T Mode 1 Delta Freq 0 1 Acc Dec Time Based on Operation Frequency Setting Details Code Description BAS 08 Ramp T Mode Set the parameter value to 1 Delta Freq to set Acc Dec times based on Maximum frequency Configuration Description 0 Max Freq Set the Acc Dec time based on Maximum frequency 1 Delta Freq Set the ...

Страница 127: ...5 12 XCEL M 13 XCEL H 89 Multi step command delay time In Check Time 1 1 5000 ms Acc Dec Time Setup via Multi function Terminals Setting Details Code Description BAS 70 82 Acc Time 1 7 Set multi step acceleration time1 7 BAS 71 83 Dec Time 1 7 Set multi step deceleration time1 7 IN 65 71 Px Define P1 P7 Choose and configure the terminals to use for multi step Acc Dec time inputs Configuration Desc...

Страница 128: ...ut received at P6 4 10 4 Configuring Acc Dec Time Switch Frequency You can switch between two different sets of Acc Dec times Acc Dec gradients by configuring the switch frequency without configuring the multi function terminals Group Code Name LCD Display Parameter Setting Setting Range Unit DRV 03 Acceleration time Acc Time 10 0 0 0 600 0 sec 04 Deceleration time Dec Time 10 0 0 0 600 0 sec BAS ...

Страница 129: ...115 Learning Basic Features ...

Страница 130: ...cy If the operation frequency exceeds the switch frequency the gradient level configured for the accelerration and deceleration times set at DRV 03 and DRV 04 will be used If you configure the P1 P7 multi function input terminals for multi step Acc Dec gradients XCEL L XCEL M XCEL H the inverter will operate based on the Acc Dec inputs at the terminals instead of the Acc Dec switch frequency confi...

Страница 131: ...adient Dec S Start 40 1 100 06 S curve Dec end gradient Dec S End 40 1 100 Acc Dec Pattern Setting Details Code Description ADV 03 Acc S Start Sets the gradient level as acceleration starts when using an S curve Acc Dec pattern ADV 03 defines S curve gradient level as a percentage up to half of total acceleration If the frequency reference and maximum frequency are set at 60 Hz and ADV 03 is set t...

Страница 132: ...ation for the remaining acceleration in the 45 60 Hz frequency range ADV 05 Dec S Start ADV 06 Dec S End Sets the rate of S curve deceleration Configuration for codes ADV 05 andADV 06 may be performed the same way as configuring codes ADV 03 and ADV 04 Acceleration deceleration pattern configuration Acceleration deceleration S curve parrten configuration ...

Страница 133: ...nfigured deceleration time x starting gradient level 2 user configured deceleration time x ending gradient level 2 Note that actual Acc Dec times become greater than user defined Acc Dec times when S curve Acc Dec patterns are in use 4 12 Stopping the Acc Dec Operation Configure the multi function input terminals to stop acceleration or deceleration and operate the inverter at a fixed frequency Gr...

Страница 134: ...ange Unit IN 09 Control mode Control Mode 0 V F 0 1 18 Base frequency Base Freq 60 00 30 00 400 00 Hz 19 Start frequency Start Freq 0 50 0 01 10 00 Hz BAS 07 V F pattern V F Pattern 0 Linear 0 3 Linear V F Pattern Setting Details Code Description DRV 18 Base Freq Sets the base frequency A base frequency is the inverter s output frequency when running at its rated voltage Refer to the motor s ratin...

Страница 135: ...t BAS 07 V F pattern V F Pattern 1 Square 0 3 3 Square 2 Square Reduction V F pattern Operation Setting Details Code Description BAS 07 V F Pattern Sets the parameter value to 1 Square or 2 Square2 according to the load s start characteristics Setting Function 1 Square The inverter produces output voltage proportional to 1 5 square of the operation frequency 3 Square2 The inverter produces output ...

Страница 136: ...3 User Frequency 2 User Freq 2 30 00 0 Maximum frequency Hz 44 User Voltage 2 User Volt 2 50 0 100 45 User Frequency 3 User Freq 3 45 00 0 Maximum frequency Hz 46 User Voltage 3 User Volt 3 75 0 100 47 User Frequency 4 User Freq 4 Maximum frequency 0 Maximum frequency Hz 48 User Voltage 4 User Volt 4 100 0 100 User V F pattern Setting Details Code Description BAS 41 User Freq 1 BAS 48 User Volt 4 ...

Страница 137: ...be based on the input voltage When a normal induction motor is in use care must be taken not to configure the output pattern away from a linear V F pattern Non linear V F patterns may cause insufficient motor torque or motor overheating due to over excitation When a user V F pattern is in use forward torque boost DRV 16 and reverse torque boost DRV 17 do not operate ...

Страница 138: ...gure manual torque boost while running loads that require high starting torque such as lift type loads Grou p Cod e Name LCD Display Parameter Setting Setting Range Unit DRV 15 Torque boost options Torque Boost 0 Manual 0 2 16 Forward torque boost Fwd Boost 2 0 0 0 15 0 17 Reverse torque boost Rev Boost 2 0 0 0 15 0 Manual Torque Boost Setting Details Code Description DRV 16 Fwd Boost Set torque b...

Страница 139: ...igure auto torque boost while running a load that requires high starting torque such as lift type loads Refer to 5 21 Auto Tuning on page 212 4 14 3 Auto Torque Boost 2 No Motor Parameter Tuning Required By adjusting the auto torque boost voltage gain set at DRV 15 ATB Volt Gain automatic torque boost may be operated without tuning the motor related parameter values The DRV 15 ATB Volt Gain value ...

Страница 140: ...Learning Basic Features 126 ...

Страница 141: ...r adjusts the voltage and supplies the motor with the voltage set at BAS 15 motor rated voltage If the motor s rated voltage is higher than the input voltage at the inverter the inverter will supply the inverter input voltage to the motor If BAS 15 motor rated voltage is set to 0 the inverter corrects the output voltage based on the input voltage in the stopped condition If the frequency is higher...

Страница 142: ...aking This start mode supplies a DC voltage for a set amount of time to provide DC braking before an inverter starts to accelerate a motor If the motor continues to rotate due to its inertia DC braking will stop the motor allowing the motor to accelerate from a stopped condition DC braking can also be used with a mechanical brake connected to a motor shaft when a constant torque load is applied if...

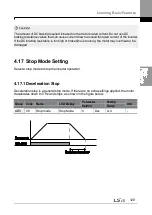
Страница 143: ...stance is too high or brake time is too long the motor may overheat or be damaged 4 17 Stop Mode Setting Select a stop mode to stop the inverter operation 4 17 1 Deceleration Stop Deceleration stop is a general stop mode If there are no extra settings applied the motor decelerates down to 0 Hz and stops as shown in the figure below Group Code Name LCD Display Parameter Setting Setting Range Unit A...

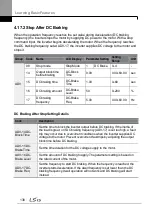
Страница 144: ...DC Brake Freq 5 00 0 00 60 00 Hz DC Braking After Stop Setting Details Code Description ADV 14 DC Block Time Set the time to block the inverter output before DC braking If the inertia of the load is great or if DC braking frequency ADV 17 is set too high a fault trip may occur due to overcurrent conditions when the inverter supplies DC voltage to the motor Prevent overcurrent fault trips by adjust...

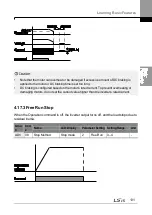
Страница 145: ...ured based on the motor s rated current To prevent overheating or damaging motors do not set the current value higher than the inverter s rated current 4 17 3 Free Run Stop When the Operation command is off the inverter output turns off and the load stops due to residual inertia Grou p Cod e Name LCD Display Parameter Setting Setting Range Unit ADV 08 Stop Method Stop mode 2 Free Run 0 4 ...

Страница 146: ...is needed without causing an over voltage fault trip To prevent overheating or damaging the motor do not apply power braking to the loads that require frequent deceleration Stall prevention and power braking only operate during deceleration and power braking takes priority over stall prevention In other words when both bit 3 of PRT 50 stall prevention and flux braking and ADV 08 braking options ar...

Страница 147: ...wer limit value for speed unit parameters that are expressed in Hz or rpm If an input frequency is lower than the start frequency the parameter value will be 0 00 DRV 20 Max Freq Set upper and lower frequency limits All frequency selections are restricted to frequencies from within the upper and lower limits This restriction also applies when you in input a frequency reference using the keypad 4 1...

Страница 148: ...Learning Basic Features 134 ...

Страница 149: ... frequency to all speed unit parameters that are expressed in Hz or rpm except for the base frequency DRV 18 Frequency cannot be set higher WhenADV 24 Freq Limt is set to Yes the frequency set at ADV 25 Freq Limit Lo is the minimum frequency Low Freq If ADV 24 Freq Limit is set to No the frequency set at DRV 19 Start Freq becomes the minimum frequency WhenADV 24 Freq Limt is set to Yes the frequen...

Страница 150: ...n the frequency parameter setting exceeds the range of frequencies used by the frequency jump band Group Code Name LCD Display Parameter Setting Setting Range Unit ADV 27 Frequency jump Jump Freq 0 0 1 0 1 28 Jump frequency lower limit1 Jump Lo 1 10 00 0 00 Jump frequency upper limit 1 Hz 29 Jump frequency upper limit1 Jump Hi 1 15 00 Jump frequency lower limit 1 Maximum frequency Hz 30 Jump frequ...

Страница 151: ...ion terminals from codes IN 65 71 and set the parameter value to 15 2nd Source Group Code Name LCD Display Parameter Setting Setting Range Unit DRV 06 Command source Cmd Source 1 Fx Rx 1 0 5 07 Frequency reference source Freq Ref Src 2 V1 0 11 BAS 04 2nd Command source Cmd 2nd Src 0 Keypad 0 5 05 2nd Frequency reference source Freq 2nd Src 0 KeyPad 1 0 11 IN 65 71 Px terminal configuration Px Defi...

Страница 152: ...Learning Basic Features 138 Code Description Src 7 and DRV 01 The 2nd command source settings cannot be changed while operating with the 1st command source Main Source ...

Страница 153: ...he inverter may stop operating when you switch the command modes 4 20 Multi function Input Terminal Control Filter time constants and the type of multi function input terminals can be configured to improve the response of input terminals Group Code Name LCD Display Parameter Setting Setting Range Unit IN 85 Multi function input terminal On filter DI On Delay 10 0 10000 mse c 86 Multi function inpu...

Страница 154: ...figured as a A terminal Normally Open contact With the top segment on it indicates that the terminal is configured as a B terminal Normally Closed contact Terminals are numbered P1 P7 from right to left Type B terminal status Normally Closed A terminal status Normally Open Keypad IN 90 DI Status Display the configuration of each contact When a segment is configured as A terminal using DRV 87 the O...

Страница 155: ...00 0000 111 1111 84 Availability of applying DI Off Delay DI Off DealyEn 111 1111 000 0000 111 1111 Multi function Input Terminal On Off Delay Control Setting Details Code Description IN 83 DI On Delay En IN 84 DI Off Delay En Every Input Terminal it is possible to set availability of using On Off Delay of Input Terminal From right Availability of using On Off Delay about Multi function Input Term...

Страница 156: ... by a push button p 152 Safety operation mode This safety feature allows the inverter s operation only after a signal is input to the multi function terminal designated for the safety operation mode This feature is useful when extra care is needed in operating the inverter using the multi purpose terminals p 153 Dwell operation Use this feature for the lift type loads such as elevators when the to...

Страница 157: ...ower source to the motor from the inverter output to a commercial power source or vice versa p 246 Cooling fan control Used to control the cooling fan of the inverter p 247 Multi function output On Off control Set standard values and turn On Off the output relays or multi function output terminals according to the analog input value p 290 Regeneration prevention for press operation Used during a p...

Страница 158: ... inverter in a way to cope with emergency situations such as fire by controlling the operation of ventilation intake and exhaust fans p 233 5 1 Operating with Auxiliary References Frequency references can be configured with various calculated conditions that use the main and auxiliary frequency references simultaneously The main frequency reference is used as the operating frequency while auxiliar...

Страница 159: ... be set to voltage 4 I2 Sets the I2 current terminal at the control terminal block as the source of auxiliary frequency reference SW4 must be set to current 5 Pulse Sets the TI pulse terminal at the control terminal block as the source of auxiliary frequency reference BAS 02 Aux Calc Type Set the auxiliary reference gain with BAS 03 Aux Ref Gain to configure the auxiliary reference and set the per...

Страница 160: ...ng BAS 03 50 IN 01 32 Factory default Example an input voltage of 6 V is supplied to V1 and the frequency corresponding to 10 V is 60 Hz The table below shows the auxiliary frequencyA as 36 Hz 60 Hz X 6 V 10 V or 60 100 X 6 V 10 V Setting Calculating final command frequency 0 M Hz G A Hz 30 Hz M 50 G x36 Hz A 48 Hz 1 M Hz G A 30 Hz M x 50 G x60 A 9 Hz 2 M Hz G A 30 Hz M 50 G x60 A 100 Hz 3 M Hz M ...

Страница 161: ...e table below shows auxiliary frequencyA as 24 Hz 60 Hz X 10 4 mA 4 mA 20 mA 4 mA or 40 100 X 10 4 mA 4 mA 20 mA 4 mA Setting Calculating final command frequency 0 M Hz G A Hz 30 Hz M 50 G x24 Hz A 42 Hz 1 M Hz G A 30 Hz M x 50 G x40 A 6 Hz 2 M Hz G A 30 Hz M 50 G x40 A 150 Hz 3 M Hz M Hz G A 30 Hz M 30 Hz x 50 G x40 A 36 Hz 4 M Hz G 2 A 50 Hz 30 Hz M 50 G x2x 40 A 50 x60 Hz 24 Hz 5 M HZ G 2 A 50 ...

Страница 162: ... to I2 with the frequency corresponding to 20 mA of 60 Hz The table below shows auxiliary frequencyAas 24 Hz 60 Hz x 10 4 mA 4 mA 20 mA 4 mA or 40 100 x 10 4 mA 4 mA 20 mA 4 mA Setting Calculating final command frequency 0 M Hz G A Hz 30 Hz M 50 G x24 Hz A 42 Hz 1 M Hz G A 30 Hz M x 50 G x40 A 6 Hz 2 M Hz G A 30 Hz M 50 G x40 A 150 Hz 3 M Hz M Hz G A 30 Hz M 30 Hz x 50 G x40 A 36 Hz 4 M Hz G 2 A 5...

Страница 163: ...tion is available in either forward or reverse direction using the keypad or multi function terminal inputs The table below lists parameter setting for a forward jog operation using the multi function terminal inputs Group Code LCD Display LCD Display Parameter Setting Setting Range Unit DRV 11 Jog frequency JOG Frequency 10 00 0 00 Low Freq High Freq Hz 12 Jog operation acceleration time JOG Acc ...

Страница 164: ...to start operation but while using jog operation 2 a terminal that is set for a forward or reverse jog also starts an operation The priorities for frequency Acc Dec time and terminal block input during operation in relation to other operating modes Dwell 3 wire up down etc are identical to jog operation 1 If a different operation command is entered during a jog operation it is ignored and the oper...

Страница 165: ...olled through input at the multi function terminal block Similar to a flowmeter the up down operation can be applied easily to a system that uses the upper lower limit switch signals for Acc Dec commands Group Code Name LCD Display Parameter Setting Setting Range Unit ADV 65 Up down operation frequency save U D Save Mode 1 Yes 0 1 IN 65 71 Px terminal configuration Px Define Px P1 P7 19 Up 0 55 20...

Страница 166: ...a constant speed operation the operating frequency is saved automatically in the following conditions the operation command Fx or Rx is off a fault trip occurs or the power is off When the operation command is turned on again or when the inverter regains the power source or resumes to a normal operation from a fault trip it resumes operation at the saved frequency To delete the saved frequency use...

Страница 167: ...t for 3 wire operation is 2 ms and the operation stops when both forward and reverse operation commands are entered at the same time P1 P5 CM 1 FX 6 JOG P7 16 3 Wire Terminal connections for 3 wire operation FX RX 3 Wire Freq 3 wire operation 5 5 Safe Operation Mode When the multi function terminals are configured to operate in safe mode operation commands can be entered in the Safe operation mode...

Страница 168: ... Set the operation of the inverter when the multi function input terminal in safe operation mode is off When the safety operation mode terminal signal is given the inverter decelerates based on the settings at the Q Stop time The inverter decelerates and stops based on the deceleration time Dec Time settings if the run command is off Setting Function 1 Free Run Blocks the inverter output when the ...

Страница 169: ...is reached within the acceleration dwell operation time Acc Dwell Time After the Acc Dwell Time has passed acceleration is carried out based on the acceleration time and the operation speed that was originally set Deceleration Dwell Operation When a stop command is run deceleration continues until the deceleration dwell frequency and constant speed are reached within the deceleration dwell operati...

Страница 170: ...n time is set to 0 sec or dwell frequency is set to 0 Hz Re acceleration is attempted from stop or during deceleration as only the first acceleration dwell operation command is valid Acceleration dwell operation Although deceleration dwell operation is carried out whenever stop commands are entered and the deceleration dwell frequency is passed through it does not work during a deceleration by sim...

Страница 171: ...157 Learning Advanced Features Deceleration dwell operation ...

Страница 172: ...le Number 4 2 48 12 Rated slip speed Rated Slip 40 5 5 kW based 0 3000 Rpm 13 Rated motor current Rated Curr 3 6 5 5 kW based 1 0 1000 0 A 14 Motor no load current Noload Curr 1 6 5 5 kW based 0 5 1000 0 A 16 Motor efficiency Efficiency 72 5 5 kW based 70 100 Slip Compensation Operation Setting Details Code Description DRV 09 Control Mode Set DRV 09 to 2 Slip Compen to carry out the slip compensat...

Страница 173: ... functions of PID control that can be applied to the inverter operation are as follows Purpose Function Speed Control Controls speed by monitoring the current speed levels of the equipment or machinery being controlled Control maintains consistent speed or operates at the target speed Pressure Control Controls pressure by monitoring the current pressure levels of the equipment or machinery being c...

Страница 174: ... Err Value 10 PID reference source PID Ref1 Source 0 Keypad 0 11 11 PID reference setting PID Ref Set Unit Default Unit Min Unit Max Unit 12 PID reference 1 auxiliary source selection PID Ref1AuxSrc 0 None 0 13 13 PID reference 1 auxiliary mode selection PID Ref1AuxMod 0 M G A 0 13 14 PID reference auxiliary gain PID Ref 1 Aux G 0 0 200 0 200 0 Unit 15 PID reference 2 auxiliary source selection PI...

Страница 175: ...PID proportional gain 1 PID P Gain 1 50 0 0 0 300 00 Unit 26 PID integral time 1 PID I Time 1 10 0 0 0 200 0 sec 27 PID differential time 1 PID D Time 1 0 00 0 1 00 sec 28 PID feed forward gain PID FF Gain 0 0 0 0 1000 0 Unit 29 PID output filter PID Out LPF 0 00 0 10 00 sec 30 PID output upper limit PID Limit Hi 100 00 PID Limit Lo 100 00 Unit 31 PID output lower limit PID Limit Lo 0 00 100 00 PI...

Страница 176: ...tep Ref 4 Unit Default Unit Min Unit Max Unit 44 PID multi step reference setting 5 PID Step Ref 5 Unit Default Unit Min Unit Max Unit 45 PID multi step reference setting 6 PID Step Ref 6 Unit Default Unit Min Unit Max Unit 46 PID multi step reference setting 7 PID Step Ref 7 Unit Default Unit Min Unit Max Unit 50 PID controller unit selection PID Unit Sel 0 0 40 51 PID control setting scale PID U...

Страница 177: ...that were set in the PID group are applied on the display PID 04 PID Ref Value Displays the existing reference value set for the PID controller The unit gain and scale that were set in the PID group are applied on the display PID 05 PID Fdb Value Displays the latest feedback value of the PID controller The unit gain and scale that were set in the PID group are applied on the display PID 06 PID Err...

Страница 178: ...Function 0 None Not used 1 V1 10 10 V input voltage terminal 3 V2 I2 analog input terminal If the analog voltage current input terminal selection switch SW4 at the terminal block is set to I current input 0 20 mA current If it is set to V voltage input 0 10 V 4 I2 6 Pulse TI Pulse input terminal 0 32 kHz Pulse input 7 Int 485 RS 485 input terminal 8 FieldBus Communication command via a communicati...

Страница 179: ...f Source To set V1 as a feedback source change the reference source Setting Function 0 V1 10 10 V input voltage terminal 2 V2 I2 analog input terminal If the analog voltage current input terminal selection switch SW4 at the terminal block is set to I current input 0 20 mA current If it is set to V voltage input 0 10 V 3 I2 4 Int 485 RS 485 input terminal 5 FieldBus Communication command via a comm...

Страница 180: ...communication option card 10 EPID1 Output External PID 1 output 11 EPID1 Fdb Val External PID 1 feedback PID 22 PID FDB AuxMod The PID 30 PID FDB AuxMod provides formulas to calculate the final feedback value If PID 31 PID RefAuxSrc is set to any other value than None the final feedback is calculated using the input values at the sources set at PID 31 and PID 32 Setting 0 M G A 1 M G A 2 M G A 3 M...

Страница 181: ... output change based on the DRV 03 and DRV 04 settings Therefore consider the relationship between these values when configuring the gains and the Acc Dec times PID 27 PID D Time 1 PID 34 PID D Time 2 Sets the output volume for the rate of change in errors If the differential time PID D Time is set to 1 ms and the rate of change in errors per sec is 100 output occurs at 1 per 10 ms PID 28 PID FF G...

Страница 182: ...it Sel Sets the unit for the control variable 0 CUST is a custom unit defined by the user Setting 0 CUST 21 m 3 m m 3 min 1 22 m 3 h m 3 h 2 PSI 23 l s 3 F 24 l m 4 C 25 l h 5 inWC 26 kg s 6 inM 27 kg m 7 Bar 28 kg h 8 mBar 29 gl s 9 Pa 30 gl m 10 kPa 31 gl h 11 Hz 32 ft s 12 Rpm 33 f3 s ft3 min 13 V 34 f3 h ft3 h 14 I 35 lb s 15 kW 36 lb m 16 HP 37 lb m 17 mpm 38 lb h 18 ft 39 ppm 19 m s 40 pps 2...

Страница 183: ...169 Learning Advanced Features ...

Страница 184: ...Learning Advanced Features 170 PID Command Block ...

Страница 185: ...171 Learning Advanced Features PID Feedback Block ...

Страница 186: ...Learning Advanced Features 172 PID Output Block ...

Страница 187: ...173 Learning Advanced Features PID Output Mode Block ...

Страница 188: ...oup Code Name LCD Display Parameter Setting Setting Range Unit AP1 20 Soft Fill options Soft Fill Sel 0 No 0 1 21 Pr PID operation frequency Pre PID Freq 30 00 Low Freq High Freq Hz 22 Pre PID duration Pre PID Delay 60 0 600 0 sec 23 Soft fill escape value Soft Fill Set 20 00 Unit Min Unit Max 24 Soft fill reference increment Fill Step Set 2 00 0 Unit Band 25 Soft fill reference increment cycle Fi...

Страница 189: ...k or the Soft Fill PID Reference exceeds the Soft Fill Set value the soft fill operation ends and a normal process PID operation begins AP1 24 Fill Step Set AP1 25 Fill Step Time AP1 26 Fill Fdb Diff The Soft Fill PID Reference increases each time the set time at AP1 25 Fill Step Time is elapsed by the amount set at AP1 24 Fill Step Set However note that if the difference between the Soft Fill PID...

Страница 190: ...sleep mode for sleep mode frequency sleep mode delay time wakeup variation and wakeup delay time One of the two configurations may be selected depending on the multi function input terminal configuration and input conditions Group Code Name LCD Displays Parameter Setting Setting Range Unit AP1 05 Sleep boost settings Sleep Bst Set 0 00 0 Unit Max Unit 06 Sleep boost speed Sleep Bst Freq 60 00 0 00...

Страница 191: ...eep2Freq If the operating frequency stays below the frequencies set at AP1 08 and AP1 12 for the set times at AP1 07 and AP1 11 the inverter accelerates to the PID sleep boost frequency PID Sleep Bst Freq Then when the feedback reaches the value set at the boost level the inverter enters standby mode AP1 09 PID WakeUp1 DT AP1 13 PID WakeUp2 DT AP1 10 PID WakeUp1Dev AP1 14 PID WakeUp2Dev Sets the r...

Страница 192: ...PID Switching PID Openloop When one of the multi function terminals IN 65 71 is set to 25 PID Openloop and is turned on the PID operation stops and is switched to general operation When the terminal turns off the PID operation starts again ...

Страница 193: ... Control maintains consistent flow or operates at a target flow Temperature Control Controls temperature by monitoring the current temperature levels of the equipment or machinery to be controlled Control maintains a consistent temperature or operates at a target temperature Depending on the PID output mode the EPID output value can be overlapped to the PID output External output is also available...

Страница 194: ...ID1 FF Gain 0 0 0 0 1000 0 Unit 13 EPID1 output filter EPID1 Out LPF 0 0 10 00 Sec 14 EPID1 output upper limit EPID1 Limit Hi 100 00 EPID1 Limit Lo 100 00 15 EPID1 lower limit EPID1 Limit Lo 0 00 100 00 EPID1 Limit Hi 16 EPID1 output inverse EPID1 Out Inv 0 No 0 1 17 EPID1 unit EPID1 Unit Sel 1 Refer to EPID unit details table 18 EEPID1 unit scale EPID1 Unit Scl 2 X1 0 X100 1 X10 2 X1 3 X0 1 4 X0 ...

Страница 195: ...00 100 00 Unit 33 EPID2 reference monitor value EPID2 Ref Val 34 EPID2 feedback monitor value EPID2 Fdb Val 35 EPID2 error monitor value EPID2 Err Val 36 EPID2 command source selection EPID2 Ref Src 0 Keypad 0 10 37 EPID2 keypad command value EPID2 Ref Set Unit Min Unit Min Unit Max Unit 38 EPID2 feedback source selection EPID2 Fdb Src 0 V1 0 9 39 EPID2 proportional gain EPID2 P Gain 50 0 0 0 300 ...

Страница 196: ... EPID2 Out Inv 0 No 0 No 1 Yes 47 EPID2 unit EPID2 Unit Sel 0 CUST Refer to EPID unit details table 48 EPID2 unit scale EPID2 Unit Scl 2 X1 0 X100 1 X10 2 X1 3 X0 1 4 X0 01 49 EPID2 unit 0 value EPID2 Unit0 Differs depending on the unit setting X100 32000 Unit 100 X10 3200 0 Unit 100 X1 320 00 Unit 100 X0 1 32 000 Unit 100 X0 01 3 2000 Unit 100 50 EPID2 unit 100 value EPID2 Unit100 Differs dependi...

Страница 197: ...183 Learning Advanced Features ...

Страница 198: ...PID group are applied on the display EPI 03 EPID Ref Value Displays the existing reference value set for the EPID controller The unit gain and scale that were set in the EPID group are applied on the display EPI 04 EPID1 Fdb Value Displays the existing feedback value set for the EPID controller The unit gain and scale that were set in the EPID group are applied on the display EPI 05 EPID1 Err Valu...

Страница 199: ...ad 1 V1 10 10 V input voltage terminal 3 V2 I2 analog input terminal When analog voltage current input terminal selection switch SW4 at the terminal block is set to I current input 0 20 mA current If it is set to V voltage input 0 10 V voltage 4 I2 5 Int 485 RS 485 input terminal 7 FieldBus Communication command via a communication option card EPI 10 EPID1 I Time Sets the time to output accumulate...

Страница 200: ...erence error value between the reference and the feedback is set as the feedback reference value EPI 17 EPID1 Unit Sel Sets the unit for the control variable 0 CUST is a custom unit defined by the user Setting 0 CUST 21 m 3 m m 3 min 1 22 m 3 h m 3 h 2 PSI 23 l s 3 F 24 l m 4 C 25 l h 5 inWC 26 kg s 6 inM 27 kg m 7 Bar 28 kg h 8 mBar 29 gl s 9 Pa 30 gl m 10 kPa 31 gl h 11 Hz 32 ft s 12 Rpm 33 f3 s...

Страница 201: ...187 Learning Advanced Features Code Description 100 EPID1 Control block ...

Страница 202: ...Learning Advanced Features 188 EPID2 Control block ...

Страница 203: ...sary When the time difference between the inverter run command and the damper open signal exceeds the delay time set at AP2 45 Damper DT damper error Damper Err occurs If the damper open relay output and damper control input are set at the same time and if the damper open signal is not received until the time set at AP2 45 Damper DT is elapsed when the inverter is not operating damper error Damper...

Страница 204: ...e Sets one of the multi functional terminals to 45 Damper Open to enable damper operation OUT 31 35 Relay 1 5 Sets one of the relay outputs to 33 Damper Control to provide a relay output when the inverter run command is turned on Note Damper operation is one of the essential system features that are available in both HAND and AUTO modes ...

Страница 205: ...ned off Grou p Code Name LCD Display Parameter Setting Setting Range Unit AP2 46 Lubrication operation time Lub Op Time 0 1 600 0 sec OUT 31 35 Multi function relay 1 5 Relay 1 5 33 Damper Control Lubrication Operation Setting Details Code Description AP2 46 Lub Op Time Outputs the lubrication signal for a set time when the inverter run command is turned on The inverter starts operating when the s...

Страница 206: ...es and higher flow rate cause greater pressure loss A flow compensation operation can compensate for pressure loss by increasing the volume of the PID reference Grou p Code Name LCD Display Parameter Setting Setting Range Unit AP1 30 Flow Comp function options Flow Comp Sel 0 No 1 Yes 31 Max Comp amount Max Comp Value 0 Unit Band Flow Compensation Setting Details Code Description AP1 30 Flow Comp ...

Страница 207: ...re difference between A and B in the figure when the flows are different To compensate for the pressure loss above the value of AP1 31 is set to the maximum volume of compensation when the inverter has the maximum frequency and adds to the PID reference after calculating compensation volume based on the output frequency The final PID reference PID 11 Compensation amount and compensation amount is ...

Страница 208: ...per kWh Cost per kWh 0 0 0 1000 0 kW 90 Saved kWh Saved kWh 0 999 9 999 9 kWh 91 Saved MWh Saved MWh 0 32000 32000 MWh 92 Saved Cost below 1000 unit Saved Cost1 0 999 9 999 9 93 Saved Cost over 1000 unit Saved Cost2 0 32000 32000 94 Reduced CO2 conversion Factor CO2 Factor 0 5 0 1 5 0 95 Reduced CO2 Ton Saved CO2 1 0 9999 9999 Ton 96 Reduced CO2 1000 Ton Saved CO2 2 0 160 160 Ton 97 Reset Energy p...

Страница 209: ...uction rate per 1 MW default value 0 5 The value is multiplied with AP2 90 andAP2 91 and the resulting values are displayed at AP2 95 and AP2 96 AP2 95 Saved CO2 1 AP2 96 Saved CO2 2 Displays the CO2 reduction rate in tons AP2 95 and kilo tons AP2 96 AP2 97 Reset Energy Resets all the saved energy parameters Note Note that the actual saved energy may differ from the displayed values since the resu...

Страница 210: ...0 0 Sec 21 0 speed operating time at Fx Rx switching PC Step DT 5 0 1 0 6000 0 Sec 22 Pump clean Acc time PC Acc Time 10 0 0 600 0 Sec 23 Pump clean Dec time PC Dec Time 10 0 0 600 0 Sec 24 Forward step run time Fwd Steady T 10 0 1 0 6000 0 Sec 25 Forward step run frequency Fwd SteadyFreq 30 0 00 Low Freq High Freq Hz 26 Reverse step run time Rev Steady T 10 0 1 0 6000 0 Sec 27 Reverse step run fr...

Страница 211: ... by the time set at AP2 23 and then stops This operation repeats in the forward and reverse directions one after another for the number of times set at AP2 28 PC Num of Step Each time the steps Fx Rx switch the inverter waits at a stop state for the time set at AP2 21 before going on with the next step One step in the forward direction and another step in the reverse direction makes one cycle The ...

Страница 212: ... AP2 2 AP2 10 by the value set at AP2 17 100 AP2 17 and reset the load characteristic curve for the pump clean operation refer to the load tune features for AP2 2 AP2 10 setting values Apply rated inverter current x AP2 18 setting value and rated motor x AP2 18 setting value to the pump clean load curve calculated byAP2 17 to calculate the final pump clean load curve The inverter performs pump cle...

Страница 213: ... Set Sets the number of cycles for one pump clean operation set at AP2 21 AP2 28 AP2 32 PC Limit Time AP2 33 PC Limit Num Frequent pump clean operations may indicate a serious system problem To warn the users of potential system problems an error CleanRPTErr occurs if the number of pump clean operation exceeds the number set at AP2 33 within the time period set at AP2 32 Note When the run prevent ...

Страница 214: ...is performed when ADV 24 Freq Limit is set to 1 Yes Group Code Name LCD Display Parameter Setting Setting Range Unit AP2 40 Start End Ramp Gradient Start End Ramp 0 No 0 No 1 Yes 41 StartRampAcc StartRampAcc 10 0 0 600 0 Sec 42 EndRampDec EndRampDec 10 0 0 600 0 Sec ADV 24 Frequency limit options Freq Limit 0 No 0 No 1 Yes 25 Low Freq minimum value Freq Limit Lo 30 00 Start Freq Max Freq Hz 26 Low...

Страница 215: ...ion time set at DRV 03 and Time B normal deceleration time set at DRV 04 in the figure will change according to the Acc Dec gradients defined by AP2 41 and AP2 42 5 16 Decelerating Valve Ramping This function is used to prevent pump damage due to abrupt deceleration When the pump operation frequency reaches the valve ramp frequency AP2 38 Dec Valve Freq while decelerating rapidly based on the dece...

Страница 216: ...q Sets the start frequency where the slow deceleration begins in order to prevent pump damage when the inverter stops Decelerating valve ramping is performed from the frequency set at AP2 38 to the frequency limit set at ADV 25 low frequency limit for pump operation AP2 39 DecValve Time Sets the time it takes to decelerate from the frequency set at AP2 38 to the frequency limit set at ADV 25 low f...

Страница 217: ...Freq and the maximum set point can be set up to the base frequency If the frequency limit is set to 1 Yes at ADV 24 Freq Limit the range is limited within the frequencies set at ADV 25 Freq Limit Lo and ADV 26 Freq Limit Hi Group Code Name LCD Display Parameter Setting Setting Range Unit AP2 01 Load curve Tuning Load Tune No 0 No 1 Yes 02 Load curve Low Freq Load Fit LFreq 30 00 Base Freq 15 Load ...

Страница 218: ...es for AP2 03 and AP2 04 are user definable AP2 08 Load fit HFreq Defines the second frequency set point for load tuning user definable AP2 09 Load Fit HCurr AP2 10 Load Fit HPwr Displays the current and power measured at the frequency set at AP2 08 as a percentage value based on motor rated current and rated power Values for AP2 09 and AP2 10 are user definable AP2 11 Load Curve Cur AP2 12 Load C...

Страница 219: ...rating at or above the frequency set at PRT 74 LDT Level this function is used to triggers a fault trip or sets a relay output if the source value is out of the range of the user defined values If the reset restart feature is turned on the inverter continues to operate based on the run command after the LDT fault trip is released Group Code Name LCD Display Parameter Setting Setting Range Unit PRT...

Страница 220: ... below the frequency set by the user 2 Above Triggers a level detect fault trip when the inverter operates above the frequency set by the user PRT 72 LDT Source Selects a source for level detection Setting Function 0 Output Current Sets the output current as the source 1 DC Link Voltage Sets the DC link voltage as the source 2 Output Voltage Sets the output voltage as the source 3 kW Sets the outp...

Страница 221: ...e set level it must be adjusted to be above the LDT Level LDT Band Width value to release the level detection fault trip If the source is detected above the set level it must be adjusted to be below the LDT Level LDT Band Width value to release the level detection fault trip The level detection trip bandwidth is 10 of the maximum source value PRT 76 LDT Freq Sets the start frequency for the level ...

Страница 222: ...T Source of PRT 71 PRT 74 and PRT 75 become default value if the LDT Source is modified PRT 77 Restart DT and PRT 08 RST restart features operate separately The inverter waits until the delay time set at PRT 73 LDT Dly Time before it operates based on the setting in LDT 70 when the level detection time condition is met 5 19 Pipe Break Detection This function detects Pipe Breaks while the PID opera...

Страница 223: ...cting Pipe Breaks Setting Function 0 None No operation 1 Warning The inverter displays a warning message 2 Free Run The inverter free runs then stops 3 Dec The inverter decelerates then stops PRT 61 PipeBroken Dev Sets the Pipe Break Detection level Set the detect level by multiplying the set value for PRT 61 by PID Reference PRT 62 PipeBroken DT Sets the detect delay time Pipe Break operates if t...

Страница 224: ...me DC Inj Delay T 60 0 0 0 600 0 sec IN 65 71 Terminal block input 1 7 P1 7 Define 44 Pre Heat Initial Heating Setting Details Code Description AP2 48 Pre Heat Curr Sets the current to be used for initial heating Sets the current to motor no load current value AP2 49 Pre Heat Duty Sets the duty time for the current to be used for initial heating from 10 seconds to value AP2 50 DC Inj Delay T Sets ...

Страница 225: ... above shows the operation waveform related to AP2 50 DC Inj Delay T The Pre Heat function performs when the inverter stop mode is set to Free Run and the Pre Heat signal is supplied Then if the inverter operation command is on the inverter maintains acceleration and a fixed frequency If the inverter operation command is off the motor is in Free Run and the Pre Heat operations starts after the tim...

Страница 226: ...utomatically and can be used for an auto torque boost Example Auto Tuning Based on 5 5 kW 200 V Motor Group Code Name LCD Display Parameter Setting Setting Range Unit DRV 14 Motor capacity Motor Capacity 9 5 5 kW 7 20 BAS 11 Motor pole number Pole Number 4 2 48 12 Rated slip speed Rated Slip 45 0 3000 Rpm 13 Rated motor current Rated Curr 21 0 1 0 1000 0 A 14 Motor no load current Noload curr 7 1 ...

Страница 227: ... 488 15 53 6 15 5 1 00 0 084 1 118 18 5 65 6 19 0 1 00 0 0676 0 819 400 V 0 75 2 0 1 0 3 00 7 81 53 9 1 5 3 7 1 5 2 67 3 52 27 9 2 2 5 0 1 9 2 3 2 52 19 95 3 7 8 0 2 9 2 3 1 50 13 45 5 5 12 1 4 1 1 50 0 940 9 62 7 5 16 3 5 4 1 33 0 520 8 53 11 23 2 7 2 1 00 0 360 4 48 15 31 0 9 0 1 00 0 250 3 38 18 5 38 0 11 0 1 00 0 168 2 457 22 44 5 12 5 1 00 0 168 2 844 30 60 5 16 9 1 00 0 1266 2 133 37 74 4 20...

Страница 228: ...or spindle Note that the rotor time constant Tr must be measured in a stopped position 2 All static type Measures all parameters while the motor is in the stopped position including stator resistance Rs no load current Noload Curr rotor time constant Tr etc Since the motor is not rotating while the parameters are measured the measurements are not affected when the load is connected to the motor sp...

Страница 229: ... I O board of the H100 inverter and it lasts approximately 25 800 hours with the inverter turned off and 53 300 hours with the inverter turned on To use the Time Event set the current date and time Three parameters need to be set to configure the Time event feature Time Period Module Time Event and Exception Date Time Period Description Time Period Used to set the time of operation Time Event Used...

Страница 230: ...me Period 2 End time Period2 Stop T 24 00 Period2 StartT 24 00 Min Min 16 Time Period 2 Day of the week Period2 Day 00000000 0000000 111111 1 17 Time Period 3 Start time configuration Period3 StartT 24 00 00 00 24 00 Min 18 Time Period 3 End time Period3 Stop T 24 00 Period3 StartT 24 00 Min Min 19 Time Period 3 Day of the week Period3 Day 0000000 0000000 111111 1 20 Time Period 4 Start time Perio...

Страница 231: ...n Date 1 70 Time Event functions Time Event En 0 No 0 No 1 Yes 71 Time Event configuration status T Event Status 72 Time Event 1 Connection T Event1Period 000000000000 000000000000 111111111111 73 Time Event 1 functions T Event1Define 0 None 0 None 1 Fx 2 Rx 3 Speed L 4 Speed M 5 Speed H 7 Xcel L 8 Xcel M 9 Xcel H 10 Xcel Stop 11 Run Enable 12 2nd Source 13 Exchange 14 Analog Hold 15 I Term Clear ...

Страница 232: ...vent 2 Time Event 8 Parameter The same setting range and initial value as Time Event 1 Time Event Function Setting Details Code Description AP3 01 Now Date AP3 02 Now Time AP3 03 Now Weekday Sets the current date time and day of the week The Time Event function is based on the setting AP3 04 Summer T Start AP3 05 Summenr T Stop Set the Summer time start and finish date AP3 06 Date format Select th...

Страница 233: ...t indicates the relevant day is not selected Bit 6 5 4 3 2 1 0 Sunday Monday Tuesday Wednesday Thursday Friday Saturday AP3 30 AP3 51 Exception1 8 Start T The operation start time for the 8 Exception days can be set AP3 31 AP3 52 Exception1 8 Stop T The operation end time for the 8 Exception days can be set AP3 32 AP3 53 Exception1 8 Date The date for the 8 Exception days can be set AP3 70 Time Ev...

Страница 234: ...8 Xcel H 24 Pre Heat 9 Xcel Stop 25 EPID2 Run 10 Run Enable 26 EPID2 Openloop 11 2nd Source 27 Sleep Wake Chg 12 Exchange 28 PID Step Ref L 13 Analog Hold 29 PID Step Ref M 14 I Term Clear 30 PID Step Ref H 15 None Time Period Parameter Setting There are 4 Time Period Sets in the Time Event Each Time Period Set has period 1 4 Start Start time Period 1 4 Stop T End time and Period 1 4 Day Operation...

Страница 235: ...turday for 24 hours On Time Schedule Code Function Setting AP3 14 Period2 StartT 00 00 AP3 15 Period2 StopT 24 00 AP3 16 Period2 Day 1000001 Time Period 3 Every Sunday Thursday Friday and Saturday at 10 00 On and 14 00 Off Time Schedule Code Function Setting AP3 17 Period3 StartT 10 00 AP3 18 Period3 StopT 14 00 AP3 19 Period3 Day 1000111 Time Period settingTime Chart Parameters Setting for Except...

Страница 236: ... 8 Stop T 00 00 24 00 Hour Minutes Except1 8 Date 1 1 12 31 Select the particular date between 1 1 and 12 31 Time Period Schedule Exception Date 1 Every Sunday Monday Wednesday Thursday and Friday at 06 00 On and 18 00 Off Time Schedule Code Function Setting AP3 30 Except1 StartT 06 00 AP3 31 Except1 StopT 18 00 AP3 32 Except1 Day 12 25 Exception Date 2 Every Sunday and Saturday for 24 hours On Ti...

Страница 237: ...223 Learning Advanced Features Time Period Schedule AP3 38 Except3 Day 01 01 ...

Страница 238: ...tle Setting Range Remarks Except1 8 StartT 00 00 24 00 Hour Minutes by the minute Except1 8 Stop T 00 00 24 00 Hour Minutes Except1 8 Date 1 1 12 31 Select the particular date between 1 1 and 12 31 The Time Chart for the Exception Day ...

Страница 239: ...as a bit unit in the parameters for Events 1 8 The diagram below shows the connections between the Time event modules and the time period modules The Time Event 1 is connected to Time Period 4 The Time Event 8 is connected to Time Periods 1 4 and the Exception Dates 2 Time Event Module Function Settings The functions to be performed in the Time Event for T Events 1 8 can be set 30 functions can be...

Страница 240: ... 24 00 Min 12 Time Period 1 End time Period1 Stop T 20 00 00 00 24 00 Min 13 Time Period 1 Day of the week Period1 Day 0110000 0000000 1111111 14 Time Period 2 Start time Period2 StartT 12 00 00 00 24 00 Min 15 Time Period 2 End time Period2 Stop T 17 00 00 00 24 00 Min 16 Time Period 2 Day of the week Period2 Day 00100000 0000000 1111111 70 Time Event configuration Time Event En 1 YES 0 No 1 Yes ...

Страница 241: ...Source 13 Exchange 14 Analog Hold 15 I Term Clear 16 PID Openloop 17 PID Gain 2 18 PID Ref Change 19 2nd Motor 20 Timer In 21 DiasAux Ref 22 EPID1 Run 23 EPID1 ITerm Clr 24 Pre Heat 25 EPID2 RUn 26 EPID2 ITerm Clr 27 Sleep Wake Chg 28 PID Step Ref L 29 PID Step Ref M 30 PID Step Ref H 74 Time Event 2 connection T Event1Period 00000000010 000000000001 111111111111 75 Time Event 2 functions T Event2...

Страница 242: ...at Time Period module 2 On Mondays the inverter operates in the forward direction based on the frequency input on the keypad from 10AM to 8PM Time Event 1 On Tuesdays it operates again in the forward direction based on the keypad frequency input from 10AM to 12PM Time Event 1 and then operates at Speed L from 12PM to 5PM Time Event 2 When the operation assigned by Time Event 2 is complete the inve...

Страница 243: ...135 125 145 80 Kinetic energy buffering slip gain KEB Slip Gain 300 1 20000 81 Kinetic energy buffering P Gain KEB P Gain 1000 1 20000 82 Kinetic energy buffering I gain KEB I Gain 500 1 20000 83 Kinetic energy buffering acceleration time KEB Acc Time 10 0 0 0 600 0 Sec command sources set in Freq Ref Src for DRV 07 followed by Jog operation and multi step acc dec If a fault trip occurs during a t...

Страница 244: ...Learning Advanced Features 230 ...

Страница 245: ...energy buffering operation It operates the inverter by modifying the set value to prevent malfunctions caused by low voltage after power interruptions CON 82 KEB I Gain Used to maintain the voltage during the kinetic energy buffering operation Sets the gain value to maintain the operation until the frequency stops during the kinetic energy buffering operation CON 83 KEB Acc Time Sets the accelerat...

Страница 246: ... Yes 14 Anti hunting regulation P Gain AHR P Gain 1000 0 32767 15 Anti hunting regulation start frequency AHR Low Freq 0 0 AHR High Freq Hz 16 Anti hunting regulation end frequency AHR High Freq 400 00 AHR Low Freq 400 00 Hz 17 Anti hunting regulation compensation voltage limit AHR Limit 2 0 20 Depending on the duration of instantaneous power interruptions and the amount of load inertia a low volt...

Страница 247: ...on 5 25 Fire Mode Operation This function is used to allow the inverter to ignore minor faults during emergency situations such as fire and provides continuous operation to protect other systems such as ventilating fans In Fire mode the inverter continues to operate based on the Fire mode run direction and frequency set at PRT 46 and PRT 47 Grou p Code Name LCD Display Parameter Setting Setting Ra...

Страница 248: ...a reset restart to continue the operation Fire Mode Function Setting Details Code Description PRT 44 Fire Mode PW Fire mode password is 3473 A password must be created to enable Fire mode PRT 45 Fire Mode Sel can be modified only after the password is entered PRT 45 Fire Mode Sel Sets the Fire Mode Setting Function 0 None Fire mode is not used 1 Fire Mode Normal Fire mode 2 Test Mode Fire mode tes...

Страница 249: ...inverter stops operating and is turned off 5 26 Energy Saving Operation 5 26 1 Manual Energy Saving Operation If the inverter output current is lower than the current set at BAS 14 Noload Curr the output voltage must be reduced as low as the level set at ADV 51 Energy Save The voltage before the energy saving operation starts will become the base value of the percentage Manual energy saving operat...

Страница 250: ...ime may take longer than the set time due to the time required to return to general operations from the energy saving operation 5 27 Speed Search Operation Speed search operation is used to prevent fault trips that can occur when the inverter voltage output is disconnected and the motor is idling Since this feature estimates the motor rotation speed based on the inverter output current it does not...

Страница 251: ...tory result because the direction of idling cannot be established 1 Flying Start 2 The speed search is carried out as it PI controls the ripple current which is generated by the counter electromotive force during no load rotation Because this mode establishes the direction of the idling motor forward reverse the speed search function is stable regardless of the direction of the idling motor and di...

Страница 252: ...tor to the operation frequency used before the fault trip when the Reset key is pressed or the terminal block is initialized after a fault trip Automatic restart after a power interruption If bit 3 is set to 1 and if a low voltage trip occurs due to a power interruption but the power is restored before the internal power shuts down the speed search operation accelerates the motor back to its frequ...

Страница 253: ...t to 1 Flying Start 2 this code is not visible CON 73 SS P Gain CON 74 SS I Gain The P I gain of the speed search controller can be adjusted If CON 70 SS Mode is set to 1 Flying Start 2 different factory defaults based on motor capacity are used and defined in DRV 14 Motor Capacity CON 75 SS Block Time The block time parameter prevents overvoltage trips due to counter electromotive force Note If o...

Страница 254: ...t at trip reset RST Restart 11 09 Auto restart count Retry Number 6 0 10 10 Auto restart delay time Retry Delay 1 0 0 1 60 0 sec CON 71 Select speed search operation Speed Search 0000 1111 bit 72 Speed search startup current SS Sup Current 90 70 120 73 Speed search proportional gain SS P Gain 100 0 9999 74 Speed search integral gain SS I Gain 200 0 9999 75 Output block time before speed search SS ...

Страница 255: ... restarts after the time set at PRT 10 Retry Delay At each restart the inverter counts the number of tries and subtracts it from the number set at PRT 09 until the retry number count reaches 0 After an auto restart if a fault trip does not occur within 60 sec it will increase the restart count number The maximum count number is limited by the number set at PRT 09 If the inverter stops due to over ...

Страница 256: ...cy Settings Group Code Name LCD Display Parameter Setting Setting Range Unit CON 04 Carrier Frequency Carrier Freq 3 0 1 0 15 0 kHz 05 Switching Mode PWM Mode 0 Normal PWM 0 1 PWM Pulse width modulation Operational Noise Setting Details Code Description CON 04 Carrier Freq Adjusts motor operational noise by changing carrier frequency settings Power transistors IGBT in the inverter generate and sup...

Страница 257: ...sed on the rated load and the duration The overload capacity on the H100 series inverter is 120 1 min for normal loads The current rating differs from the load rating as it also has an ambient temperature limit For derating specifications refer to 11 8 Inverter Continuous Rated Current Derating on page 569 Current rating for ambient temperature at normal load operation 5 30 2nd Motor Operation The...

Страница 258: ...T 40 ETH Trip Sel must be set first before M2 29 M2 ETH 1 min and M2 30 M2 ETH Cont settings Parameter Setting at Multi function Terminal Input on a 2nd Motor Code Description Code Description M2 04 Acc Time Acceleration time M2 15 M2 Efficiency Motor efficiency M2 05 M2 Dec Time Deceleration time M2 17 M2 Rs Stator resistance M2 06 M2 Capacity Motor capacity M2 18 M2 Lsigma Leakage inductance M2 ...

Страница 259: ...245 Learning Advanced Features Code Description Code Description Volt ...

Страница 260: ...capacity M2 Capacity 3 7 kW 08 Control mode M2 Ctrl Mode 0 V F 5 31 Supply Power Transition A supply power transition is used to switch the power source for the motor connected to the inverter from the inverter output power to the main supply power source commercial power source or vice versa Group Code Name LCD Display Parameter Setting Setting Range Unit IN 65 71 Px terminal configuration Px Def...

Страница 261: ...OUT 31 Relay 1 OUT 36 Q1 Define Set multi function relay or multi function output to 17 Inverter Line or 18 Comm Line The relay operation sequence is as follows 5 32 Cooling Fan Control This function turns the inverter s heat sink cooling fan on and off It is used in situations where the load stops and starts frequently or a noise free environment is required The correct use of cooling fan control...

Страница 262: ...n if the setting is in Temp Control the cooling fan will not operate unless the temperature in the heat sink reaches the set temperature Note Despite setting ADV 64 to 0 During Run if the heat sink temperature reaches a set level by current input harmonic wave or noise the cooling fan may run as a protective function 5 33 Input Power Frequency and Voltage Settings Select the frequency for inverter...

Страница 263: ...r save Parameter Save 1 Yes Read Write and Save Parameter Setting Details Code Description CNF 46 Parameter Read Copies saved parameters from the inverter to the keypad Saved parameters on the keypad will be deleted and replaced with the copied parameters CNF 47 Parameter Write Copies saved parameters from the keypad to the inverter Saved parameters on the inverter will be deleted and replaced wit...

Страница 264: ...CD Display Function 0 No No 1 Initialize all groups All Grp Initialize all data Select 1 All Grp and press the PROG ENT key to start initialization On completion 0 No will be displayed 2 Initialize DRV group DRV Grp Initialize data by groups Select initialize group and press the PROG ENT key to start initialization On completion 0 No will be displayed 3 Initialize BAS group BAS Grp 4 Initialize AD...

Страница 265: ...ck Setting Details Code Description CNF 51 View Lock Pw Register a password to allow access to parameter view lock Follow the steps below to register a password No Procedure 1 PROG ENT key on CNF 51 code will show the previous password input window If registration is made for the first time enter 0 It is the factory default 2 If a password had been set enter the saved password 3 If the entered pas...

Страница 266: ...n locked 0 9999 53 Parameter lock password Key Lock Pw Password 0 9999 Parameter Lock Setting Details Code Description CNF 53 Key Lock PW Register a password to prohibit parameter modifications Follow the procedures below to register a password No Procedures 1 Press the PROG ENT key on CNF 53 code and the saved password input window will be displayed If password registration is being made for the ...

Страница 267: ...r view lock and parameter lock functions are enabled no inverter operation related function changes can be made It is very important that you memorize the password 5 38 Changed Parameter Display This feature displays all the parameters that are different from the factory defaults Use this feature to track changed parameters Group Code Name LCD Display Parameter Setting Setting Range Unit CNF 41 Ch...

Страница 268: ...eters are not registered setting the multi function key to the user group select key UserGrp SelKey will not display user group USR Grp items on the Keypad Follow the procedures below to register parameters to a user group No Procedure 1 Set CNF 42 to 3 UserGrp SelKey A icon will be displayed at the top of the LCD display 2 In the parameter mode PAR Mode move to the parameter you need to register ...

Страница 269: ...arameters are listed in the user group in U M mode You can register one parameter multiple times if necessary For example a parameter can be registered as code 2 code 11 and more in the user group Follow the procedures below to delete parameters in the user group No Settings 1 Set CNF 42 to 3 UserGrp SelKey A icon will be displayed at the top of the LCD display 2 In the USR group in U M mode move ...

Страница 270: ...tialize all parameters in the inverter 3 Restarting the inverter will activate Easy Start On Set the values in the following screens on the Keypad To escape from Easy Start On press the ESC key Start Easy Set Select Yes CNF 99 Select a macro BAS 10 60 50 Hz Sel Set motor rated frequency DRV 14 Motor Capacity Set motor capacity BAS 13 Rated Curr Set motor rated current BAS 15 Rated Volt Set motor r...

Страница 271: ...art On the inverter may start operating as soon as it is powered on 5 41 Config CNF Mode The config mode parameters are used to configure keypad related features Group Code Name LCD Display Parameter Setting Setting Range Unit CNF 2 LCD brightness contrast adjustment LCD Contrast 10 Inverter S W version Inv S W Ver x xx 11 Keypad S W version Keypad S W Ver x xx 12 Keypad title version KPD Title Ve...

Страница 272: ...ter SW version is updated and more code is added CNF 60 settings will add display and operate the added codes Set CNF 60 to 1 Yes and disconnect the keypad from the inverter Reconnecting the keypad to the inverter updates titles CNF 62 WH Count Reset Initialize the accumulated electric energy consumption count 5 42 Macro Selection The Macro selection function is used to put various application fun...

Страница 273: ...ters controlled by the Macro function are initialized For other macro application settings settings 1 7 refer to 5 42 Macro Selection on page 258 5 43 Timer Settings Set a multi function input terminal to a timer Sets the On Off controls to the multi function outputs and relays according to the timer settings Group Code Name LCD Display Parameter Setting Setting Range Unit IN 65 71 Px terminal con...

Страница 274: ... the multi function input terminal is off the multi function output or relay turns off after the time set at OUT 56 5 44 Multiple Motor Control MMC The MMC Multiple Motor Control function is used to control multiple motors for a pump system The main motor connected with the inverter output is controlled by the PID controller The auxiliary motors are connected with the supply power and turned on an...

Страница 275: ...t stop AuxAll Stop 0 No 0 No 1 Yes 49 Stop order for auxiliary motors FIFO FILO 0 FILO 0 FILO 1 FIFO 2 Op Time Order 50 Auxiliary motor pressure difference Actual Start Diff 2 0 100 Unit 51 Main motor acceleration time when auxiliary motor is reduced AuxAcc Time 2 0 600 0 Sec 52 Main motor deceleration time when auxiliary motor is added Aux Dec Time 2 0 600 0 Sec 2 If Extension IO option is equipp...

Страница 276: ...ence Aux Stop Diff 2 0 100 Unit 60 Target frequency of Aux Motor while Multi Master is operating Follower Freq 60 00 Low Freq High Freq Hz 61 1 auxiliary motor start frequency Start Freq 1 45 Low Freq High Freq Hz 62 2 auxiliary motor start frequency Start Freq 2 45 Low Freq High Freq Hz 63 3 auxiliary motor start frequency Start Freq 3 45 Low Freq High Freq Hz 64 4 auxiliary motor start frequency...

Страница 277: ...auxiliary motor stop frequency Stop Freq 5 20 Low Freq High Freq Hz 75 6 auxiliary motor stop frequency Stop Freq 6 20 Low Freq High Freq Hz 76 7 auxiliary motor stop frequency Stop Freq 7 20 Low Freq High Freq Hz 77 8 auxiliary motor stop frequency Stop Freq 8 20 Low Freq High Freq Hz 80 1 auxiliary motor reference compensation Aux1 Ref Comp 0 0 Unit Band Unit 81 2 auxiliary motor reference compe...

Страница 278: ...uto change on the main motor occur Interlock DT 5 0 0 360 0 Sec 955 Selecting auxiliary motor to indicate in AP1 96 AP1 97 AuxRunTime Sel 0 Aux 1 1 Aux 2 2 Aux 3 3 Aux 4 4 Aux 5 56 Aux 6 6 Aux 7 7 Aux 8 96 Operating time Day of auxiliary motor chosen in AP1 95 AuxRunTime Day 0 0 65535 97 Operating time of auxiliary motor chosed in AP1 95 AuxRunTime Min 00 00 00 00 23 59 5 AP1 95 98 are available w...

Страница 279: ...g Advanced Features Grou p Code Name LCD Display Setting Setting Range Unit 98 Deleting operating time of auxiliary motor AuxRunTime Clr 0 None 1 All 2 Aux 1 3 Aux 2 4 Aux 3 5 Aux 4 6 Aux 5 7 Aux 6 8 Aux 7 9 Aux 8 ...

Страница 280: ...ing time Each four digit numbers for the parameter mean the auxiliary motor numbers and indicate the priority of auxiliary motors In other words the most right number of AP1 45 Aux Priority1 indicates the priority of Auxiliary motor 1 and the second number from the right of AP1 45 Aux Priority1 indicates the priority of Auxiliary motor 2 AP1 45 Aux Priority1 x x x x The Priority of the Aux motor1 ...

Страница 281: ...me set at AP1 52 Dec Time When the auxiliary motor stops the main motor accelerates up to the auxiliary motor restart frequency set at AP1 61 65 Start Freq 1 5 based on the acceleration time set at AP1 51 Acc Time AP1 53 Aux Start DT AP1 54 Aux Stop DT The auxiliary motors turns on or off after the auxiliary motor stop delay time or the auxiliary motor restart delay time elapses or if the differen...

Страница 282: ...eaches the start frequencies set at AP1 61 65 Start freq and the difference between the PID reference and feedback is bigger than the value set at AP1 50 Then the auxiliary motors stop operating when the operation frequency reach the stop frequency set at AP1 70 74 Stop Freq 1 5 and the difference between the PID feedback and reference becomes greater than the value set at AP1 50 Group Code Name L...

Страница 283: ...LO and FIFO settings AP1 61 AP1 62 AP1 63 AP1 64 AP1 65 Max Freq Frequency Output frequency Aux Motor 1 Off On PID Feedback AP1 71 AP1 70 AP1 72 AP1 73 AP1 74 AP1 74 AP1 71 AP1 72 AP1 73 AP1 70 Aux Motor 2 Aux Motor 3 Aux Motor 4 Aux Motor 5 PID Reference AP1 50 AP1 59 Time MMC Basic operation FILO ...

Страница 284: ... PID Feedback Aux Motor 1 Aux Motor 2 Aux Motor 3 Aux Motor 4 Aux Motor 5 PID Reference AP1 50 AP1 59 AP1 61 AP1 62 AP1 63 AP1 64 AP1 65 AP1 71 AP1 72 AP1 73 AP1 74 AP1 70 AP1 70 AP1 71 AP1 72 AP1 73 AP1 74 AP1 65 AP1 64 AP1 63 AP1 62 AP1 61 MMC Basic operation FIFO ...

Страница 285: ...nt M3 M2 M1 M4 M5 Priority at the moment M3 M2 M1 M4 M5 5min 10min AP1 61 30min Operation time M1 30min M2 25min M3 20min Supposing its operating in less than 1 minute Output frequency MMC Basic operation OP Time Order The following diagram is an operation graph based on the start and stop delay times set at AP1 53 Aux start DT and AP1 54 Aux stop DT When the start or stop frequencies are reached ...

Страница 286: ...by motor state as much as the difference Ex In case that Replay1 2 3 and 4 and 5 are set to MMC and the number of Num of Aux is 3 Relay1 Relay2 Relay3 Relay4 Relay5 Operable Operable Operable Standby Standby In this case though only Relay1 2 3 operate MMC function and the output of Relay is set to MMC it doesn t work as long as the order is not changed by Interlock and Auto Change ...

Страница 287: ... them from deterioration Group Code Name LCD Display Parameter Setting Setting Range Unit AP1 55 Auto change mode selection Auto Ch Mode 0 None 0 None 1 Aux motor 1 AUX Exchange 2 Main motor 2 Main Exchange 56 Auto change time Auto Ch Mode Time value within the range 00 00 99 00 Sec 57 Auto change frequency Auto Ch Level Frequency value within the range Low Freq High Freq Hz 58 Auto change operati...

Страница 288: ... Aux Auto Change functionality is disabled When AP1 55 Auto Ch Mode is set to 1 Aux Exchange the auxiliary motors operate based on the order sequence set at AP1 43 Starting Aux Auto Change is activated when auxiliary motors are in the operating state over time of AP1 56 and then every auxiliary motor is stopped Once the auto change is operated the auxiliary motor that started first is given the lo...

Страница 289: ...iary motors are turned off and the inverter operation frequency is below the frequency set at AP1 58 Auto Op Time auto change is operated Then when the inverter frequency increases due to decrease in the feedback auxiliary motor 2 starts instead of auxiliary motor 1 due to this auto change auxiliary motor 1 starts last for it has the lowest priority Later on during the operation when the feedback ...

Страница 290: ...1 63 AP1 64 AP1 65 AP1 72 AP1 73 AP1 74 Option 2 All auxiliary motors are off Aux Auto Change operation FILO AP1 57 100 AP1 70 AP1 70 AP1 61 Option 1 AP1 58 Auto Op Time AP1 56 Auto Ch Time AP1 70 Aux Auto Change operation FIFO option 1 AP1 58 Auto Op Time AP1 56 Auto Ch Time Max Freq Output frequency Feedback 0 Fx Off On Aux Motor 1 Aux Motor 2 Aux Motor 3 Aux Motor 4 Aux Motor 5 AP1 61 AP1 62 AP...

Страница 291: ...r to operate MMC M3 M4 M5 Standby motor M1 M2 Supposing its operation in less than 1 minute AP1 74 AP1 72 AP1 65 AuxAuto Changeoperation OpTimeOrder when operable motor and standbymotor are set to 3 and 2 each Option 1 AP1 58 Auto Op Time AP1 56 Auto Ch Time When AP1 55 Auto Ch Mode is set to 2 Main Exchange the system uses all the motors main and auxiliary motors regardless of the types The auxil...

Страница 292: ...n AP1 55 Auto Ch Mode is set to 2 Main when the inverter operation time exceeds the auto change interval set at AP1 58 If the inverter operation frequency is below the frequency set at AP1 57 all the auxiliary motors including the start auxiliary motor are turned off After the delay time set at AP1 91 Interlock DT elapses the Main auto change is operated After the Main auto change the auxiliary mo...

Страница 293: ...279 Learning Advanced Features Main_Exch occurs AP1 70 Output frequency Main Motor Option 3 AP1 91 Interlock DT AP1 70 Off Stop On Run Main Auto Change operation FILO Max Freq Freqency Fx Inv State ...

Страница 294: ...Learning Advanced Features 280 Max Freq Frequency Main_Exch occurs AP1 70 Output frequency Main Motor Option 3 AP1 91 Interlock DT AP1 70 Fx Off Stop Inv State On Run Main Auto Change operation FIFO ...

Страница 295: ...Supposing its operation in less than 1minute AP1 65 AP1 74 Motor to operate MMC M1 M2 M3 Standby motor M4 M5 Motor to operate MMC M3 M4 M5 Standby motor M1 M2 AP1 72 Main Auto Change operation Op Time Order when Operable Motor and Standby Motorare set to 3 and 2 each Option 3 AP1 91 Interlock DT 5 44 4 Interlock When there is motor trouble the interlock feature is used to stop the affected motor a...

Страница 296: ...auses the priority level of the auxiliary motors with lower priority level than the interlocked motor to be increased by 1 The interlock is released when the input terminals IN 65 71 are turned off and the relevant auxiliary motor is included in the MMC operation again with lowest priority When the inverter stops all motors stop operating and the auxiliary motor with the highest priority becomes t...

Страница 297: ... of the operating motors If the auxiliary motor turns off by a rise of Feedback the auxiliary motors turns off in order from 1 to 5 because auxiliary motor 1 turned on last The interlocked auxiliary motor will have the lowest priority Note IN 65 71 PxDefine Select the terminal from the input terminal function group IN 65 71 and set Interlock 1 5 respectively with the correct motor order When auto ...

Страница 298: ... Frequency AP1 70 AP1 71 AP1 72 Aux Motor 1 Aux Motor 2 Aux Motor 3 Aux Motor 4 Aux Motor 5 Feedback AP1 71 0 100 Fx Off On Interlock 1 Interlock 3 AP1 74 AP1 65 AP1 73 AP1 64 AP1 62 Interlockoperation Op time Order when Operable Motor and Standby Motorare set to 3 and 2 each ...

Страница 299: ...tors activating depending on the priority of Interlock occurring and releasing In the figure the order is the same for FILO FIFO because the auxiliary motor turns on Max Freq Off On AP1 62 AP1 61 AP1 74 AP1 73 AP1 72 AP1 71 AP1 70 Interlock operation Feedback Interlock 1 Interlock 2 Aux Motor 1 Aux Motor 2 Aux Motor 3 Aux Motor 4 Aux Motor 5 In case that Operable Motor and Standby Motor are set to...

Страница 300: ...ting time min Aux Priority 5 Operating time min 1 Aux Motor3 00 30 Operating Aux Motor2 00 40 Operating Aux Motor1 00 50 Operating Aux Motor4 01 30 Operating Aux Motor 5 01 50 Operating Set 3 Aux2of AP1 98 AuxRunTime Clr 2 Aux Motor2 00 00 Operating Aux Motor3 00 30 Operating Aux Motor1 00 50 Operating Aux Motor4 01 30 Operating Aux Motor 5 01 50 Operating Set time of Aux2to 2 00 through AP1 97 Au...

Страница 301: ...speed based on the feedback amount instead of using the PID Auxiliary motors may be controlled with this feature based on the feedback amount Group Code Name LCD Display Parameter Setting Setting Range Unit AP1 41 Bypass selection Regul Bypass 1 0 No 1 Yes 61 65 1 5 auxiliary motor start frequency Start Freq 1 5 Frequency value within the range Freq Low Limit Freq High limit Hz 70 74 1 5 auxiliary...

Страница 302: ...by the number of motors being used including the main motor Each auxiliary motor turns on when feedback reaches the relevant level and turns off when feedback goes below the relevant level The primary motor increases its speed based on the feedback and when it reaches the start frequency of the relevant auxiliary motor and decelerates to the stop frequency The primary motor reaccelerates when the ...

Страница 303: ...pipe also increases and the pressure of the pipe line decreases Aux motor PID compensation compensates for this pressure when the number of the auxiliary motor increases By adding the additional PID reference value relevant to the auxiliary motor to the current reference the loss of pressure can be compensated for Auxiliary PID Compensation Detailed Settings Code Description AP1 80 84 Aux 1 5 Ref ...

Страница 304: ...00 0 Auxiliary motor PID compensation NOTE When the aux reference value is set to 100 the final PID reference becomes 100 In this case output frequency of the inverter does not decelerate because the PID output does not decelerate even if the input feedback value is 100 5 44 8 Master Follower ...

Страница 305: ...pensation Serve Drive It is an inverter to operate motors with Leader Drive Each inverter and motor has the same number ID COM 01 Int485 St ID Among the operating motors the motor with the lowest priority is called Main Motor and the rest of motors are called as Aux Motor In case that every motor is stopped the motor with the highest priority is called as Main Motor This is Main Motor and Aux Moto...

Страница 306: ...l PID Ctrl Main Motor Main Motor Main Motor Main Motor Main Motor Aux Motor Aux Motor Aux Motor Aux Motor Aux Motor Aux Motor PID Output PID Limit High PID Ctrl M1 M2 M3 M1 M2 A condition that extra Aux Motor is turned on After a real operating frequency reaches the frequency set in Start Freq belonging to the next priority number and the time set in AP1 53 Aux Start DT passes AP1 44 Aux Motor Run...

Страница 307: ...rity is Motor1 M1 Motor2 M2 Motor3 M3 The priority can be changed automatically according to operating time Start Freq 1 Start Freq 3 Out Freq High Freq t M1 OutFreq M2 OutFreq Stop Freq 2 Start Freq 2 Stop Freq 3 M3 OutFreq Run Cmd FeedBack PID Reference M1 Cmd Freq PID Ctrl M2 Cmd Freq M3 Cmd Freq Main Motor M1 M2 M3 M2 PID Ctrl PID Ctrl Main Motor Main Motor Main Motor Aux Motor Main Motor Aux ...

Страница 308: ... on operating time The priority of each Motor is arranged automatically based on operating time Among operating Motors Motor with the longest operating time is placed at the last The moment for the priority arrangement is the time when the number of motor is changed Start Freq 1 Start Freq 3 Out Freq Run Cmd Follower Freq M1 OutFreq M2 OutFreq FeedBack PID Reference Start Freq 2 M3 OutFreq M2 M3 M...

Страница 309: ...the description of Multi Master Mode and Multi Follower Mode 5 44 8 4 Master Follower Interlock As Interlock signals are sent from Serve Drive Leader Drive puts together through Communication Line Every Trip such as HAND State or OFF State of Serve Drive is processed by Interlock in Leader Drive This is other Server Drives keep performing Master Follower function except the cases that it is in HAN...

Страница 310: ...d Trip are caused supposing that the priority is not changed interlock is the function corresponding to B terminal Normal close Start Freq 1 Start Freq 3 Out Freq Run Cmd Follower Freq t M1 OutFreq M2 OutFreq FeedBack Stop Freq 2 PID Reference Start Freq 2 Stop Freq 3 M3 OutFreq M1 M2 M3 M1 M2 M1 Cmd Freq PID Ctrl Follower Freq M2 Cmd Freq M3 Cmd Freq PID Ctrl Follower Freq PID Ctrl PID Ctrl Main ...

Страница 311: ...On Off Ctrl Src 1 V1 0 8 67 Output terminal on level On C Level 90 00 Output terminal off level 100 00 68 Output terminal off level Off C Level 10 00 0 00 Output terminal on level OUT 31 Multi function relay 1 item Relay 1 26 On Off 33 Multi function output 1 item Q1 Define Multi function Output On Off Control Setting Details Code Description ADV 66 OnOff Ctrl Src Select analog input On Off contro...

Страница 312: ...evention P Gain RegenAvd Pgain 50 0 0 0 100 0 78 Press regeneration prevention I gain RegenAvd Igain 500 ms 20 30000 ms ms Press Regeneration Prevention Setting Details Code Description ADV 74 RegenAvd Sel Frequent regeneration voltage from a press load during a constant speed motor operation may force excessive stress on the brake unit which may damage or shorten brake life To prevent this select...

Страница 313: ... current Group Code Name LCD Display Parameter Setting Setting Range Unit OUT 01 Analog output1 AO1 Mode 0 Frequency 0 15 02 Analog output1 gain AO1 Gain 100 0 1000 0 1000 0 03 Analog output1 bias AO1 Bias 0 0 100 0 100 0 04 Analog output1 filter AO1 Filter 5 0 10000 ms 05 Analog constant output1 AO1 Const 0 0 0 0 100 0 Note Press regeneration prevention does not operate during accelerations or de...

Страница 314: ...on the actual input voltages 240 V and 480 V respectively 3 DC Link Volt Outputs inverter DC link voltage as a standard Outputs 10 V when the DC link voltage is 410 V DC for 200 V models and 820 V DC for 400 V models 4 Output Power Monitors output wattage 150 of rated output is the maximum display voltage 10 V 7 Target Freq Outputs set frequency as a standard Outputs 10 V at the maximum frequency ...

Страница 315: ... an output item it will operate as shown below 𝐴𝑂1 𝐹𝑟𝑒𝑞𝑢𝑒𝑛𝑐𝑦 𝑀𝑎𝑥𝐹𝑟𝑒𝑞 𝐴𝑂1 𝐺𝑎𝑖𝑛 𝐴𝑂1 𝐵𝑖𝑎𝑠 The graph below illustrates how the analog voltage output AO1 changes depending on OUT 02 AO1 Gain and OUT 3 AO1 Bias values The Y axis is analog output voltage 0 10 V and the X axis is a value of the output item Example if the maximum frequency set at DRV 20 Max Freq is 60 Hz and the present output frequency is...

Страница 316: ...Pulse output filter TO Filter 5 0 10000 65 Pulse output constant output2 TO Const 0 0 0 0 100 0 66 Pulse output monitor TO Monitor 0 0 0 1000 0 Analog Pulse Output Setting Details Code Description OUT 62 TO Gain OUT 63 TO Bias Adjusts output value and offset If frequency is selected as an output it will operate as shown below 𝑇𝑂 𝐹𝑟𝑒𝑞𝑢𝑒𝑛𝑐𝑦 𝑀𝑎𝑥𝐹𝑟𝑒𝑞 𝑇𝑂 𝐺𝑎𝑖𝑛 𝑇𝑂 𝐵𝑖𝑎𝑠 The following graph illustrates tha...

Страница 317: ...me constant on analog output OUT 65 TO Const If the analog output item is set to constant the analog pulse output is dependent on the set parameter values OUT 66 TO Monitor Monitors the analog output value It displays the maximum output pulse 32 kHz as a percentage of the standard ...

Страница 318: ...2 Bias until 4 mA is measured If the value is more than 4 mA gradually decrease OUT 09 AO2 Bias until 4 mA is measured 3 Set OUT 11 AO2 Const to 100 0 4 Set OUT 08 AO2 Gain to 80 0 and measure the current output at 20 mA If the value is less than 20 mA gradually increase OUT 08 AO2 Gain until 20 mA is measured If the value is more than 20 mA gradually decrease OUT 08 AO2 Gain until 20 mA is measur...

Страница 319: ...0 None 36 Multi function output setting Q1 define 0 None 41 Multi function output monitor DO Status 00 11 bit 57 Detection frequency FDT Frequency 30 00 0 00 Maximum frequency Hz 58 Detection frequency band FDT Band 10 00 IN 65 71 Px terminal configuration Px Define 18 Exchange 0 55 Multi function Output Terminal and Relay Setting Details Code Description OUT 31 35 Relay1 5 Set relay Relay 1 5 out...

Страница 320: ...condition at the same time Absolute value set frequency detected frequency detected frequency width 2 FDT 1 Detected frequency width is 10 Hz When the detected frequency is set to 30 Hz FDT 2 output is as shown in the graph below 3 FDT 3 Outputs a signal when the Absolute value output frequency operation frequency detected frequency width 2 Detected frequency width is 10 Hz When the detected frequ...

Страница 321: ...ts a signal at load fault warning 8 Fan Warning Outputs a signal at fan fault warning 9 Stall Outputs a signal when a motor is overloaded and stalled 10 Over Voltage Outputs a signal when the inverter DC link voltage rises above the protective operation voltage 11 Low Voltage Outputs a signal when the inverter DC link voltage drops below the low voltage protective level 12 Over Heat Outputs signal...

Страница 322: ...ulti function output to MMC and configuring the AP1 40 AP1 92 it can conduct the necessary operations for multi motor control function 22 Timer Out A timer function to operate terminal output after a certain time by using multi function terminal block input For details refer to 5 43Timer Settings on page 259 23 Trip Outputs a signal after a fault trip Refer to 5 45 Multi function Output On Off Con...

Страница 323: ...when operating the exception day schedule 40 KEB Operating Outputs a signal at KEB operation 41 BrokenBelt Outputs a signal when a Broken belt is in operation OUT 36 Q1 Define Select an output item for the multi function output terminal Q1 of the terminal block Q1 stands for the open collector TR output OUT 41 DO State Used to check On Off state of the D0 by each bit FDT 1 and FDT 2 functions are ...

Страница 324: ... output on delay TripOut OnDly 0 00 0 00 100 00 sec 54 Fault trip output off delay TripOut OffDly 0 00 0 00 100 00 sec Fault Trip Output by Multi function Output Terminal and Relay Setting Details Code Description OUT 30 Trip Out Mode Fault trip relay operates based on the fault trip output settings Item bit on bit off Keypad display Select a fault trip output terminal relay and select 29 Trip Mod...

Страница 325: ...nction output terminal DO NC NO Sel 000000 00 11 bit Multi function output terminals are numbered Starting from the right number 1 the number increases to the left Output Terminal Delay Time Setting Details Code Description OUT 50 DO On Delay When a relay operation signal operation set in OUT 31 35 36 occurs the relay turns on or the multi function output operates after the time delay set at OUT 5...

Страница 326: ...toring mode displays three different items on the keypad but only one item can be displayed in the status window at a time Group Code Name LCD Display Parameter Setting Setting Range Unit CNF 20 Display item condition display window AnyTime Para 0 Frequency 21 Monitor mode display 1 Monitor Line 1 0 Frequency Hz 22 Monitor mode display 2 Monitor Line 2 2 Output Current A 23 Monitor mode display 3 ...

Страница 327: ...utput Power Displays output power 5 WHour Counter Displays inverter power consumption 6 DCLink Voltage Displays DC link voltage within the inverter 7 DI Status Displays input terminal status of the terminal block Starting from the right displays P1 P8 8 DO Status Displays output terminal status of the terminal block Starting from the right Relay1 Relay2 and Q1 9 V1 Monitor V Displays the input vol...

Страница 328: ...lues are calculated using voltage and current Electric power is calculated every second and the results are accumulated Setting CNF 62 WH Count Reset value to 1 Yes will reset cumulated electric energy consumption Power consumption is displayed as shown below Less than 1 000 kW Units are in kW displayed in 999 9 kW format 1 99 MW Units are in MW displayed in 99 99 MWh format 100 999 MW Units are i...

Страница 329: ...t Setting 1 Yes will delete the power supply accumulated time On time and operation accumulated time Run time and is displayed as 0 00 00 00 00 format CNF 74 Fan time Displays accumulated time of the inverter cooling fan operation Information will be displayed in YY MM DD Hr Min 0 00 00 00 00 format CNF 75 Fan Time Reset Setting 1 Yes will delete the cooling fan operation accumulated time on time ...

Страница 330: ...he COM 96 PowerOn Resume function is set to Yes do not operate the inverter The Power on Run function operates separately Power on Run function and PowerOn Resume function is set to Yes and power turns off and turns on inverter maintains for the time set in Power on run function and then by the Power On Resume function if the inverter is in operation by the communication command before the power i...

Страница 331: ...haracteristics Group Code Name LCD Display Parameter Setting Setting range Unit PRT 40 Electronic thermal prevention fault trip selection ETH Trip Sel 0 None 0 2 41 Motor cooling fan type Motor Cooling 0 Self cool 42 Electronic thermal one minute rating ETH 1 min 120 100 150 43 Electronic thermal prevention continuous rating ETH Cont 100 50 150 Electronic Thermal ETH Prevention Function Setting De...

Страница 332: ...Additional power is supplied to operate the cooling fan This provides extended operation at low speeds Motors designed for inverters typically have this design PRT 42 ETH 1 min The amount of input current that can be continuously supplied to the motor for 1 minute based on the motor rated current BAS 13 PRT 43 ETH Cont Sets the amount of current with the ETH function activated The range below deta...

Страница 333: ... 07 Analog output 2 item AO2 Mode 14 Constant 0 18 08 Analog output 2 gain AO2 Gain 100 0 100 Motor Overheat Protect Sensor Input Detail Settings Code Description PRT 34 Thermal T Sel Sets the inverter operation state when motor is overheated Setting Function 0 None Do not operate when motor overheating is detected 1 Free Run When the motor is overheated the inverter output is blocked and the moto...

Страница 334: ...2 or V1 terminal block by using the analog output terminal Using the temperature sensor PTC by connecting it to the analog input terminal Wnen the AO 2 analog current outout terminal is connected to the temperature sensor installed on a motor the inverter supplies constant current to the temperature sensor Then connecting the motor signal wire to one of the the inverter s analog input terminals al...

Страница 335: ...is released but it only decreases as time passes 6 1 3 Overload Early Warning and Trip A warning or fault trip cutoff occurs when the motor reaches an overload state based on the motor s rated current The amount of current for warnings and trips can be set separately Group Code Name LCD Display Parameter Setting Setting range Unit PRT 17 Overload warning selection OL Warn Select 1 Yes 0 1 18 Overl...

Страница 336: ...output Relay 1 Q1 sends a warning signal When Over Load is selected at OUT 31 OUT 33 the multi function output terminal or relay outputs a signal The signal output does not block the inverter output PRT 20 OL Trip Select Select the inverter protective action in the event of an overload fault trip Setting Function 0 None No protective action is taken 1 Free Run In the event of an overload fault inv...

Страница 337: ...ates with optimum deceleration without a braking resistor by using flux braking If the deceleration time is too short an over voltage fault trip may occur because of regenerative energy from the motor The flux braking makes the motor use regenerate energy therefore optimum deceleration is available without over voltage fault trip To protect the motor from overload faults the inverter output freque...

Страница 338: ...us Off Keypad display Setting Function Bit 4 Bit 3 Bit 2 Bit 1 Stall protection during acceleration Stall protection while operating at a constant speed Stall protection during deceleration Flux braking during deceleration Setting Function 0001 Stall protection during acceleration If inverter output current exceeds the preset stall level PRT 52 54 56 58 during acceleration the motor stops accelera...

Страница 339: ... As a result deceleration times can be longer than the set time depending on the load 1000 Flux braking during deceleration When using flux braking deceleration time may be reduced because regenerative energy is expended at the motor 1100 Stall protection and flux braking during deceleration Stall protection and flux braking operate together during deceleration to achieve the shortest and most sta...

Страница 340: ...e deceleration performance without triggering an over voltage fault trip for loads with high inertia and short deceleration times Do not use this function when frequent deceleration of the load is required as the motor can overheat and be easily damaged Use caution when decelerating while using stall protection since the deceleration time can take longer than the time set depending on the load Acc...

Страница 341: ...k of torque Group Code Name LCD Display Parameter Setting Setting range Unit PRT 05 Input output open phase protection Phase Loss Chk 00 bit 06 Open phase input voltage band IPO V Band 40 1 100 V V Input and Output Open phase Protection Setting Details Code Description PRT 05 Phase Loss Chk PRT 06 IPO V Band When open phase protection is operating input and output configurations are displayed diff...

Страница 342: ...inal setting options Px Define Px P1 P7 4 External Trip 0 55 87 Multi function input contact selection DI NC NO Sel bit External Trip Signal Setting Details Code Description IN 87 DI NC NO Sel Selects the type of input contact If the mark of the switch is at the bottom 0 it operates as an A contact Normally Open If the mark is at the top 1 it operates as a B contact Normally Closed The correspondi...

Страница 343: ...vercurrent time reaches 60 of the allowed overcurrent 120 1 min 140 5 sec a warning signal output is provided signal output at 120 36 sec 6 2 4 Speed Command Loss When setting operation speed using an analog input at the terminal block communication options or the keypad speed command loss setting can be used to select the inverter operation for situations when the speed command is lost due to the...

Страница 344: ...ction 1 Warning Select 24 Lost keypad from OUT 31 36 one of the multi function terminal blocks outputs a relevant warning signal when abnormal operating conditions arise 2 Free Run The inverter blocks output The motor performs in free run condition 3 Dec The motor decelerates and then stops at the time set at PRT 07 Trip Dec Time PRT 12 Lost Cmd Mode In situations when speed commands are lost the ...

Страница 345: ...ime speed loss decision time set at PRT 13 Lost Cmd Time For example set the speed command to 2 V1 at DRV 07 and set IN 06 V1 Polarity to 0 Unipolar When the voltage input drops to less than half of the value set at IN 08 V1 Volt x 1 the protective function is activated 1 Below of x1 The protective operation starts when the signal becomes smaller than the initial value of the analog input set by t...

Страница 346: ... PRT 12 Lost Cmd Mode to 2 Dec and then set PRT 13 Lost Cmd Time to 5 seconds Then the inverter operates as follows Note If speed command is lost while using communication options or the integrated RS 485 communication the protection function operates after the command loss decision time set at PRT 13 Lost Cmd Time is elapsed ...

Страница 347: ...on output 1 item Q1 Define Dynamic Breaking Resistor Setting Details Code Description PRT 66 DB Warn ED Set the braking resistor configuration ED Duty cycle The braking resistor configuration sets the rate at which the braking resistor operates for one operation cycle The maximum time for continuous braking is 15 sec and the braking resistor signal is not output from the inverter after the 15 sec ...

Страница 348: ... it can overheat and cause a fire When using a resistor with a heat sensor the sensor output can be used as an external trip signal for the inverter s multi function input 6 2 6 Low Battery Voltage Warning The H100 series has a battery low voltage warning feature If the low battery voltage warning function is set to Yes a low battery voltage warning occurs when the battery voltage is lower than 2 ...

Страница 349: ...ke sure that the battery doesn t fall inside of the inverter 6 3 Under load Fault Trip and Warning The following table lists the under load fault trip and warning features of the H100 series inverter Group Code Name LCD Display Parameter Setting Setting range Unit PRT 23 Under load detection Source UL Source 0 Output Current 0 1 24 Under load detection Band UL Band 10 0 0 0 100 0 25 Under load war...

Страница 350: ...Trip Sel Sets the inverter operation mode for situations when an under load trip occurs If set to 1 Free Run the output is blocked in an under load fault trip event If set to 2 Dec the motor decelerates and stops when an under load trip occurs PRT 28 UL Trip Time A protect function operates when under load level conditions explained above maintain for the trip time set To operate under load trip p...

Страница 351: ...Trip When inverter input power is lost and the internal DC link voltage drops below a certain voltage level the inverter stops output and a low voltage trip occurs Group Code Name LCD Display Parameter Setting Setting range Unit PRT 81 Low voltage trip decision delay time LVT Delay 0 0 0 60 0 sec OUT 31 35 Multi function relay 1 5 Relay 1 5 11 Low Voltage 36 Multi function output 1 Q1 Define Low V...

Страница 352: ...rminal When the multi function input terminal is set as the output block signal terminal and the signal is input to the terminal then the operation stops Group Code Name LCD Display Parameter Setting Setting range Unit IN 65 71 Px terminal setting options Px Define Px P1 P7 5 BX 0 55 Output Block by Multi function Terminal Setting Details Code Description IN 65 71 Px Define When the operation of t...

Страница 353: ...he trip status 6 3 6 Operation Mode for Option Card Trip Option card trips may occur when an option card is used with the inverter Set the operation mode for the inverter when a communication error occurs between the option card and the inverter body or when the option card is detached during operation Group Code Name LCD Display Parameter Setting Setting range Unit PRT 80 Operation mode for optio...

Страница 354: ...e output current value based on the rated current BAS 13 is lower than the value set at PRT 32 No Motor Level and if this continues for the time set at PRT 33 No Motor Time a no motor trip occurs If BAS 07 V F Pattern is set to 1 Square set PRT 32 No Motor Level to a value lower than the factory default Otherwise a no motor trip due to a lack of output current will occur when the no motor trip ope...

Страница 355: ... 0 0 100 0 95 Function Delay time of broken belt BrokenBelt Dly 10 0 10 0 S After inverter is operating in the frequency over PRT 92 and current torque reaches the limit set at PRT 94 and then it meets the conditions at the time above set PRT 95 Broken Belt is activated BrokenBelt Trq Torque Current A t Time count BrokenBelt Dly t Broken Belt Warning or Trip t Current Trq at BrokenBelt Freq No act...

Страница 356: ...r Setting Setting Range Unit PRT 83 Estimated current level of the capacitance CAP Diag Perc 0 0 10 0 100 0 84 CAP estimating mode CAP Diag 0 None 0 None 1 CAP Diag 1 2 CAP Diag 2 3 CAP Init 85 CAP deterioration level CAP Level1 0 0 0 100 0 86 CAP detected level CAP Level2 0 0 0 100 0 OUT 31 35 Output relay 1 5 Relay 1 5 34 CAP Warning Main Capacitor Life Estimation Detail Settings Code Descriptio...

Страница 357: ...AP Level 2 Display estimated capacitance value according to the mode in PRT 84 If this value is lower than the value set in PRT 85 the warning message CAP Warning appears on the display Be careful when replacing the battery Remaining voltage in the battery may cause electric shock Make sure that the battery doesn t fall inside of the inverter The main capacitor life examination is only for referen...

Страница 358: ...f this value is bigger than the value in PRT 88 the warning message Fan Exchange appears on the display PRT 88 Fan Exchange Displays the life replacement standard of the fan in percentage CNF 75 Fan Time Rst Initializes the accumulation time of the fan operation Setting Function 0 No Do not initialize the accumulated operation time of the fan 1 Yes Initialize the accumulated operation time of the ...

Страница 359: ...ault trip Out Phase Open Output open phase fault trip In Phase Open Input open phase fault trip Ground Trip Ground fault trip Fan Trip Fan fault trip E Thermal Motor overheat fault trip IO Board Trip IO Board connection fault trip No Motor Trip No motor fault trip Low Voltage2 Low voltage fault trip during operation ParaWrite Trip Write parameter fault trip Pipe Broken Pipe Break fault trip Damper...

Страница 360: ...d loss fault trip warning Over Load Overload warning Under Load Under load warning Inv Over Load Inverter overload warning Fan Warning Fan operation warning DB Warn ED Braking resistor braking rate warning Low Battery Low battery warning Fire Mode Fire mode warning Pipe Broken Pipe Break warning Level Detect Level detect warning CAP Warning Capacitor lifetime warning Fan Exchange Fan replacement w...

Страница 361: ...set the inverter even if the trip state is released after the trip occurs In level type trip the inverter can unlock the fault by itself if the trip state is unlocked after the trip occurs In a fetal type trip there is no way to unlock the fault other than turning the inverter off then back on after the trip occurs ...

Страница 362: ...Learning Protection Features 348 ...

Страница 363: ...oise Please refer to the following table for details about the communication standards Item Standard Communication method Transmission type RS 485 Bus type Multi drop Link System Inverter type name H100 Number of connected inverters Transmission distance Maximum of 16 inverters Maximum1 200 m recommended distance within 700 m Recommended cable size 0 75 mm 18 AWG Shielded Type Twisted Pair STP Wir...

Страница 364: ...ation system configuration 7 2 1 Communication Line Connection Make sure that the inverter is turned off completely and then connect the RS 485 communication line to the S S SG terminals of the terminal block The maximum number of inverters you can connect is 16 For communication lines use shielded twisted pair STP cables The maximum length of the communication line is 1 200 meters but it is recom...

Страница 365: ...3 05 Transmission delay after reception Resp Delay 5 0 1000 msec Communication Parameters Setting Details Code Description COM 01 Int485 St ID Sets the inverter station ID between 1 and MaxComID COM 02 Int485 Proto Select one of the four built in protocols Modbus RTU LS INV 485 BACnet or Metasys N2 Setting Function 0 Modbus RTU Modbus RTU compatible protocol 2 LS INV 485 Dedicated protocol for the...

Страница 366: ...uration Set the data length parity check method and the number of stop bits Setting Function 0 D8 PN S1 8 bit data no parity check 1 stop bit 1 D8 PN S2 8 bit data no parity check 2 stop bits 2 D8 PE S1 8 bit data even parity 1 stop bit 3 D8 PO S1 8 bit data odd parity 1 stop bit If the COM 02 Int485 Prtoto setting is Metasys N2 the communication frame composition is fixed to D8 PN S1 and COM 04 I...

Страница 367: ...quency Reference via RS 485 Communication on page 98 To select the built in RS485 communication as the source of command set DRV 07 to 6 Int485 on the keypad Then set common area parameters for the operation command and frequency via communication Group Code Name LCD Display Parameter Setting Setting range Unit DRV 06 Command source Cmd Source 3 Int 485 0 5 07 Frequency setting method Freq Ref Src...

Страница 368: ...on Features 354 Group Code Name LCD Display Parameter Setting Setting range Unit PRT 12 Speed command loss operation mode Lost Cmd Mode 0 None 0 5 13 Time to determine speed command loss Lost Cmd Time 6 1 0 0 1 120 0 Sec ...

Страница 369: ...rforms in free run condition 2 Dec The motor decelerates and then stops 3 Hold Input Operates continuously with the speed of the inputted speed command until the loss of the speed command The inverter calculates the average input value for 10 seconds before the loss of the speed command and uses it as the speed reference 4 Hold Output Operates continuously with the operate frequency before the spe...

Страница 370: ...8 0 None 0 55 86 Communication multi function input monitoring Virt DI Status Example When sending an Fx command by controlling virtual multi function input in the common area via Int485 set COM 70 to FX and set address 0h0385 to 0h0001 7 3 2 Saving Parameters Defined by Communication If you turn off the inverter after setting the common area parameters or keypad parameters via communication and o...

Страница 371: ...a 0h0100 0h01FF Areas registered at COM 31 38 and COM 51 58 0h0200 0h023F Area registered for User Group 0h0240 0h027F Area registered for Macro Group 0h0280 0h02FF Reserved communication common area 0h0300 0h037F Inverter monitoring area 0h0380 0h03DF Inverter control area 0h03E0 0h03FF Inverter memory control area 0h0400 0h0FFF Reserved 0h1100 DRV Group 0h1200 BAS Group 0h1300 ADVGroup 0h1400 CO...

Страница 372: ...8 Input communication address x Para Control x 0000 FFFF Hex Currently Registered CM Group Parameter Address Parameter Assigned content by bit 0h0100 0h0107 Status Parameter 1 Status Parameter 8 Parameter communication code value registered at COM 31 38 Read only 0h0110 0h0117 Control Parameter 1 Control Parameter 8 Parameter communication code value registered at COM 51 58 Read Write access Note ...

Страница 373: ...value registered at U M USR 1 Read Write access 0h0201 User Grp Code 2 Parameter value registered at U M USR 2 Read Write access 0h023E User Grp Code 63 Parameter value registered at U M USR 63 Read Write access 0h023F User Grp Code 64 Parameter value registered at U M USR 64 Read Write access Currently Registered Macro Group Parameters Address Parameter Assigned Content by Bit 0h0240 Macro Grp Co...

Страница 374: ... code SUM EOT 1 byte 2 bytes 1 byte 2 bytes 2 bytes 1 byte A request starts with ENQ and ends with EOT A normal response starts with ACK and ends with EOT An error response starts with NAK and ends with EOT A station ID indicates the inverter number and is displayed as a two byte ASCII HEX string that uses characters 0 9 and A F CMD Uses uppercase characters returns an IF error if lowercase charac...

Страница 375: ...the control value is not included ENQ ACK NAK etc ENQ Station ID CMD Address Number of Addresses SUM EOT 05h 01 R 3000 1 A7 04h 1 byte 2 bytes 1 byte 4 bytes 1 byte 2 bytes 1 byte Note Broadcasting Broadcasting sends commands to all inverters connected to the network simultaneously When commands are sent from station ID 255 each inverter acts on the command regardless of the station ID However no ...

Страница 376: ...XX 04h 1 byte 2 bytes 1 byte 2 bytes 2 bytes 1 byte Total bytes 9 7 3 6 2 Detailed Write Protocol Write Request ENQ Station ID CMD Address Number of Addresses Data SUM EOT 05h 01 FA W XXXX 1 8 n XXXX XX 04h 1 byte 2 bytes 1 byte 4 bytes 1 byte n x 4 bytes 2 bytes 1 byte Total bytes 12 n x 4 a maximum of 44 Write Normal Response ACK Station ID CMD Data SUM EOT 06h 01 FA W XXXX XX 04h 1 byte 2 bytes...

Страница 377: ...efers to the number of addresses The addresses do not have to be contiguous ENQ Station ID CMD Number of Addresses Address SUM EOT 05h 01 FA X 1 8 n XXXX XX 04h 1 byte 2 bytes 1 byte 1 byte n x 4 bytes 2 bytes 1 byte Total bytes 8 n x 4 a maximum of 40 Monitor Registration Normal Response ACK Station ID CMD SUM EOT 06h 01 FA X XX 04h 1 byte 2 bytes 1 byte 2 bytes 1 byte Total bytes 7 Monitor Regis...

Страница 378: ... ID CMD Error Code SUM EOT 15h 01 FA Y XX 04h 1 byte 2 bytes 1 byte 2 bytes 2 bytes 1 byte Total bytes 9 7 3 6 4 Error Code Code Abbreviation Description ILLEGAL FUNCTION IF The requested function cannot be performed by a slave because the corresponding function does not exist ILLEGAL DATA ADDRESS IA The received parameter address is invalid at the slave ILLEGAL DATA VALUE ID The received paramete...

Страница 379: ...62 63 64 65 66 67 68 69 6A 6B 6C 6D 6E 6F 70 q r s t u v w x y z 0 1 2 3 4 5 6 7 8 9 space 71 72 73 74 75 76 77 78 79 7A 30 31 32 33 34 35 36 37 38 39 20 21 22 23 24 25 26 27 28 29 2A 2B 2C 2D 2E 2F 3A 3B 3C 3D 3E 3F BEL BS CAN CR DC1 DC2 DC3 DC4 DEL DLE EM ACK ENQ EOT ESC ETB ETX FF FS GS HT LF NAK NUL RS S1 SO SOH STX SUB SYN US 40 5B 5C 5D 5E 5F 60 7B 7C 7D 7E 07 08 18 0D 11 12 13 14 7F 10 19 0...

Страница 380: ... Parameter on page 370 Reading up to 8 Consecutive Inverter Parameters Based on the Set Number Read Holding Register Func Code 0x03 and Read Input Register Func Code 0x04 Read Holding Registers Func Code 0x03 and Read Input Registers Func Code 0x04 are processed identically by the inverter Codes Description Start Addr Starting address 1 of the inverter parameters common area or keypad to be read f...

Страница 381: ...lue Lo is changed by the Request No of Reg Error Response Slave Station ID Func Code Except Code CRC Lo CRC Hi 1 byte 1 byte 1 byte 1 byte 1 byte Func Code of the error response is Request Func Code 0x80 Writing One Inverter Parameter Value Func Code 0x06 Codes Description Addr Address 1 of the inverter parameter common area or keypad to be written to Reg Value The inverter parameter common area o...

Страница 382: ...e inverter parameters common area or keypad to be written to No of Reg Number of the inverter parameters common area or keypad to be written Reg Value The inverter parameter common area or keypad values to write with Except Code Error codes Request Slave Station ID Func Code Start Addr Hi Start Addr Lo No of Reg Hi No of Reg Lo Byte Count Reg Value Hi Reg Value Lo CRC Lo CRC Hi 1 byte 1 byte 1 byt...

Страница 383: ...hanged to 5 0 sec and the Dec time Communication address 0x1104 is changed to 10 0 sec Frame Transmission from Master to Slave Item Station ID Function Starting Address of Registe r Byte Count Data 1 Data 2 CRC Hex 0x01 0x10 0x1102 0x0002 0x04 0x0032 0x0064 0x1202 Des cript ion COM 01 Int485 St ID Preset Multiple Register Start Address 1 0x1103 1 50 ACC time 5 0 sec 100 DEC time 10 0 sec Frame Tra...

Страница 384: ...ameter Scale Unit R W Assigned Content by Bit 0h0000 Inverter model R F H100 0h0001 Inverter capacity R 4 5 5 kW 5 7 5 kW 6 11 kW 7 15 kW 8 18 5 kW 9 22 kW 10 30 kW 11 37 kW 12 45 kW 13 55 kW 14 75 kW 15 90 kW 0h0002 Inverter input voltage R 0 220 V product 1 440 V product 0h0003 Version R Example 0h0064 Version 1 00 Example 0h0065 Version 1 01 0h0004 Reserved R 0h0005 Command frequency 0 01 Hz R ...

Страница 385: ...us B2 Reverse operation R B1 Forward operation F B0 Stop S 0h0007 Acceleration time 0 1 sec R W 0h0008 Deceleration time 0 1 sec R W 0h0009 Output current 0 1 A R 0h000A Output frequency 0 01 Hz R 0h000B Output voltage 1 V R 0h000C DC link voltage 1 V R 0h000D Output power 0 1 kW R 0h000E Operation status R B15 0 HAND 1 AUTO B14 1 Frequency command source by communication built in option B13 1 Ope...

Страница 386: ... B5 Decelerating B4 Accelerating B3 Fault Trip operates according to OUT 30 setting B2 Operating in reverse direction B1 Operating in forward direction B0 Stopped 0h000F Fault trip information R B15 Reserved B14 Reserved B13 Reserved B12 Reserved B11 Reserved B10 H W Diag B9 Reserved B8 Reserved B7 Reserved B6 Reserved B5 Reserved B4 Reserved B3 Level Type trip B2 Reserved B1 Reserved ...

Страница 387: ... B4 P5 B3 P4 B2 P3 B1 P2 B0 P1 0h0011 Output terminal information R B15 Reserved B14 Reserved B13 Reserved B12 Reserved B11 Reserved B10 Q1 B9 Reserved B8 Reserved B7 Reserved B6 Reserved B5 Reserved B4 Relay 5 B3 Relay 4 B2 Relay 3 B1 Relay 2 B0 Relay 1 0h0012 V1 0 1 R V1 input voltage 0h0013 Thermal 0 1 R Input Thermal 0h0014 V2 0 1 R V2 input voltage 0h0015 I2 0 1 R I2 input Current ...

Страница 388: ...ameter 7 3 9 1 Monitoring Area Parameter Read Only Comm Address Parameter Scale Unit Assigned content by bit 0h0300 Inverter model H100 000Fh 0h0301 Inverter capacity 5 5 kW 4055h 7 5 kW 4075h 11 kW 40B0h 15 kW 40F0h 18 5 kW 4125h 22 kW 4160h 30 kW 41E0h 37 kW 4250h 45 kW 42D0h 55 kW 4370h 75 kW 44B0h 90 kW 45A0h 0h0302 Inverter input voltage power Single phase 3 phase cooling method 200 V 3 phase...

Страница 389: ... to stop 6 H W OCS 7 S W OCS 8 Dwell operating B6 B5 B4 B3 0 Stopped 1 Operating in forward direction 2 Operating in reverse direction 3 DC operating B2 B1 B0 0h0306 Inverter operation frequency command source B15 Operation command source 0 Keypad 1 Communication option 3 Built in RS 485 4 Terminal block B14 B13 B12 B11 B10 B9 B8 B7 Frequency command source 0 Keypad speed 1 Keypad torque 2 4 Up Do...

Страница 390: ...y 0 01 Hz 0h0312 Output rpm 0 Rpm 0h0313 Reserved 0h0314 Output voltage 1 V 0h0315 DC Link voltage 1 V 0h0316 Output power 0 1 kW 0h0317 Reserved 0h0318 PID reference 0 1 PID reference value 0h0319 PID feedback 0 1 PID feedback value 0h031A Display the number of poles for the 1st motor Displays the number of poles for the first motor 0h031B Display the number of poles for the 2nd motor Displays th...

Страница 391: ...15 B11 Reserved B10 Q1 B9 B5 Reserved B4 Relay 5 B3 Relay 4 B2 Relay 3 B1 Relay 2 B0 Relay 1 0h0322 Virtual digital input information B15 B8 Reserved B7 Virtual DI 8 COM 77 B6 Virtual DI 7 COM 76 B5 Virtual DI 6 COM 75 B4 Virtual DI 5 COM 74 B3 Virtual DI 4 COM 73 B2 Virtual DI 3 COM 72 B1 Virtual DI 2 COM 71 B0 Virtual DI 1 COM 70 0h0323 Display the selected motor 0 1st motor 1 2nd motor 0h0324 A...

Страница 392: ...2B Reserved 0 01 Reserved 0h032C Reserved Reserved 0h032D Reserved Reserved 0h032E Consumption energy kWh 0 1 kWh Consumption energy kWh 0h032F Consumption energy MWh 1 MWh Consumption energy MWh 0h0330 Latch type trip information 1 B15 PC Repeat Err B14 Over Heat Trip B13 Reserved B12 External Trip B11 Damper Err B10 Pipe Break B9 NTC Open B8 Reserved B7 Reserved B6 In Phase Open B5 Out Phase Ope...

Страница 393: ...ved B7 IO Board Trip B6 Reserved B5 ParaWrite Trip B4 TB Trip B3 Fan Trip B2 Thermal Trip B1 Level Detect B0 Reserved 0h0332 Level type trip information B15 B4 Reserved B3 Lost Keypad B2 Lost Command B1 Low Voltage B0 BX 0h0333 H W Diagnosis Trip information B15 B3 Reserved B2 Watchdog 1 error B1 EEP Err B0 ADC Offset 0h0334 Warning information 1 B15 Reserved B14 Low Battery B13 Load Tune B12 Fan ...

Страница 394: ...B6 Fire Mode B5 DB Warn ED B4 Fan Warning B3 Lost Command B2 Inv Over Load B1 Under Load B0 Over Load 0h0335 Latch type trip information 3 B15 Reserved Reserved B4 Reserved B3 Overcurrent2 Trip B2 Overvoltage Trip B1 Overcurrent1 Trip B0 Ground Fault Trip 0h0336 Warning information 2 B15 Reserved Reserved B3 Reserved B2 Lsig Tune Err B1 Rs Tune Err B0 ParaWrite Fail ...

Страница 395: ...of minutes excluding the total number of On Time days 0h0342 Run Time date 0 Day Total number of days the inverter has driven the motor 0h0343 Run Time minute 0 Min Total number of minutes excluding the total number of Run Time days 0h0344 Fan Time date 0 Day Total number of days the heat sink fan has been running 0h0345 Fan Time minute 0 Min Total number of minutes excluding the total number of F...

Страница 396: ... Output 0 01 External PID 2 output 0h0358 E PID 2 Ref 0 1 External PID 2 Reference 0h0359 E PID 2 Fdb 0 1 External PID 2 feedback 0h035A E PID 2 Unit Scale Ref Proc Unit Proc Unit Unit Scale External PID 2 Reference 0h035B E PID 2 Unit Scale Fdb Proc Unit Proc Unit Unit Scale External PID 2 feedback 0h035C Applicaion Status B15 B2 Reserved B1 Fire Mode B0 Pump Clean 0h035D Inv Temperature 0 Heatsi...

Страница 397: ...383 RS 485 Communication Features Comm Address Parameter Scale Unit Assigned content by bit B4 5th motor running B3 4th motor running B2 3rd motor running B1 2nd motor running B0 1st motor running ...

Страница 398: ...op command 1 Run command Example Forward operation command 0003h Reverse operation command 0001h 0h0383 Acceleration time 0 1 sec Acceleration time setting 0h0384 Deceleration time 0 1 sec Deceleration time setting 0h0385 Virtual digital input control 0 Off 1 On B15 B8 Reserved B7 Virtual DI 8 COM 77 B6 Virtual DI 7 COM 76 B5 Virtual DI 6 COM 75 B4 Virtual DI 5 COM 74 B3 Virtual DI 4 COM 73 B2 Vir...

Страница 399: ...the CNF 20 value refer to 5 49Operation State Monitor on page 312 0h039B Monitor Line 1 Set the CNF 21 value refer to 5 49Operation State Monitor on page 312 0h039C Monitor Line 2 Set the CNF 22 value refer to 5 49Operation State Monitor on page 312 0h039D Monitor Line 3 Set the CNF 23 value refer to 5 49Operation State Monitor on page 312 0h039E 0h039F Reserved Reserved 0h03A0 PID Ref 1 Aux Value...

Страница 400: ...ternal PID 2 feedback 0h03B7 E PID 2 Unit Scale Ref Proc Unit Proc Unit Unit Scale External PID 2 reference 0h03B8 E PID 2 Unit Scale Fdb Proc Unit Proc Unit Unit Scale External PID 2 feedback Note A frequency set via communication using the common area frequency address 0h0380 0h0005 is not saved even when used with the parameter save function To save a changed frequency to use after a power cycl...

Страница 401: ... Grp 8 COM Grp 9 PID Grp 10 EPID Grp 11 AP1 Grp 12 AP2 Grp 13 AP3 Grp 14 PRT Grp 15 M2 Grp Setting is prohibited during fault trip interruption s 0h03E3 Display changed O 0 No 1 Yes 0h03E4 Macro Function Setting X 0 BASIC 1 Compressor 2 Supply Fan 3 Exhaust Fan 4 Cooling Tower 5 Circul Pump 6 Vacuum Pump 7 Constant Torq 0h03E5 Delete all fault history O 0 No 1 Yes 0h03E6 Delete user registrated co...

Страница 402: ...e can be identified by reading the parameter when operating the inverter via communication The addresses 0h03E7 and 0h03E8 are parameters for entering the password When the password is entered the condition will change from Lock to Unlock and vice versa When the same parameter value is entered continuously the parameter is executed just once Therefore if the same value is entered again change it t...

Страница 403: ... time 7 4 BACnet Communication 7 4 1 What is BACnet Communication BACnet Building Automation and Control network is a communication network frequently used in building automation BACnet introduces the concept of object oriented systems and defines standardized objects By exchanging data this function makes communication possible between products from different companies It also stadardizes some of...

Страница 404: ... motors are connected to the inverter output terminal Relay 1 2 3 4 Interlock 1 2 3 4 are the monitors connected to Relay 1 2 3 4 Set COM 04 Int485 Mode 2 Set the Device Object Instances for COM 21 and 22 and dfine the values The device object instances must have unique values 3 Set COM 01 Int485 St ID by entering a value for BACnet the Int485 station ID must be set within a range of 0 127 The sta...

Страница 405: ...unication is not available if the value is not included in the range COM 03 Baud Rate Sets the communication speed to use in the network COM 20 BAC Mas Master Range for Max Master that is the number of devices currently connected to the communication Line is 1 127 and the default value is 127 COM 21 22 BAC Dev Inst 1 2 BACnet Device Instance is used to identify BACnet Device and must be set as the...

Страница 406: ... each Master tries to give Token to Device set as its own MACD 1 7 4 4 Protocol Implementation The following table sums the information required to implement a BACnet system Refer to each section of the table to implement a BACnet system properly Category Items Remarks BACnet Services I Am Answer to Who Is when broadcast or reset after power up I Have Answer to Who Has Read Property Write Property...

Страница 407: ...BV AI AO MSI MVI Object Identifier O O O O O O O Object Name O O O O O O O Object Type O O O O O O O System Status O Vendor Name O Vendor Identifier O Model Name O Firmware Revision O Appl Software Revision O Location O Protocol Version O Protocol Revision O Services Supported O Object Types Supported O Object List O Max APDU Length O APDU Timeout O NumberAPDU Retries O Max Master O Max Info Frame...

Страница 408: ...ate Input MSV Multistate Value You can read write in Location and Description only if it is the device object You can write a maximum of 29 words 7 4 5 1 Analog Value Object Instance Instance ID Object Name Description Setting Range Units R W AV1 CommTimeoutSet Command timeout setting 0 1 120 0 Secs R W AV2 AccelTimeSet Accelerate time setting 0 0 600 0 Secs R W AV3 DecelTimeSet Decelerate time se...

Страница 409: ...n in AUTO mode only 7 4 5 2 Multi state Value Object Instance Instance ID Object Name Description Setting Range Units R W MSV1 LostCommand Command lost operation setting 0 None 1 FreeRun 2 Dec 3 HoldInput 4 HoldOutput 5 LostPreset MSG R W 7 4 5 3 Binary Value Object Instance Instance ID Object Name Description Active Inactive Text R W BV1 StopCmd Stop command False True R W BV2 RunForwardCmd Run f...

Страница 410: ...ge type Volts R AI4 OutputCurrent Output current Amps R AI5 OutputFreq Output frequency Hz R AI6 OutputVolgate Output voltage Volts R AI7 DCLinkVoltage DC Link voltage Volts R AI8 OutputPower Output power kW R AI9 AI1 Value of Analog 1 R AI10 AI2 Values of Analog 2 R AI11 OutputRPM Output speed RPM R AI12 Pole Pole number of the motor R AI13 InvStatus Information of the inverter state Refer to add...

Страница 411: ...he common area R AI20 KiloWattHour Output power by kW h kW h R AI21 MegaWattHour Output power by MW h MW h R AI22 PowerFactor Power factor R AI23 RunTimeDay Run time by day Day R AI24 RunTimeMin Run time by minute Day R AI25 PidOutValue PID Output Value R AI26 PidReferenceValu e PID Reference Value R AI27 PidFeedbackValue PID Feedback Value R Refer to the relevant addresses in 7 3 8 communication ...

Страница 412: ...at e Reverse run command state R BI12 P1 P1 state R BI13 P2 P2 state R BI14 P3 P3 state R BI15 P4 P4 state R BI16 P5 P5 state R BI17 P6 P6 state R BI18 P7 P7 state R BI19 Relay1 Relay1 state R BI20 Relay2 Relay2 state R BI21 Relay3 Relay3 state R BI22 Relay4 Relay4 state R BI23 Relay5 Relay5 state R BI24 Q1 Q1 state R BI25 SpeedSearch Speed search operating R BI26 HWOCS H W OCS occurred R BI27 SWO...

Страница 413: ...ertyerror 9 Invalid data type serviceserror 10 Invalid access method serviceserror 11 Invalid file start serviceserror 29 Service request denied objecterror 31 Unknown object propertyerror 0 Property other propertyerror 27 Read access denied propertyerror 32 Unknown property propertyerror 37 Value out of range propertyerror 40 Write access denied propertyerror 42 Invalid array index clienterror 31...

Страница 414: ...nication modes and make sure that they are fixed to Data Bit 8 No Parity Bit Start Bit 1 Stop Bit 1 4 Test the network and make sure Metasys N2 communication is working properly 7 5 2 Metasys N2 Communication Standard Item Standards Communication speed 9600 bps Control procedure Asynchronous communications system Communication system Half duplex system Cable Twisted pair 1 pair and shield Characte...

Страница 415: ...401 RS 485 Communication Features Item Standards Parity check None ...

Страница 416: ... Description AO1 Command Frequency 0 0 Max Freq Hz Command frequency setting AO2 Accel Time 0 0 600 0 Sec ACC time setting AO3 Decel Time 0 0 600 0 Sec DEC time setting AO4 Drive mode 0 KeyPad Drive mode setting 1 Fx Rx 1 2 Fx Rx 2 3 Int 485 4 FieldBus 5 Time Event AO5 Freq mode 0 KeyPad 1 Frequency mode setting 1 KeyPad 2 2 V1 3 Reversed 4 V2 5 I2 6 Int485 7 FieldBus 8 Reversed 9 Pulse ...

Страница 417: ...nverter from the Metasys N2 master No Name Range Description BO1 Stop Command 1 Stop Stop command BO2 Run Forward Command 1 Forward Run Forward run command BO3 Run Reverse Command 1 Reverse Run Reverse run command BO4 Reset Fault 1 Reset Fault reset command BO5 Free Run Stop 1 Bx Free run stop command 7 5 3 3 Analog Input Metasys N2 master monitors inverter state No Name Unit Description AI1 Outpu...

Страница 418: ... CommonArea parameter address 0h0334 1 Refer to 7 3 8Compatible Common Area Parameteron page 370 7 5 3 4 Binary Input Metasys N2 master unit monitors the inverter input and output status in binary codes The following table lists the binary codes used and their meanings No Name Description BI1 Stopped 1 Stopped BI2 Running Forward 1 Forward operation is running BI3 Running Reverse 1 Reverse operati...

Страница 419: ... 7 5 3 5 Error Code Defined Codes Description 00 The device has been reset Currently waiting for the Identity Yourself command 01 Undefined command 02 Checksum error has occurred 03 Data size exceeded the input buffer meaasage is bigger than the device buffer size 05 Data field error input message size does not fit the command type 10 Invalid data message value is out of the range 11 Invalid comma...

Страница 420: ...te enabled during operation Δ Write enabled when operation stops X Write disabled Cod e Comm Address Name LCD Display Setting Range Initial value Propert y Ref 00 Jump Code Jump Code 1 99 9 O p 65 01 0h1101 Target frequency Cmd Frequency 0 00 Low Freq High Freq 0 00 O p 83 02 0h1102 Keypad run direction Keypad Run Dir 0 Reverse 1 O p 81 1 Forward 03 0h1103 Accelerati on time Acc Time 0 0 600 0 sec...

Страница 421: ...10 00 O p 14 9 12 0h110C Jog run accelerati on time Jog Acc Time 0 0 600 0 sec 20 0 O p 14 9 13 0h110D Jog run decelerati on time Jog Dec Time 0 0 600 0 sec 30 0 O p 14 9 14 0h110E Motor capacity Motor Capacity 0 0 2 kW 0 3HP Depen dent on motor setting Δ p 21 2 1 0 4 kW 0 5HP 2 0 75 kW 1 0HP 3 1 1 kW 1 5HP 4 1 5 kW 2 0HP 5 2 2 kW 3 0HP 6 3 0 kW 4 0HP 8 10 V3 11 I3 of DRV 07 are available when Ext...

Страница 422: ... 15 0HP 12 15 0 kW 20 0HP 13 18 5 kW 25 0HP 14 22 0 kW 30 0HP 15 30 0 kW 40 0HP 16 37 0 kW 50 0HP 17 45 0 kW 60 0HP 18 55 0 kW 75 0HP 19 75 0kW 100 0 HP 20 90 0kW 120 0 HP 15 0h110F Torque boost options Torque Boost 0 Manual 0 Manual Δ p 12 4 1 Auto 1 2 Auto 2 169 0h1110 Forward Torque Fwd Boost 0 0 15 0 2 0 Δ p 12 4 9 DRV 16 17 are displayed when DRV 15 is set to 0 Manual ...

Страница 423: ...x Freq 40 00 400 00 Hz 60 00 Δ p 13 3 21 0h1115 Select speed unit Hz Rpm Sel 0 Hz Display 0 Hz Display O p 10 0 1 RPM Display 25 0h1119 Hand mode operation frequency HAND Cmd Freq 0 00 Low Freq High Freq 0 00 O p 78 26 0h111A Hand mode operation Frequenc y reference source HAND Ref Mode 0 HAND Parameter 0 HAND Param eter Δ p 78 1 Follow AUTO 30 0h111E kW HP unit selection kW HP Unit Sel 0 kW 1 HP ...

Страница 424: ...Jump Code Jump Code 1 99 20 O p 65 01 0h120 1 Auxiliary reference source Aux Ref Src 0 None 0 None Δ p 144 1 V1 3 V2 4 I2 6 Pulse 7 Int 485 8 FieldBus 10 EPID1 Output 11 EPID1 Fdb Val 1210 V3 13 I3 0211 0h120 2 Auxiliary command calculation type Aux Calc Type 0 M G A 0 M G A Δ p 144 1 Mx G A 2 M G A 3 M M G A 4 M G 2 10 12 V3 13 I3 of BAS 01 are available when Extension IO option is equipped Refer...

Страница 425: ... p 144 04 0h120 4 Second command source Cmd 2nd Src 0 Keypad 1 Fx Rx 1 Δ p 137 1 Fx Rx 1 2 Fx Rx 2 3 Int 485 4 FieldBus 5 Tme Event 05 0h120 5 Second frequency source Freq 2nd Src 0 Keypad 1 0 Keypad 1 O p 137 1 Keypad 2 2 V1 4 V2 5 I2 6 Int 485 7 FieldBus 9 Pulse 1012 V3 12 10 V3 11 I3 of BAS 05 are available when Extension IO option is equipped Refer to Extension IO option manual for more detail...

Страница 426: ...t power frequency 60 50 Hz Sel 0 60 Hz 0 60 Hz Δ p 248 1 50 Hz 11 0h120 B Number of motor poles Pole Number 2 48 Depende nt on motor setting Δ p 158 12 0h120 C Rated slip speed Rated Slip 0 3000 RPM Δ p 158 13 0h120 D Motor rated current Rated Curr 1 0 1000 0 A Δ p 158 14 0h120 E Motor no load current NoloadCurr 0 0 1000 0 A Δ p 158 15 0h120 F Motor rated voltage Rated Volt 0 170 480 V 0 Δ p 127 1...

Страница 427: ... Hz 15 00 Δ p 122 42 0h122 A User voltage1 User Volt 1 0 100 25 Δ p 122 43 0h122 B User frequency2 User Freq 2 0 00 Maximum frequency Hz 30 00 Δ p 122 44 0h122 C User voltage2 User Volt 2 0 100 50 Δ p 122 45 0h122 D User frequency3 User Freq 3 0 00 Maximum frequency Hz 45 00 Δ p 122 46 0h122 E User voltage3 User Volt 3 0 100 75 Δ p 122 47 0h122 F User frequency4 User Freq 4 0 00 Maximum frequency ...

Страница 428: ...q High Freq 50 00 O p 100 55 0h123 7 Multi step speed frequency6 Step Freq 6 Low Freq High Freq 60 00 O p 100 56 0h123 8 Multi step speed frequency7 Step Freq 7 Low Freq High Freq 60 00 O p 100 70 0h124 6 Multi step deceleratio n time1 Acc Time 1 0 0 600 0 sec 20 0 O p 113 71 0h124 7 Multi step deceleratio n time1 Dec Time 1 0 0 600 0 sec 20 0 O p 113 7215 0h124 8 Multi step deceleratio n time2 Ac...

Страница 429: ...atio n time5 Acc Time 5 0 0 600 0 sec 40 0 O p 113 79 0h124 F Multi step acceleratio n time5 Dec Time 5 0 0 600 0 sec 40 0 O p 113 80 0h125 0 Multi step acceleratio n time6 Acc Time 6 0 0 600 0 sec 30 0 O p 113 81 0h125 1 Multi step deceleratio n time6 Dec Time 6 0 0 600 0 sec 30 0 O p 113 82 0h125 2 Multi step acceleratio n time7 Acc Time 7 0 0 600 0 sec 20 0 O p 113 83 0h125 3 Multi step acceler...

Страница 430: ...oint gradient Acc S Start 1 100 40 Δ p 117 04 0h1304 S curve accelerati on end point gradient Acc S End 1 100 40 Δ p 117 0517 0h1305 S curve decelerati on start point gradient Dec S Start 1 100 40 Δ p 117 06 0h1306 S curve decelerati on end point gradient Dec S End 1 100 40 Δ p 117 07 0h1307 Start Mode Start Mode 0 Acc 0 Acc Δ p 128 1 DC Start 08 0h1308 Stop Mode Stop Mode 0 Dec 0 Dec Δ p 129 1 DC...

Страница 431: ...r on Power on Run 0 No 0 No O p 107 1 Yes 1118 0h130 B Power on run delay time Power On Delay 0 0 6000 0 sec 0 0 O p 107 1219 0h130 C DC braking time at startup DC Start Time 0 00 60 00 sec 0 00 Δ p 128 13 0h130 D Amount of applied DC DC Inj Level 0 200 50 Δ p 128 1420 0h130 E Output blocking time DC Block Time 0 00 60 00 sec 0 00 Δ p 129 18ADV 11 is displayed when ADV 10 is set to 1 YES 19ADV 12 ...

Страница 432: ...n Acc Dwell Freq Start frequency Maximum frequency Hz 5 00 Δ p 155 21 0h1315 Dwell operation time on accelerati on Acc Dwell Time 0 0 60 0 sec 0 0 Δ p 155 22 0h1316 Dwell frequency on decelerati on Dec Dwell Freq Start frequency Maximum frequency Hz 5 00 Δ p 155 23 0h1317 Dwell operation time on decelerati on Dec Dwell Time 0 0 60 0 sec 0 0 Δ p 155 24 0h1318 Frequenc y limit Freq Limit 0 No 0 No Δ...

Страница 433: ...Hz 15 00 O p 136 30 0h131 E Jump frequency lower limit2 Jump Lo 2 0 00 Jump frequency upper limit2 Hz 20 00 O p 136 31 0h131 F Jump frequency upper limit2 Jump Hi 2 Jump frequency lower limit2 Maximum frequency Hz 25 00 O p 136 32 0h1320 Jump frequency lower limit3 Jump Lo 3 0 00 Jump frequency upper limit3 Hz 30 00 O p 136 33 0h1321 Jump frequency upper limit3 Jump Hi 3 Jump frequency lower limit...

Страница 434: ...ntrol Fan Control 0 During Run 0 During Run O p 247 1 Always ON 2 Temp Control 65 0h1341 Up Down operation frequency save U D Save Mode 0 No 0 No O p 151 1 Yes 66 0h1342 Output contact On Off control options On Off Ctrl Src 0 None 0 None O p 290 1 V1 3 V2 4 I2 6 Pulse 723 V3 8 I3 22ADV 51 is displayed when ADV 50 is set to 1 Manual ADV 52 is displayed when ADV 50 is set to 2 Auto 23 10 V3 11 I3 of...

Страница 435: ...Always Enable 0 Always Enable Δ p 153 1 DI Depend ent 7124 0h1347 Safe operation stop options Run Dis Stop 0 Free Run 0 Free Run Δ p 153 1 Q Stop 2 Q Stop Resum e 72 0h1348 Safe operation decelerati on time Q Stop Time 0 0 600 0 sec 5 0 O p 153 74 0h134 A Selection of regenerati on evasion function for press RegenAvdS el 0 No 0 No Δ p 297 1 Yes 75 0h134 B Voltage level of regenerati on evasion mot...

Страница 436: ...n frequency limit of regenerati on evasion for press CompFreq Limit 0 00 10 00 Hz 1 00 Δ p 297 77 0h134 D Regenera tion evasion for press P Gain RegenAvdP gain 0 0 100 0 50 0 O p 297 78 0h134 E Regenera tion evasion for press I gain RegenAvdIg ain 20 30000 msec 500 O p 297 25ADV 76 78 are displayed when ADV 74 is set to 1 Yes ...

Страница 437: ...tching mode PWM Mode 0 Normal PWM 0 Normal PWM Δ p 242 1 Low leakage PWM 13 0h140 D Anti hunting regulator mode AHR Sel 0 No 1 Yes Δ p 232 1 Yes 14 0h140 E Anti hunting regulator P Gain AHR P Gain 0 32767 1000 O p 232 15 0h140F Anti hunting regulator start frequency AHR Low Freq 0 00 AHR High Freq 0 50 O p 232 16 0h1410 Anti hunting regulator end frequency AHR High Freq AHR Low Freq 400 00 400 00 ...

Страница 438: ...0h1447 Speed search operation selection Speed Search Bit 0000 1111 0000 Δ p 236 Bit 0 Speed search on accelerat ion Bit 1 Restart after trips other than LV trip Bit 2 Restart after instantan eous interrupti on Bit 3 Power on run 7227 0h1448 Speed search reference current SS Sup Current 50 120 90 O p 236 7328 0h1449 Speed SS P Gain 0 9999 Flying O p 236 27CON 72 is displayed after Flying Start 1 an...

Страница 439: ...0h144 B Output block time before speed search SS Block Time 0 0 60 0 sec 1 0 Δ p 236 77 0h144 D Energy buffering selection KEB Select 0 No 0 No Δ p 192 1 Yes 7829 0h144 E Energy buffering start level KEB Start Lev 110 0 140 0 125 0 Δ p 192 79 0h144F Energy buffering stop level KEB Stop Lev 125 0 145 0 130 0 Δ p 192 80 0h1450 Energy buffering slip gain KEB Slip Gain buffering slip gain 0 20000 300 ...

Страница 440: ...on Δ Write enabled when operation stops X Write disabled Cod e Comm Addres s Name LCD Display Setting Range Initial Value Propert y Ref 00 Jump Code Jump Code 1 99 65 O p 65 01 0h1501 Frequency at maximum analog input Freq at 100 Start frequency Maximum frequency Hz Maximu m frequenc y O p 85 0530 0h1505 V1 input voltage display V1 Monitor V 0 12 00 V or 12 00 12 00 V 0 00 X p 85 06 0h1506 V1 inpu...

Страница 441: ... V 0 00 O p 89 13 0h150 D Output at V1 minimum voltage V1 Perc y1 100 00 0 00 0 00 O p 89 14 0h150 E V1 maximum input voltage V1 Volt x2 12 00 0 00 V 10 00 O p 89 15 0h150 F Output at V1 maximum voltage V1 Perc y2 100 00 0 00 100 00 O p 89 16 0h1510 V2 rotation direction change V1 Inverting 0 No 0 No O p 85 1 Yes 17 0h1511 V1quantizatio n change V1 Quantizing 0 0032 0 04 10 00 0 04 O p 85 2033 0h1...

Страница 442: ... 100 00 100 00 O p 95 46 0h152 E V2 Rotation direction options V2 Inverting 0 No 0 No O p 95 1 Yes 47 0h152 F V2 Quantizing level V2 Quantizing 0 0035 0 04 10 00 0 04 O p 95 5036 0h1532 I2 input monitor I2 Monitor mA 0 24 mA 0 O p 92 52 0h1534 I2 input filter time I2 Filter 0 10000 msec 10 O p 92 53 0h1535 I2 minimum input power supply I2 Curr x1 0 00 20 00 mA 4 00 O p 92 54 0h1536 Output at I2 ma...

Страница 443: ...41 P1 Px terminal configuration P1 Define 0 None 1 Fx Δ p 10 2 1 Fx 66 0h1542 P2 Px terminal configuration P2 Define 2 Rx 2 Rx Δ p 10 2 67 0h1543 P3 Px terminal configuration P3 Define 3 RST 5 BX Δ p 33 9 68 0h1544 P4 Px terminal configuration P4 Define 4 External Trip 3 RST Δ p 33 8 69 0h1545 P5 Px terminal configuration P5 Define 5 BX 7 Sp L Δ p 33 8 70 0h1546 P6 Px terminal configuration P6 Def...

Страница 444: ...4 XCEL Stop p 11 9 15 RUN Enable p 15 3 16 3 Wire p 15 2 17 2nd Source p 13 7 18 Exchang e p 24 6 19 Up p 15 1 20 Down p 15 1 22 U D Clear p 15 1 23 Analog Hold p 98 24 I Term Clear p 16 0 25 PID Openloo p p 16 0 26 PID Gain2 p 16 0 27 PID Ref Change p 11 9 28 2nd Motor p 24 3 29 Interlock 1 p 28 1 30 Interlock 2 p 28 1 ...

Страница 445: ... Interlock 4 p 28 1 33 Interlock 5 p 28 1 34 Pre Excite 35 Timer In p 25 9 37 disAux Ref p 14 4 38 FWD JOG p 15 0 39 REV JOG p 15 0 40 Fire Mode p 23 3 41 EPID1 Run p 17 9 42 EPID1 ItermClr p 17 9 43 Time Event En p 21 5 44 Pre Heat p 21 0 45 Damper Open p 18 8 46 PumpCl ean p 19 5 47 EPID2 Run p 17 9 48 EPID2 ItermClr p 17 9 ...

Страница 446: ...84 0h1554 DI Off Delay Selection DI Off DelayEn 000 0000 111 1111 111 1111 Δ 85 0h1555 Multi function input terminal On filter DI On Delay 0 10000 msec 10 O p 13 9 86 0h1556 Multi function input terminal Off filter DI Off Delay 0 10000 msec 3 O p 13 9 87 0h1557 Multi function input terminal selection DI NC NO Sel P7 P1 000 0000 Δ p 13 9 0 ATerminal NO 1 B Terminal 38 53 Interlock6 55 Interlock8 of...

Страница 447: ...00 X p 96 92 0h155 C TI minimum input pulse TI Filter 0 9999 msec 10 O p 96 93 0h155 D TI minimum input pulse TI Pls x1 0 TI Pls x2 0 00 O p 96 94 0h153 E Output at TI minimum pulse TI Perc y1 0 00 100 00 0 00 O p 96 95 0h155 F TI maximum input pulse TI Pls x2 TI Pls x1 32 00 32 00 O p 96 96 0h1560 Output at TI maximum pulse TI Perc y2 0 00 100 00 100 00 O p 96 97 0h1561 TI rotation direction chan...

Страница 448: ...Write disabled Cod e Comm Addres s Name LCD Display Parameter Setting Initial Value Property Ref 00 Jump Code JumpCod e 1 99 30 O p 65 01 0h1601 Analog output1 AO1 Mode 0 Frequency 0 Frequency O p 29 9 1 Output Current 2 Output Voltage 3 DCLink Voltage 4 Output Power 7 Target Freq 8 Ramp Freq 9 PID Ref Value 10 PID Fdb Value 11 PID Output 12 Constant 13 EPID1 Output 14 EPID1 RefVal 15 EPID1 FdbVal...

Страница 449: ...00 0 0 0 O p 29 9 06 0h1606 Analog output1 monitor AO1 Monitor 0 0 1000 0 0 0 X p 29 9 07 0h1607 Analog output2 AO2 Mode Identical to the OUT 02 AO1 Mode selected range 0 Frequency O p 29 9 08 0h1608 Analog output2 gain AO2 Gain 1000 0 1000 0 100 0 O p 29 9 09 0h1609 Analog output2 bias AO2 Bias 100 0 100 0 0 0 O p 29 9 10 0h160 A Analog output2 filter AO2 Filter 0 10000 msec 5 O p 29 9 11 0h160 B...

Страница 450: ... Any faults other than low voltage Bit 2 Automatic restart final failure 31 0h161 F Multi function relay1 Relay 1 0 None 23 Trip O p 30 4 1 FDT 1 2 FDT 2 3 FDT 3 4 FDT 4 5 Over Load 6 IOL 7 Under Load 8 Fan Warning 9 Stall 10 Over Voltage 11 Low Voltage 12 Over Heat 13 Lost Command 14 Run 15 Stop 16 Steady 17 Inverter Line 18 Comm Line 19 Speed Search ...

Страница 451: ...e Mode 28 Pipe Broken 29 Damper Err 30 Lubrication 31 Pump Clean 32 Level Detect 33 Damper Control 34 CAP Warnin g 35 Fan Exchange 32 0h1620 Multi function relay2 Relay 2 36 AUTO State 14 RUN O p 30 4 33 0h1621 Multi function relay3 Relay 3 37 Hand State 0 None O p 30 4 34 0h1622 Multi function relay4 Relay 4 38 TO 0 None O p 30 4 35 0h1623 Multi function Relay 5 39 Except Date 0 None O p 30 4 ...

Страница 452: ...ti function output Off delay DO Off Delay 0 00 100 00 sec 0 00 O p 31 1 52 0h1634 Multi function output contact selection DO NC NO Sel Q1 Relay5 Relay1 00 0000 Δ p 31 1 0 A contact NO 1 B contact NC 53 0h1635 Fault output On delay TripOutO nDly 0 00 100 00 sec 0 00 O p 31 0 54 0h1636 Fault output Off delay TripOutOf fDly 0 00 100 00 sec 0 00 O p 31 0 55 0h1637 Timer On delay TimerOn Delay 0 00 100...

Страница 453: ...00 Maximum frequency Hz 10 00 O p 30 4 61 0h163 D Pulse output item TO Mode 0 Frequency 0 Frequency O p 30 2 1 Output Current 2 Output Voltage 3 DCLink Voltage 4 Output Power 7 Target Freq 8 Ramp Freq 9 PID Ref Value 10 PID Fdb Value 11 PID Output 12 Constant 13 EPID1 Output 14 EPID1 RefVal 15 EPID1 FdbVal 16 EPID2 Output 17 EPID2 RefVal 18 EPID2 FdbVal ...

Страница 454: ...tput monitor TO Monitor 0 0 1000 0 0 0 X p 30 2 8 7 Communication Function Group COM Data in the following table will be displayed only when the related code has been selected O Write enabled during operation Δ Write enabled when operation stops X Write disabled Cod e Comm Addres s Name LCD Display Parameter Setting Initial Value Property Ref 00 Jump Code Jump Code 1 99 20 O p 65 01 0h1701 Built i...

Страница 455: ...485 BaudR 0 1200 bps 3 9600 bps O p 35 1 1 2400 bps 2 4800 bps 3 9600 bps 4 19200 bps 5 38400 bps 6 56 Kbps 7 76 8 kbps 8 115 2 Kbps42 04 0h1704 Built in communicat ion frame setting Int485 Mode 0 D8 PN S1 0 D8 PN S 1 O p 35 1 1 D8 PN S2 2 D8 PE S1 3 D8 PO S1 05 0h1705 Transmissio n delay after reception Resp Delay 0 1000 msec 5 O p 35 1 41 COM 02 is automatically set to 6 Modbus Master when AP1 4...

Страница 456: ...r number BAC Max Master 1 127 127 O p 38 9 21 0h1715 BACnet device number1 BAC Dev Inst1 0 4194 237 O p 38 9 22 0h1716 BACnet device number2 BAC Dev Inst2 0 999 0 O p 38 9 23 0h1717 BACnet password BAC PassWord 0 32767 0 O p 38 9 28 0h171 C USB Protocol USB Protocol 0 Modbus RTU 2 LS Inv 485 O 2 LS Inv 485 30 0h171 E Number of output parameters ParaStatu sNum 0 8 3 O p 35 9 31 0h171 F Output Commu...

Страница 457: ...FFF Hex 0000 O p 35 9 35 0h1723 Output Communica tion address5 Para Status 5 0000 FFFF Hex 0000 O p 35 9 36 0h1724 Output Communica tion address6 Para Status 6 0000 FFFF Hex 0000 O p 35 9 37 0h1725 Output Communica tion address7 Para Status 7 0000 FFFF Hex 0000 O p 35 9 38 0h1726 Output Communica tion address8 Para Status 8 0000 FFFF Hex 0000 O p 35 9 50 0h1732 Number of input parameters Para Ctrl...

Страница 458: ...s 5 Para Control 5 0000 FFFF Hex 0000 O p 35 9 56 0h1738 Input Communica tion address 6 Para Control 6 0000 FFFF Hex 0000 O p 35 9 57 0h1739 Input Communica tion address 7 Para Control 7 0000 FFFF Hex 0000 O p 35 9 58 0h173 A Input Communica tion address 8 Para Control 8 0000 FFFF Hex 0000 O p 35 9 70 0h1746 Communica tion multi function input 1 Virtual DI 1 0 None 0 None O p 38 4 71 0h1747 Commun...

Страница 459: ...al DI 5 4 External Trip 0 None O p 38 4 75 0h174 B Communica tion multi function input 6 Virtual DI 6 5 BX 0 None O p 38 4 76 0h174 C Communica tion multi function input 7 Virtual DI 7 6 JOG 0 None O p 38 4 77 0h174 D Communica tion multi function input 8 Virtual DI 8 7 Speed L 0 None O p 38 4 8 Speed M 9 Speed H 11 XCEL L 12 XCEL M 13 XCEL H 14 XCEL Stop 15 Run Enable 16 3 wire 17 2nd source 18 E...

Страница 460: ...ef Hold 24 I Term Clear 25 PID Openloop 26 PID Gain 2 27 PID Ref Change 28 2nd Motor 29 Interlock1 30 Interlock2 31 Interlock3 32 Interlock4 33 Interlock5 34 Pre Excite 35 Timer In 37 disAux Ref 38 FWD JOG 39 REV JOG 40 Fire Mode 41 EPID1 Run 42 EPID1 ItermClr 43 Time Event En 44 Pre Heat 45 Damper Open ...

Страница 461: ...nterlock6 54 Interlock7 55 Interlock8 86 0h1756 Communica tion multi function input monitoring Virt DI Status 0000 0000 1111 1111 0000 0000 Δ p 35 6 96 0h173 C Communica tion operation auto resume PowerOn Resume 0 No 0 No Δ p 31 5 8 8 Advanced Function Group PID Functions 44 53 Interlock6 55 Interlock8 of ADV 66 are available when Extension IO option is equipped Refer to Extension IO option manual...

Страница 462: ...CD Display Parameter Setting Initial Value Property Ref 00 Jump Code Jump Code 1 99 50 O p 65 01 0h1801 PID mode selection PID Sel 0 No 0 No Δ p 160 1 Yes 02 0h1802 E PID selection E PID Sel 0 No 0 No O p 179 1 Yes 03 0h1803 PID output monitor PID Output X p 160 04 0h1804 PID reference monitor PID Ref Value X p 160 05 0h1805 PID feedback monitor PID Fdb Value X p 160 06 0h1806 PID error monitor va...

Страница 463: ...None Δ p 160 1 V1 3 V2 4 I2 6 Pulse 7 Int 485 8 FieldBus 10 EPID1 Output 11 E PID Fdb Val 1246 V3 13 I3 13 0h180D PID reference 1 auxiliary mode selection PID Ref1AuxM od 0 M G A 0 M G A O p 160 1 M G A 2 M G A 3 M M G A 45 10 V3 11 I3 of PID 10 are available when Extension IO option is equipped Refer to Extension IO option manual for more detailed information 46 12 V3 13 I3 of PID 12 are availabl...

Страница 464: ... A 2 13 Root M A 14 0h180E PID reference auxiliary gain PID Ref1 Aux G 200 0 200 0 0 0 O p 160 15 0h180F PID reference 2 auxiliary source selection PID Ref 2 Src 0 Keypad 0 KeyPa d Δ p 160 1 V1 3 V2 4 I2 5 Int 485 6 Fieldbus 8 Pulse 9 E PID Output 1047 V3 11 I3 47 10 V3 11 I3 of PID 15 are available when Extension IO option is equipped Refer to Extension IO option manual for more detailed informat...

Страница 465: ...lection PID Ref2AuxSr c 0 None 0 None Δ p 160 1 V1 3 V2 4 I2 6 Pulse 7 Int 485 8 FieldBus 10 EPID1 Output 11 EPID1 Fdb Val 1248 V3 13 I3 18 0h1812 PID reference 2 auxiliary mode selection PID Ref2AuxM od 0 M G A 0 M G A O p 160 1 M G A 2 M G A 3 M M G A 4 M G 2 A 50 5 M G 2 A 50 6 M G 2 A 50 7 M M G 2 48 12 V3 13 I3 of PID 17 are available when Extension IO option is equipped Refer to Extension IO...

Страница 466: ... 200 0 200 0 0 0 O p 160 20 0h1814 PID feedback selection PIDFdb Source 0 V1 0 V1 Δ p 160 2 V2 3 I2 4 Int 485 5 FieldBus 7 Pulse 8 EPID1 Output 9 EPID1 Fdb Val 1049 V3 11 I3 21 0h1815 PID feedback auxiliary source selection PID Fdb Aux Src 0 None 0 None Δ p 160 1 V1 3 V2 4 I2 6 Pulse 49 10 V3 11 I3 of PID 20 are available when Extension IO option is equipped Refer to Extension IO option manual for...

Страница 467: ...k auxiliary mode selection PID FdbAuxMo d 0 M G A 0 M G A O p 160 1 M G A 2 M G A 3 M M G A 4 M G 2 A 50 5 M G 2 A 50 6 M G 2 A 50 7 M M G 2 A 50 8 M A 2 9 M 2 A 2 10 MAX M A 11 MIN M A 12 M A 2 13 Root M A 23 0h1817 PID PID Fdb 200 0 200 0 0 0 O p 160 50 12 V3 13 I3 of PID 21 are available when Extension IO option is equipped Refer to Extension IO option manual for more detailed information ...

Страница 468: ...al time 1 PID D Time 1 0 00 1 00 sec 0 00 O p 160 28 0h181C PID controller feed forward gain PID FF Gain 0 0 1000 0 0 0 O p 160 29 0h181D PID output filter PID Out LPF 0 00 10 00 sec 0 00 O p 160 30 0h181E PID output upper limit PID Limit Hi PID Limit Lo 100 00 100 00 O p 160 31 0h181F PID output lower limit PID Limit Lo 100 00 PID Limit Hi 0 00 O p 160 32 0h1820 PID controller proportional gain 2...

Страница 469: ... 1 Unit Min Unit Max Unit Default O p 160 41 0h1829 PID multi step reference setting 2 PID Step Ref 2 Unit Min Unit Max Unit Default O p 160 42 0h182A PID multi step reference setting 3 PID Step Ref 3 Unit Min Unit Max Unit Default O p 160 43 0h182B PID multi step reference setting 4 PID Step Ref 4 Unit Min Unit Max Unit Default O p 160 44 0h182C PID multi step reference setting 5 PID Step Ref 5 U...

Страница 470: ...ial Value Property Ref reference setting 7 50 0h1832 PID controller unit selection PID Unit Sel Refer to the Unit List 1 O p 160 0 CUST 1 2 PSI 3 F 4 C 5 inWC 6 inM 7 mBar 8 Bar 9 Pa 10 kPa 11 Hz 12 rpm 13 V 14 A 15 kW 16 HP 17 mpm 18 ft 19 m s 20 m3 s 21 m3 m 22 m 3 h 23 l s 24 l m ...

Страница 471: ...l m 31 gl h 32 ft s 33 f3 s 34 f3 m 35 f3 h 36 lb s 37 lb m 38 lb h 39 ppm 40 pps 51 0h1833 PID unit scale PID Unit Scale 0 x100 2 x 1 O p 160 1 x10 2 x1 3 x 0 1 4 x0 01 52 0h1834 PID control 0 setting figure PID Unit 0 X100 30000 Unit Max Range varies depend ing on PID 50 setting O p 160 X10 3000 0 Unit Max X1 300 00 Unit Max X0 1 30 000 Unit Max ...

Страница 472: ...ter Setting Initial Value Property Ref X0 01 3 0000 Unit Max 53 0h1835 PID control 100 setting figure PID Unit 100 X100 Unit Min 30000 Range differs depend ing on PID 50 setting O p 160 X10 Unit Min 3000 0 X1 Unit Min 300 00 X0 1 Unit Min 30 000 X0 01 Unit Min 3 0000 ...

Страница 473: ...Name LCD Display Setting Range Initial Value Property Ref 00 Jump Code Jump Code 1 99 1 O p 65 01 0h1901 EPID 1 Mode Selection EPID1 Mode 0 None 0 None O p 179 1 Always ON 2 During Run 3 DI depende nt 0252 0h1902 EPID1out put monitor value EPID1 Output 100 00 100 00 0 00 X p 179 03 0h1903 EPID1 standard monitor value EPID1 Ref Val X p 179 04 0h1904 EPID1 feedback monitor value EPID1 Fdb Val X p 17...

Страница 474: ...t Max Unit Min O p 179 08 0h1908 EPID1 feedback source selection EPID1 FdbSrc 0 V1 0 V1 O p 179 2 V2 3 I2 4 Int485 5 FieldB us 7 Pulse 854 V3 9 I3 09 0h1909 EPID1 proportion al gain EPID1 P Gain 0 00 300 00 50 00 O p 179 53 9 V3 10 I3 of EPID 06 are available when Extension IO option is equipped Refer to Extension IO option manual for more detailed information 54 8 V3 9 I3 of EPID 08 are available...

Страница 475: ...D1 Out LPF 0 00 10 00 sec 0 00 O p 179 14 0h190E EPID1 output upper limit EPID1 Limit Hi EPID1 Limit Lo 100 00 100 00 O p 179 15 0h190F EPID1 lower limit EPID1 Limit Lo 100 00 EPID1 Limit Hi 0 00 O p 179 16 0h1910 EPID1 output inverse EPID1 Out Inv 0 No 0 No O p 179 1 Yes 17 0h1911 EPID1 unit EPID1 Unit Sel Refer to the EPID Unit details table p 179 1 O p 179 18 0h1912 EPID1 unit scale EPID1 Unit ...

Страница 476: ...alue Property Ref X10 3000 0 Unit Max setting X1 300 00 Unit Max X0 1 30 000 Unit Max X0 01 3 0000 Unit Max 20 0h1914 EPID1 unit 100 value EPID1 Unit100 X100 Unit Min 30000 Values vary depend ing on the unit setting O p 179 X10 Unit Min 3000 0 X1 Unit Min 300 00 X0 1 Unit Min 30 000 ...

Страница 477: ...n dent 3255 0h1920 EPID2 output monitor value EPID2 Output 100 00 100 00 0 00 X p 179 33 0h1921 EPID2 reference monitor value EPID2 Ref Val X p 179 34 0h1922 EPID2 feedback monitor value EPID2 Fdb Val X p 179 35 0h1923 EPID2 error monitor value EPID2 Err Val X p 179 36 0h1924 EPID2 command source selection EPID2 Ref Src 0 Keypa d 0 Keypad Δ p 179 1 V1 3 V2 4 I2 55EPID 32 50 are displayed when EPID...

Страница 478: ...dB us 7 Pulse 857 V3 9 I3 39 0h1927 EPID2 proportion al gain EPID2 P Gain 0 00 300 00 50 0 O p 179 40 0h1928 EPID2 integral time EPID2 I Time 0 0 200 0 sec 10 0 O p 179 41 0h1929 EPID2 differentiati on time EPID2 D Time 0 00 1 00 sec 0 00 O p 179 56 9 V3 10 I3 of EPID 36 are available when Extension IO option is equipped Refer to Extension IO option manual for more detailed information 57 8 V3 9 I...

Страница 479: ...D2 Limit Lo 100 00 100 00 O p 179 45 0h192D EPID2 output lower limit EPID2 Limit Lo 100 00 EPID2 Limit Hi 0 00 O p 179 46 0h192E EPID2 output inverse EPID2 Out Inv 0 No 0 No O p 179 1 Yes 47 0h192F EPID2 unit EPID2 Unit Sel Refer to EPID Unit details table p 179 0 CUST O p 179 48 0h1930 EPID2 unit scale EPID2 Unit Scl 0 X100 2 X1 O p 179 1 X10 2 X1 3 X0 1 4 X0 01 49 0h1931 EPID2 unit 0 value EPID2...

Страница 480: ...al Value Property Ref X1 300 00 Unit Max X0 1 30 000 Unit Max X0 01 3 0000 Unit Max 50 0h1932 EPID2 unit 0 value EPID2 Unit100 X100 Unit Min 30000 Values vary depend ing on the unit setting O p 179 X10 Unit Min 3000 0 X1 Unit Min 300 00 X0 1 Unit Min 30 000 X0 01 Unit Min 3 0000 ...

Страница 481: ... 65 05 0h1A0 5 Sleep boost amount Sleep Bst Set 0 00 Unit Max 0 00 O p 17 5 06 0h1A0 6 Sleep boost speed Sleep BstFreq 0 00 Low Freq High Freq 60 00 O p 17 5 07 0h1A0 7 PID sleep mode 1 delay time PID Sleep 1 DT 0 0 6000 0 sec 20 0 O p 17 5 08 0h1A0 8 PID sleep mode 1 frequency PID Sleep1Fr eq 0 00 Low Freq High Freq 0 00 O p 17 5 09 0h1A0 9 PID wakeup 1 delay time PID WakeUp 1 DT 0 0 6000 0 sec 2...

Страница 482: ...elay time Pre PID Delay 0 0 600 0 sec 60 0 O p 17 4 23 0h1A1 7 Soft Fill escape value Soft Fill Set Unit Min Unit Max 20 00 O p 17 4 24 0h1A1 8 Soft Fill reference increasing value Fill Step Set 0 00 Unit Band 2 00 O p 17 4 25 0h1A1 9 Soft Fill reference increasing cycle Fill Step Time 0 9999 sec 20 O p 17 4 26 0h1A1 A Soft Fill changing amount Fill Fdb Diff 0 00 Unit Band 0 00 O p 17 4 30 0h1A1 E...

Страница 483: ...tarting auxiliary motor Starting Aux 1 5 1 Δ p 26 0 44 0h1A2 C Display the number of running auxiliary motors Aux Motor Run X p 26 0 45 0h1A2 D Display auxiliary motors 1 4 priority Aux Priority 1 X p 26 0 46 0h1A2 E Display auxiliary motors 5 8 priority Aux Priority 2 X p 26 0 48 0h1A3 0 Auxiliary motor options for inverter stop AuxAll Stop 0 No 1 Yes O p 26 0 1 Yes 49 0h1A3 1 Auxiliary motor sto...

Страница 484: ... Auxiliary motors start delay time Aux Start DT 0 0 3600 0 sec 60 0 O p 26 0 54 0h1A3 6 Auxiliary motors stop delay time Aux Stop DT 0 0 3600 0 sec 60 0 O p 26 0 55 0h1A3 7 Auto change mode selection Auto Ch Mode 0 None 1 AUX Exchang e Δ p 26 0 1 AUX Exchang e 2 Main Exchang e 56 0h1A3 8 Auto change time Auto Ch Time 00 00 99 00 72 00 O p 26 0 57 0h1A3 9 Auto change frequency Auto Ch Level Low Fre...

Страница 485: ...ry motor start frequency Start Freq 5 Low Freq High Freq 45 00 O p 26 0 70 0h1A4 6 1 auxiliary motor stop frequency Stop Freq 1 Low Freq High Freq 20 00 O p 26 0 71 0h1A4 7 2 auxiliary motor stop frequency Stop Freq 2 Low Freq High Freq 20 00 O p 26 0 72 0h1A4 8 3 auxiliary motor stop frequency Stop Freq 3 Low Freq High Freq 20 00 O p 26 0 73 0h1A4 9 4 auxiliary motor stop frequency Stop Freq 4 Lo...

Страница 486: ...uxiliary motor reference compensation Aux5 Ref Comp 0 00 Unit Band 0 00 O p 26 0 90 0h1A5 A Interlock selection Interlock 0 NO 0 No O p 28 1 1 YES 91 0h1A5 B Delay time before next motor operates when an interlock or an auto change on the main motor occurs Interlock DT 0 1 360 0 Sec 5 0 O p 28 1 9560 0h1A5 F Selection of Auxiliary motor to display AP1 96 AP1 97 AuxRun Time Sel 0 Aux 1 0 Aux1 O 1 A...

Страница 487: ...Hour Minute AuxRun Time Min 00 00 23 59 00 00 O 98 0h1A6 2 Deleting operation time of Auxiliary motor AuxRun Time Clr 0 None 0 None O 1 All 2 Aux 1 3 Aux 2 4 Aux 3 5 Aux 4 6 Aux 5 8 11 Application 2 Function Group AP2 Data In the following table will be displayed only when the related code has been selected O X Write enabled during operation Δ Writing available when operation stops Cod e Comm Addr...

Страница 488: ... 4 Low Freq power total Load Fit LPwr 0 0 80 0 30 0 Δ p 20 3 08 0h1B0 8 High Freq load curve Load Fit Hfreq Load Fit LFreq HighFreq 51 00 Δ p 20 3 09 0h1B0 9 High Freq current Load Fit HCurr Load Fit LCurr 200 0 80 0 Δ p 20 3 10 0h1B0 A High Freq total power Load Fit HPwr Load Fit LPwr 200 0 80 0 Δ p 20 3 11 0h1B0 B Current load curve Load Curve Cur X p 20 3 12 0h1B0 C Power load curve Load Curve ...

Страница 489: ...Curve DT 0 0 6000 0 sec 60 0 O p 19 5 20 0h1B1 4 Pump clean start delay time PC Start DT 0 0 6000 0 sec 10 0 O p 19 5 21 0h1B1 5 0 speed operating time at Fx Rx switching PC Step DT 0 1 6000 0 sec 5 0 O p 19 5 22 0h1B1 6 Pump clean Acc time PC Acc Time 0 0 600 0 sec 10 0 O p 19 5 23 0h1B1 7 Pump clean Dec time PC Dec Time 0 0 600 0 sec 10 0 O p 19 5 24 0h1B1 8 Forward step maintaining time FwdStea...

Страница 490: ...pump clean end PC End Mode 0 Stop 0 Stop Δ p 19 5 1 Run 32 0h1B2 0 Pump clean continuous limit time PC Limit Time 6 60 min 10 O p 19 5 33 0h1B2 1 Pump clean continuous limit numbers PC Limit Num 0 10 3 O p 19 5 38 0h1B2 6 Dec Valve operation frequency Dec Valve Freq Low Freq High Freq 40 00 O p 20 1 39 0h1B2 7 Dev Valve Dec time Dev Valve Time 0 0 6000 0 sec 0 0 O p 20 1 40 0h1B2 8 Start and End r...

Страница 491: ... 0 600 0 sec 60 0 O p 21 0 87 0h1B5 7 1 Motor average power M1 AVG PWR 0 1 90 0 kW O p 19 4 88 0h1B5 8 2 Motor average power M2 AVG PWR 0 1 90 0 kW O p 19 4 89 0h1B5 9 Cost per kWh Cost per kWh 0 0 1000 0 0 0 O p 19 4 90 0h1B5 A Saved kWh Saved kWh 0 0 X p 19 4 91 0h1B5 B Saved MWh Saved MWh 0 X p 19 4 92 0h1B5 C Saved Cost below 1000 unit Saved Cost1 0 0 X p 19 4 93 0h1B5 D Saved Cost over 1000 u...

Страница 492: ... Addres s Name LCD Display Setting Range Initial Value Property Ref 95 0h1B5 F Saved CO2 Ton Saved CO2 1 0 0 X p 19 4 96 0h1B6 0 Saved CO2 kTon Saved CO2 2 0 X p 19 4 97 0h1B6 1 Saved energy reset Reset Energy 0 No 0 No Δ p 19 4 1 Yes ...

Страница 493: ...n 0 00 O p 215 03 0h1C0 3 Current day Now Weekday 0000000 1111111 Bit 0000001 O p 215 04 0h1C0 4 Summer Time Start date Summer T Start 01 01 Summer T Stop 04 01 O p 215 05 0h1C0 5 Summer Time Finish date Summer T Stop Summer T Start 12 31 Date 11 31 O p 215 0663 0h1C0 6 Date display format Date Format 0 YYYY MM D D Date Format O p 215 1 MM DD YYY Y 2 DD MM YYY Y 10 0h1C0 A Period connection status...

Страница 494: ...figuration Period2 Day 0000000 1111111 Bit 00000000 O p 215 17 0h1C1 1 Time Period 3 Start time configuration Period3 Start T 0 00 24 00 min 24 00 O p 215 18 0h1C1 2 Time Period 3 End time configuration Period3 Stop T Period3 Start T 24 00 min 24 00 O p 215 19 0h1C1 3 Time Period 3 Day of the week configuration Period3 Day 0000000 1111111 Bit 0000000 O p 215 20 0h1C1 4 Time Period 4 Start time con...

Страница 495: ... 24 00 min 24 00 O p 215 35 0h1C2 3 Except2 Date configuration Except2 Date 01 01 12 31 Date 01 01 O p 215 36 0h1C2 4 Except3 Date Start time configuration Except3 Start T 0 00 24 00 min 24 00 O p 215 37 0h1C2 5 Except3 Date End time configuration Except3 Stop T Except3 StartT 24 00 min 24 00 O p 215 38 0h1C2 6 Except3Date configuration Except3 Date 01 01 12 31 Date 01 01 O p 215 39 0h1C2 7 Except...

Страница 496: ... Date configuration Except6 Date 01 01 12 31 Date 01 01 O p 215 48 0h1C3 0 Except7 Date Start time configuration Except7 Start T 0 00 24 00 min 24 00 O p 215 49 0h1C3 1 Except7 Date End time configuration Except7 Stop T Except7 StartT 24 00 min 24 00 O p 215 50 0h1C3 2 Except7 Date configuration Except7 Date 01 01 12 31 Date 01 01 O p 215 51 0h1C3 3 Except8 Date Start time configuration Except8 St...

Страница 497: ... Event 1 connection status T Event1P eriod 000000000000 111111111111 00000000000 0 Δ p 215 73 0h1C4 9 Time Event 1 functions T Event1D efine 0 None 0 None Δ p 215 1 Fx 2 Rx 3 Speed L 4 Speed M 5 Speed H 7 Xcel L 8 Xcel M 9 Xcel H 10 Xcel Stop 11 Run Enable 12 2nd Source 13 Exchange 14 Analog Hold 15 I Term Clear 16 PID Openloop 17 PID Gain 2 18 PID Ref Change 19 2nd Motor 20 Timer In ...

Страница 498: ...ation T Event2P eriod 000000000000 111111111111 00000000000 0 Δ p 215 75 0h1C4 B Time Event 2 functions T Event2D efine Identical to the setting range for AP3 73 0 None Δ p 215 76 0h1C4 C Time Event 3 connection configuration T Event2P eriod 000000000000 111111111111 00000000000 0 Δ p 215 77 0h1C4 D Time Event 3 functions T Event3D efine Identical to the setting range for AP3 73 0 None Δ p 215 78 ...

Страница 499: ... 0h1C5 2 Time Event 6 connection configuration T Event6P eriod 000000000000 111111111111 00000000000 0 Δ p 215 83 0h1C5 3 Time Event 6 functions T Event6D efine Identical to the setting range for AP3 73 0 None Δ p 215 84 0h1C5 4 Time Event 7 connection configuration T Event7P eriod 000000000000 111111111111 00000000000 0 Δ p 215 85 0h1C5 5 Time Event 7 functions T Event7D efine Same setting range ...

Страница 500: ...7 Bit0 Output open phase Bit1 Input open phase 06 0h1D06 Input voltage range during open phase IPO V Band 1 100 V 15 O p 32 7 07 0h1D07 Deceleration time at fault trip Trip Dec Time 0 0 600 0 sec 3 0 O 08 0h1D08 Selection of startup on trip reset RST Restart Bit 00 11 00 O p 24 0 Bit0 Fault trips other than LV trip Bit1 LV Trip 09 0h1D09 Number of automatic restarts Retry Number 0 10 0 O p 24 0 10...

Страница 501: ...nd loss Lost Preset F 0 00 Low Freq High Freq 0 00 O p 32 9 15 0h1D0F Analog input loss decision level AI Lost Level 0 Half of x1 0 Half of x1 O p 32 9 1 Below x1 17 0h1D11 Overload warning selection OL Warn Select 0 No 0 No O p 31 8 1 Yes 18 0h1D12 Overload warning level OL Warn Level 30 OL Trip Level 110 O p 31 8 19 0h1D13 Overload warning time OL Warn Time 0 0 30 0 sec 10 0 O p 31 8 20 0h1D14 M...

Страница 502: ...nder load warning selection ULWarn Sel 0 No 0 No O p 33 5 1 Yes 26 0h1D1A Under load warning time ULWarn Time 0 0 600 0 sec 10 0 O p 33 5 27 0h1D1B Under load trip selection ULTrip Sel 0 None 0 None O p 33 5 1 Free Run 2 Dec 28 0h1D1C Under load trip timer ULTrip Time 0 0 600 0 sec 30 0 O p 33 5 31 0h1D1F Operation on no motor trip No Motor Trip 0 None 0 None O p 34 0 1 Free Run 32 0h1D20 No motor...

Страница 503: ... sensor Thermal Monitor X p 31 8 40 0h1D28 Electronic thermal prevention fault trip selection ETH Trip Sel 0 None 0 None O p 31 7 1 Free Run 2 Dec 41 0h1D29 Motor cooling fan type Motor Cooling 0 Self cool 0 Self cool O p 31 7 1 Forced cool 42 0h1D2A Electronic thermal one minute rating ETH 1 min ETH Cont 150 120 O p 31 7 43 0h1D2B Electronic thermal prevention continuous rating ETH Cont 50 120 10...

Страница 504: ... 32 3 Bit 0 At acceleration Bit 1 At constant speed Bit 2 At deceleration Bit 3 Flux braking 51 0h1D33 Stall frequency 1 Stall Freq 1 Start frequency Stall frequency2 Hz 60 00 O p 32 3 52 0h1D34 Stall level 1 Stall Level 1 30 150 130 Δ p 32 3 53 0h1D35 Stall Stall Freq Stall frequency1 60 00 O p 32 66 PRT 45 can only be set when PRT 44 is in Fire mode To change the mode in PRT 44 create a new pass...

Страница 505: ...Stall Freq 4 Stall frequency3 Maximum frequency Hz 60 00 O p 32 3 58 0h1D3A Stall level 4 Stall Level 4 30 150 130 Δ p 32 3 59 0h1D3B Flux braking gain Flux Brake Kp 0 150 0 O 60 0h1D3C Pipe break detection setting PipeBroke nSel 0 None 0 None O p 20 8 1 Warning 2 Free Run 3 Dec 61 0h1D3D Pipe break detection variation PipeBroke n Lev 0 0 100 0 97 5 O p 20 8 62 0h1D3E Pipe break detection time Pip...

Страница 506: ...t source LDT Source 0 Output Current 0 Output Curren t O p 20 5 1 DC Link Voltage 2 Output Voltage 3 kW 4 HP 5 V1 6 V2 7 I2 8 PID Ref Value 9 PID Fdb Value 10 PID Output 11 EPID1 Fdb Val 12 EPID2 Fdb Val 73 0h1D49 Level detect delay time LDT DlyTime 0 9999 sec 2 O p 20 5 74 0h1D4A Level detect standard set value LDT Level Source setting Source setting O p 20 5 75 0h1D4B Level detect band width LDT...

Страница 507: ...D50 Operation mode on optional card trip Opt Trip Mode 0 None 1 Free Run O p 33 9 1 Free Run 2 Dec 81 0h1D51 Low voltage trip decision delay time LVT Delay 0 0 60 0 sec 0 0 Δ p 33 7 82 0h1D52 Low voltage trip decision during operation LV2 Trip Sel 0 No 0 No Δ p 33 7 1 Yes 83 0h1D53 Remaining capacitor life diagnosis level CAP DiagP erc 10 100 0 O p 34 0 8469 Capacitor life diagnosis mode CAP Diag ...

Страница 508: ...umulated operating time operation Fan Time Perc 0 X p 34 3 88 0h1D58 Fan replacement alarm level Fan Exchange 0 0 100 0 0 0 O p 34 3 90 0h1D5A Low battery voltage setting Low Battery 0 None 0 None O p 33 4 1 Warning 91 0h1D5B Setting the function of Broken belt BrokenBelt Sel 0 None 0 None Δ 1 Warning 2 Free Run 92 0h1D5C Operating the frequency of Broken belt BrokenBelt Freq 15 00 MzxFreq 15 00 Δ...

Страница 509: ... Comm Address Name LCD Display Setting Range Initial Value Propert y Ref 94 0h1D5E Torque current of operating Broken belt BrokenBelt Trq 0 0 100 0 10 0 Δ 95 0 h1D5F Delay of operating Broken belt BrokenBelt Dly 0 600 0 sec 10 0 Δ ...

Страница 510: ...Name LCD Display Setting Range Initial Value Proper ty Ref 00 Jump code Jump Code 1 99 14 O p 65 04 0h1E0 4 Acceleration time M2 Acc Time 0 0 600 0 sec 20 0 O p 243 05 0h1E0 5 Deceleration time M2 Dec Time 0 0 600 0 sec 30 0 O p 243 06 0h1E0 6 Motor capacity M2 Capacity 0 0 2 kW 0 3HP Δ p 243 1 0 4 kW 0 5HP 2 0 75 kW 1 0HP 3 1 1 kW 1 5HP 4 1 5 kW 2 0HP 5 2 2 kW 3 0HP 6 3 0 kW 4 0HP 7 3 7 kW 5 0HP ...

Страница 511: ... 243 11 0h1E0 B Rated slip speed M2 Rated Slip 0 3000 RPM Δ p 243 12 0h1E0 C Motor rated current M2 Rated Curr 1 0 1000 0 A Δ p 243 13 0h1E0 D Motor no load current M2 Noload Curr 0 0 1000 0 A Δ p 243 14 0h1E0 E Motor rated voltage M2 Rated Volt 071 170 480 V Δ p 243 15 0h1E0 F Motor efficiency M2 Efficiency 70 100 Δ p 243 17 Stator resistor M2 Rs 0 000 9 999 Δ p 243 18 0h1E1 2 Leakage inductance ...

Страница 512: ...ute rating M2 ETH 1 min 100 150 120 Δ p 243 30 0h1E1 E Electronic thermal continuous rating M2 ETH Cont 50 120 100 Δ p 243 8 15 Trip TRIP Last x and Config CNF Mode 8 15 1 Trip Mode TRP Last x Code Name LCD Display Setting Range Initial Value Ref 00 Trip type display Trip Name x 01 Frequency reference at trip Output Freq 02 Output current at trip Output Current 03 Acceleration Decelerati on state ...

Страница 513: ...itial Value Ref 06 Input terminal state DI State 0000 0000 07 Output terminal state DO State 000 08 Trip time after Power on Trip On Time 00 00 00 00 00 09 Trip time after operation start Trip Run Time 00 00 00 00 00 10 Delete trip history Trip Delete 0 No 1 Yes ...

Страница 514: ...S W Ver p 257 12 Keypad title version KPD Title Ver p 257 20 Display item condition display window Anytime Para 0 Frequency 0 Frequency p 312 21 Monitor mode display 1 Monitor Line 1 1 Speed 0 Frequency p 312 22 Monitor mode display 2 Monitor Line 2 2 Output Current 2 OutputCurren t p 312 23 Monitor mode display 3 Monitor Line 3 3 Output Voltage 3 OutputVoltag e p 312 4 Output Power 5 WHour Counte...

Страница 515: ...D2Fdb Val 24 Monitor mode initialize Mon Mode Init 0 No 0 No p 312 1 Yes 3072 Option slot 1 type display Option 1 Type p 257 31 Option slot 2 type display Option 2 Type p 257 32 Option slot 3 type display Option 3 Type p 257 40 Parameter initialization Parameter Init 0 No 0 No p 250 1 All Grp 2 DRV Grp 3 BAS Grp 4 ADV Grp 5 CON Grp 6 IN Grp 7 OUT Grp 8 COM Grp 72 Please refer to the communication ...

Страница 516: ... Multi Key Sel 0 None 0 None p 253 1 UserGrpSelKey 43 Macro function item Macro Select 0 Basic 0 Basic p 258 1 Compressor 2 Supply Fan 3 Exhaust Fan 4 Cooling Tower 5 Circul Pump 6 Vacuum Pump 7 Constant Torque 44 Trip history deletion Erase All Trip 0 No 0 No p 257 1 Yes 45 User registration code deletion UserGrpAllDel 0 No 0 No p 254 1 Yes 46 Read parameters Parameter Read 0 No 0 No p 249 1 Yes ...

Страница 517: ...arameter edit Key Lock Pw 0 9999 Password p 251 60 Additional title update Add Title Up 0 No 0 No p 257 1 Yes 61 Simple parameter setting Easy Start On 0 No 1 Yes p 256 1 Yes 62 Power consumption initialization WHCount Reset 0 No 0 No p 256 1 Yes 7073 Accumulated inverter motion time On time Date Format p 314 7174 Accumulated inverter operation time Run time Date Format p 314 72 Accumulated Time R...

Страница 518: ...75 Real Time Real Time Date Format 74 Accumulated cooling fan operation time시간 Fan Time Date Format p 314 7576 Reset of accumulated cooling fan operation time Fan Time Rst 0 No 0 No p 314 1 Yes 75 The date format can be changed according to the AP3 06 settings 76 The date format can be changed according to the AP3 06 settings ...

Страница 519: ...12 JOG Acc Time 13 0 7 DRV 13 JOG Dec Time 20 0 8 DRV 15 Torque Boost 1 Auto1 9 BAS 70 Acc Time 1 10 0 10 BAS 71 Dec Time 1 20 0 11 ADV 10 Power on Run 1 Yes 12 ADV 65 U D Save Mode 1 Yes 13 CON 4 Carrier Freq 3 0 14 CON 70 SS Mode 0 Flying Start 1 15 CON 77 KEB Select 1 Yes 16 OUT 32 Relay 2 14 Run 17 PID 1 PID Sel 1 Yes 18 PID 3 PID Output 0 00 19 PID 4 PID Ref Value 20 PID 5 PID Fdb Value 21 PI...

Страница 520: ... 52 Stall Level 1 130 39 PRT 66 DB Warn ED 10 40 PRT 70 LDT Sel 1 Warning 41 PRT 72 LDT Source 0 Output Current 42 PRT 75 LDT Band Width LDT Source 10 of the Max value 43 PRT 76 LDT Freq 20 00 44 M2 4 M2 Acc Time 10 0 45 M2 5 M2 Dec Time 20 0 46 M2 8 M2 Ctrl Mode 1 Slip Compen 47 M2 28 M2 Stall Lev 125 48 M2 29 M2 ETH 1 min 120 8 16 2 Supply Fan MC2 Group Macro Code Code LCD Display Initial Value ...

Страница 521: ...4 PID Ref Value 19 PID 5 PID Fdb Value 20 PID 10 PID Ref 1 Src 4 I2 21 PID 11 PID Ref 1 Set 0 5000 22 PID 25 PID P Gain 1 40 00 23 PID 26 PID I Time 1 20 0 24 PID 36 PID Out Inv 1 Yes 25 PID 50 PID Unit Sel 5 inWC 26 PID 51 PID Unit Scale 4 x0 01 27 AP 21 Pre PID Freq 30 00 28 AP1 22 Pre PID Delay 120 0 29 PRT 8 RST Restart 11 30 PRT 9 Retry Number 0 31 PRT 10 Retry Delay 20 0 32 PRT 11 Lost KPD M...

Страница 522: ...0 2 DRV 4 Dec Time 30 0 3 DRV 7 Freq Ref Src 1 Keypad 2 4 DRV 11 JOG Frequency 15 00 5 BAS 7 V F Pattern 1 Square 6 BAS 70 Acc Time 1 20 0 7 BAS 71 Dec Time 1 30 0 8 BAS 72 Acc Time 2 22 5 9 BAS 73 Dec Time 2 32 5 10 BAS 74 Acc Time 3 25 0 11 BAS 75 Dec Time 3 35 0 12 BAS 76 Acc Time 4 27 5 13 BAS 77 Dec Time 4 37 5 14 BAS 78 Acc Time 5 30 0 15 BAS 80 Acc Time 6 32 5 16 BAS 81 Dec Time 6 42 5 17 B...

Страница 523: ... Yes 36 PID 50 PID Unit Sel 5 inWC 37 PID 51 PID Unit Scale 4 x0 01 38 AP1 21 Pre PID Freq 30 00 39 PRT 8 RST Restart 11 40 PRT 9 Retry Number 0 41 PRT 10 Retry Delay 10 0 42 PRT 11 Lost KPD Mode 3 Dec 43 PRT 12 Lost Cmd Mode 3 Hold Input 44 PRT 40 ETH Trip Sel 1 Free Run 45 PRT 42 ETH 1 min 120 46 PRT 52 Stall Level 1 130 47 PRT 70 LDT Sel 1 Warning 48 PRT 72 LDT Source 0 Output Current 49 PRT 75...

Страница 524: ...Table of Functions 510 ...

Страница 525: ... 75 Dec Time 3 35 0 12 BAS 76 Acc Time 4 27 5 13 BAS 77 Dec Time 4 37 5 14 BAS 78 Acc Time 5 30 0 15 BAS 80 Acc Time 6 32 5 16 BAS 81 Dec Time 6 42 5 17 BAS 82 Acc Time 7 35 0 18 BAS 83 Dec Time 7 45 0 19 ADV 10 Power on Run 1 Yes 20 ADV 50 E Save Mode 2 Auto 21 ADV 64 FAN Control 2 Temp Control 22 ADV 65 U D Save Mode 1 Yes 23 CON 4 Carrier Freq 3 0 24 CON 70 SS Mode 1 Flying Start 2 25 CON 77 KE...

Страница 526: ...el 1 Free Run 46 PRT 42 ETH 1 min 120 47 PRT 52 Stall Level 1 130 48 PRT 70 LDT Sel 1 Warning 49 PRT 72 LDT Source 0 Output Current 50 PRT 75 LDT Band Width LDT Source 10 of the Max value 51 PRT 76 LDT Freq 10 00 52 PRT 77 LDT Restart DT 300 0 53 M2 25 M2 V F Patt 1 Square 54 M2 28 M2 Stall Lev 110 55 M2 29 M2 ETH 1 min 110 8 16 5 Circululation Pump MC5 Group Macro Code Code LCD Display Initial Va...

Страница 527: ... 79 Dec Time 5 58 0 20 BAS 80 Acc Time 6 40 0 21 BAS 81 Dec Time 6 59 0 22 BAS 82 Acc Time 7 42 0 23 BAS 83 Dec Time 7 60 0 24 ADV 10 Power on Run 1 Yes 25 ADV 25 Freq Limit Lo 20 00 26 ADV 50 E Save Mode 2 Auto 27 ADV 64 FAN Control 2 Temp Control 28 ADV 65 U D Save Mode 1 Yes 29 CON 4 Carrier Freq 3 0 30 CON 70 SS Mode 0 Flying Start 1 31 CON 77 KEB Select 1 Yes 32 OUT 32 Relay 2 14 Run 33 PID 1...

Страница 528: ...PRT 42 ETH 1 min 120 53 PRT 52 Stall Level 1 130 54 PRT 60 PipeBroken Sel 1 Warning 55 PRT 61 PipeBroken Lev 90 0 56 PRT 62 Pipe Broken DT 22 0 57 PRT 70 LDT Sel 1 Warning 58 PRT 72 LDT Source 0 Output Current 59 PRT 75 LDT Band Width LDT Source 10 of the Max value 60 PRT 76 LDT Freq 10 00 61 PRT 77 LDT Restart DT 100 0 62 M2 4 M2 Acc Time 10 0 63 M2 5 M2 Dec Time 20 0 64 M2 25 M2 V F Patt 1 Squar...

Страница 529: ...4 BAS 74 Acc Time 3 34 0 15 BAS 75 Dec Time 3 54 0 16 BAS 76 Acc Time 4 36 0 17 BAS 77 Dec Time 4 56 0 18 BAS 78 Acc Time 5 38 0 19 BAS 79 Dec Time 5 58 0 20 BAS 80 Acc Time 6 40 0 21 BAS 81 Dec Time 6 59 0 22 BAS 82 Acc Time 7 42 0 23 BAS 83 Dec Time 7 60 0 24 ADV 10 Power on Run 1 Yes 25 ADV 25 Freq Limit Lo 40 00 26 ADV 64 FAN Control 2 Temp Control 27 ADV 65 U D Save Mode 1 Yes 28 CON 4 Carrie...

Страница 530: ...9 PRT 42 ETH 1 min 120 50 PRT 52 Stall Level 1 130 51 PRT 60 PipeBroken Sel 1 Warning 52 PRT 61 PipeBroken Lev 90 0 53 PRT 62 Pipe Broken DT 22 0 54 PRT 66 DB Warn ED 10 55 PRT 70 LDT Sel 1 Warning 56 PRT 72 LDT Source 0 Output Current 57 PRT 75 LDT Band Width LDT Source 10 of the Max value 58 PRT 76 LDT Freq 15 00 59 PRT 77 LDT Restart DT 100 0 60 M2 4 M2 Acc Time 10 0 61 M2 5 M2 Dec Time 20 0 62...

Страница 531: ...3 15 0 13 BAS 75 Dec Time 3 25 0 14 BAS 76 Acc Time 4 17 5 15 BAS 77 Dec Time 4 27 5 16 BAS 78 Acc Time 5 20 0 17 BAS 79 Dec Time 5 30 0 18 BAS 80 Acc Time 6 22 5 19 BAS 81 Dec Time 6 32 5 20 BAS 82 Acc Time 7 25 0 21 BAS 83 Dec Time 7 35 0 22 ADV 1 Acc Pattern 1 S curve 23 ADV 2 Dec Pattern 1 S curve 24 ADV 25 Freq Limit Lo 20 00 25 ADV 74 RegenAvd Sel 1 Yes 26 CON 4 Carrier Freq 3 0 27 CON 70 SS...

Страница 532: ...o Code Code LCD Display Initial Value 36 PRT 72 LDT Source 0 Output Current 37 PRT 75 LDT Band Width LDT Source 10 of the Max value 38 PRT 76 LDT Freq 5 00 39 PRT 77 LDT Restart DT 250 0 40 M2 4 M2 Acc Time 10 0 41 M2 5 M2 Dec Time 20 0 42 M2 8 M2 Ctrl Mode 1 Slip Compen ...

Страница 533: ...Table of Functions 519 ...

Страница 534: ...fault conditions can be categorized as follows Level When the fault is corrected the trip or warning signal disappears and the fault is not saved in the fault history Latch When the fault is corrected and a reset input signal is provided the trip or warning signal disappears Fatal When the fault is corrected the fault trip or warning signal disappears only after the user turns off the inverter wai...

Страница 535: ...s set to a value other than 0 Out Phase Open Latch Displayed when a 3 phase inverter output has one or more phases in an open circuit condition Operates when bit 1 of PRT 05 is set to 1 In Phase Open Latch Displayed when a 3 phase inverter input has one or more phases in an open circuit condition Operates only when bit 2 of PRT 05 is set to 1 Inverter OLT Latch Displayed when the inverter has been...

Страница 536: ... writing parameters due to keypad or memory EEPRom fault ADC Off Set An error in the current sensing circuit U V W terminal current sensor etc NTC Open Latch Displayed when an error is detected in the temperature sensor of the Insulated Gate Bipolar Transistor IGBT Fan Trip Latch Displayed when an error is detected in the cooling fan Set PRT 79 to 0 to activate fan trip for models below 22 kW capa...

Страница 537: ...ree Run Option Protection LCD Display Type Description Lost Command Level Displayed when a frequency or operation command error is detected during inverter operation by controllers other than the keypad e g using a terminal block and a communication mode Activate by setting PRT 12 to any value other than 0 IO Board Trip Latch Displayed when the I O board or external communication card is not conne...

Страница 538: ...ing to receive the fan warning output signals DB Warn ED Displayed when the DB resistor usage rate exceeds the set value Set the detection level at PRT 66 Fire Mode When there is a fire Fire Mode forces the inverter to ignore certain fault trips and continue to operate Set the digital output terminals or relay OUT 31 35 or OUT 36 to 27 Fire Mode to receive the fire mode warning output signals Pipe...

Страница 539: ...layed when the function of Lsigma tunning is not normal For example auto tunning is performed without wiring the motor 9 2 Troubleshooting Fault Trips When a fault trip or warning occurs due to a protection function refer to the following table for possible causes and remedies Type Cause Remedy Over Load The load is greater than the motor s rated capacity Ensure that the motor and inverter have ap...

Страница 540: ...o the power source has a faulty connection Replace the magnetic contactor Low Voltage2 The input voltage has decreased during the operation Determine if the input voltage is above the specified value An input phase loss has occurred Check the input wiring The power supply magnetic contactor is faulty Replace the magnetic contractor Ground Trip A ground fault has occurred in the inverter output wir...

Страница 541: ...e air inlet outlet or vent The inverter cooling fan has been operated for an extended period Replace the cooling fan The ambient temperature is too high Keep the ambient temperature below 50 Over Current2 Output wiring is short circuited Check the output wiring There is a fault with the electronic semiconductor IGBT Do not operate the inverter Contact the retailer or the LSIS customer service cent...

Страница 542: ...ections R S T and U V W The charge lamp is turned off Turn on the inverter The operation command is off Turn on the operation command RUN The motor is locked Unlock the motor or lower the load level The load is too high Operate the motor independently An emergency stop signal is input Reset the emergency stop signal The wiring for the control circuit terminal is incorrect Check the wiring for the ...

Страница 543: ...on prevention The reverse rotation signal is not provided even when a 3 wire sequence is selected Check the input signal associated with the 3 wire operation and adjust as necessary The motor is overheating The load is too heavy Reduce the load Increase the Acc Dec time Check the motor parameters and set the correct values Replace the motor and the inverter with models with appropriate capacity fo...

Страница 544: ...cceleration time The combined values of the motor properties and the inverter parameter are incorrect Change the motor related parameters The stall prevention level during acceleration is low Change the stall prevention level The stall prevention level during operation is low Change the stall prevention level Motor speed varies during operation There is a high variance in load Replace the motor an...

Страница 545: ...Check that the ground resistance is less than 100Ω for 200 V inverters and less than 10Ω for 400 V inverters Check the capacity of the earth leakage breaker and make the appropriate connection based on the rated current of the inverter Lower the carrier frequency Make the cable length between the inverter and the motor as short as possible The motor vibrates severely and does not rotate normally P...

Страница 546: ... not operating normally Adjust the DC braking parameter Increase the set value for the DC braking current Increase the set value for the DC braking stopping time The output frequency does not increase to the frequency reference The frequency reference is within the jump frequency range Set the frequency reference higher than the jump frequency range The frequency reference is exceeding the upper l...

Страница 547: ...533 Troubleshooting ...

Страница 548: ...ergents may result in electric shock or damage to the product 10 1 Regular Inspection Lists 10 1 1 Daily Inspection Inspectio n area Inspection item Inspection details Inspection method Inspection standard Inspection equipment All Ambient environme nt Is the ambient temperature and humidity within the design range and is there any dust or foreign objects present Refer to 1 3 Installation Considera...

Страница 549: ...lay Measuring device Is the display value normal Check the display value on the panel Check and manage specified values Voltmeter ammeter etc Motor All Is there any abnormal vibration or noise Visual inspection No abnormality Is there any abnormal smell Check for overheating or damage 10 1 2 Annual Inspection Inspection area Inspection item Inspection details Inspection method Judgment standard In...

Страница 550: ...abnormality Smoothing condenser Measure electrostatic capacity Measure with capacity meter Rated capacity over 85 Capacity meter Relay Is there any chattering noise during operation Visual inspection No abnormality Is there any damage to the contacts Visual inspection Braking resistor Is there any damage from resistance Visual inspection No abnormality Digital multimeter anaog tester Check for dis...

Страница 551: ... fan Are any of the fan parts loose Check all connected parts and tighten all screws No abnormality Display Display device Is the display value normal Check the command value on the display device Specified and managed values must match Voltmeter Ammeter etc 10 1 3 Bi annual Inspection Inspection area Inspection item Inspection details Inspection method Judgment standard Inspection equipment Motor...

Страница 552: ...s required RTC Battery Specifications Model type CR 2032 lithium manganese Nominal voltage 3 V Nominal capacity 220 mAh Operating temperature range 20 80 degrees C Life span approximately 53 300 hrs inverter on 25 800 hrs inverter off Follow the instructions below to replace the RTC battery ESD Electrostatic discharge from the human body may damage sensitive electronic components on the PCB Theref...

Страница 553: ...er and make sure that DC link voltage has dropped to a safe level 2 Loosen the screw on the power cover then remove the power cover 0 75 30 kW Models 37 90 kW Models 3 Remove the keypad from the inverter body 0 75 30 kW Models 37 90 kW Models ...

Страница 554: ...30 kW Models 37 90 kW Models 5 Locate the RTC battery holder on the main PCB and replace the battery 0 75 90 kW Models 6 Reattach the front cover the power cover and the keypad back onto the inverter body Ensure that the inverter is turned off and DC link voltage has dropped to a safe level before opening the terminal cover and installing the RTC battery ...

Страница 555: ...allow the inverter to be exposed to dusty or humid environments If the inverter is installed in such environments for example a construction site and the inverter will be unused for an extended period remove the inverter and store it in a safe place 10 3 2 Disposal When disposing of the product categorize it as general industrial waste Recyclable materials are included in the product so recycle th...

Страница 556: ... 0 400 Hz Output Voltage V 3 Phase 200 240 V Rated input Working Voltage V Three Phase 3 Phase 200 240 VAC 15 10 Single Phase 1 Phase 240 VAC 5 10 Input Frequency Three Phase 50 60 Hz 5 Single Phase 60 Hz 5 Rated Current A 4 9 8 4 12 9 17 5 Weight kg 3 3 3 3 3 3 3 3 The standard motor capacity is based on a standard 4 pole motor The standard used for 200 V inverters is based on a 220 V supply volt...

Страница 557: ... Phase 200 240 V Rated input Working Voltage V Three Phase 3 Phase 200 240 VAC 15 10 Single Phase 1 Phase 240 VAC 5 10 Input Frequency Three Phase 50 60 Hz 5 Single Phase 60 Hz 5 Rated Current A 23 7 32 7 46 4 62 3 77 2 Weight kg 3 3 3 3 3 3 4 6 7 1 The standard motor capacity is based on a standard 4 pole motor The standard used for 200 V inverters is based on a 220 V supply voltage and 400 V inv...

Страница 558: ...ase 380 480 V Rated input Working Voltage V Three Phase 3 Phase 380 480 VAC 15 10 Single Phase 1 Phase 480 VAC 5 10 Input Frequency Three Phase 50 60 Hz 5 Single Phase 60 Hz 5 Rated Current A 2 4 4 2 6 5 8 7 Weight kg 3 3 3 3 3 3 3 3 The standard motor capacity is based on a standard 4 pole motor The standard used for 200 V inverters is based on a 220 V supply voltage and 400 V inverters are based...

Страница 559: ...age V 3 Phase 380 480 V Rated input Working Voltage V Three Phase 3 Phase 380 480 VAC 15 10 Single Phase 1 Phase 480 VAC 5 10 Input Frequency Three Phase 50 60 Hz 5 Single Phase 60 Hz 5 Rated Current A 12 2 17 5 26 5 33 4 42 5 50 7 Weight kg 3 3 3 3 3 4 4 6 4 8 7 5 The standard motor capacity is based on a standard 4 pole motor The standard used for 200 V inverters is based on a 220 V supply volta...

Страница 560: ...oltage V 3 Phase 380 480 V Rated input Working Voltage V Three Phase 3 Phase 380 480 VAC 15 10 Single Phase 1 Phase 480 VAC 5 10 Input Frequency Three Phase 50 60 Hz 5 Single Phase 60 Hz 5 Rated Current A 69 1 69 3 84 6 100 1 133 6 160 0 Weight kg 7 5 26 35 35 43 43 The standard motor capacity is based on a standard 4 pole motor The standard used for 200 V inverters is based on a 220 V supply volt...

Страница 561: ...function PID control 3 wire operation Frequency limit Second function Anti forward and reverse direction rotation Commercial transition Speed search Power braking Leakage reduction Up down operation DC braking Frequency jump Slip compensation Automatic restart Automatic tuning Energy buffering Flux braking Energy Saving Input Multi function terminal 7EA P1 P7 Select PNP Source or NPN Sink mode Fun...

Страница 562: ...urrent output voltage DC terminal voltage and others Pulse train Maximum 32 kHz 0 12 V Protection function Trip Over current trip External signal trip ARM short circuit current trip Over heat trip Input imaging trip Ground trip Motor over heat trip I O board link trip No motor trip Parameter writing trip Emergency stop trip Command loss trip External memory error CPU watchdog trip Motor under load...

Страница 563: ...ction structure IP 20 UL Open Enclosed Type 1 option UL Enclosed Type 1 is satisfied by conduit installation option Ambient temperature 10 50 2 5 current derating is applied above 40 No ice or frost should be present Working under normal load at 50 122 F it is recommended that less than 75 load is applied Ambient humidity Relative humidity less than 90 RH to avoid condensation forming Storage temp...

Страница 564: ...Technical Specification 550 11 3 External Dimensions IP 20 Type 0 75 30 kW 3 phase 37 90 kW 3 phase ...

Страница 565: ...37 232 216 5 10 5 181 5 5 0015H100 4 160 137 232 216 5 10 5 181 5 5 0022H100 4 160 137 232 216 5 10 5 181 5 5 0037H100 4 160 137 232 216 5 10 5 181 5 5 0055H100 4 160 137 232 216 5 10 5 181 5 5 0075H100 4 160 137 232 216 5 10 5 181 5 5 0110H100 4 160 137 232 216 5 10 5 181 5 5 0150H100 4 180 157 290 273 7 11 3 205 3 5 5 0185H100 4 180 157 290 273 7 11 3 205 3 5 5 0220H100 4 220 193 8 350 331 13 22...

Страница 566: ... 30 5 39 9 13 8 52 0 41 7 13 0 20 0 20 0022H100 4 6 30 5 39 9 13 8 52 0 41 7 13 0 20 0 20 0037H100 4 6 30 5 39 9 13 8 52 0 41 7 13 0 20 0 20 0055H100 4 6 30 5 39 9 13 8 52 0 41 7 13 0 20 0 20 0075H100 4 6 30 5 39 9 13 8 52 0 41 7 13 0 20 0 20 0110H100 4 6 30 5 39 9 13 8 52 0 41 7 13 0 20 0 20 0150H100 4 7 09 6 18 11 42 10 78 0 45 8 08 0 20 0 20 0185H100 4 7 09 6 18 11 42 10 78 0 45 8 08 0 20 0 20 ...

Страница 567: ...0 EBS103 c 100 MC 85a 85 15 100 100 MC 130a 130 18 5 ABS203c 150 UTS150 150 EBS203 c 200 MC 150a 150 3 Phas e 400 V 0 75 ABS33c 10 UTE100 15 EBS33C 10 MC 6a 9 1 5 10 15 10 MC 6a 9 2 2 15 15 15 MC 9a 11 3 7 15 15 15 MC 12a 13 5 5 ABS53c 50 UTE100 50 EBS33C 30 MC 22b 22 7 5 50 50 30 MC 32a 32 11 ABS63c 60 60 EBS53c 50 MC 50a 50 15 ABS63c 60 80 EBS63c 60 MC 65a 65 18 5 ABS103c 100 100 EBS103 c 100 MC...

Страница 568: ...65 100 150kA 65 100 150kA 65 100 150kA 480V 50 60Hz 25 35kA 35 65 100kA 35 65 100kA 35 65 100kA Working Voltage ABS33c ABS53c ABS63c ABS103c ABS20 3c ABS403c 240V 50 60Hz 30kA 35kA 35kA 85kA 85kA 75kA 480V 50 60Hz 7 5kA 10kA 10kA 26kA 26kA 35kA 11 5 Fuse and Reactors Specifications Products kW AC Input Fuse AC reactor DC Reactor Current A Voltage V Inductanc e mH Current A Inductanc e mH Current A...

Страница 569: ...75 250 0 15 134 90 350 0 13 160 Use Class H or RK5 UL Listed Input Fuse and UL Listed Breaker Only See the table above for the Voltage and Current rating of the fuse and the breaker Attention Utiliser UNIQUEMENT des fusibles d entrée homologués de Classe H ou RK5 UL et des disjoncteurs UL Se reporter au tableau ci dessus pour la tension et le courant nominal des fusibless et des disjoncteurs 11 6 ...

Страница 570: ... 24 5 31 8 2 4 3 1 18 5 3 Phase 400 V 0 75 M4 7 1 12 2 0 7 1 2 1 5 2 2 3 7 5 5 7 5 11 15 M5 24 5 31 8 2 4 3 1 18 5 22 30 37 M8 61 2 91 8 6 9 45 55 75 90 Control Circuit Terminal Screw Specification Terminal Terminal Screw Size Screw Torque Kgf cm Nm P1 P7 CM VR V1 I2 AO Q1 EG 24 TI TO SA SB SC S S M2 2 2 2 5 0 22 0 25 ...

Страница 571: ...rovoquer des courts circuits et des dysfonctionnements Ne pas trop serrer la vis car cela risque d endommager les bornes et de provoquer des courts circuits et des dysfonctionnements Utiliser uniquement des fils de cuivre avec une valeur nominale de 600 V 90 pour le câblage de la borne d alimentation et une valeur nominale de 300 V 75 pour le câblage de la borne de commande 11 7 Dynamic breaking u...

Страница 572: ...t Non UL type Type B Resistance of DB Resistor refer to the manual of DB Unit 200V 30 37 kW SV037DBH 2 Refer to the appearance of Group 2 400V 30 37 kW SV037DBH 4 45 55 kW 75kW SV075DBH 4 SV075DB 4 Refer to the appearance of Group 3 185 220kW SV2200DB 4 Refer to the appearance of Group 4 280 375Kw SV2200DB 4 2Set Type C 200V 30 37 kW LSLV0370DBU 2LN Refer to the appearance of Group 5 ...

Страница 573: ...up 5 LSLV0750DBU 2HN Refer to the appearance of Group 6 400V 30 37 kW LSLV0370DBU 4LN Refer to the appearance of Group 5 LSLV0370DBU 4HN Refer to the appearance of Group 6 45 55 kW 75kW LSLV0750DBU 4LN Refer to the appearance of Group 5 90 kW LSLV0900DBU 4HN Refer to the appearance of Group 6 110 132kW LSLV1320DBU 4HN 160kW LSLV1600DBU 4HN 185 220kW LSLV2200DBU 4HN 280 375Kw LSLV2200DBU 4HN 2Set ...

Страница 574: ...watt breaking torque ED of DB Resistor for Type A DB Unit refer to the table of 11 7 6 DB Resistors and Resistance of DB Resistor for type B and C refer to the manual of DB Unit 11 7 2 Terminal arrangement Group 1 Group 2 Terminals Functions G Ground Terminal B2 Terminal for connection with B2 of DBU B1 Terminal for connection with B1 of DBU N Terminal for connection with N of Inverter P Terminal ...

Страница 575: ... connection with N of Inverter P Terminal for connection with P of Inverter Group 5 Terminals Functions P Terminal for connection with P of Inverter N Terminal for connection with N of Inverter B1 Terminal for connection with B1 of DBU B2 Terminal for connection with B2 of DBU N C Unused E Ground Terminal Group6 A Frame 37kW 75kW 4 P N B1 B2 N C E P N B1 B2 N C E ...

Страница 576: ...nnection with P of Inverter N Terminal for connection with N of Inverter B1 Terminal for connection with B1 of DBU B2 Terminal for connection with B2 of DBU E Unused Note You must refer to dynamic braking unit manual for choice the braking resistor to use the dynamic braking unit P N B1 B2 E ...

Страница 577: ...Technical Specification 563 11 7 3 Dynamic Breaking DB Unit DB resistor basic wiring DBU Terminals Description B1 B2 Wire correctly referring to wiring diagram DB Resistors connect with B1 B2 of DB Unit ...

Страница 578: ... R2 R1 R S T IM W V U N WIRING P P2 B1 적 품 제 용 P G N B2 R2 R1 R S T IM W V U N WIRING P P2 B1 P G N B2 R2 R1 R S T IM W V U N WIRING P P2 B1 적 품 제 용 IM ynamic R T S U N P P2 W V D B1 N P G WIRING B2 B2 B1 U raking B nit 166 2 5 5 25 8 5 24 5 2 Ø 5 5 80 80 123 Dynamic Braking Unit RESE T POWE R RUN OHT OCT 231 5 1 2 15 27 130 7 5 ...

Страница 579: ...ltage Capacity of applied motor Dimension mm Hole position for installation mm Weight Hole size for installation V kW W H H2 D W1 H1 kg 220 15 140 227 4 192 76 4 125 215 4 1 50 M4 22 1 55 37 1 57 75 1 84 440 15 1 53 22 1 55 37 1 56 75 1 85 ...

Страница 580: ...on 566 Group6 Fram e Voltag e Capaci ty of applied motor ED Dimension mm Hole position for installation mm Wei ght Hole size for insta llatio n E D W H H2 D W1 H1 Kg A Fra 220 V 37 kW 50 200 219 190 165 2 160 208 5 3 77 M6 ...

Страница 581: ...Fra me 440 V 160 kW 50 240 380 351 200 369 5 9 40 220 kW 50 9 70 11 7 5 Display Functions DB Resistors connect with B1 B2 of DB Unit DBU has 3 LEDs Red LED which is located in middle displays supplying main power one Green LED which is right side displays under breaking and another green LED which is left side displays Over Heat Trip OHT Displays Function description ...

Страница 582: ...aking if the temperature is exceeded over setting value due to over heat of Heatsink Cut the TURN ON signal of DBU and LED is turn on by working overheat protection function 11 7 6 DB Resistors Product kW DB unit Resistor Ω Rated capacity W Reference 3 Phase 200 V 0 75 150 150 150 braking torque 5 ED 1 5 60 300 2 2 50 400 3 7 33 600 5 5 25 600 7 5 20 750 11 15 1200 15 10 1500 18 5 8 2000 3 Phase 4...

Страница 583: ...0V and 0 75 30kW 400V because basically the dynamic braking unit is built in The resistance rated capacity breaking torque ED of DB Resistor are valid only for the DB unit of type A and the values of DB Resistor for type B and C refer to the manual of DB Unit Rating Watt of DBU has to be doubled when ED is doubled 11 8 Inverter Continuous Rated Current Derating Derating by carrier frequency The co...

Страница 584: ... 22 30 kW 37 55 kW 75 90 kW fs def kHz 3 3 3 3 3 fs c kHz 8 8 8 fs max kHz 15 15 15 10 7 DR1 70 65 65 DR2 60 55 50 60 55 fs def Switching frequency for continued operation fs c Switching frequency where the firstcurrent derating ends ffs max The maximum switching frequency where the secondcurrent derating begins ...

Страница 585: ...Technical Specification 571 ...

Страница 586: ...ing by Ambient Temperature and Installation Type Ambient temperature and installation type determine the constant rated current of the inverter Refer to the following graph A 2 5 current derating is applied during operation when the ambient temperature is above 40 The inverter must be operated at less than 75 of its rated capacity when the ambient temperature is above 50 ...

Страница 587: ...th a three phase 60 Hz supply However under single phase use the DC bus ripple becomes 120 Hz and the VFDs DC bus circuit is subject to higher stress in order to deliver equivalent power Additionally input currents and harmonics increase beyond those encountered with three phase input Input current distortion of 90 THD and greater can be expected under single phase input compared to approximately ...

Страница 588: ...e converter will approximately double creating another derating consideration for the VFD Input current harmonic distortion will increase beyond that with a three phase supply making the overall input power factor low Input current distortion over 100 is likely under single phase conditions without a reactor Therefore the reactor is always required When using a motor that is selected by the three ...

Страница 589: ...ase input is lower than the equivalent of a three phase input Therefore the maximum output voltage motor voltage will be lower with a single phase input The minimum input voltage must be no less than 228Vac for 240 volt models and 456Vac for 480 volt models to ensure motor voltage production of 207Vac and 415Vac respectively Thus if full motor torque must be developed near base speed full power it...

Страница 590: ...es can be used for single phase as well If phase open trip occurs please turn off the input phase open protection PRT 05 Protection for output current like OCT or IOLT is based on 3 phase input ratings which is larger than single phase input User should set the parameters that are relative to motor information BAS 11 16 overload trip PRT 17 22 and E thermal functions PRT 40 43 The minimum input vo...

Страница 591: ...e product warranty covers product malfunctions under normal operating conditions for 12 months from the date of installation If the date of installation is unknown the product warranty is valid for 18 months from the date of manufacturing Please note that the product warranty terms may vary depending on purchase or installation contracts Warranty Service Information During the product warranty per...

Страница 592: ... negligence power supply problems or from other appliances being connected to the product acts of nature fire flood earthquake gas accidents etc modifications or repair by unauthorized persons missing authentic LSIS rating plates expired warranty period Visit Our Website Visit us at http www lsis com for detailed service information ...

Страница 593: ...onics manufacturers and the EMC guidelines for safe noise control Low Voltage Directive We have confirmed that our products comply with the Low Voltage Directive EN 61800 5 1 EMC Directive The Directive defines the requirements for immunity and emissions of electrical equipment used within the European Union The EMC product standard EN 61800 3 covers requirements stated for drives EAC mark The EAC...

Страница 594: ...580 ...

Страница 595: ...581 ...

Страница 596: ...582 ...

Страница 597: ...ency 120 Ramp T Mode 120 Acc Dec stop 83 130 Acc Dec time 120 Acc Dec time switch frequency 125 configuration via multi function terminal 124 maximum frequency 120 operation frequency 123 Acc Dec time configuration 82 accelerating start 83 add User group UserGrp SelKey 284 ADV advanced 62 ADV Expanded funtction group 449 advanced features group 62 Advanced function groupRefer to ADV advanced funct...

Страница 598: ...equency calculation 164 main reference 160 auxiliary motor PID compensation 312 B B terminal Normally Closed 156 BACnet 376 420 analog input object 428 analog value object 426 binary input object 429 binary object 427 communication standard 420 data link layer 424 defining 420 error message 431 MAC ID Sevice object Instance 424 Max Master Property 424 multi state input object 431 multi state objec...

Страница 599: ...ry map 382 parameter group for data transmission 383 PLC 373 saving parameters defined by communication 381 setting virtual multi function input 381 Communication function group Refer to COM communication function group communication system configuration 374 compatible common area parameter 399 Compressor MC1 538 CON Control function group 62 457 Config CNF mode 287 inverter S W version 287 keypad...

Страница 600: ... braking DB resistor configuration 357 E earth leakage breaker 565 Easy Start On 286 EEP Rom Empty 278 EG terminal 39 electronic thermal overheating protection ETH 337 EMC filter 42 asymmetric power source 42 disabling 42 44 45 enable 44 enabling 44 45 emergency stop fault trip Refer to BX Enclosed Type 1 582 energy saving 216 energy saving operation 263 automatic energy saving operation 264 manua...

Страница 601: ...rip 370 Pipe Broken Warning 371 Under Load Trip 370 FE Frame Error 393 ferrite 39 fieldbus 91 110 communication option 153 FIFO FILO 296 filter time constant 93 filter time constant number 155 Fire mode 261 Fire Mode Warning 558 flow compensation 214 maximum compensation value 215 flux braking 345 forward or reverse run prevention 114 free run stop 84 145 frequency hold by analog input 107 frequen...

Страница 602: ... 278 input power voltage settings 277 input terminal 37 156 A NO or B NC terminal configuration 156 bit setting 156 CM terminal 37 I2 terminal 38 NO NC configuration 156 P1 P7 terminal 37 TI terminal 38 V1 terminal 37 VR terminal 37 input terminal contact Acontact 351 B contact 351 Input terminal function group Refer to IN Input terminal function group inspection annual inspection 569 bi annual in...

Страница 603: ...2 selecting a display mode 64 selecting the status bar display item 75 setting the monitor display items 74 switching between groups in Parameter Display mode 67 switching between groups in User Macro mode 68 keypad title update 287 keypad trip mode 531 kinetic energy buffering 256 L latch 553 LCD display 55 leakage breaker 586 learning basic features 81 level 553 level dectectiontrip restart time...

Страница 604: ...9 Constant Torque 290 Coolong Tower 289 Supply Fan 289 Vacuum Pump 290 magnetic contactor 32 586 main capacitor life estimation 367 CAP Level 1 368 CAP Level 2 368 maintenance 568 manual torque boost 83 137 master 374 maximum allowed prospective short circuit current iv megger test 570 572 Metasys N2 376 analog input 435 analog output 434 binary input 436 binary output 435 communication standard 4...

Страница 605: ...function output terminal and relay settings 323 multi function output terminal delay time settings 330 multi function relay1 category Relay 1 471 multi function relay2 category Relay 2 473 multi function relay3category Relay 3 473 multi function relay4 category Relay 4 473 multi function relay5 category Relay 5 473 trip output by multi function output terminal and relay 329 multi function terminal...

Страница 606: ... changed parameter 283 hide parameter mode 281 initializing the parameters 79 parameter initialization 280 parameter lock 282 parameter settings 72 password 281 282 Parameter Initialization 280 parameter mode 61 parameter setting mode 62 ParaWrite Trip 557 parmeter read write save 278 part names 3 parts illustrated 3 parts life 367 capacitor life estimation 367 fan life 368 password 281 282 419 pa...

Страница 607: ...on group 520 Pulse output terminal Refer to TO terminal pump clean 218 Pump clean trip Refer to Pump Clean Trip PWM 272 frequency modulation 271 Q quantizing 96 Quantizing noise 96 quick reference v R R S T terminals 29 31 562 R S T terminals 32 rating braking resistor rated capacity 589 derating 590 rated motor current 176 rated motor voltage 238 rated slip frequency 176 rated slip speed 176 rati...

Страница 608: ...Flying Start 1 265 Flying Start 2 265 options 266 P I gain 268 speed unit selection Hz or Rpm 108 square reduction 83 square reduction load 133 V F pattern operation 133 stall 345 bit On Off 346 stall prevention 345 start after DC braking 83 start at power on PowerOn Resume 118 Power on Run 116 start mode 141 acceleration start 141 start after DC braking 141 Start End Ramp operation 223 Station ID...

Страница 609: ...137 overexcitation 138 trip 553 erasing trip history 287 fault waring list 370 trip no motor trip 366 trip status reset 365 troubleshooting 558 Trip mode 61 Trip mode 531 troubleshooting 553 fault trips 558 other faults 561 U U M mode 284 385 U V W terminals 29 31 32 562 Under Load Under Load Trip 359 554 Under Load Warning 359 557 underload fault trip 370 underload warning 371 underload fault tri...

Страница 610: ...AO terminal VR terminal 37 W warning 370 553 fault warning list 370 warning message 557 Warning 371 wiring 10 24 circuit breaker 586 control terminal board wiring 34 copper cable 24 disassembling the cover 24 ferrite 39 ground 26 power terminal board 27 re assembling the cover 46 wiring length 39 WM write mode error 393 Write parameter fault trip Refer to ParaWrite Trip ...

Отзывы: