31
Using DVR Netviewer
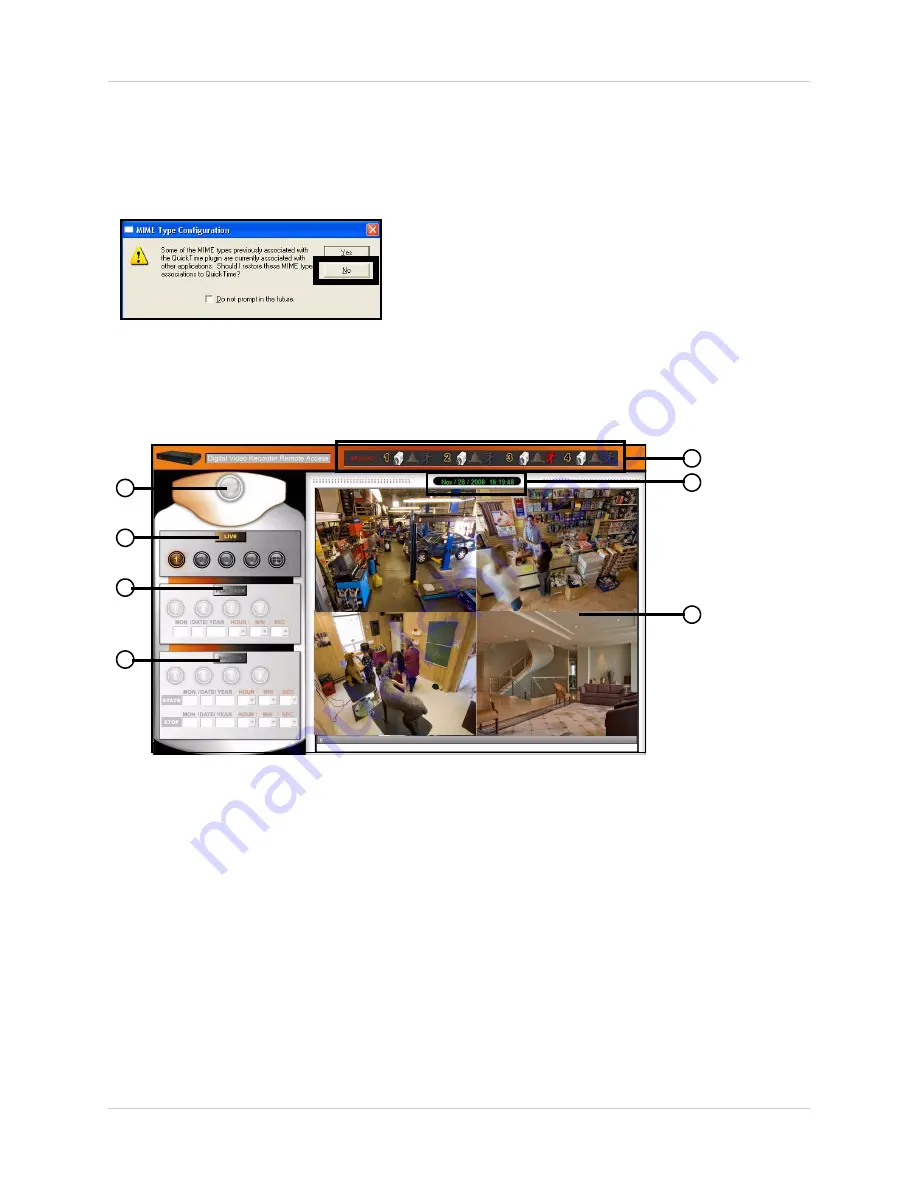
4. If necessary, select your MIME type* configuration. DVR Netviewer uses Quicktime™ for live
video streaming. Select
No
to maintain your MIME type association with your default media
player. If you select Yes, the MIME types will be associated with QuickTime™. Check the
box to avoid seeing the MIME type prompt in the future.
Remote Access Main Screen
Upon login, the DVR Netviewer main screen appears in your browser. By default, DVR Netviewer
opens in Live Viewing mode.
1.
SETUP
: Click to open the Setup menu.
2.
LIVE
: Click to view live, streaming video; view single channels in full-screen, or view all
channels in quad split-screen.
3.
PLAYBACK
: Click to view recorded video from the DVR. Select channel and enter date and
time; playback controls appear when Playback mode selected.
4.
BACKUP
: Click to save recorded video data to your PC.
5.
Message bar
: Indicates the status of the connected cameras; icons will change to display
motion, alarm, or camera loss
6.
Date/Time
: Present data and time on the networked DVR.
7.
Display screen
: Live, playback, and backup modes. Displays channels in single channel
full-screen, or all channels in quad split-screen; click the Pause button to pause the live video
stream.
*Multimedia Internet Mail extension—an essential component of Internet communication (HTTP protocol).
Figure 18.1 MIME Type
Figure 19.0 DVR Netviewer main screen
1
2
3
4
5
6
7


