


32
Bioscience Solutions
– 4D-Nucleofector™ Manual
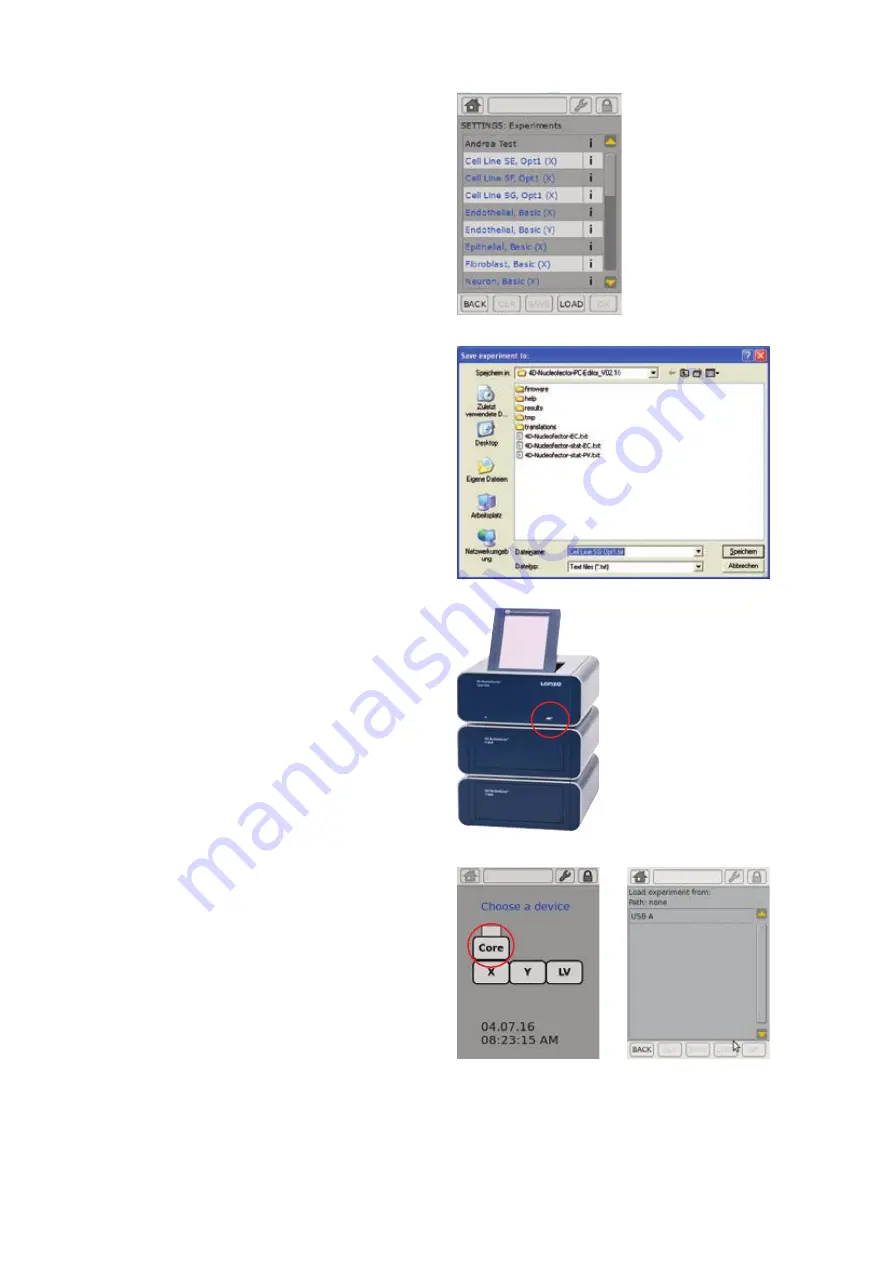
Transfer of Experiments from the PC Editor
– Open PC Editor by double clicking on the file
4D-Nucleofector_Editor.exe.
– Define and save your experiment with the PC Editor
– Plug USB stick into a USB port of your PC.
– Open the “Settings” menu by pressing the “Wrench” icon and
select the menu “Experiments”.
– Select your new experiment by clicking the appropriate field
(figure 2.29, A).
– This will activate the
“SAVE”
keys of the PC Editor
– Press
“SAVE” .
– A Windows® Explorer® screen will open allowing you to save the
experiment to the appropriate location (figure 2.29, B).
– Select the USB stick and press
“SAVE”.
– Unplug the USB stick from your PC as soon as the experiment file
has been saved.
NOTE:
Do not unplug the stick while saving!
– Turn on the 4D-Nucleofector™ System.
– Plug USB stick with new experiment into the USB port at the front
of the Core Unit (figure 2.29, C).
– Press the Core icon to open the “Settings” menu (figure 2.29, D).
– Press “EXPERIMENTS” to open the experiment menu.
– Press
“LOAD”.
– A screen appears displaying “Load experiment from” (figure 2.29, E)
– Select the USB stick by double clicking on
“USB”.
– Select your experiment and press
“OK”
to load it.
– Press
“OK”
to leave the experiment menu.
– Your new experiment is now saved onto the 4D-Nucleofector™
System and can be used directly.
B
C
E
D
Figure 2.29:
Transferring experiments from the PC Editor
A


