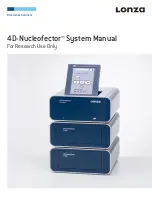
4D-Nucleofector™ Manual –
Bioscience Solutions
3
Content
1
The Nucleofector™ Technology
4
2
Operating Instructions
6
2.1 Restrictions
6
2.2 Maintenance
6
2.3
Safety Instructions – Please Read Carefully
7
2.4
Waste Disposal
7
2.5
4D-Nucleofector™ System Components
8
2.6
Set-up Instructions
9
2.7
General Use Instructions
10
2.7.1
Turning on the 4D-Nucleofector™ System
10
2.7.2
Adjusting the Position of the Touch Screen
10
2.7.3
Operating Software
11
2.7.4
Turning off the 4D-Nucleofector™ System
11
2.8
General Instructions for Running a Nucleofection Experiment 12
2.8.1 Overview
12
2.8.2 Unit and Vessel Selection
13
2.8.3 Experiment Parameters - Overview
13
2.8.4 Using a Predefined Experiment
14
2.9
4D-Nucleofector™ X Unit
15
2.9.1 Defining a New Experiment
15
2.9.2 Loading Samples
16
2.9.3 Running the Experiment
17
2.10 4D-Nucleofector™ Y Unit
18
2.10.1 Defining a New Experiment
18
2.10.2 Loading Samples
19
2.10.3 Running the Experiment
19
2.11 4D-Nucleofector™ LV Unit
20
2.11.1 Using the 1 mL Nucleocuvette™ Cartridge
(Fixed Volume)
21
2.11.1.1
Defining a New Experiment
21
2.11.1.2
Loading Samples
22
2.11.1.3
Running the Experiment
22
2.11.2
Using the LV Nucleocuvette™ Cartridge
(Scalable Volume)
23
2.11.2.1
Mounting an LV Nucleocuvette™
Cartridge
23
2.11.2.2
Defining a New Experiment
25
2.11.2.3
Running the Experiment
27
2.12 Additional Settings and Options
28
2.12.1 Experiments
28
2.12.2 Results
29
2.12.3 Custom Programs
29
2.12.4 Synchronize
30
2.12.5 Cleaning the Nucleofection Vessel Tray
(X or Y Unit)
30
2.12.6 Lonza Programs
30
2.12.7 Firmware Update
30
2.13 PC Editor Software
31
2.14 96-well Shuttle™ Mode
33
3 Troubleshooting
33
3.1
Suboptimal Transfection Results
33
3.2
Rescue of Samples (X and Y Unit)
34
4
Error Codes of the
4D-Nucleofector™ System
35
4.1
Arc Discharge Correction
35
5
Purchaser Notification
37
6
Technical Specifications
38


