


28
Bioscience Solutions
– 4D-Nucleofector™ Manual
2.12 Additional Settings and
Options
This chapter explains how to change settings like date and time and how
to organize and manage your stored experiments, results and custom
programs.
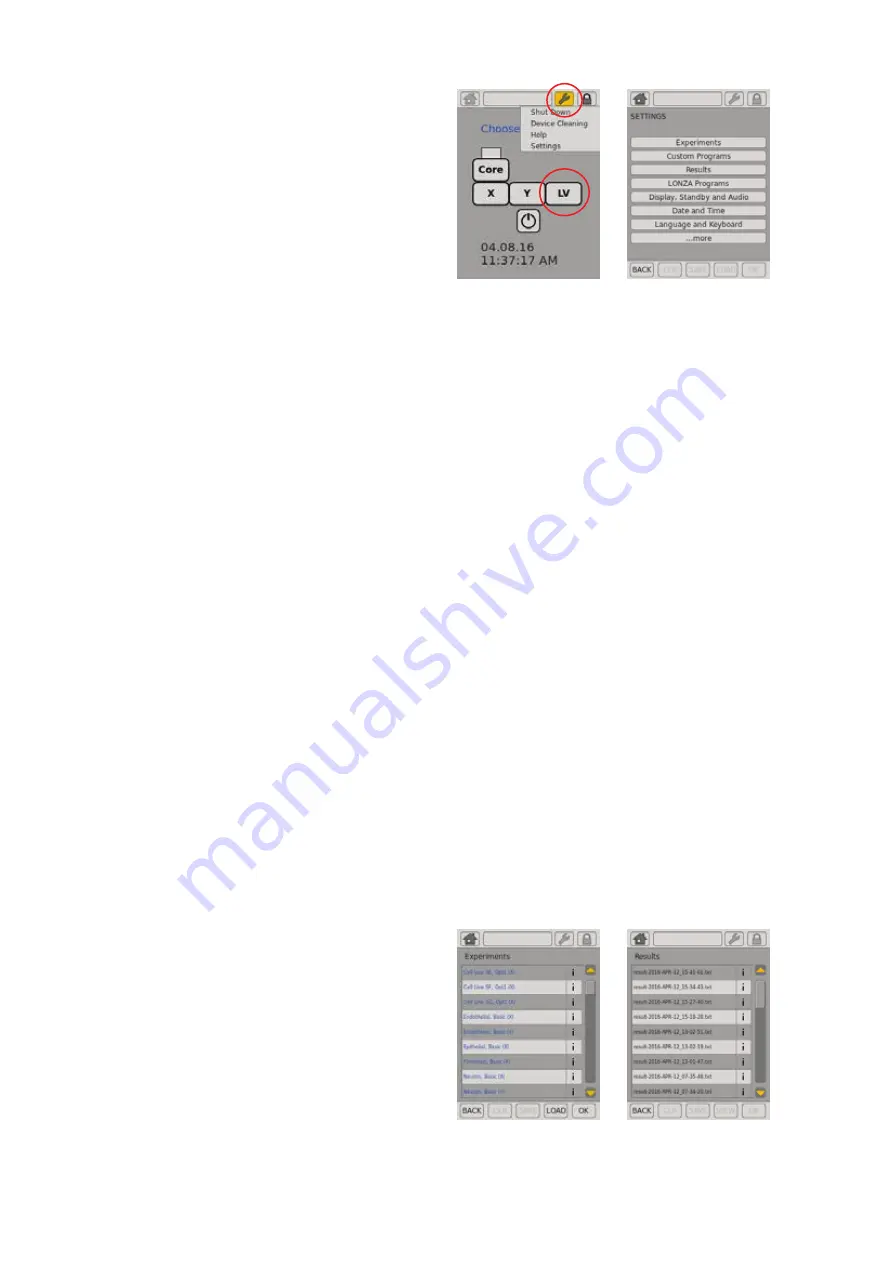
– Activate the “Settings” menu by either pressing the
“Core Unit”
icon or
the
“Wrench”
icon submenu “Settings” (figure 2.27, A).
– A screen appears displaying a list of setting options (figure 2.27, B):
–
Experiments
– display user-defined experiments (see chapter
2.12.1 for more information)
–
Custom programs
– create and manage custom Nucleofection
programs (see chapter 2.12.3 for more information)
–
Results
– reopen or load result files onto a USB stick plugged
into the USB port in front of the Core Unit (see chapter 2.12.2 for
more information)
–
Lonza programs
– version information about the cell type list and
option to upload a new cell type program list (see chapter 2.12.6)
–
Display and audio
– adjust brightness of the touch screen display,
time to activate standby and deactivate the touch tone
–
Date and time
– set and format date and time
–
Language and keyboard
– change language settings for display
functions and keyboard
–
... more
– to switch between pages of the settings list
–
Firmware update
– update the system software (see chapter
2.12.7for details)
–
Device cleaning
– opens the tray of the functional modules to
remove it for cleaning (see chapter 2.12.5 for details)
–
System restart
– restart system
–
Shut down
– activates the transportation lock (for X and Y Unit)
and shuts down the system (software version 4.0 or later, in older
versions it may not be available or only activate the transport
mode; also see chapter 2.7.4)
–
Synchronize
– supports synchronization of the actual firmware
with the PC Editor (see chapter 2.12.4 and chapter 2.13 for more
information)
–
Version
– displays firmware version and serial number of all
modules
To open one of the setting menus touch the appropriate field. Depending on
the menu, several parameter settings will appear. Most of the menus are
intuitive. The menus requiring additional information are described below.
2.12.1
Experiments
This menu displays a list of experiments and allows you to view additional
information by pressing the
“i”
field. Erase existing experiments by
pressing
“CLR”
. To load a predefined experiment from a USB stick, insert
the stick into the USB port on the front of the Core Unit, press
“LOAD”
and
follow the instructions displayed on the screen (figure 2.27, C).
Figure 2.27:
Additional settings and options for organizing stored experiments
C Menu “Experiments”
D Menu “Results”
B
A Activate Settings


