


83
Controller Installation and Operation
Due to our policy of continuous product innovation, some specifications may change without notification.
©LG Electronics U.S.A., Inc., Englewood Cliffs, NJ. All rights reserved. “LG Life’s Good” is a registered trademark of LG Corp.
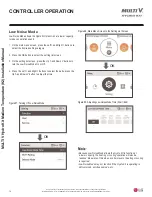
Schedule Setting
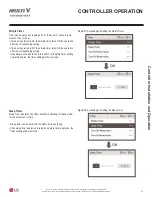
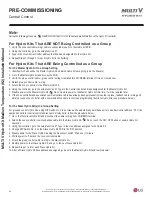
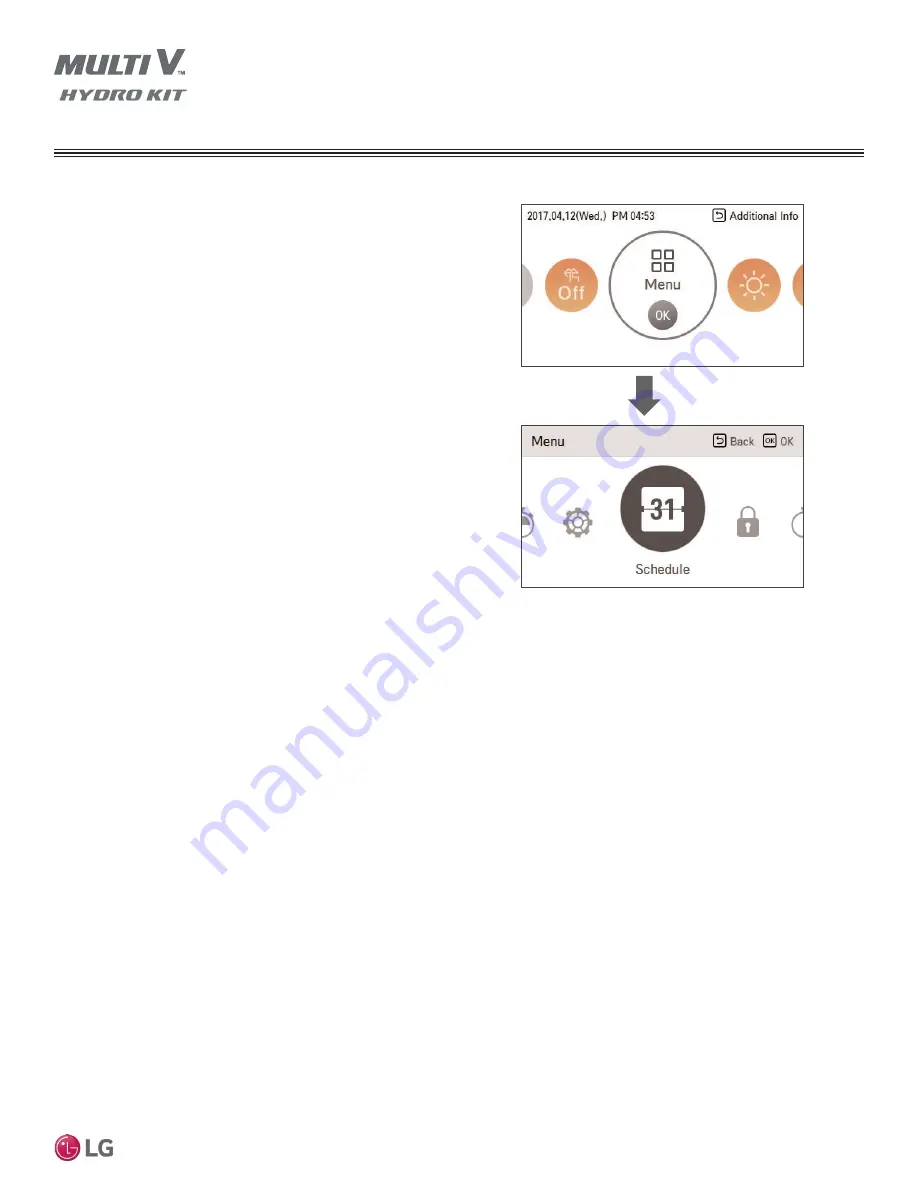
How to Enter the Schedule Setting Menu
1. On the main menu screen, press the Left < and Right > buttons to
select the desired setting category.
2. Press the OK button to select the schedule setting list screen.
3.
2QWKHVFKHGXOHVHWWLQJOLVWVFUHHQSUHVVWKH8SȁDQG'RZQ9
buttons to select the menu to set.
4. Press the OK button to access the detail screen.
OK
Figure 101: Main Menu Screen to the Schedule Setting Menu Screen.
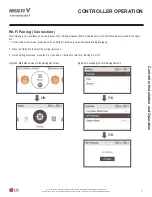
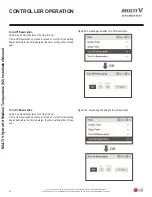
Daily Schedule
Use the Daily Schedule function to check the status of the timer
(schedule) saved in the remote controller.
1. On the schedule list, select daily schedule status.
2. Press the OK button to access the detail daily schedule status
screen.
3. Press the Left < and Right > buttons to check the timer informa-
tion for other dates.
4.
3UHVVWKH8SȁDQG'RZQ9EXWWRQVWRFKHFNWKHFRUUHVSRQGLQJGDWH¶VRWKHUWLPHULQIRUPDWLRQ
5. Select the timer information, and press the OK button to access the corresponding timer’s edit screen.
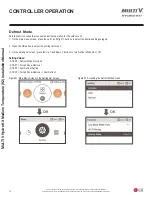
Schedules and Edit
The status of the timer (schedule) saved in the remote controller can be checked in the Schedules and Edit function.
1. On the schedule list, select daily schedule status.
2. Press the OK button to access the daily schedule status detail screen.
3. Press the Left < and Right > buttons to check timer information for other dates.
4. To edit timer information for saved schedules:
•
3UHVVWKH8SȁDQG'RZQ9EXWWRQVWRVHOHFWWKHVFKHGXOHWRHGLWDQGWKHQSUHVVWKH2.EXWWRQWRDFFHVVWKHHGLWVFUHHQ
• Select the timer information, and press then press the OK button to access the edit screen of the corresponding timer
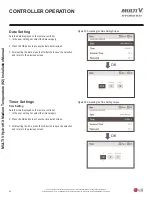
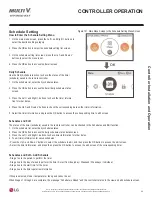
Schedules and Edit – Add Schedule
• Stage 1 sets the period to perform the timer.
• Stage 2 sets the day of week to perform the timer. Select from Everyday / Weekend / Weekdays / Individual.
• Stage 3 sets the start time for the timer.
• Stage 4 sets the timer operation information.
If Stop is selected, mode / temperature / fan speed cannot be set.
When Stages 1 through 4 are complete, the message “Schedule is Added” and the controller returns to the view and edit schedule screen.
CONTROLLER OPERATION