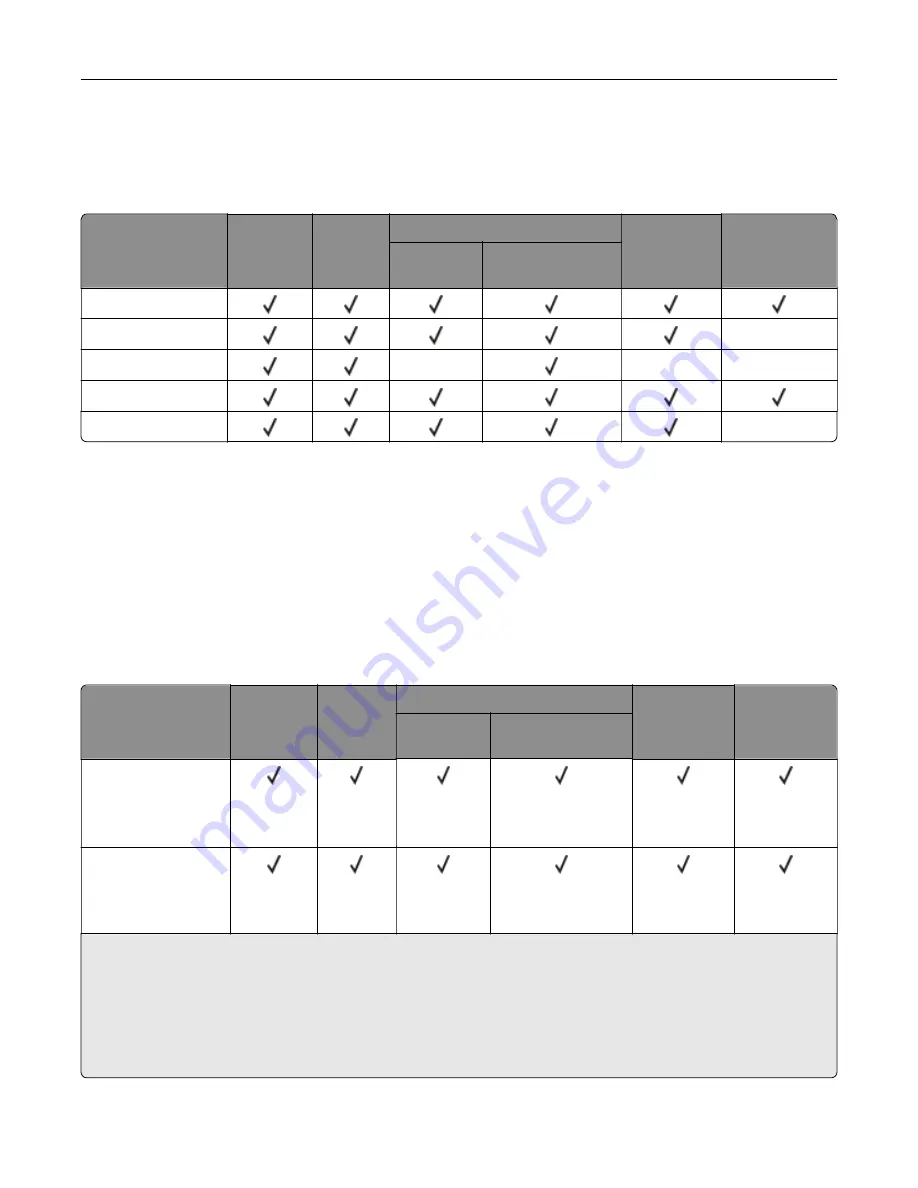
type as the 550
‑
sheet tray. The integrated multipurpose feeder supports different paper sizes, types,
and weights.
•
Labels, envelopes, and card stock always print at 25 pages per minute.
•
The ADF supports only plain paper.
Paper type
Standard
250
‑
sheet
tray
Manual
feeder
Optional 650
‑
sheet duo tray
Optional
550
‑
sheet
tray
Two
‑
sided
printing
550
‑
sheet
tray
Multipurpose
feeder
Plain paper
Card stock
X
Envelopes
X
X
X
Paper labels
Vinyl labels
X
Supported paper weights
Notes:
•
Your printer model may have a 650
‑
sheet duo tray, which consists of a 550
‑
sheet tray and an integrated
100
‑
sheet multipurpose feeder. The 550
‑
sheet tray of the 650
‑
sheet duo tray supports the same paper
types as the 550
‑
sheet tray. The integrated multipurpose feeder supports different paper sizes, types,
and weights.
•
Labels, envelopes, and card stock always print at 25 pages per minute.
•
The ADF supports 52–120 g/m
2
(14–32 lb bond) paper.
Paper type and
weight
Standard
250
‑
sheet
tray
Manual
feeder
Optional 650
‑
sheet duo tray
Optional
550
‑
sheet
tray
Two
‑
sided
printing
550
‑
sheet
tray
Multipurpose
feeder
Light paper
1
60–74.9 g/m
2
grain long (16–
19.9
‑
lb bond)
Plain paper
75–90.3 g/m
2
grain long (20–
24
‑
lb bond)
1
Paper less than 75 g/m
2
(20 lb) must be printed with Paper Type set to Light Paper. Failure to do so may cause
excessive curl which can lead to feeding errors, especially in more humid environments.
2
Labels and other specialty media are supported for occasional use and must be tested for acceptability.
3
Paper labels up to 105 g/m
2
(28
‑
lb bond) are supported.
4
100% cotton content maximum weight is 24
‑
lb bond.
5
28
‑
lb bond envelopes are limited to 25% cotton content.
Paper support
29
Содержание MX-C357F
Страница 40: ...3 From the Shortcut Type menu select E mail and then configure the settings 4 Apply the changes E mailing 40 ...
Страница 132: ...2 Remove the used toner cartridge 3 Unpack the new toner cartridge Maintaining the printer 132 ...
Страница 136: ...6 Insert the new waste toner bottle 7 Insert the right side cover Maintaining the printer 136 ...
Страница 143: ...2 Remove the jammed paper Note Make sure that all paper fragments are removed Clearing jams 143 ...
Страница 147: ...2 Remove the jammed paper Note Make sure that all paper fragments are removed 3 Close door A Clearing jams 147 ...
Страница 150: ...4 Close doors A and B Clearing jams 150 ...
Страница 153: ...3 Remove the jammed paper Note Make sure that all paper fragments are removed 4 Close door C Clearing jams 153 ...


