


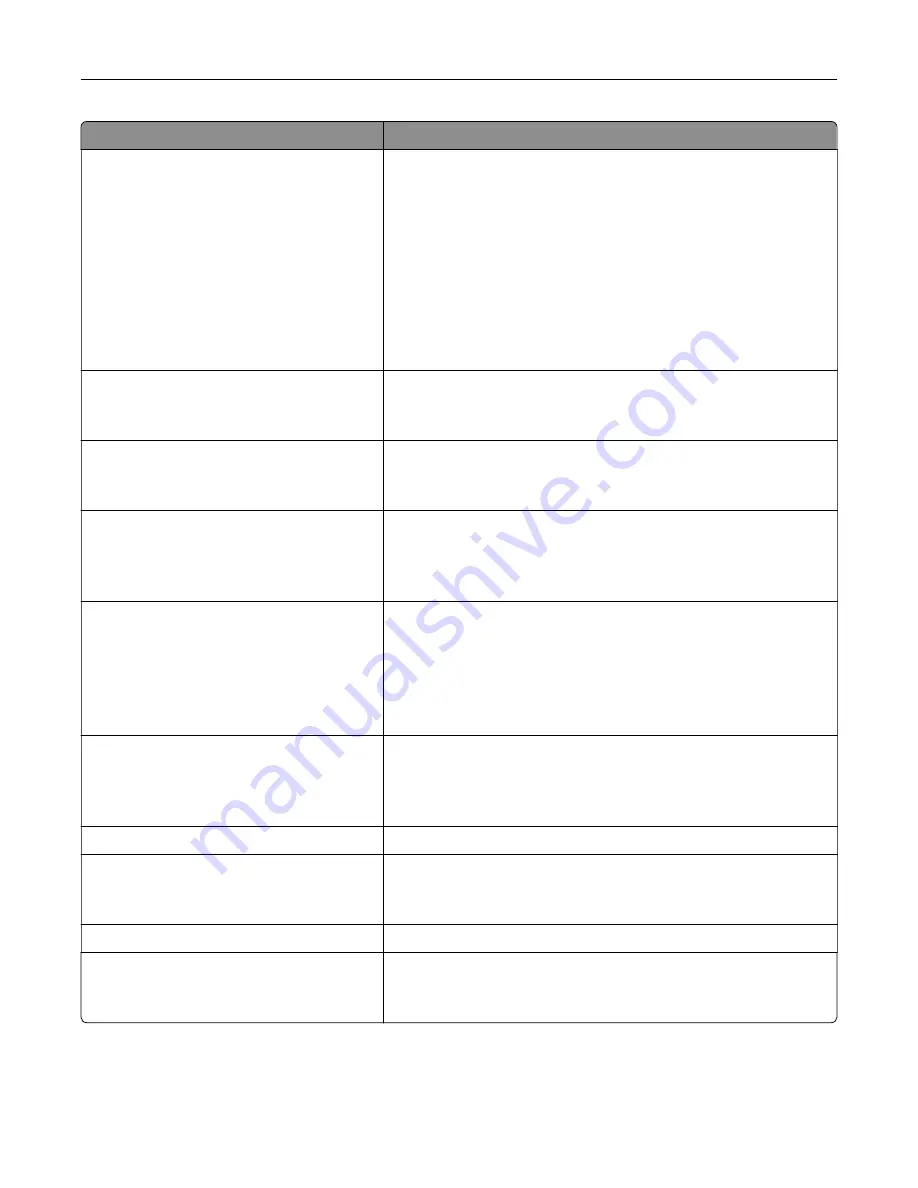
Menu item
Description
Wi
‑
Fi Protected Setup
WPS Auto Detect
Off
On*
Start Push Button Method
Start PIN Method
Establish a Wi
‑
Fi network and enable network security.
Notes:
•
WPS Auto Detect appears only when the Wireless Security
Mode is set to WEP.
•
Start Push-Button Method connects the printer to a Wi
‑
Fi
network when buttons on both the printer and the access point
(wireless router) are pressed within a given time.
•
Start PIN Method connects the printer to a Wi
‑
Fi network when
a PIN on the printer is entered into the wireless settings of the
access point.
Network Mode
BSS Type
Infrastructure*
Specify the network mode.
Enable Wi
‑
Fi Direct
On
Off*
Enable Wi-Fi Direct
‑
capable devices to connect directly to the printer.
Compatibility
802.11b/g/n (2.4GHz)*
802.11a/b/g/n/ac (2.4GHz/5GHz)
802.11a/n/ac (5GHz)
Specify the standard for the Wi
‑
Fi network.
Note:
802.11a/b/g/n/ac (2.4GHz/5GHz) and 802.11a/n/ac (5GHz) only
appear when a Wi
‑
Fi option is installed.
Wireless Security Mode
Disabled*
WEP
WPA2/WPA-Personal
WPA2-Personal
802.1x - RADIUS
Set the security mode for connecting the printer to Wi
‑
Fi devices.
Note:
802.1x - RADIUS can be configured only from the Embedded
Web Server.
WEP Authentication Mode
Auto*
Open
Shared
Set the type of Wireless Encryption Protocol (WEP) for the printer.
Note:
This menu item appears only when the Wireless Security
Mode is set to WEP.
Set WEP Key
Specify a WEP password for secure Wi
‑
Fi connection.
WPA2/WPA Personal
AES
Enable Wi
‑
Fi security through Wi-Fi Protected Access (WPA).
Note:
This menu item appears only when the Wireless Security
Mode is set to WPA2/WPA-Personal.
Set Pre
‑
Shared Key
Set the password for secure Wi
‑
Fi connection.
WPA2-Personal
AES
Enable Wi
‑
Fi security through WPA2.
Note:
This menu item appears only when the Wireless Security
Mode is set to WPA2-Personal.
Understanding the printer menus
101
Содержание MX-C357F
Страница 40: ...3 From the Shortcut Type menu select E mail and then configure the settings 4 Apply the changes E mailing 40 ...
Страница 132: ...2 Remove the used toner cartridge 3 Unpack the new toner cartridge Maintaining the printer 132 ...
Страница 136: ...6 Insert the new waste toner bottle 7 Insert the right side cover Maintaining the printer 136 ...
Страница 143: ...2 Remove the jammed paper Note Make sure that all paper fragments are removed Clearing jams 143 ...
Страница 147: ...2 Remove the jammed paper Note Make sure that all paper fragments are removed 3 Close door A Clearing jams 147 ...
Страница 150: ...4 Close doors A and B Clearing jams 150 ...
Страница 153: ...3 Remove the jammed paper Note Make sure that all paper fragments are removed 4 Close door C Clearing jams 153 ...


