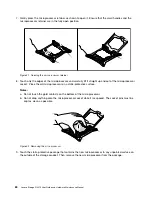
8. Carefully press the PCIe card straight into the PCIe slot until it is securely seated.
Figure 32. Installing a PCIe card
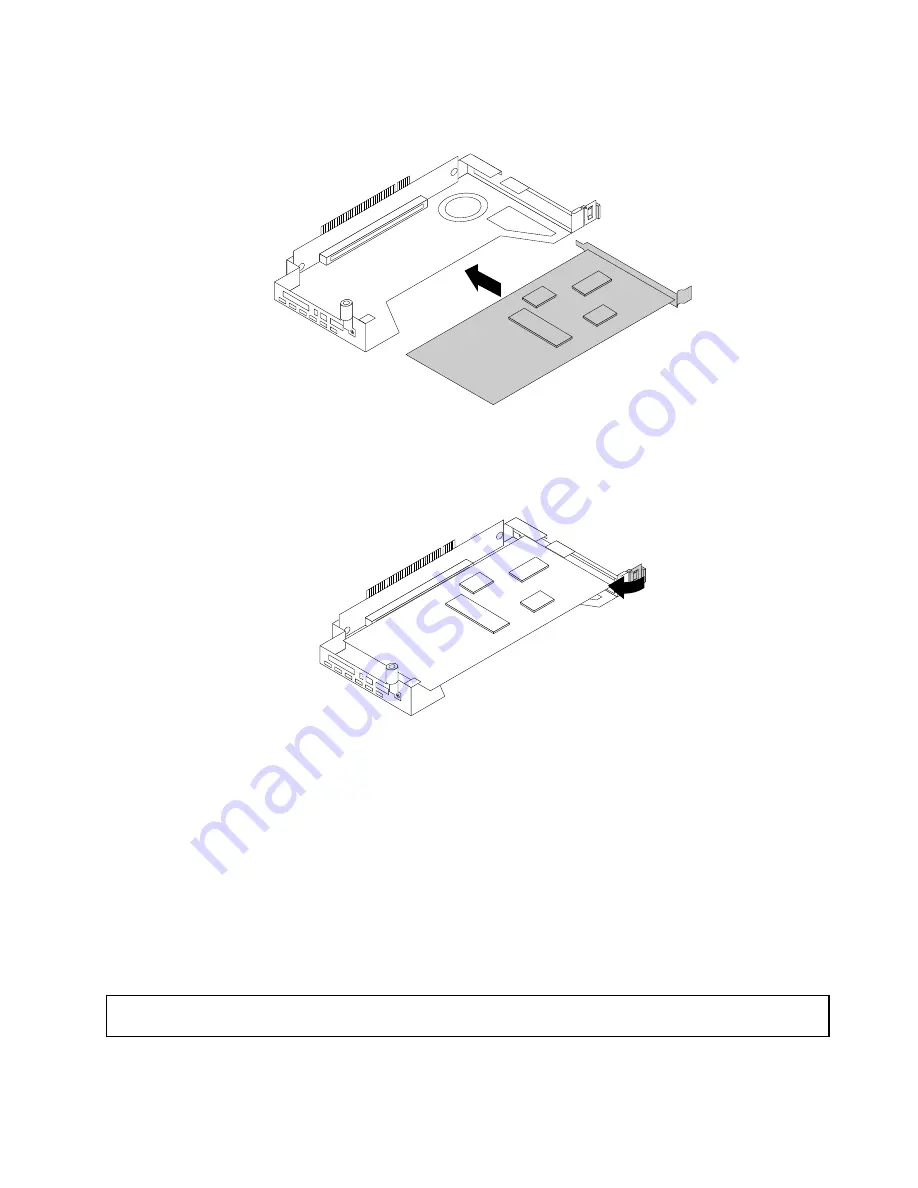
9. Pivot the card latch to the closed position to secure the PCIe card in position.
Figure 33. Pivoting the card latch to the closed position
10. Depending on the type of the PCIe card, you might need to connect any required cables. Refer to the
documentation that comes with the PCIe card for specific information.
11. Reinstall the riser card assembly with the PCIe card to the system board. See “Replacing the riser
What to do next:
• To work with another piece of hardware, go to the appropriate section.
• To complete the installation, go to “Completing the parts replacement” on page 112. Then, continue with
the following procedure to install the PCIe card driver if required.
Removing a PCIe card
Attention:
Do not open your storage product or attempt any repair before reading and understanding “Safety
information” on page iii and “Guidelines” on page 41.
Before you begin, print all the related instructions or ensure that you can view the PDF version on another
computer for reference.
.
65
Содержание Storage N3310
Страница 1: ...Lenovo Storage N3310 User Guide and Hardware Maintenance Manual Machine Types 70FX and 70FY ...
Страница 14: ...xii Lenovo Storage N3310 User Guide and Hardware Maintenance Manual ...
Страница 18: ...4 Lenovo Storage N3310 User Guide and Hardware Maintenance Manual ...
Страница 20: ...6 Lenovo Storage N3310 User Guide and Hardware Maintenance Manual ...
Страница 138: ...124 Lenovo Storage N3310 User Guide and Hardware Maintenance Manual ...
Страница 151: ......
Страница 152: ......


