14
31
32
11
I
8.5
A4R
A3A4
C
A3A4
11
8.5
A4R
a
b
33
34
33
34
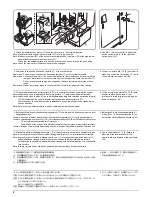
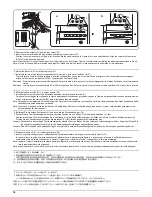
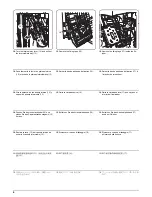
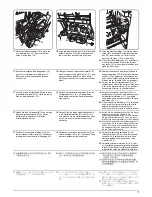
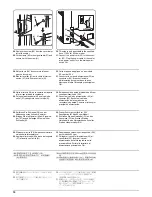
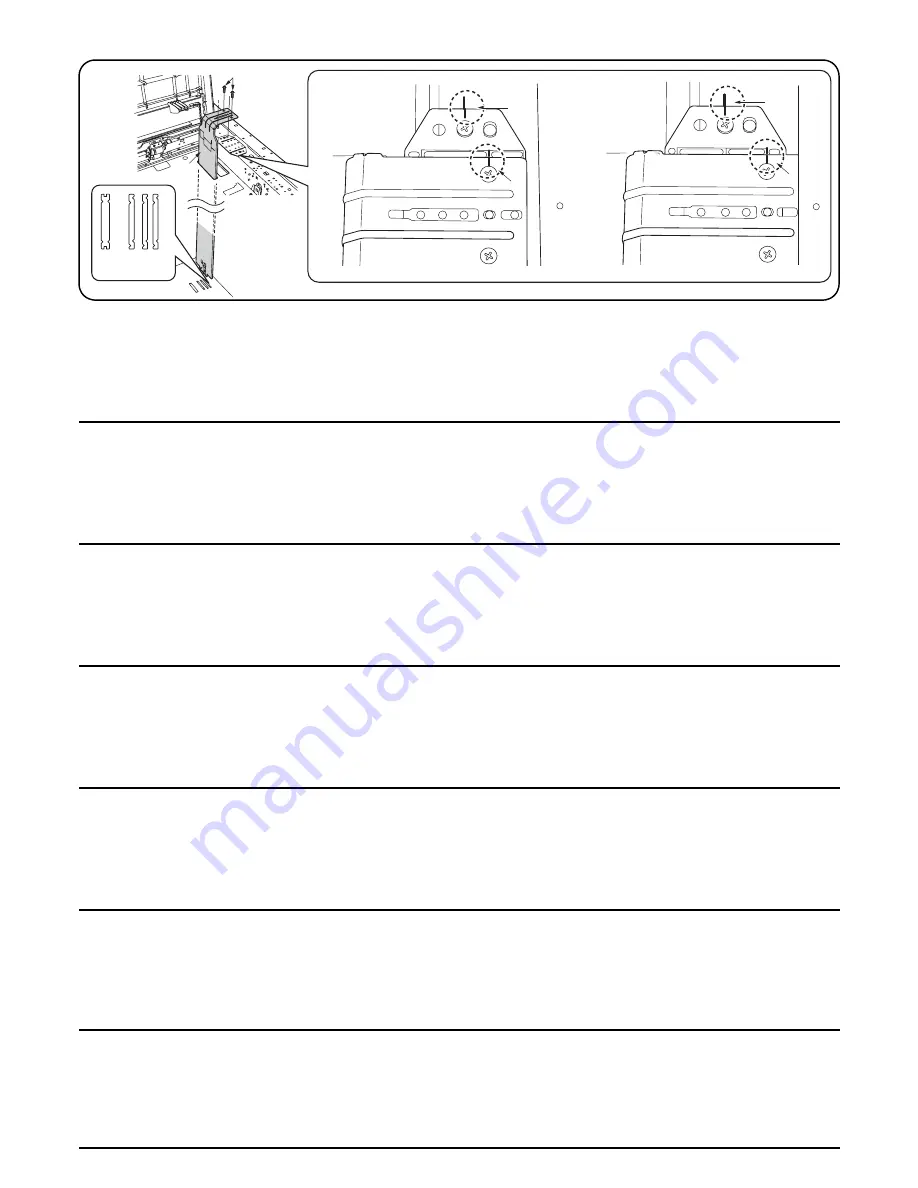
2. Entfernen Sie die beiden Schrauben (31) und den hinteren Positionsanzeiger (32).
3. Setzen Sie den Positionsanzeiger an der gewünschten Position ein, und ziehen Sie die beiden Schrauben (31) fest.
Positionieren Sie den Positionsanzeigen wie in Abbildung a (für die Zoll-Ausführung) oder in Abbildung b (für die metrische Ausführung) gezeigt.
Richten Sie den Positionsanzeiger auf die Markierungen (33) (34) für das gewünschte Papierformat aus.
Hinweis: Platzieren Sie den vorderen Positionsanzeiger an dieselbe Position. Ziehen Sie den vorderen Positionsanzeiger mit dem Finger fest. Ziehen Sie
ihn richtig fest, nachdem Sie die in Schritt 9 beschriebenen Einstellungen abgeschlossen haben.
Hinweis: Da 8,5 Zoll und A4R nahe beieinander liegen, überprüfen Sie, dass der Positionsanzeiger auf beiden Seiten der Anzeigen parrallel eingeführt ist.
2. Remove the two screws (31) and the rear cursor (32).
3. Insert the cursor at the desired size position and tighten the two screws (31).
Position the cursor as shown in Figure a for inch specifications and as shown in Figure b for metric specifications. Align the cursor with the marks
(33)(34) for the desired paper size.
Note: Place the front cursor at the same position. Finger tighten the front cursor. Tighten it securely after completing the adjustments described in Step 9.
Note: Since 8.5 inch and A4R are located close together, make sure that the cursor is inserted parallel to either side of the indications.
2. Retirer les deux vis (31) et la ferrure arrière (32).
3. Installer la ferrure à la position correspondant au format voulu, puis serrer les deux vis (31).
Placer la ferrure comme illustré à la figure a pour les configurations en pouces et comme illustré à la figure b pour les configurations métriques.
Aligner la ferrure avec les repères (33)(34) correspondant au format voulu.
Remarque : Placer la ferrure avant dans la même position. Serrer à la main la ferrure avant. Une fois les réglages décrits à l’étape 9 effectués, serrer fermement la
ferrure.
Remarque : Comme les positions des formats 8,5” et A4R sont proches l’une de l’autre, s’assurer que la ferrure est bien installée droit à l’une ou l’autre position.
2. Rimuovere le due viti (31) e il cursore posteriore (32).
3. Inserire il cursore nella posizione corrispondente al formato desiderato e stringere nuovamente le due viti (31).
In caso di misure in pollici il cursore deve essere posizionato come mostrato nella figura a, mentre in caso di misure in millimetri deve essere
posizionato come mostrato nella figura b. Allineare il cursore con i riferimenti (33)(34) corrispondenti al formato desiderato.
Nota: regolare il cursore anteriore nella stessa posizione. Bloccarlo provvisoriamente a mano. Dovrà essere bloccato definitivamente una volta comple-
tate le regolazioni descritte al passo 9.
Nota: poiché le posizioni 8,5 pollici e A4R sono molto vicine, è necessario accertarsi che il cursore sia stato inserito parallelamente ad entrambi i lati delle indicazioni.
2. ビス (31)2 本を外し、
カーソル後 (32) を一旦外す。
3. 変更するサイズの位置に合わせてカーソルを差し直し、
ビス (31)2 本を締め直す。
インチの場合は a、センチの場合は b のように、
変更するサイズ表示の刻印(33)
(34)にしっかり合わせること。
注意:カーソル前も同じ位置に変更すること。ただし、カーソル前は仮締めにする。
手順 9 で位置調整後、本締めすること。
注意:8.5 インチと A4R が近接しているので、
カーソルが平行に差し込まれている事を確認すること。
2. 取下 2 颗螺钉 (31) 和后游标 (32)。
3. 将游标调节到要更改的尺寸位置,用 2 颗螺钉 (31) 固定。
如果为英制规格,则请将游标如图 a 放置;如果为公制规格,则请将游标如图 b 放置。 将游标对准所需纸张尺寸的标记 (33)(34)。
注 :请将前游标变更到相同位置。但是,先把前游标暂时固定,等完成步骤 9 的位置调整后,再正式固定。
注 :由于 8.5 英寸和 A4R 的位置较接近,请确认游标是否平行插入。
2. Extraiga los dos tornillos (31) y el cursor trasero (32).
3. Introduzca el cursor en la posición de tamaño deseada y apriete los dos tornillos (31).
Coloque el cursor según se muestra en la Figura a para especificaciones en pulgadas, y según la Figura b para especificaciones en sistema métrico.
Alinee el cursor con las marcas (33)(34) para el tamaño del papel deseado.
Nota: Coloque el cursor delantero en la misma posición. Apriete el cursor delantero con los dedos. Apriételo hasta que quede bien fijado después de haber
finalizado los ajustes descritos en el paso 9.
Nota: Puesto que el espacio entre los tamaños de 8,5 pulgadas y A4R es muy reducido, asegúrese de que el cursor esté insertado paralelamente a
ambos lados de las indicaciones.
Содержание TASKalfa 620
Страница 1: ...SERVICE MANUAL Published in August 2009 842KP112 2KPSM062 Rev 2 TASKalfa 620 820 ...
Страница 4: ...This page is intentionally left blank ...
Страница 10: ...This page is intentionally left blank ...
Страница 144: ...2KN 2KP 1 3 106 This page is intentionally left blank ...
Страница 308: ...2KN 2KP 1 5 88 This page is intentionally left blank ...
Страница 412: ...2KN 2KP 2 3 60 This page is intentionally left blank ...
Страница 435: ...1 1 INSTALLATION GUIDE INSTALLATION GUIDE FOR SIDE FEEDER ...
Страница 442: ...INSTALLATION GUIDE FOR LARGE SIZE SIDE FEEDER ...
Страница 460: ...INSTALLATION GUIDE FOR DOCUMENT FINISHER ...
Страница 475: ...INSTALLATION GUIDE FOR CENTERFOLD UNIT ...
Страница 490: ...INSTALLATION GUIDE FOR MULTI JOB TRAY ...
Страница 501: ...INSTALLATION GUIDE FOR PUNCH UNIT ...
Страница 512: ...INSTALLATION GUIDE FOR STOPPER GUIDE ...
Страница 515: ...INSTALLATION GUIDE FOR PRINTING SYSTEM ...
Страница 518: ...INSTALLATION GUIDE FOR SCAN SYSTEM ...
Страница 520: ......
Страница 521: ......

