


6
15
13
14
13
12
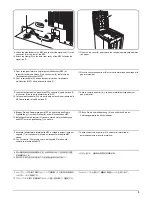
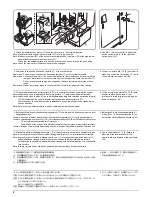
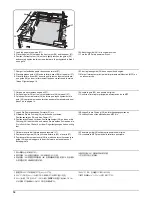
L1
L2
A
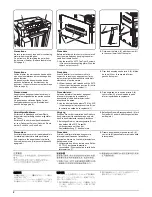
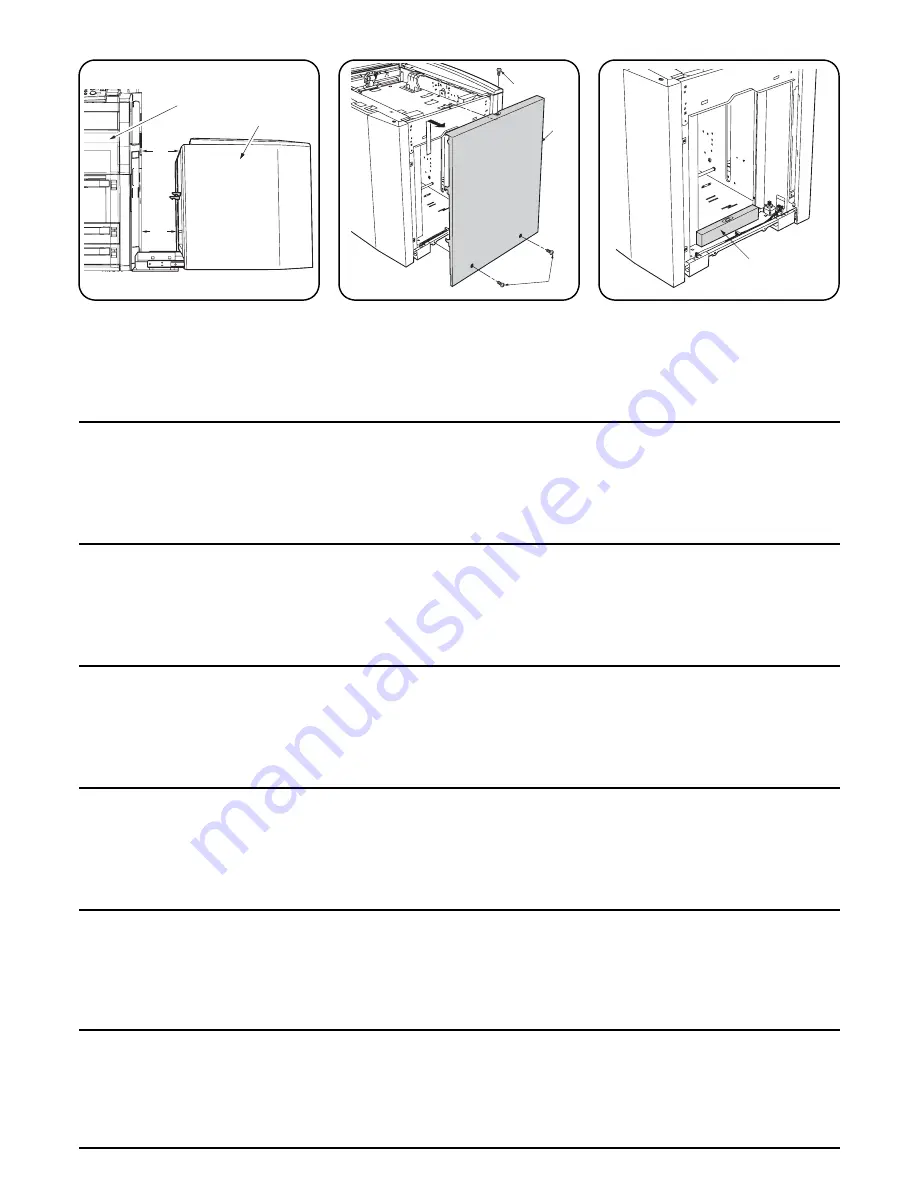
Checking inclination
1. Make sure that distances L1 and L2 between
the MFP (12) and the side feeder (A) are the
same.
2. Loosen the three screws (13) and lift the
right cover (14) of the side feeder to remove
it.
3. Use a water level (15) to check that the front
and rear of the side feeder (A) are horizontal.
4. If the side feeder (A) is not level, perform the
following steps to adjust it.
Correction de l’inclinaison
1. S’assurer que les distances L1 et L2 entre
l’imprimante multifonction (MFP) (12) et le
chargeur latéral (A) sont égales.
2. Dévisser les trois vis (13) puis soulever le
couvercle droit (14) du chargeur latéral pour
le retirer.
3. Utiliser un niveau à bulle (15) pour vérifier
que l’avant et l’arrière du chargeur latéral (A)
sont bien horizontaux.
4. Si le chargeur latéral (A) n’est pas plan,
procéder comme suit pour le rectifier.
Corrección de la inclinación
1. Asegúrese de que las distancias L1 y L2
entre la MFP (12) y el alimentador de papel
(A) sean iguales.
2. Afloje los tres tornillos (13) y levante la
cubierta derecha (14) del alimentador de
papel para extraerla.
3. Utilice un nivel de agua (15) para comprobar
que la parte delantera y posterior del
alimentador de papel (A) estén en posición
horizontal.
4. Si el alimentador de papel (A) no está
correctamente nivelado, siga los siguientes
pasos para ajustarlo.
Überprüfen der Neigung
1. Vergewissern Sie sich, dass die Abstände
L1 und L2 zwischen dem MFP (12) und dem
Papiereinzug (A) gleich sind.
2. Lockern Sie die drei Schrauben (13), und
heben Sie die rechte Abdeckung (14) des
Papiereinzugs an, um sie zu entfernen.
3. Verwenden Sie eine Wasserwaage (15), um
zu überprüfen, ob die Vorder- und Rückseite
des Papiereinzugs (A) waagerecht sind.
4. Falls der Papiereinzug (A) nicht waagerecht
ist, stellen Sie ihn wie folgt waagerecht ein.
Controllo dell’inclinazione
1. Accertarsi che le distanze L1 e L2 tra la the
MFP (12) e l’alimentatore laterale (A) siano
identiche.
2. Allentare le tre viti (13) e sollevare quindi il
pannello destro (14) dell’alimentatore late-
rale in modo da rimuoverlo.
3. Per verificare che il lato frontale e il lato
posteriore dell’alimentatore laterale (A) siano
perfettamente orizzontali si raccomanda di
fare uso di una livella ad acqua (15).
4. Se l’alimentatore laterale (A) non è
perfettamente orizzontale è necessario
regolarlo osservando la procedura che segue.
傾きの確認
1. MFP 本体 (12) とサイドフィーダー(A) の間
隔 L1 と L2 が同じ距離になっているか確認
する。
2. ビス (13)3 本を外し、サイドフィーダの右カ
バー(14) を持ち上げるようにして取り外す。
3. 水準器 (15) を用いてサイドフィーダ (A) 前
後の水平を確認する。
4. サイドフィーダ (A) に傾きがある場合は、
次
の調整をおこなう。
确认倾斜度
1. 请确保复印机主机 (12) 和大容量供纸盒 (A)
之间的距离 L1 和 L2 相同。
2. 松开 3 颗螺钉 (13),然后提起大容量供纸盒
的右盖 (14) 将其取出。
3. 用水平仪 (15) 检查大容量供纸盒 (A) 前后是
否水平。
4. 如果大容量供纸盒 (A) 尚未水平,则请执行下
列步骤进行调节。
Содержание TASKalfa 620
Страница 1: ...SERVICE MANUAL Published in August 2009 842KP112 2KPSM062 Rev 2 TASKalfa 620 820 ...
Страница 4: ...This page is intentionally left blank ...
Страница 10: ...This page is intentionally left blank ...
Страница 144: ...2KN 2KP 1 3 106 This page is intentionally left blank ...
Страница 308: ...2KN 2KP 1 5 88 This page is intentionally left blank ...
Страница 412: ...2KN 2KP 2 3 60 This page is intentionally left blank ...
Страница 435: ...1 1 INSTALLATION GUIDE INSTALLATION GUIDE FOR SIDE FEEDER ...
Страница 442: ...INSTALLATION GUIDE FOR LARGE SIZE SIDE FEEDER ...
Страница 460: ...INSTALLATION GUIDE FOR DOCUMENT FINISHER ...
Страница 475: ...INSTALLATION GUIDE FOR CENTERFOLD UNIT ...
Страница 490: ...INSTALLATION GUIDE FOR MULTI JOB TRAY ...
Страница 501: ...INSTALLATION GUIDE FOR PUNCH UNIT ...
Страница 512: ...INSTALLATION GUIDE FOR STOPPER GUIDE ...
Страница 515: ...INSTALLATION GUIDE FOR PRINTING SYSTEM ...
Страница 518: ...INSTALLATION GUIDE FOR SCAN SYSTEM ...
Страница 520: ......
Страница 521: ......


