Section 7 DOCUMENT MANAGEMENT FUNCTIONS
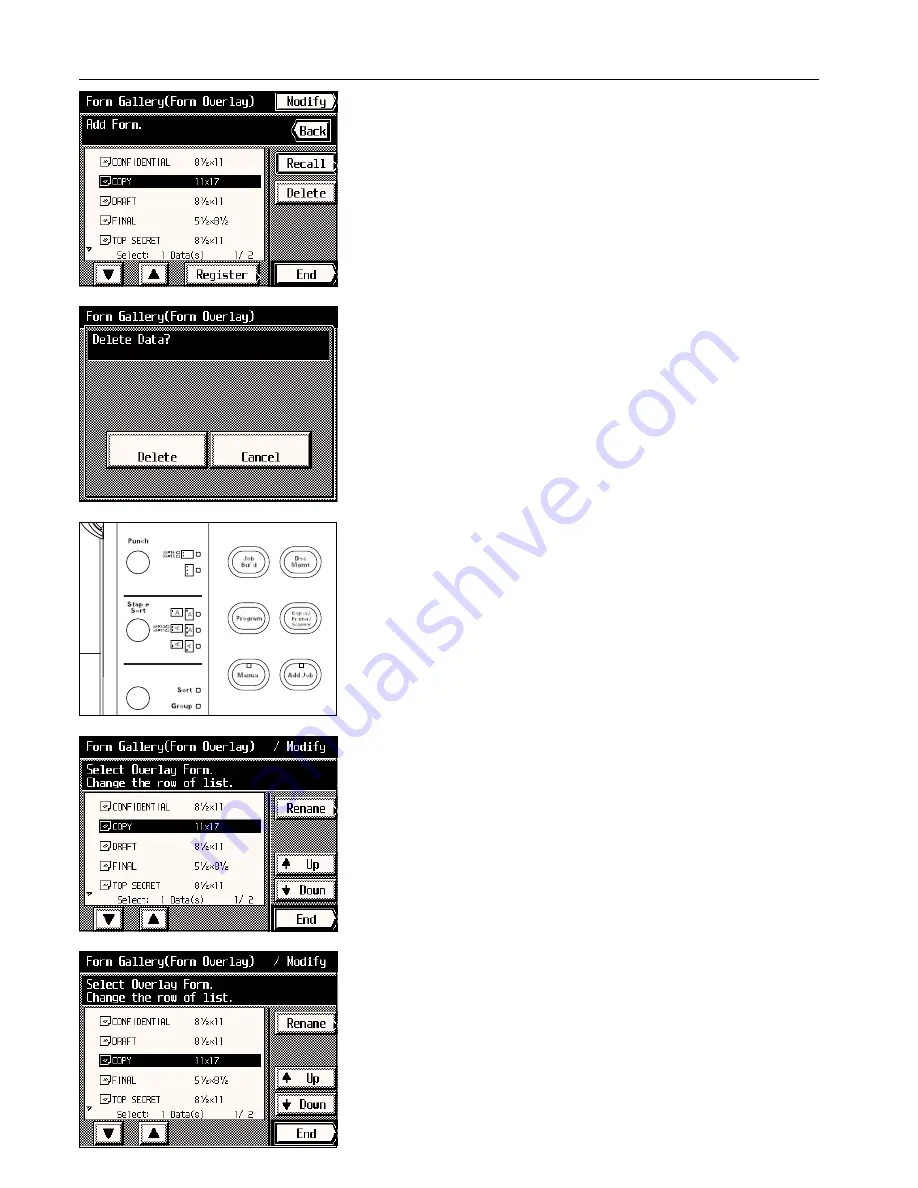
3. Select the image that you want to delete and touch the “Delete” key.
* If the image that you want to delete is not displayed, touch the “
▼
” key or the “
▲
” key until
it is displayed.
4. If you are certain that you want to delete that image, touch the “Delete” key once again.
The touch panel will return to the screen for step 3.
* If you do not want to delete that image, touch the “Cancel” key.
5. If you want to delete other images, repeat steps 3 and 4. Once you are finished deleting
images, touch the “End” key. The touch panel will return to the basic screen.
4
Modifying information for an image
Follow the procedure below when you want to change the registered name of an image or
change the order in which the image names are displayed.
1. Press the Doc. Mgmt. key.
The document management screen will appear.
2. Touch the “Form Gallery (Overlay)” key.
A list of registered images will appear.
3. Touch the “Modify” key.
4. Select the image that corresponds to the information that you want to modify.
* If the image that you want to modify the information for is not displayed, touch the “
▼
” key
or the “
▲
” key until it is displayed.
5. If you want to change the order in which the image name is displayed, touch the “
q
Up”
key or the “
Q
Down” key until that name is in the position that you want.
* If you want to change the name of the image, touch the “Rename” key. (See page 8-29
for the procedure on entering the name.) Once you are finished changing the name, the
touch panel will return to the basic screen.
6. Once you are finished modifying information, touch the “End” key. The touch panel will
return to the basic screen.
7-3
Содержание KM-6230
Страница 12: ...Section 2 NAMES OF PARTS Section 2 NAMES OF PARTS 2 1 ...
Страница 154: ...12 4 ...
Страница 158: ...12 8 A ...


