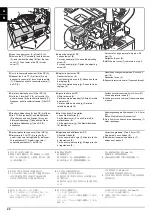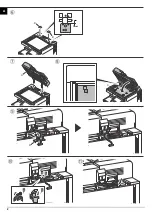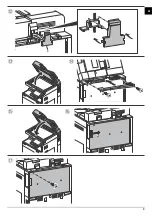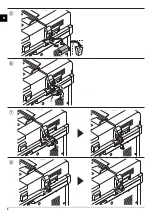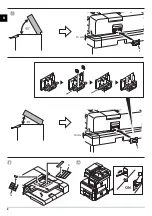
30
A
B
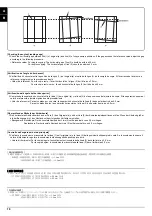
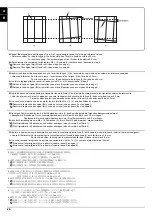
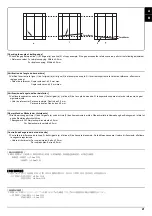
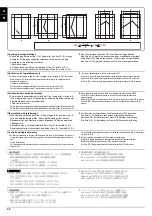
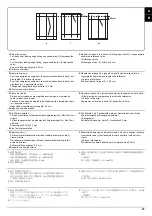
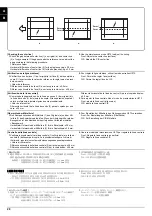
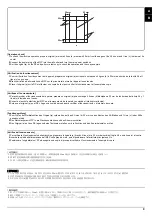
[Automatic adjustment using the original for adjustment]
If there is no DP auto adjustment original.
1.
Set the maintenance mode U411 and press [DP Auto Adj] to output the
adjustment original.
2.
Set the printed original on the contact glass and press the Start key.
3.
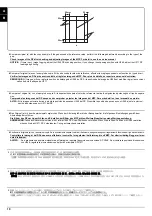
Set the original on the DP face up and press the Start key to carry out
surface adjustment.
4.
Set the original on the DP face down and press the Start key to carry
out rear-side adjustment.
5.
If
"OK"
appears on the display, the adjustment is completed.
If ERROR XX appears, the adjustment failed. Check the original set
position and repeat steps 2 and 4 until
"OK"
appears.
For details, see the service manual.
[Réglage automatique en utilisant l’original pour effectuer le réglage]
Si la machine n'est pas pourvue de la fonction réglage automatique d'original du DP
1.
Passez en mode maintenance U411 et appuyez sur [DP Auto Adj] pour imprimer
l'original de réglage.
2.
Placer l'original qui vient d'être imprimé sur la vitre d'exposition et appuyer sur la
touche Start.
3.
Placer l'original sur le DP côté imprimé en haut et appuyer sur la touche Start
pour procéder au réglage de la surface.
4.
Placer l'original sur le DP côté imprimé en bas et appuyer sur la touche Start pour
procéder au réglage du côté arrière.
5.
Si le message "OK" apparaît sur l'affichage, le réglage est terminé.Si le message
ERROR XX (erreur XX) s'affiche, le réglage a échoué. Vérififer la position de
l'original et recommencer les opérations 2 et 4 jusqu'à ce que le message "OK"
apparaisse.
Pour plus de details, se reporter au manuel d’entretien.
[Ajuste automático utilizando el original para el ajuste]
Si no existe el original de ajuste automático del DP
1.
Configure el modo de mantenimiento U411 y pulse [DP Auto Adj] para imprimir el
original de ajuste.
2.
Coloque el original impreso sobre el cristal de contacto y pulse la tecla de Start.
3.
Coloque el original en el DP cara arriba y pulse la tecla de Start para realizar un
ajuste de anverso.
4.
Coloque el original en el DP cara abajo y pulse la tecla de Start para realizar un
ajuste de reverso.
5.
Si aparece
"OK"
en la pantalla significa que el ajuste ha sido realizado.
Si aparece ERROR XX, el ajuste ha fallado. Compruebe la posición
ajustada del original y repita los pasos 2 y 4 hasta que aparezca
"OK"
en la pantalla.
Para mas detalles, lea el manual de servicio.
[Automatische Einstellung mithilfe des Originals]
Falls keine automatische Einstellung des Originals des DP vorhanden ist
1.
Aktivieren Sie den Wartungsmodus U411 und wählen Sie [DP Auto Adj], um das
Original für die Anpassung auszudrucken.
2.
Das ausgedruckte Original auf das Kontaktglas legen und die Start-Taste betäti-
gen.
3.
Das Original mit der Druckseite nach oben einlegen und die Start-Taste betäti-
gen, um die Oberflächeneinstellung ausführen zu lassen.
4.
Das Original mit der Druckseite nach unten einlegen und die Start-Taste betäti-
gen, um die Rückseiteneinstellung ausführen zu lassen.
5.
Wenn am Display "OK" angezeigt wird, ist die Einstellung abgeschlossen. Wenn
ERROR XX (FEHLER XX) angezeigt wird, ist die Einstellung fehlgeschlagen.
Überprüfen Sie die Originalpositionierung und wiederholen Sie Schritte 2 und 4,
bis "OK" angezeigt wird.
Weitere Einzelheiten siehe Wartungsanleitung.
[Regolazione automatica eseguita con l’originale]
Se non è presente l'autoregolazione originale DP
1.
Impostare la modalità manutenzione U411, quindi premere [DP Auto Adj] per
stampare l'originale da utilizzare per la regolazione.
2.
Posizionare l'originale stampato sul vetro di appoggio e premere il tasto di Start.
3.
Posizionare l'originale sul DP rivolto verso l'alto e premere il tasto di Start per
eseguire la regolazione della superficie.
4.
Posizionare l'originale sul DP rivolto verso il basso e premere il tasto di Start per
eseguire la regolazione del lato posteriore.
5.
Se "OK" appare sul display, la regolazione è completata.Se compare ERROR XX
(ERRORE XX), la regolazione non è riuscita. Verificare la posizione di impostazi-
one dell'originale e ripetere le operazioni 2 e 4
fino a quando appare "OK".
Per ulteriori dettagli leggere il manuale d’istruzioni.
[ 調整用原稿による自動調整 ]
DP 調整用原稿が無い場合
1.
メンテナンスモード U411 をセットし、
[DP Auto Adj] を押し原稿を出力
する。
2.
出力した原稿をコンタクトガラス上にセットし、
スタート
キーを押す。
3.
原稿を FaceUp で DP へセットし、
スタート
キーを押し、表面の調整を行
う。
4.
原稿を FaceDown で DP へセットし、スタートキーを押し、裏面の調整を
行う。
5.
ディスプレイに
「OK」が表示されれば調整完了となる。
ERROR XX が表示された場合は調整失敗である。原稿のセット位置を確
認し、
「OK」が表示されるまで手順 2 ~ 4 を繰り返す。
詳細はサービスマニュアルを参照のこと。
[ 通过调整用原稿进行自动调整 ]
没有 DP 调整用原稿时
1.
进入维修保养模式 U411,选择[DP Auto Adj],输出测试原稿。
2.
将输出的原稿放在稿台上,按 Start 键。
3.
将原稿面朝上放在 DP 主机上,按 Start 键以进行正面的调整。
4.
将原稿面朝下放在 DP 主机上,按 Start 键以进行反面的调整。
5.
如果屏幕上出现 "OK"(完成),则表示调整完成。
如果出现 ERROR XX(错误 XX),则表示调整失败。检查原稿设定位置并
重复步骤 2 和 4,直到 "OK"(完成)出现。
详细内容请参照维修手册。
[ 조정용 원고를 이용한 자동조정 ]
DP 조정용 원고가 없는 경우
1.
메인터넌스 모드 U411 을 설정하고 [DP Auto Adj] 를 눌러 조정된 원고를
출력합니다 .
2.
출력한 원고를 원고 유리에 장착하고 시작키를 누릅니다 .
3.
원고를 FaceUp 으로 DP 로 세트하고 시작키를 눌러 표면조정을 합니다 .
4.
원고를 FaceDown 으로 DP 에 장착하고 시작키를 눌러 뒷면조정을 합
니다 .
5.
디스플레이에 "OK" 가 표시되면 조정완료가 됩니다 .
ERROR XX 가 표시된 경우에는 조정실패입니다 . 원고 장착위치를 확
인하고 "OK" 가 표시될 때까지 순서 2 ~ 4 를 반복합니다 .
상세는 서비스 매뉴얼을 참조 .
A
B
Содержание Copystar CS 3011i
Страница 1: ...SERVICE MANUAL Published in September 2016 2RHSM 1 Rev 1 6 3011i 6 3511i ...
Страница 4: ...This page is intentionally left blank ...
Страница 10: ...This page is intentionally left blank ...
Страница 78: ...2RG 2RH 1 2 51 B B A A B B A A B B A A Tray lower cover Pin Pin ...
Страница 79: ...2RG 2RH 1 2 52 11 Attach the tray lower cover 12 Fix the tray lower cover by using two pins Figure 1 2 77 ...
Страница 83: ...2RG 2RH 1 2 56 This page is intentionally left blank ...
Страница 496: ...2RG 2RH 2 1 18 Figure 2 1 23 Duplex conveying section block diagram EPWB DU_SENS DU_CL_REM YC13 A5 YC15 1 DUCL DUS ...
Страница 504: ...2RG 2RH 2 2 8 This page is intentionally left blank ...
Страница 568: ...Installation Guide DP 7100 Document processor Installation Guide ...
Страница 572: ...2 1mm 0mm ն ո պ ջ չ շ A D C B B A ...
Страница 573: ...3 ռ ս վ ր ւ ց տ E A ...
Страница 574: ...4 ք द I M3x8 փ F G M4x10 K J H A ...
Страница 575: ...5 ON ध A ...
Страница 577: ...7 շ յ ն ո D E B ...
Страница 578: ...8 չ պ F G M4x10 H I M3x8 K J ջ B ...
Страница 579: ...9 ռ B ...
Страница 589: ...19 ո ն շ պ ջ չ 8 6 7 10 11 9 A B ...
Страница 599: ...DP 7110 Document processor Installation Guide ...
Страница 603: ...2 շ շ 2 շ 2 շ C M4x14 E ߑ ߒ ߓ ߔ ո շ 2 ߑ ն A ...
Страница 604: ...3 ߘ ո ߕ ߗ ո չ պ ջ ߖ F G H M3x8 BLACK A ...
Страница 605: ...4 ռ վ ր ւ ց ࠉտ ս I A ...
Страница 606: ...5 J L փ ք द K M3x8 K M3x8 K M3x8 ध A ...
Страница 607: ...6 ऩ प भ फ ब न म O N A ...
Страница 608: ...7 ON य A ...
Страница 610: ...9 շ ո շ 2 շ 2 շ 2 ߑ ն շ ߑ ߒ ߓ ߔ C M4x14 E B ...
Страница 611: ...10 ߖ ߕ ߘ ߎ չ պ ջ ߗ F G ո H M3x8 BLACK B ...
Страница 612: ...11 ռ ս տ ր ց վ I B ...
Страница 613: ...12 ւ ք द ध न փ J L P K M3x8 K M3x8 B ...
Страница 614: ...13 ऩ प फ O N B ...
Страница 634: ...DP 7120 Document processor Installation Guide ...
Страница 638: ...2 1mm 0mm ն շ ո չ ջ պ B B A D C A ...
Страница 639: ...3 ռ ս վ տ ց ր E A ...
Страница 640: ...4 G ւ F F ք փ H ON 10 mm 10 mm A ...
Страница 642: ...6 շ ո յ ն D B ...
Страница 643: ...7 չ E B ...
Страница 644: ...8 F ON G պ F ջ ռ H 10 mm 10 mm B ...
Страница 653: ...17 ղ ն շ ճ մ յ 2 6 7 3 4 5 A B ...
Страница 655: ...19 չ ջ պ ս վ ռ 9 11 10 13 14 12 10 mm A B ...
Страница 665: ...PF 791 500 x 2 Paper feeder Installation Guide ...
Страница 673: ...PF 810 3000 sheet deck Installation Guide ...
Страница 686: ...DF 791 3000 sheet finisher Installation Guide ...
Страница 701: ...DF 7120 1000 sheet finisher Installation Guide ...
Страница 705: ...2 մ յ ն 7 7 15 a b a a b b b a A ...
Страница 706: ...3 ո շ չ պ A ...
Страница 707: ...4 ջ ռ ս c d 14 c d c d 12 c d ջ ռ ս c d 14 c d c d 12 c d A ...
Страница 708: ...5 վ ր D ց ON տ A ...
Страница 710: ...7 L յ մ ն շ B ...
Страница 712: ...9 ս ռ վ տ G B ...
Страница 713: ...10 ր ց ւ b a 17 17 25 a b a a b b B ...
Страница 714: ...11 ք փ द c d 24 c d c d 22 c d B ...
Страница 715: ...12 न ध ऩ प B ...
Страница 716: ...13 ब फ ON D B ...
Страница 719: ...AK 740 Bridge unit Installation Guide ...
Страница 721: ...MT 730 Mailbox Installation Guide ...
Страница 736: ...PH 7A C D Punch unit Installation Guide ...
Страница 757: ...DT 730 B Document tray Installation Guide ...
Страница 759: ...5 2013 5 302LC56750 01 H F G D D 6 4 3 7 E C D D M4 8 M4 8 M4 8 M4 8 ...
Страница 760: ...FAX System 12 Installation Guide ...


