2RG/2RH
1-3-141
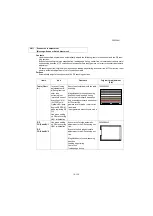
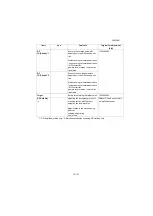
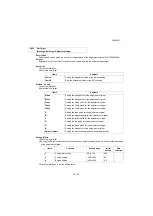
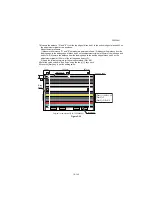
Setting: G
1.Select the item to set.
2.By using [Left/Right cursor] keys or the numeric keys, enter the values which are shown on the back page
of the adjustment original.
3.Press the [Start] key to set the setting value.
Setting: B
1.Select the item to set.
2.By using [Left/Right cursor] keys or the numeric keys, enter the values which are shown on the back page
of the adjustment original.
3.Press the [Start] key to set the setting value.
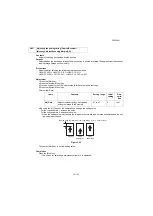
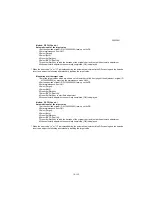
Setting: Adjust Original
*: This setting is usually unnecessary.
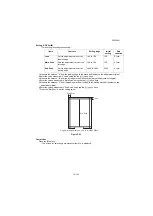
1.Measure the distances "A", "B" and "C" from the upper edge of black belt 1 to the lower edge of black belt
3 of the adjustment original.
Measurement procedure
1) Measure the distance "A", "B" and "C" between two points as follows. (A: 30mm from the left edge, B:
105mm from the left edge, C: 180mm from the left edge)
?Measure the distance from the leading edge to the top edge of black belt 1.
2) Apply the following formula for the values obtained: ((A+B+C)/3)
2.Enter the value solved in "Lead" using the the [+] [-] keys keys.
3.Press the [Start] key to set the setting value.
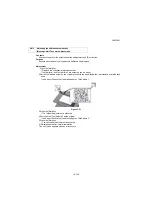
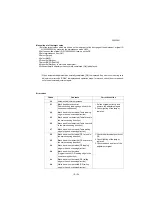
4.Measure the distance "F" from the left edge to the right edge of black belt 2 on the adjustment original.
Measurement procedure
Measure the distance "F" from the left edge at 21mm from the top edge of black belt 1to the right edge of
black belt 2.
5.Enter the values measured in "Main Scan" using the the [+] [-] keys keys.
6.Press the [Start] key to set the setting value.
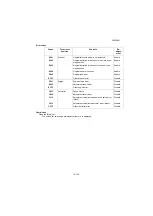
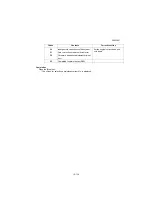
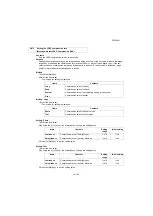
Items
Contents
Setting range
Initial
setting
Data
variation
L
L parameter setting
0.0 to 100
67.8
-
a
A value setting
-200 to 200
-51.3
-
b
B value setting
-200 to 200
48.9
-
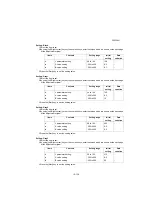
Items
Contents
Setting range
Initial
setting
Data
variation
L
L parameter setting
0.0 to 100
38.8
-
a
A value setting
-200 to 200
25.3
-
b
B value setting
-200 to 200
-22.8
-
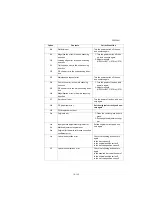
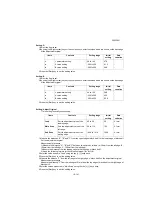
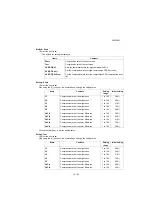
Items
Contents
Setting range
Initial
setting
Data
variation
Lead
Set the adjustment value of the
leading edge.
4.0 to 6.0
5.0
0.1mm
Main Scan
Sets the adjustment value of the
left edge.
9.0 to 11.0
10.0
0.1mm
Sub Scan
Set the adjustment value of the
trailing edge.
189.0 to 191.0
190.0
0.1mm
Содержание Copystar CS 3011i
Страница 1: ...SERVICE MANUAL Published in September 2016 2RHSM 1 Rev 1 6 3011i 6 3511i ...
Страница 4: ...This page is intentionally left blank ...
Страница 10: ...This page is intentionally left blank ...
Страница 78: ...2RG 2RH 1 2 51 B B A A B B A A B B A A Tray lower cover Pin Pin ...
Страница 79: ...2RG 2RH 1 2 52 11 Attach the tray lower cover 12 Fix the tray lower cover by using two pins Figure 1 2 77 ...
Страница 83: ...2RG 2RH 1 2 56 This page is intentionally left blank ...
Страница 496: ...2RG 2RH 2 1 18 Figure 2 1 23 Duplex conveying section block diagram EPWB DU_SENS DU_CL_REM YC13 A5 YC15 1 DUCL DUS ...
Страница 504: ...2RG 2RH 2 2 8 This page is intentionally left blank ...
Страница 568: ...Installation Guide DP 7100 Document processor Installation Guide ...
Страница 572: ...2 1mm 0mm ն ո պ ջ չ շ A D C B B A ...
Страница 573: ...3 ռ ս վ ր ւ ց տ E A ...
Страница 574: ...4 ք द I M3x8 փ F G M4x10 K J H A ...
Страница 575: ...5 ON ध A ...
Страница 577: ...7 շ յ ն ո D E B ...
Страница 578: ...8 չ պ F G M4x10 H I M3x8 K J ջ B ...
Страница 579: ...9 ռ B ...
Страница 589: ...19 ո ն շ պ ջ չ 8 6 7 10 11 9 A B ...
Страница 599: ...DP 7110 Document processor Installation Guide ...
Страница 603: ...2 շ շ 2 շ 2 շ C M4x14 E ߑ ߒ ߓ ߔ ո շ 2 ߑ ն A ...
Страница 604: ...3 ߘ ո ߕ ߗ ո չ պ ջ ߖ F G H M3x8 BLACK A ...
Страница 605: ...4 ռ վ ր ւ ց ࠉտ ս I A ...
Страница 606: ...5 J L փ ք द K M3x8 K M3x8 K M3x8 ध A ...
Страница 607: ...6 ऩ प भ फ ब न म O N A ...
Страница 608: ...7 ON य A ...
Страница 610: ...9 շ ո շ 2 շ 2 շ 2 ߑ ն շ ߑ ߒ ߓ ߔ C M4x14 E B ...
Страница 611: ...10 ߖ ߕ ߘ ߎ չ պ ջ ߗ F G ո H M3x8 BLACK B ...
Страница 612: ...11 ռ ս տ ր ց վ I B ...
Страница 613: ...12 ւ ք द ध न փ J L P K M3x8 K M3x8 B ...
Страница 614: ...13 ऩ प फ O N B ...
Страница 634: ...DP 7120 Document processor Installation Guide ...
Страница 638: ...2 1mm 0mm ն շ ո չ ջ պ B B A D C A ...
Страница 639: ...3 ռ ս վ տ ց ր E A ...
Страница 640: ...4 G ւ F F ք փ H ON 10 mm 10 mm A ...
Страница 642: ...6 շ ո յ ն D B ...
Страница 643: ...7 չ E B ...
Страница 644: ...8 F ON G պ F ջ ռ H 10 mm 10 mm B ...
Страница 653: ...17 ղ ն շ ճ մ յ 2 6 7 3 4 5 A B ...
Страница 655: ...19 չ ջ պ ս վ ռ 9 11 10 13 14 12 10 mm A B ...
Страница 665: ...PF 791 500 x 2 Paper feeder Installation Guide ...
Страница 673: ...PF 810 3000 sheet deck Installation Guide ...
Страница 686: ...DF 791 3000 sheet finisher Installation Guide ...
Страница 701: ...DF 7120 1000 sheet finisher Installation Guide ...
Страница 705: ...2 մ յ ն 7 7 15 a b a a b b b a A ...
Страница 706: ...3 ո շ չ պ A ...
Страница 707: ...4 ջ ռ ս c d 14 c d c d 12 c d ջ ռ ս c d 14 c d c d 12 c d A ...
Страница 708: ...5 վ ր D ց ON տ A ...
Страница 710: ...7 L յ մ ն շ B ...
Страница 712: ...9 ս ռ վ տ G B ...
Страница 713: ...10 ր ց ւ b a 17 17 25 a b a a b b B ...
Страница 714: ...11 ք փ द c d 24 c d c d 22 c d B ...
Страница 715: ...12 न ध ऩ प B ...
Страница 716: ...13 ब फ ON D B ...
Страница 719: ...AK 740 Bridge unit Installation Guide ...
Страница 721: ...MT 730 Mailbox Installation Guide ...
Страница 736: ...PH 7A C D Punch unit Installation Guide ...
Страница 757: ...DT 730 B Document tray Installation Guide ...
Страница 759: ...5 2013 5 302LC56750 01 H F G D D 6 4 3 7 E C D D M4 8 M4 8 M4 8 M4 8 ...
Страница 760: ...FAX System 12 Installation Guide ...

