


TIGW1U server—Server Installations and Upgrades
Kontron Carrier Grade Server TIGW1U
Product Guide, rev. 1.3
December 2009
48
3.4.7.1
Installing the Intel
®
RAID Smart Battery
The Intel
®
RAID Smart Battery is located just behind the front panel near HDD drive
bay 0. The connector is on the far right end of the SAS Front Panel (SFP) board.
The Smart Battery has an internal battery power cable that must be connected.
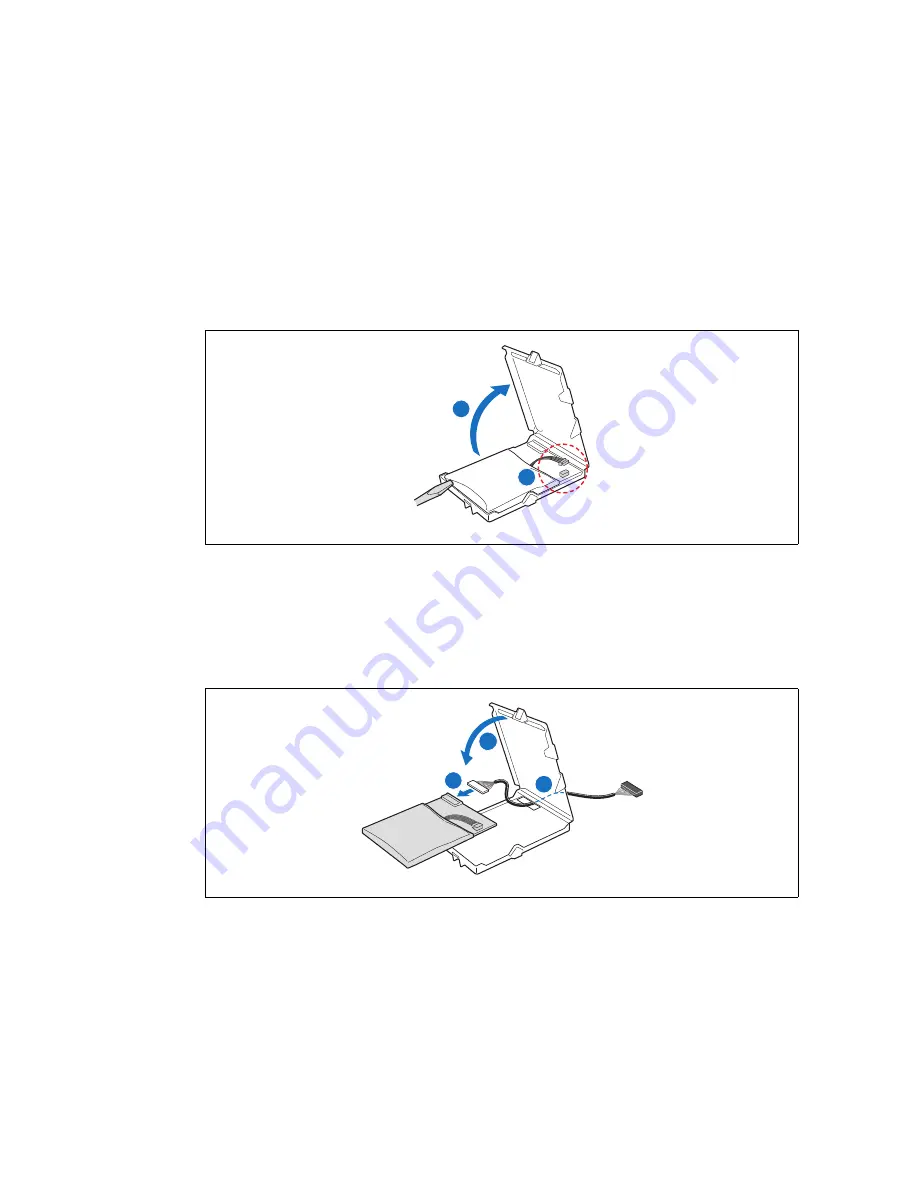
1. Open the Smart Battery case lid. If necessary, use a small flat blade screwdriver to
pry open the lid at the corners. (“A” in
Figure 33
)
2. If the battery power cable is not connected, connect it now. (“B”)
3. Lift the battery assembly out of the case and insert the battery cable through the
opening in the bottom of the case. (“B” in
Figure 34
)
4. Attach the battery cable to the connector on the back of the battery assembly. (“A”)
5. Put the battery assembly back into the case and close and latch the case lid. (“C”)
Figure 33.
Connecting the Smart Battery Power Cable
TS000292
A
B
Figure 34.
Connecting the Smart Battery Cable Through the Battery Case
TS000293
C
B
A
Содержание TIGW1U
Страница 1: ...Kontron Carrier Grade Server TIGW1U Product Guide December 2009 Rev 1 3...
Страница 8: ...TIGW1U server Kontron Carrier Grade Server TIGW1U Product Guide rev 1 3 December 2009 16...
Страница 76: ...TIGW1U server Server Utilities Kontron Carrier Grade Server TIGW1U Product Guide rev 1 3 December 2009 76...
Страница 86: ...TIGW1U server Troubleshooting Kontron Carrier Grade Server TIGW1U Product Guide rev 1 3 December 2009 86...
Страница 88: ...TIGW1U server Warranty Kontron Carrier Grade Server TIGW1U Product Guide rev 1 3 December 2009 88...
Страница 104: ...TIGW1U server Getting Help Kontron Carrier Grade Server TIGW1U Product Guide rev 1 3 December 2009 104...