Hard Disk Kit
238
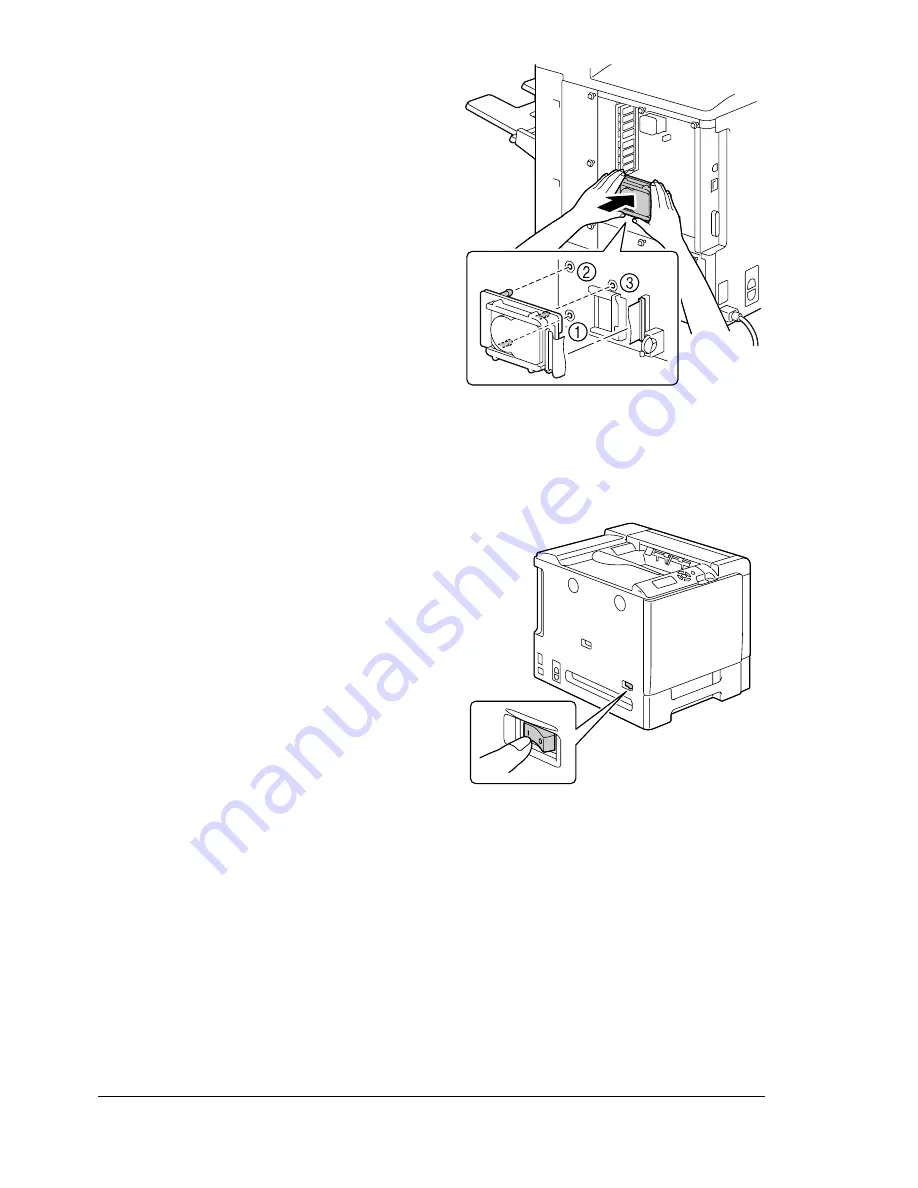
6
Insert the three mounting pins
on the hard disk kit into the holes
in the controller board to mount
the hard disk kit onto the control-
ler board.
7
Reinstall the panel and tighten the seven screws.
8
Attach the rear cover.
9
Reconnect all interface cables.
10
Reconnect the power cord, and
turn on the printer.
11
Declare the Hard Disk in the Windows printer driver (Properties/Configure
tab).
Содержание bizhub C31P
Страница 1: ...bizhub C31P User s Guide A0EA 9564 00A...
Страница 8: ......
Страница 14: ...Contents vi...
Страница 15: ...Introduction...
Страница 20: ...Getting Acquainted with Your Printer 6...
Страница 21: ...About the Software...
Страница 36: ...Using the Postscript and PCL Printer Driver 22...
Страница 37: ...Using the Status Monitor Windows Only...
Страница 40: ...Closing the Status Monitor 26...
Страница 41: ...Printer Control Panel and Configuration Menu...
Страница 113: ...Camera Direct...
Страница 115: ...Memory Direct...
Страница 117: ...Using Media...
Страница 151: ...Replacing Consumables...
Страница 181: ...Replacing Consumables 167 4 Remove the empty cartridge and then insert the new one 5 Install the stapler...
Страница 182: ...Replacing Consumables 168 6 Install the stapling unit 7 Close the stapler cover...
Страница 183: ...Maintaining the Printer...
Страница 188: ...Cleaning the Printer 174 3 Clean the media feed rollers by wiping them with a soft dry cloth 4 Close the tray...
Страница 193: ...10 Troubleshooting...
Страница 208: ...Clearing Media Misfeeds 194 4 Push down the levers 5 Close the right side cover...
Страница 244: ...Status Error and Service Messages 230...
Страница 245: ...11 Installing Accessories...
Страница 268: ...Staple Finisher 254 10 Install the relay unit on the machine 11 Open the relay unit cover...
Страница 275: ...Appendix...


