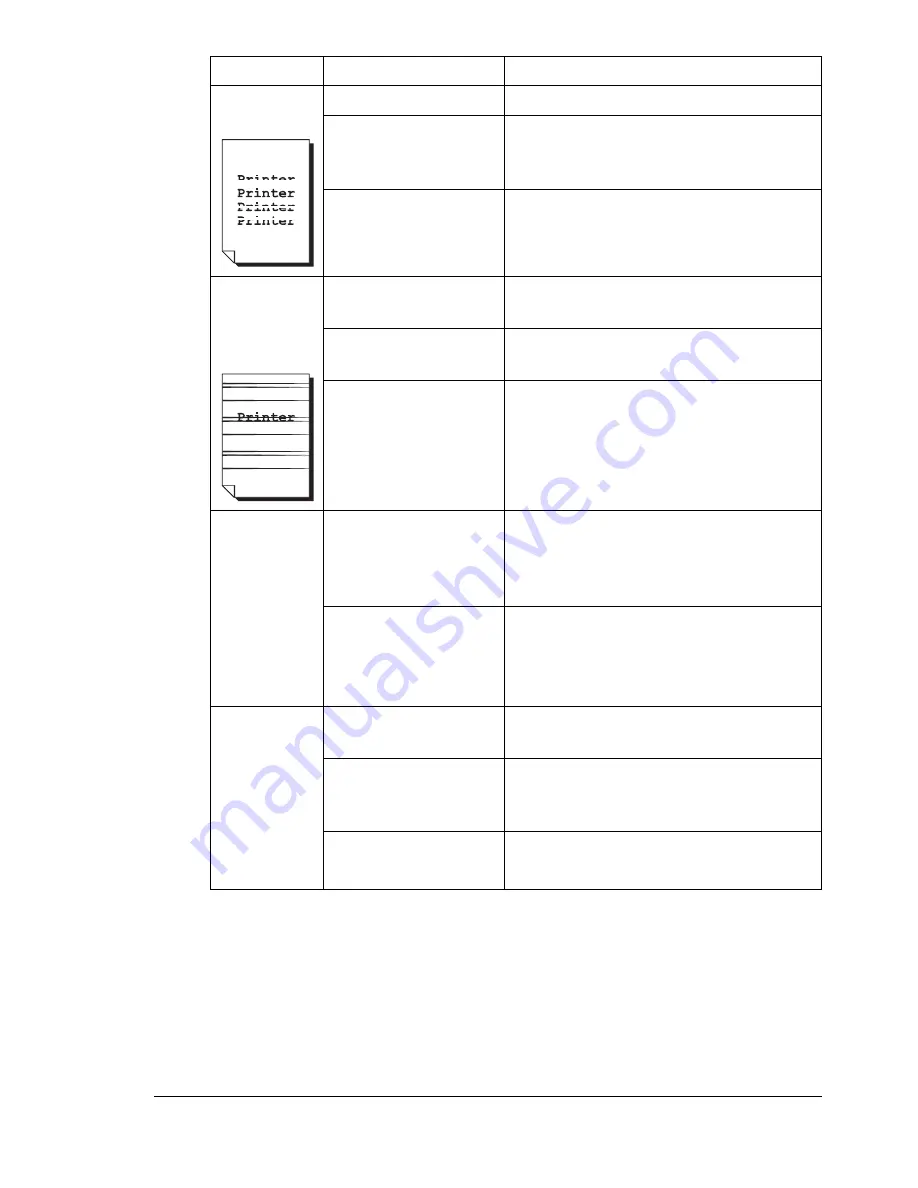
Solving Problems with Printing Quality
217
Image
defects.
The laser lens is dirty. Clean the laser lens.
A toner cartridge may
be leaking.
Remove the toner cartridges and
check them for damage. If one is dam-
aged, replace it.
A print unit may be
defective.
Remove the print unit with the color
causing the abnormal image.
Replace it with a new print unit.
Lateral lines
or bands
appear on
image.
The printer is not
level.
Place the printer on a flat, hard, level
surface.
The media path is
dirty with toner.
Print several sheets and the excess
toner should disappear.
One or more of the
print units may be
defective.
Remove the print units and check them
for damage. If one is damaged,
replace it.
Colors look
drastically
wrong.
One or more of the
print units may be
defective.
Remove the print units and verify that
the toner is distributed evenly on each
cartridge roller, and reinstall the print
units.
One or more of the
toner cartridges may
be low or empty.
Check the control panel for an
TONER
LOW
X
or
TONER OUT
X
message. If
necessary, replace the specified toner
cartridge.
Colors are
not register-
ing properly;
colors are
mixed or
have page-
to-page vari-
ation.
The front cover is not
properly closed.
Make sure that the printer’s front cover
is closed.
One or more of the
print units may be
defective.
Remove the print units and check them
for damage. If one is damaged,
replace it.
The media is moist
from humidity.
Remove the moist media and replace it
with new, dry media.
Symptom
Cause
Solution
Содержание bizhub C31P
Страница 1: ...bizhub C31P User s Guide A0EA 9564 00A...
Страница 8: ......
Страница 14: ...Contents vi...
Страница 15: ...Introduction...
Страница 20: ...Getting Acquainted with Your Printer 6...
Страница 21: ...About the Software...
Страница 36: ...Using the Postscript and PCL Printer Driver 22...
Страница 37: ...Using the Status Monitor Windows Only...
Страница 40: ...Closing the Status Monitor 26...
Страница 41: ...Printer Control Panel and Configuration Menu...
Страница 113: ...Camera Direct...
Страница 115: ...Memory Direct...
Страница 117: ...Using Media...
Страница 151: ...Replacing Consumables...
Страница 181: ...Replacing Consumables 167 4 Remove the empty cartridge and then insert the new one 5 Install the stapler...
Страница 182: ...Replacing Consumables 168 6 Install the stapling unit 7 Close the stapler cover...
Страница 183: ...Maintaining the Printer...
Страница 188: ...Cleaning the Printer 174 3 Clean the media feed rollers by wiping them with a soft dry cloth 4 Close the tray...
Страница 193: ...10 Troubleshooting...
Страница 208: ...Clearing Media Misfeeds 194 4 Push down the levers 5 Close the right side cover...
Страница 244: ...Status Error and Service Messages 230...
Страница 245: ...11 Installing Accessories...
Страница 268: ...Staple Finisher 254 10 Install the relay unit on the machine 11 Open the relay unit cover...
Страница 275: ...Appendix...


