Setup of the Smartline Pump 1000
7
Fig. 2 shows the front view of the Smartline Pump 1000. On the door of
the pump are the foil key touchpad and display panel. The pump head,
pressure transducer, static mixing chamber and capillaries are located
behind the front door and are therefore protected against damage.
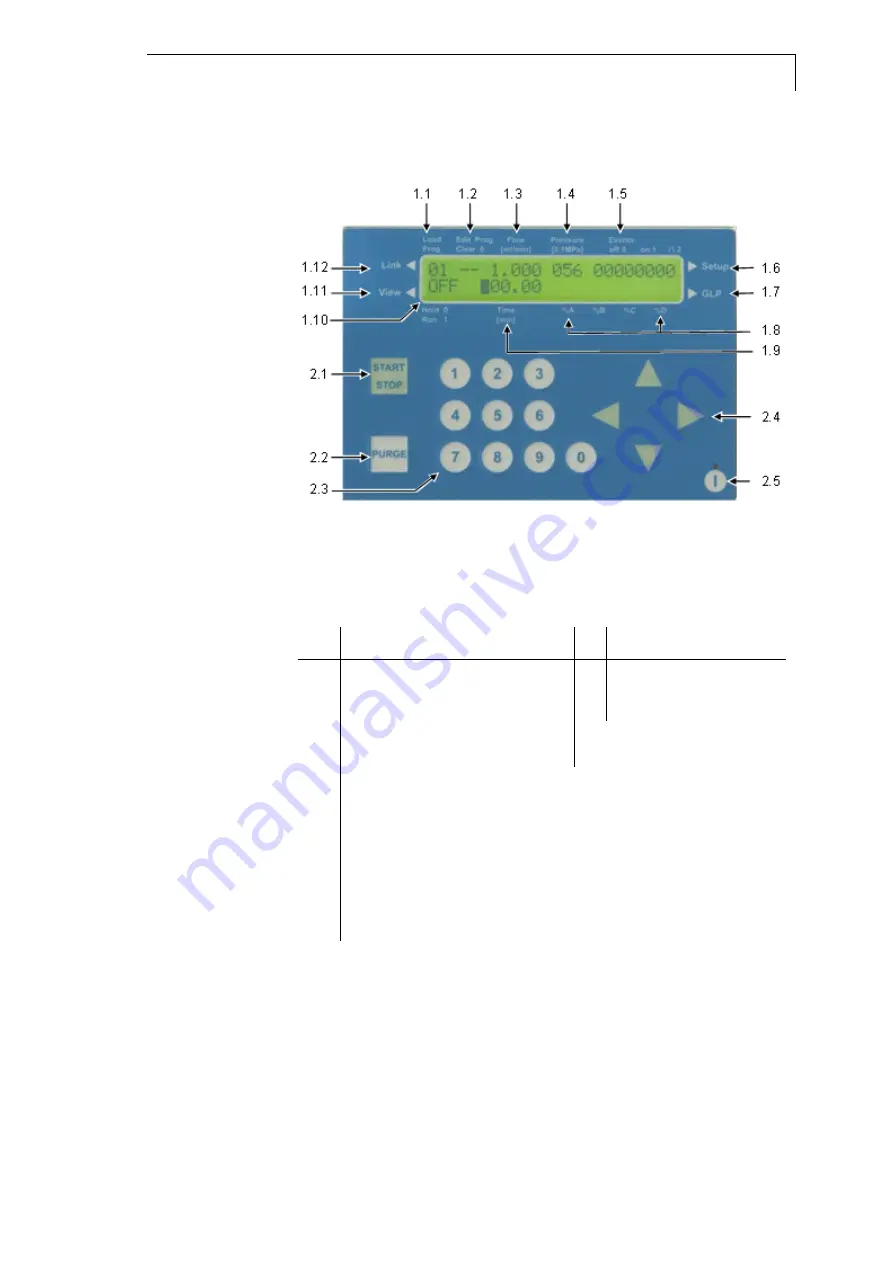
Fig. 3
Display panel and foil key touchpad in detail
Fig. 3 shows the display panel and foil key touchpad of the Smartline
Pump 1000. The explanation of position numbers is given in Table 2.
Table 2
Display panel and foil key touchpad position numbers
1
Display information
2
Foil key touchpad
1.1 Program to be loaded
2.1 Pump START / STOP
1.2 Program to be edited
2.2 Purge START / STOP
1.3 Flow rate
2.3 Numeric key pad
2.4 Arrow keys
1.4 actual system pressure or
|preset maximum|
2.5 Standby key
1.5 Event status
1.6 Go to the SETUP menu
1.7 Go to the GLP menu
1.8 Gradient mixing ratios
1.9 elapsed run time
1.10 Status of program or pump
1.11 Go to the VIEW menu
1.12 Go to the LINK menu
The display shows information about the current status of the pump, such
as the flow rate, the measured pressure or the current status of the
running program. It also serves to display input values while running
parameters are being modified.
Once the flow rate has been entered and set, the pumping process can
be either started or stopped by pressing the START/STOP key {2.1}. The
PURGE key {2.2} allows immediate access to the purging function of the
pump.
The numeric keypad {2.3} allows for the entering of running parameters
as well as for the control of program cycles. Detailed information is given


