Maintenance and service
M-2
4.
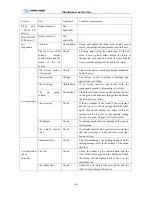
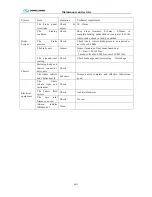
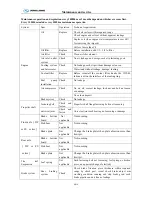
When maintain the brake shoe ,do not damage the ring gear and sensor, clean the ring gear and
sensor at the same time. after maintenance ,do remember to put the sensor to the limited position
along the ring gear direction.
5.
Make sure that the power is in off position when remove and install the components, keep the
components clean and dry.
6.
Never change the fuse capability or connect the fuse in disorder.
7.
Change the indicator in time when it doesn’t work.
8.
Do not brush the ECU with water when cleaning it.
Note
: for details about the working theory of ABS or EBS and maintenance, please refer to the relevant
instruction book which is offered by maker.
Because of different allocation requirements, some of the vehicle model may not be equipped with ABS
or EBS system, please use correctly according to actual condition of vehicle.
Electrical system maintenance and service:
(1)
When battery is charged by external power supply, disconnect ECU control box to prevent outer
high voltage damage ECU (electric control unit).
(2)
When vehicle needs to weld, disconnect ECU. Don’t use multimeter to measure ECU control box.
(3)
Monitor voltage stability of generator regularly.
(4)
Parts dismantling must be carried out after electric has been shut off and should keep parts’
cleanness and dry.
(5)
Don’t change fuse capacity casually or bestride connect fuse.
(6)
When indicator doesn’t work, replace it timely.
(7)
Don’t use water to scour ECU when doing ECU cleanness.
(8)
Don’t use multimeter to measure ECU.
Tire transposition
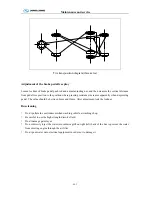
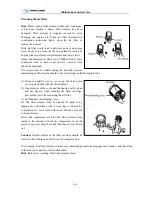
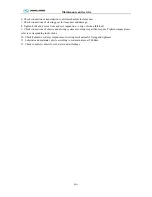
The tire may appear certain abrasion after period of running. The tire should be made transposition as
the drawing below after every 8000 km to 10000 km running for proper use and prolonged tire life.
Four-wheel locating condition should be checked, dynamic balance and tire transposition be made at
once if there shows early and irregular abrasion of the tire.
Tire transposition diagram (two axles)
Содержание XMQ6127 series
Страница 18: ...Operation Instruction CI 1 Figure 17 Set MotPPR Figure 18 Clear Trip A Figure 19 Clear Trip B...
Страница 32: ...Operation Instruction P A 1 2 Control panel operation...
Страница 33: ...Operation Instruction P A 1...
Страница 34: ...Operation Instruction P A 1...
Страница 35: ...Operation Instruction P A 1...
Страница 36: ...Operation Instruction P A 1...
Страница 41: ...Operation Instruction 0 G 1 1 1 2 2 Pushbutton Settings...
Страница 42: ...Operation Instruction 0 G 1 1 2 Starting the Engine 1 3 Selecting the Gear...
Страница 43: ...Operation Instruction 0 G 1 1 4 Setting Off 1 5 Driving Ranges...
Страница 44: ...Operation Instruction 0 G 1 1 5 1 Downhill Travel 1 5 2 Downhill Travel 1 5 3 Kickdown...
Страница 46: ...Operation Instruction 0 G 1 1 6 Stopping Parking...
Страница 49: ...Operation Instruction 0 G 1 1 9 3 Actions to be Taken When the Relevant Permissible Oil Temperature is Exceeded...
Страница 50: ...Operation Instruction 0 G 1 1 10 Status Monitoring Warning Lamps 1 11 Transmission Response to a Malfunction...
Страница 51: ...Operation Instruction 0 G 1 1 11 1 Limp Home Mode 1 12 Auxiliary Control Unit...
Страница 52: ...Operation Instruction 0 G 1 1 12 1 Operating Instructions for the Auxiliary Control Unit...
Страница 53: ...Operation Instruction 0 AB 1 WABCO ABS BASIC INTRODUCTION...
Страница 54: ...Operation Instruction 0 AB 1...
Страница 55: ...Operation Instruction 0 AB 1...
Страница 56: ...Operation Instruction 0 AB 1...
Страница 57: ...Operation Instruction 0 AB 1...
Страница 58: ...Operation Instruction 0 EC 1 ECAS System Introduction 1 System introduction...
Страница 59: ...Operation Instruction 0 EC 1 3 System function...
Страница 60: ...Operation Instruction 0 EC 1...
Страница 77: ...Operation Instruction 0 E 1 CAN bus module...
Страница 158: ...Appendix A 4 Air braking schematic diagram...
Страница 159: ...A 5 Electric schematic diagram of the complete vehicle 1...
Страница 160: ...A 6 Electric schematic diagram of the complete vehicle 2...
Страница 161: ...A 7 Electric schematic diagram of the complete vehicle 3...
Страница 162: ...A 8 Electric schematic diagram of the complete vehicle 4...


