Vehicle Starting and Driving
S-13
Control periodically, at least once a week:
1.
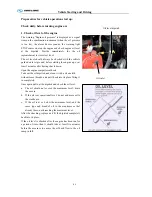
Check tire for abrasion and pressure and tire nut for fixture
The vehicle’s safety and performance depend considerably on the state of the tires, reason why they
should be checked daily.
Before driving a vehicle, check charging pressure of tire for normal, tire for damage, tire nut for fixture.
Note:
At initial 50km, please tighten tire nuts of new vehicle to specified torque in appendix.
Tire pressure
Keep the tires always correctly calibrated. The inflation pressure should be checked with the tires cold at
least once a week.
After driving the vehicle for some time, the tires heat and in consequence of the heat, the inflation
pressure increases. Never, under any circumstance, empty heated tires to reestablish the recommended
inflation pressure.
The pressure difference between the assemble tires on the same axle should not be superior to 0.1 bar.
Wheel hubs
Keep them always clean, eliminating eventual mud or other dirt adherence. Substitute the damaged and/or
deformed hubs. The utilization of refurbished hubs is not recommended.
Wheel nut
Without fail re-tighten the wheel fastening nuts of new vehicles after running 50km.
The wheel fastening nuts should be retightened, crosswise, in turns, observing the recommended
tightening torque according to the type of fastening nut. If a torque meter is not available, tighten the nuts
strongly, using the vehicle tools without additional levers.
Содержание XMQ6127 series
Страница 18: ...Operation Instruction CI 1 Figure 17 Set MotPPR Figure 18 Clear Trip A Figure 19 Clear Trip B...
Страница 32: ...Operation Instruction P A 1 2 Control panel operation...
Страница 33: ...Operation Instruction P A 1...
Страница 34: ...Operation Instruction P A 1...
Страница 35: ...Operation Instruction P A 1...
Страница 36: ...Operation Instruction P A 1...
Страница 41: ...Operation Instruction 0 G 1 1 1 2 2 Pushbutton Settings...
Страница 42: ...Operation Instruction 0 G 1 1 2 Starting the Engine 1 3 Selecting the Gear...
Страница 43: ...Operation Instruction 0 G 1 1 4 Setting Off 1 5 Driving Ranges...
Страница 44: ...Operation Instruction 0 G 1 1 5 1 Downhill Travel 1 5 2 Downhill Travel 1 5 3 Kickdown...
Страница 46: ...Operation Instruction 0 G 1 1 6 Stopping Parking...
Страница 49: ...Operation Instruction 0 G 1 1 9 3 Actions to be Taken When the Relevant Permissible Oil Temperature is Exceeded...
Страница 50: ...Operation Instruction 0 G 1 1 10 Status Monitoring Warning Lamps 1 11 Transmission Response to a Malfunction...
Страница 51: ...Operation Instruction 0 G 1 1 11 1 Limp Home Mode 1 12 Auxiliary Control Unit...
Страница 52: ...Operation Instruction 0 G 1 1 12 1 Operating Instructions for the Auxiliary Control Unit...
Страница 53: ...Operation Instruction 0 AB 1 WABCO ABS BASIC INTRODUCTION...
Страница 54: ...Operation Instruction 0 AB 1...
Страница 55: ...Operation Instruction 0 AB 1...
Страница 56: ...Operation Instruction 0 AB 1...
Страница 57: ...Operation Instruction 0 AB 1...
Страница 58: ...Operation Instruction 0 EC 1 ECAS System Introduction 1 System introduction...
Страница 59: ...Operation Instruction 0 EC 1 3 System function...
Страница 60: ...Operation Instruction 0 EC 1...
Страница 77: ...Operation Instruction 0 E 1 CAN bus module...
Страница 158: ...Appendix A 4 Air braking schematic diagram...
Страница 159: ...A 5 Electric schematic diagram of the complete vehicle 1...
Страница 160: ...A 6 Electric schematic diagram of the complete vehicle 2...
Страница 161: ...A 7 Electric schematic diagram of the complete vehicle 3...
Страница 162: ...A 8 Electric schematic diagram of the complete vehicle 4...

