


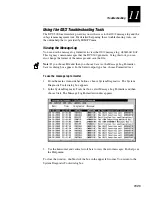


Troubleshooting
11-21
11
5. Make sure that the modem that is connected to the DCS 300 is configured.
6. After the modem connection is made, start the NetOp guest software.
7. Call the TCP/IP host using the name 222.222.222.10.
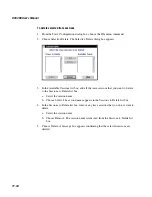
Tips for using dial-up SLIP in Windows NT/2000
1. Install RAS (Remote Access Service) so that you can have dial-up networking
support.
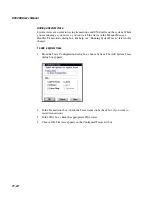
2. Create a phonebook entry.
a.
In My Computer folder, double-click the Dial-Up Networking icon.
b. In the Dial-up Networking dialog box, click the New button to create a new
phonebook entry.
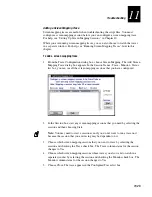
c.
In the Basic tab, enter an entry name and the phone number you want to dial.
d. In the Server tab, select SLIP as the Dial-up server type and press the TCP/IP
Settings button.
e.
In the SLIP TCP/IP Settings dialog, you must specify “222.222.222.20” as the
IP address.
Note:
You should also uncheck the IP header compression option.
3. Make sure that the modem that is connected to the DCS 300 is configured.
4. After the modem connection is made, start the NetOp guest software.
5. Call the TCP/IP host using the name 222.222.222.10.
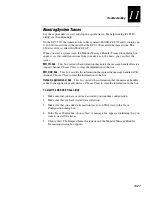
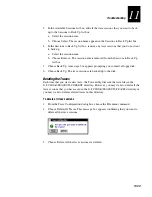
Using NetOp Guest for OS/2
After you install the NetOp guest software on your remote PC, follow these tips to
ensure that a connection is made.
Tips for using TCP/IP
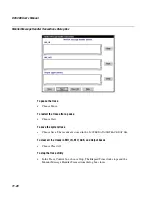
1. From the Host menu, choose Add Host. The NetOp Guest - Add Host dialog box
appears.
2. In the Host ID field, enter the IP address of the DCS 300.
3. Click Settings. The NetOp Guest - Edit Host dialog box appears.
4. In the Protocol list, select TCP/IP.
5. Close all dialog boxes and then choose the Call toolbar button.
Содержание DCS 300
Страница 1: ...P N 067296 005 User s Manual DCS300 ...
Страница 4: ...DCS 300 User s Manual blank ...
Страница 16: ...DCS 300 User s Manual ...
Страница 22: ...DCS 300 User s Manual ...
Страница 23: ...Getting Started 1 ...
Страница 24: ...DCS 300 System Manual blank ...
Страница 42: ...blank ...
Страница 43: ...Learning About the DCS 300 2 ...
Страница 44: ...DCS 300 User s Manual blank ...
Страница 68: ...blank ...
Страница 69: ...Connecting to the Upline Network 3 ...
Страница 70: ...DCS 300 System Manual 3 2 blank ...
Страница 94: ...blank ...
Страница 95: ...Connecting to the Intermec RF Network 4 ...
Страница 96: ...DCS 300 System Manual blank ...
Страница 134: ...blank ...
Страница 135: ...Connecting to the 9180 and the Intermec CrossBar Network 5 ...
Страница 136: ...DCS 300 System Manual blank blank ...
Страница 158: ...DCS 300 System Manual blank ...
Страница 159: ...Running Data Collection Browser 6 ...
Страница 160: ...DCS 300 System Manual blank ...
Страница 171: ...Running Terminal Emulation 7 ...
Страница 172: ...DCS 300 System Manual blank ...
Страница 209: ...Running Peer to Peer Applications 8 ...
Страница 210: ...DCS 300 System Manual blank ...
Страница 232: ...blank ...
Страница 233: ...Running Terminal Sessions 9 ...
Страница 234: ...DCS 300 System Manual blank ...
Страница 258: ...DCS 300 System Manual 9 26 blank ...
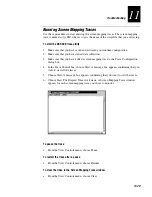
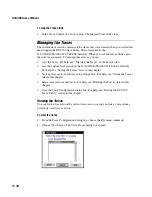
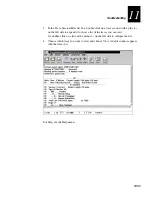
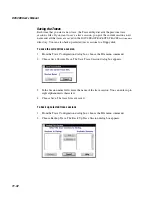
Страница 259: ...Running Screen Mapping 10 ...
Страница 260: ...DCS 300 System Manual 10 2 blank ...
Страница 269: ...Running Screen Mapping 10 11 10 Screen 3 Screen 4 Main Host Screen Screen 5 ...
Страница 271: ...Running Screen Mapping 10 13 10 Screen 4 Menu Option 915 Screen 5 Screen 6 Menu Option 910 Screen 7 ...
Страница 333: ...Troubleshooting 11 ...
Страница 334: ...DCS 300 System Manual blank ...
Страница 372: ...blank ...
Страница 373: ...Specifications and Other Helpful Information A ...
Страница 374: ...DCS 300 System Manual B 2 blank ...
Страница 391: ...Upgrading the DCS 300 and Devices B ...
Страница 392: ...DCS 300 System Manual blank ...
Страница 411: ...How the DCS 300 Routes Transactions C ...
Страница 412: ...DCS 300 System Manual blank ...
Страница 430: ...blank ...
Страница 431: ...Index I ...
Страница 432: ...DCS 300 System Manual I 2 blank ...