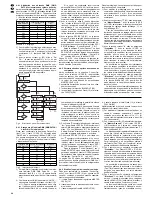
zeigt, bevor nach weiterem Drücken der Taste
zum nächsten Schritt weitergeschaltet wird. Soll
nur die Überblendzeit geändert werden, mit dem
Bedienschritt 5) fortfahren.
3) Mit den Zifferntasten (2) die Banknummer und
die Szenennummer je zweistellig für die ange-
zeigte Schrittnummer eingeben. Bei Fehlein-
gaben mit der Taste ESC/SETUP (21) einen
Bedienschritt zurückspringen und die Nummern
erneut eingeben.
4) Die DMX-Werte der gewählten Szene werden jetzt
zur Kontrolle ausgegeben. Im Display erscheint
die Frage „o.k.?“. Die Szenenauswahl mit der
Taste STORE/PRG (22) oder der Taste 12/YES
bestätigen oder die Auswahl mit der Taste 11/NO
verwerfen und anschließend eine andere Szene
eingeben.
5) Nur wenn es sich um eine Sequenz mit eigenen
Überblendzeiten handelt: Die Überblendzeit mit
dem Regler C.F. TIME (7) einstellen und mit der
Taste STORE/PRG bestätigen.
6) Um einen weiteren Sequenzschritt einzugeben,
die Bedienschritte 3) bis 5) wiederholen. Um
einen weiteren Sequenzschritt zu ändern, die Be-
dienschritte ab 2) 2. Absatz bis 5) wiederholen.
7) Zum Schluss entweder den Sequenzprogram-
mier-Modus durch mehrfaches Drücken der
Taste ESC/ SETUP beenden oder um in den Se-
quenzablauf-Modus (Kap. 7.2) zu wechseln, die
Taste SEQUENCE betätigen.
7.1.4 Sequenzschritte einfügen
1) Nach dem Drücken der Tasten SEQUENCE (26)
und STORE/PRG (22) mit den Zifferntasten (2)
die Nummer der Sequenz, die ergänzt werden
soll, zweistellig anwählen.
2) Mit den Cursor-Tasten
,
(23) den Sequenz-
schritt auswählen, vor dem ein neuer Schritt ein-
gefügt werden soll.
3) Die Taste INSERT (25) drücken. Das Display
zeigt jetzt „Seq xx St xxx _ _ / _ _“.
Enthält die Sequenz bereits die maximal für
diesen Sequenztyp mögliche Schrittzahl, kann
kein weiterer Schritt eingefügt werden und es
erscheint die Meldung „Seq xx is full!
"
ESC“. Zur
Anwahl einer anderen Sequenz oder zum Ver-
lassen des Sequenzprogrammier-Modus die
Taste ESC/SETUP (21) entsprechend mehrfach
drücken.
4) Zur Eingabe von Bank-, Szenennummer und ggf.
Überblendzeit für den neuen Schritt die Bedien-
schritte 3) bis 5) des Kapitels 7.1.2 durchführen.
5) Zum Einfügen weiterer Sequenzschritte die Be-
dienschritte 2) bis 4) wiederholen.
6) Zum Beenden des Sequenzprogrammier-Modus
die Taste ESC/SETUP mehrfach betätigen oder
um in den Sequenzablauf-Modus zu wechseln,
die Taste SEQUENCE drücken.
7.1.5 Sequenzschritte löschen
1) Nach dem Drücken der Tasten SEQUENCE (26)
und STORE/PRG (22) mit den Zifferntasten (2)
die Nummer der Sequenz, aus der Schritte ge-
löscht werden sollen, zweistellig anwählen.
2) Mit den Cursor-Tasten
,
(23) den zu
löschenden Sequenzschritt auswählen.
3) Die Taste DELETE (24) drücken. Im Display er-
scheint die Sicherheitsabfrage „Remove Step?“.
4) Mit der Taste 12/YES das Löschen bestätigen
oder mit der Taste 11/NO abbrechen. Nach dem
Löschen rücken die nachfolgenden Schritte ent-
sprechend auf. War der gelöschte Schritt der ein-
zige der Sequenz, wird angezeigt, dass diese
wieder frei ist: „Seq xx is blank!“. Es kann sofort
mit der Programmierung einer neuen Sequenz
begonnen werden – siehe dazu Kap. 7.1.2 ab
Bedienschritt 2).
5) Zum Löschen weiterer Sequenzschritte die Be-
dienschritte 2) bis 4) wiederholen.
6) Zum Beenden des Sequenzprogrammier-Modus
die Taste ESC/SETUP mehrfach betätigen oder
um in den Sequenzablauf-Modus zu wechseln,
die Taste SEQUENCE drücken.
7.2 Szenensequenz starten
1) Die Taste SEQUENCE (26) drücken. Neben der
Taste leuchtet die grüne LED RUN auf und im
Display erscheint „Seq _ _“, „Select Sequence“.
Es darf jedoch nicht das Konfigurationsmenü auf-
gerufen [zum Verlassen Taste ESC/SETUP (21)
drücken] oder der Hold-Modus aktiviert sein [zum
Ausschalten Taste HOLD (3) drücken].
2) Die Sequenznummer zweistellig mit den Ziffern-
tasten (2) direkt eingeben, z. B. für Sequenz 5 die
Tasten 0 und 5 (die untere Beschriftung der Tas-
ten beachten). Im Display erscheinen Informatio-
nen zu der gewählten Sequenz:
„Seq xx is blank!“, wenn es sich um eine freie
(unprogrammierte) Sequenznummer handelt
oder z. B. „Seq11 014St +CFT“ für die Sequenz
Nr. 11, die aus 14 Schritten (Steps) mit jeweils
eigener Überblendzeit (Crossfadingtime) besteht.
Bei Fehleingaben mit der Taste ESC/SETUP
(21) einen Bedienschritt zurückspringen und die
Nummer erneut eingeben.
3) Bei Sequenzen, bei denen die Überblendzeiten
mitgespeichert wurden (Anzeige „+CFT“), ist
beim Ablauf der Regler C.F. TIME (7) ohne Funk-
tion. Bei Sequenzen des anderen Typs („+CFT“
wird nicht angezeigt) die Überblendzeit zwischen
den Schritten der Sequenz mit dem Regler
C.F. TIME einstellen (Position MAN siehe Kap.
7.2.1). Dies kann vor dem Start einer Sequenz,
aber auch während des Ablaufs geschehen.
4) Die gelbe Takt-LED oberhalb der Taste TAP
SPEED (20) beginnt im Takt der Szenenwechsel
entsprechend der Einstellung des Reglers SE-
QUENCER SPEED (5) zu blinken. Zum Ändern
der Sequenzablaufgeschwindigkeit diesen Reg-
ler auf die gewünschte Taktzeit einstellen oder für
eine genauere Eingabe die Taste TAP SPEED
zweimal drücken: Nach dem ersten Drücken
leuchtet die gelbe Takt-LED, nach dem zweiten
erlischt sie wieder. Die Zeit zwischen den beiden
Tastenbetätigungen bestimmt die Zeit bis zum
nächsten Szenenwechsel. Wird die Taste TAP
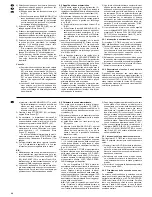
3) Enter the two-digit bank number and the two-digit
scene number for the displayed step number with
the numerical keys (2) each. In case of incorrect
inputs, go back one operating step with the but-
ton ESC/SETUP (21) and enter the numbers
again.
4) The DMX values of the selected scene are now
sent to the output as a check. The question
“o.k.?” is displayed. Confirm the scene selection
with the button STORE/PRG (22) or the button
12/YES or discard the selection with the button
11/NO and then enter another scene.
5) Only if a sequence with individual crossfading
times is concerned: Adjust the crossfading time
with the control C.F. TIME (7) and confirm it with
the button STORE/PRG.
6) To enter another sequence step, repeat the oper-
ating steps 3) to 5). To change another sequence
step, repeat the operating steps from 2) second
paragraph to 5).
7) Finally stop the sequence programming mode
either by pressing the button ESC/SETUP sev-
eral times or actuate the button SEQUENCE to
go to the sequence running mode (chapter 7.2).
7.1.4 Inserting sequence steps
1) After pressing the buttons SEQUENCE (26) and
STORE/PRG (22), select the two-digit number of
the sequence to be completed with the numerical
keys (2).
2) Select the sequence step before which a new
step is to be inserted with the cursor keys
,
(23).
3) Press the key INSERT (25). The display now
shows “Seq xx St xxx _ _ / _ _”.
If the sequence already contains the number
of steps which is possible as a maximum for this
sequence type, no further step can be inserted
and the message “Seq xx is full!
"
ESC” is dis-
played. To select another sequence or to exit the
sequence programming mode, press the button
ESC/SETUP (21) several times correspondingly.
4) To enter bank number, scene number, and, if ne-
cessary, crossfading time for the new step, per-
form the operating steps 3) to 5) of chapter 7.1.2.
5) To insert further sequence steps, repeat the oper-
ating steps 2) to 4).
6) To stop the sequence programming mode,
actuate the button ESC/SETUP several times or
press the button SEQUENCE to change into the
sequence running mode.
7.1.5 Deleting sequence steps
1) After pressing the buttons SEQUENCE (26) and
STORE/PRG (22), select the two-digit number of
the sequence from which steps are to be deleted
with the numerical keys (2).
2) With the cursor keys
,
(23) select the se-
quence step to be deleted.
3) Press the button DELETE (24). The safety
request “Remove Step?” is displayed.
4) Confirm the deletion with the button 12/YES or
interrupt it with the button 11/NO. After deleting,
the subsequent steps advance accordingly. If the
deleted step was the only step of the sequence,
the display shows that this sequence is blank
again: “Seq xx is blank!”. It is possible to start
immediately to programme a new sequence –
see chapter 7.1.2 as from operating step 2).
5) To delete further sequence steps, repeat the op-
erating steps 2) to 4).
6) To stop the sequence programming mode, actu-
ate the button ESC/SETUP several times or
press the button SEQUENCE to change into the
sequence running mode.
7.2 Starting the scene sequence
1) Press the button SEQUENCE (26). Next to the
button the green LED RUN lights up and the dis-
play shows “Seq _ _”, “Select Sequence”. How-
ever, the configuration menu must not be called
[to exit it, press the button ESC/SETUP (21)] or
the hold mode must not be activated [to switch it
off, press the button HOLD (3)].
2) Directly enter the two-digit sequence number
with the numerical keys (2), e. g. for sequence 5
the buttons 0 and 5 (pay attention to the lower let-
tering of the buttons). The display shows informa-
tion on the selected sequence:
“Seq xx is blank!” for a blank (not programmed)
sequence number
or e. g. “Seq11 014St +CFT” for the sequence
No. 11 which consists of 14 steps with individual
crossfading time in each case.
In case of incorrect inputs go back one operat-
ing step with the button ESC/SETUP (21) and
enter the number again.
3) For sequences for which the crossfading times
have been memorized (display “+CFT”), the con-
trol C.F. TIME (7) is without function when the
sequences are running. For sequences of the
other type (“+CFT” is not displayed) adjust the
crossfading time between the steps of the
sequence with the control C.F. TIME (position
MAN see chapter 7.2.1). This can be made prior
to the start of a sequence, but also during the run
of a sequence.
4) The yellow rhythm LED above the button TAP
SPEED (20) starts to flash to the rhythm of the
change of scene according to the adjustment of
the control SEQUENCER SPEED (5). To change
the sequence running speed, adjust this control
to the desired rhythm time or press the button
TAP SPEED twice for a more precise input: After
14
GB
D
A
CH

