9-6
9. D-STAR OPERATION (BASIC)
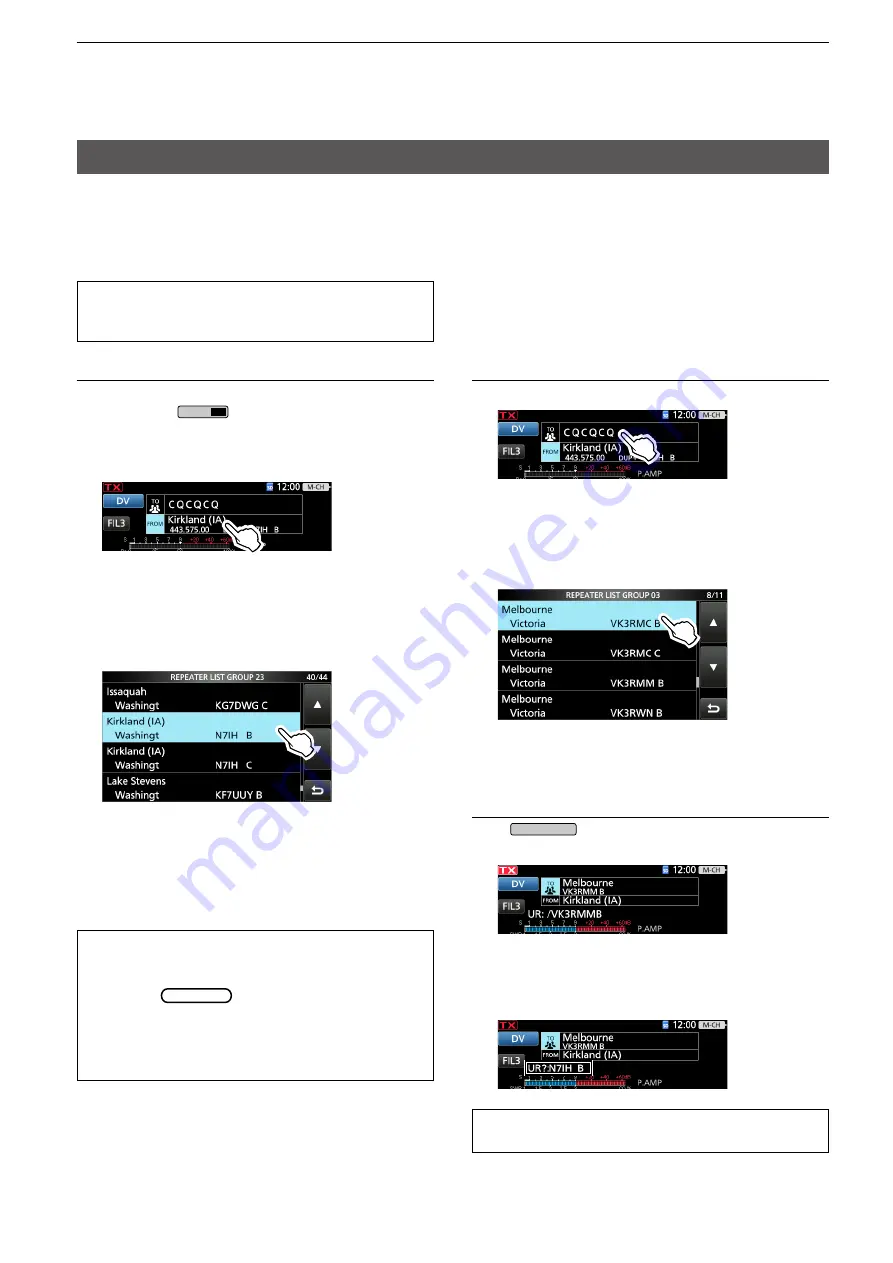
Step 2: Set “TO” (Destination)
1. Touch “TO” twice.
2. Touch “Gateway CQ.”
3. Select the repeater group where your destination
repeater is listed.
4. Select your destination repeater.
(Example: Melbourne)
• Returns to the DR screen, and the selected repeater
name is displayed in “TO.”
Step 3: Check whether you can access the
repeater
Push
TRANSMIT
, or hold down the microphone’s
[PTT] to transmit.
• If you get a reply call, or “UR?” is displayed within 3
seconds, your signal reached your access repeater
and your call was successfully sent from your
destination repeater.
TIP:
See page 10-15 for status indications after a
reply is received.
Accessing repeaters
This section describes how to check whether or not
you can access your local area repeater (Access
repeater), and if your signal is successfully sent to a
destination repeater.
TIP:
If your call sign (MY) has not been set, or your
call sign and equipment have not been registered
at a D-STAR repeater, see pages 9-3, 9-4.
TIP:
There are several ways to set your access
repeater. (p. 10-1)
• Rotating
MAIN DIAL
on the DR screen with
“FROM” is selected
• Searching for the nearest repeater
• Setting from the TX History
• Searching for a repeater using the DR scan
Step 1: Set “FROM” (Access repeater)
1. Select the operating band.
2. Hold down
CALL
DR
for 1 second to display the
DR screen.
3. Touch “FROM” to select, and then touch “FROM”
again.
4. Touch “Repeater List.”
5. Touch the repeater group where your access
repeater is listed.
6. Touch your access repeater.
(Example: Kirkland (IA))
• Returns to the DR screen, and the selected repeater
name is displayed in “FROM.”
L
By just selecting the repeater name, the repeater
call sign, its frequency, duplex setting, and frequency
offset are automatically set.
L
A repeater list here is just an example.


