


3
CONNECTING TO A WIRELESS LAN (BASIC)
3-17
4
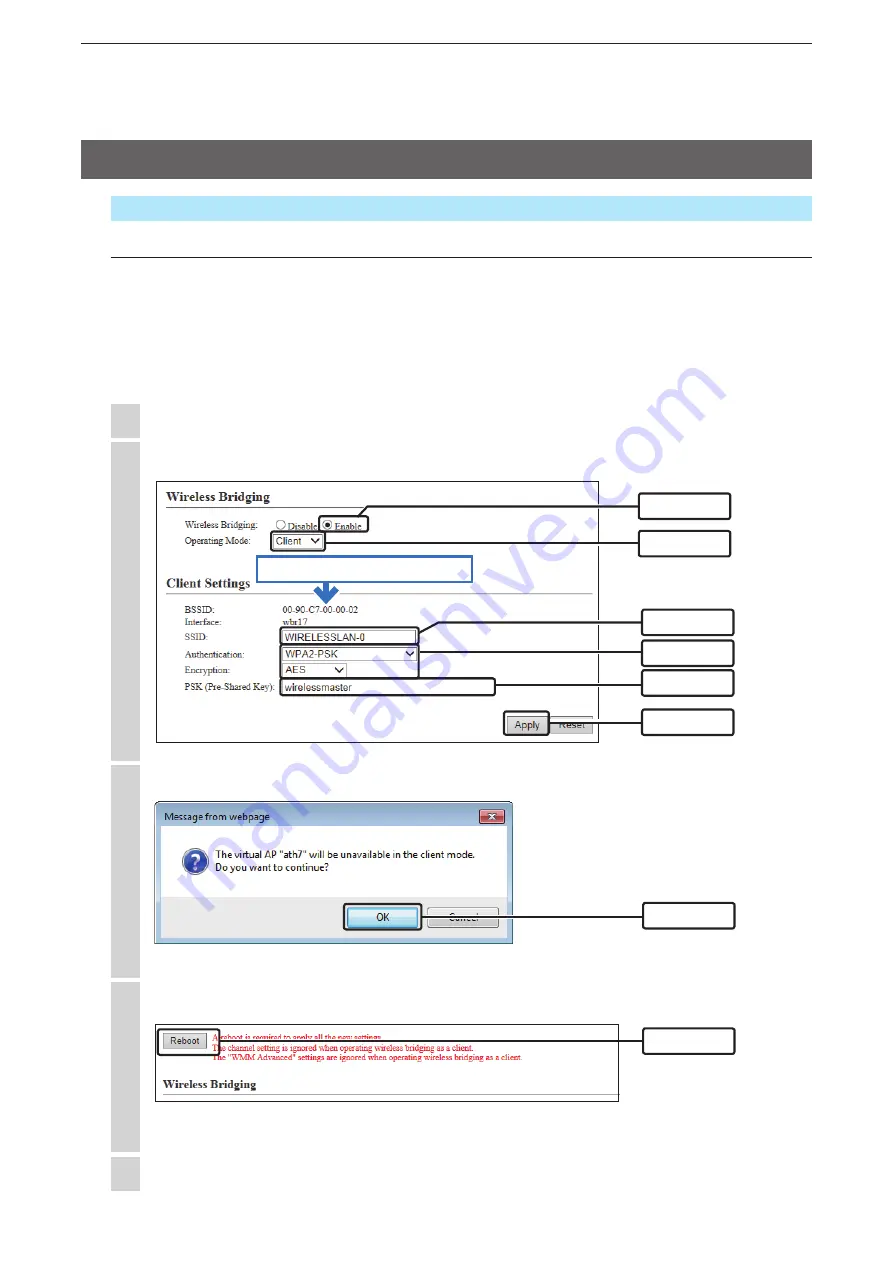
Click [Reboot].
• Reboot the AP-90M as instructed.
Click [OK].
3
After the reboot is complete, click [Back].
5
Click
Click
Click [Wireless Settings] and [Wireless 2], and then click [Wireless Bridging (WBR)].
1
Set the client’s security settings.
2
Wireless Settings > Wireless 2 > Wireless Bridging (WBR)
Setting the Client unit
Follow the steps below to set the client unit to use with the wireless bridging function.
•
For the Wireless 2, the wireless bridging is made using the SSID and Security settings set to the virtual AP (ath4) on
the master unit.
• The client unit scans the master unit that has the matching SSID and security settings.
• During a scan with the client unit, the wireless LAN station cannot be connected to the other virtual APs (ath4 to ath6)
in Wireless 2 (external antenna).
• The client’s virtual AP (ath7) cannot be used when the wireless bridging function is set.
6. Setting the Wireless Bridging function (Continued)
y
Click
w
Select
q
Click
BSSID to set for the Master unit
t
Enter
r
Select
e
Check


