background image

Hardware Installation Guide

Hardware Management Console

Installation and Operations Guide

AIX Installation in a Partitioned Environment

Application Documentation

Application Documentation

AIX Documentation Library

AIX Documentation Library

Hardware User's Guide

AIX Installation in a

Partitioned Environment

AIX Installation Guide

and Reference

Operating System Installation:

Getting Started

Installing/Configuring

Applications

Installing/Configuring

the Operating System

Installing/Configuring

the Operating System

Configuring Full

System Partition

Is System

Using

Partitions

?

Configuring

Partitions

Customer Tasks

Service Personnel Tasks

Marketing and Customer Tasks

Using the System

Planning

Managed

by HMC

?

Begin

Site and Hardware Planning Information

Hardware Management Console

Installation and Operations Guide

Site and Hardware Planning Information

Hardware

Installation

Hardware

Installation

Planning

Yes

Yes

No

No

Planning for Partitioned-System Operations

Planning for

Partitioned-System Operations

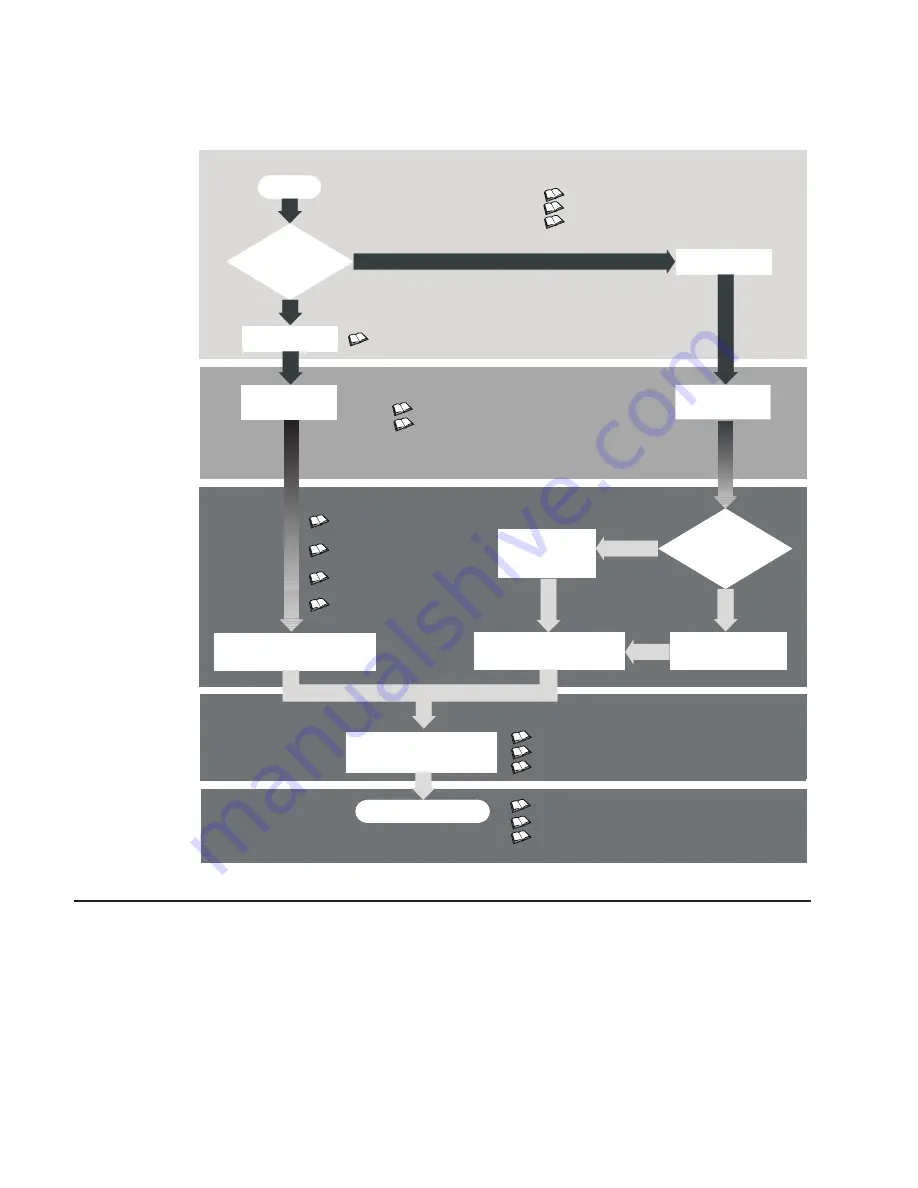
Documentation Overview

This section provides descriptions and target audience information for the eServer
pSeries and AIX 5L documentation libraries. Some of the documentation may only be
available in printed form or in softcopy form. Based on the documentation content, the
books are divided into the following categories: PlanningInstalling and Configuring,
and Using the System.

2

Eserver

pSeries 690 Installation Guide

Содержание eserver pSeries 690

Страница 1: ...pSeries 690 Installation Guide SA38 0587 02 ERserver IBM...

Страница 2: ......

Страница 3: ...pSeries 690 Installation Guide SA38 0587 02 ERserver IBM...

Страница 4: ...ion Development Department H6DS 905 6C006 11501 Burnet Road Austin Texas 78758 3493 To send comments electronically use this commercial internet address aix6kpub austin ibm com Any information that yo...

Страница 5: ...ack If Ordered 9 Connecting Internal Power Cords for the Secondary Rack 11 Connecting I O Cables for the Secondary Rack 12 Connecting the Integrated Battery Feature Power for the Secondary Rack 13 Ste...

Страница 6: ...Customer 33 Appendix A Communications Statements 35 Federal Communications Commission FCC Statement 35 European Union EU Statement 35 International Electrotechnical Commission IEC Statement 36 United...

Страница 7: ...ut IBF 76 I O Subsystem Positions Fully Populated Primary and Secondary Rack Rear View with IBFs 77 Placement of Subsystem 4 in a Two Rack Configuration Rear View with IBF 78 I O Subsystems 1 Through...

Страница 8: ...Clearance Through Doorways 100 Preparing for Rack Top Frame Installation for pSeries 690 Reduced Height Option RPQ8A1173 107 Installing the Rack Top Frame 111 Replacing Covers 117 Index 119 vi Eserver...

Страница 9: ...v viii v ix v 14 v 17 v 20 For a translation of the safety notices contained in this book see the System Unit Safety Information order number SA23 2652 Electrical Safety Observe the following safety i...

Страница 10: ...prevent electrical shock hazard disconnect all power cables from the electrical outlet before relocating the system D01 CAUTION This unit has more than one power supply cord Follow procedures for rem...

Страница 11: ...for laser certification numbers and approval information CAUTION All IBM laser modules are designed so that there is never any human access to laser radiation above a class 1 level during normal oper...

Страница 12: ...x Eserver pSeries 690 Installation Guide...

Страница 13: ...ges or component failures must verify the accuracy of operations performed and data saved or transmitted by the system at or near the time of the outage or failure In addition users must establish pro...

Страница 14: ...xii Eserver pSeries 690 Installation Guide...

Страница 15: ...r Monospace Identifies examples of specific data values examples of text similar to what you might see displayed examples of portions of program code similar to what you might write as a programmer me...

Страница 16: ...cement Reference order number SA38 0538 contains information regarding slot restrictions for adapters that can be used in this system v The Site and Hardware Planning Information order number SA38 050...

Страница 17: ...s included in the chapter v Eserver pSeries Roadmap v Documentation Overview Brief description of the printed and softcopy documentation shipped including targeted audience The Eserver pSeries Roadmap...

Страница 18: ...s Service Personnel Tasks Marketing and Customer Tasks Using the System Planning Managed by HMC Begin Site and Hardware Planning Information Hardware Management Console Installation and Operations Gui...

Страница 19: ...ns Describes planning considerations for partitioned systems including information on dynamic partitioning and Capacity Upgrade on Demand System administrators printed and softcopy Hardware Management...

Страница 20: ...nes operating instructions for hardware diagnostic programs with common MAPs and SRNs Service Request Numbers Service personnel printed and softcopy PCI Adapter Placement Reference Outlines system spe...

Страница 21: ...o a Hardware Management Console for pSeries HMC 1 2 4 3 5 6 7 8 9 1 Hardware Management Console 5 6 Primary 7040 Model 61R Integrated Battery Feature IBF Optional for the Primary Power Subsystem Redun...

Страница 22: ...38 0508 are complete Weight Reduction Certain system configurations may include a primary rack that weighs in excess of 2500 pounds doors removed as shipped from manufacturing Some elevators have a we...

Страница 23: ...need them to complete this installation v A floor plan showing where to place each rack v The items necessary for installing a modem including the correct telephone jack power cords cables and a powe...

Страница 24: ...3 Rotate each leveling foot downward until it contacts the surface on which the rack is placed 4 Adjust the leveling feet downward as needed until the rack is level When the rack is level tighten the...

Страница 25: ...EMC trim 4 Place top vertical foam on top of the bottom foam 5 Place the top EMC trim part number 11P1105 on top of the secondary rack using the middle two screws Do not tighten the screws yet 6 Plac...

Страница 26: ...e Cover 2 EMC Top Trim P N 11P1105 9 Primary Side Cover 3 Bolt and Washer Qty 4 each 10 Rear Vertical Trim P N 11P095 4 Threaded Standoff Qty 4 each 11 EMC Bottom Trim P N 11P2872 5 Front Vertical Tri...

Страница 27: ...cords from the primary rack to the secondary rack and connect them to the drawers in the secondary rack See Appendix H Cabling Information on page 87 for additional information To Back To Primary Rac...

Страница 28: ...rack to the secondary rack and connect them to the drawers in the secondary rack Secondary Rack Rear To Primary Rack Primary Rack Rear Ports 0 and 1 Ports 0 and 1 Note For more information about cabl...

Страница 29: ...ture Power for the Secondary Rack If you are installing an IBF for the secondary rack route the cables as shown in the following illustration IBF P1 IBF P1 Secondary Rack Front Secondary Rack Rear Cha...

Страница 30: ...ly cord Follow procedures for removal of power from the system when directed CAUTION Energy hazard remove all jewelry before servicing Step 7 Check the Cables and Connect I O Devices Cables may loosen...

Страница 31: ...nit emergency power off UEPO switch is located on the front of the primary frame A Frame of each pSeries 690 When the switch is tripped utility power is confined to the machine power compartment All v...

Страница 32: ...tion possible the room EPO cable must be installed for the machine to power on In the following figure an AMP connector 770019 1 is needed to connect to the system UEPO panel For room EPO cables using...

Страница 33: ...le case or faceplate is painted be sure the probe tip penetrates the paint and makes good electrical contact with the metal __ 4 Check the resistance from the ground pin of the receptacle to the recep...

Страница 34: ...For 200 240 V the acceptable phase phase voltage measurement range is 180 254 V v For 380 415 V the acceptable phase phase voltage measurement range is 342 440 V v For 480 V the acceptable phase phas...

Страница 35: ...tion brackets are installed 07H6763 Filler Plate wide 4 Use in the base of the frame to cover openings Install in the base of the frame after all of the cable retention brackets are installed 31L7174...

Страница 36: ...tion the HMC and monitor at or near their desired location using the following guidelines v Use caution when lifting or moving the HMC v Use caution when lifting or moving the monitor v Leave enough s...

Страница 37: ...tor 3 Attach the power cord to the monitor item 1 in the following illustration If the HMC has a voltage switch ensure that it is in the correct position for the supply voltage Attention Do not plug t...

Страница 38: ...f the HMC and the HMC connectors located on the primary I O book 1 Primary Rack 4 Primary HMC Connected to serial port HMC1 in Primary I O Book 2 Primary I O Book 5 Optional Second HMC Connected to Se...

Страница 39: ...C modem do the following 1 Connect the modem cable to the external HMC modem 1 2 Connect the other end of the modem cable to serial port 2 3 Connect the phone cable line port of the external modem 2 4...

Страница 40: ...able is recommended because each active partition reports errors to the HMC s Service Focal Point application through the LAN network The HMC must be attached to the system s LAN and each partition sh...

Страница 41: ...pin is longer than the bottom pin The door is made of aluminum for weight reasons Install the Front Door To install the front door do the following refer to illustration on page 26 Note After install...

Страница 42: ...on the left side of the door 1 1 1 1 2 2 2 3 4 2 1 Hinge Pin Typical Front and Rear Door 3 Front Door 2 Rack Hinge Typical Front and Rear Door 4 Rear Door Proceed to Verifying the Hardware Operation...

Страница 43: ...port on the pSeries 690 v This procedure runs the AIX online diagnostics in service mode on a system booted in Full System Partition mode Does the system have AIX diagnostics preinstalled YES Go to Lo...

Страница 44: ...his is the traditional single system method of using your system s resources The physical operator panel on your managed system displays progress codes when you boot the system to this mode Power On O...

Страница 45: ...k for OK in the primary operator panel display which indicates that the system is in standby mode Note If the power has recently been connected to the system you might need to allow approximately five...

Страница 46: ...le to load the diagnostics to the point when the DIAGNOSTIC OPERATING INSTRUCTIONS display go to Loading the Standalone Diagnostics from CD ROM Go to Running System Verification on page 31 Loading the...

Страница 47: ...e the Initialize Terminal option on the Function Selection menu to initialize the operating system before you can continue with the diagnostics 3 Select the System Verification option on the Diagnosti...

Страница 48: ...erver passed all the diagnostic tests the verification process is complete and your server is ready to use If you received an error code record the code and go to the Eserver pSeries 690 Service Guide...

Страница 49: ...ring the operating system Refer to the IBM Hardware Management Console for pSeries Installation and Operations Guide to Configure the Network To configure the network the following tasks must be perfo...

Страница 50: ...34 Eserver pSeries 690 Installation Guide...

Страница 51: ...quipment Unauthorized changes or modifications could void the user s authority to operate the equipment This device complies with Part 15 of the FCC Rules Operation is subject to the following two con...

Страница 52: ...turer s adapters it is essential that other optional cards not supplied by the manufacturer do not use main voltages or any other excessive voltages Seek advice from a competent engineer before instal...

Страница 53: ...rmit tserkl rung ist die IBM Germany Dieses Ger t erf llt die Bedingungen der EN 55022 Klasse A F r diese von Ger ten gilt folgende Bestimmung nach dem EMVG Ger te d rfen an Orten f r die sie nicht au...

Страница 54: ...38 Eserver pSeries 690 Installation Guide...

Страница 55: ...cycling facilities may not be available in your area In the United States IBM has established a collection process for reuse recycling or proper disposal of used sealed lead acid nickel cadmium and ni...

Страница 56: ...e Doors 7 9 7 9 62 62 Notes 1 Noise levels cited are for the typical configuration A Frame Bulk Power CEC cage battery option media drawer and two I O drawers 2 The 0 6 B 6 dB reduction in noise emiss...

Страница 57: ...untry where such provisions are inconsistent with local law THIS MANUAL IS PROVIDED AS IS WITHOUT WARRANTY OF ANY KIND EITHER EXPRESSED OR IMPLIED INCLUDING BUT NOT LIMITED TO THE IMPLIED WARRANTIES O...

Страница 58: ...42 Eserver pSeries 690 Installation Guide...

Страница 59: ...d floor 11 3 4 inches to 16 inches high Positioning the Rack Note The customer should unpack the rack and position it in the room If this has not been done consult the customer and the marketing repre...

Страница 60: ...N6344 4 Bushing Item 5 in illustration on page 49 21L4309 4 Washer Item 3 in illustration on page 49 0130985 4 Washer Item 6 in illustration on page 49 05N6346 4 Bolt 11P4757 Frame Tie down Kit Short...

Страница 61: ...ck Components To mount the internal rack components do the following Attention This procedure is performed by the service representative 1 Using four M 8 20 mm screws item 1 in illustration on page 46...

Страница 62: ...e rack 10 Install the latch bolts item 7 in illustration on page 46 Rack 2 5 9 10 5 9 10 5 9 10 5 9 10 2 3 3 8 6 6 7 8 1 1 1 1 Screw hex flange 20 mm long 7 Latch Bolt 2 Shipping bar upper 8 Latch Pla...

Страница 63: ...raised floor proceed to Attaching the Rack to a Short Raised or Long Raised Floor on page 52 v If the rack is not being attached to the floor proceed to Step 3 Position and Level the PrimaryRack on pa...

Страница 64: ...anchoring of the mounting plates A minimum of three anchor bolts for each mounting plate must be used to secure the plates to the concrete floor Because some of the drilled holes may be aligned with c...

Страница 65: ...on page 49 front and rear in the approximate mounting position under the system rack 3 To align the mounting plates to the system rack do the following a Place the four rack mounting bolts item 6 in i...

Страница 66: ...m REF 32x 21 mm REF 4x x 13 UNC REF 2X 53 7 mm REF 1019 mm 1070 mm REF 4x Caster 2x Mounting Plate 79 65 mm 120 8 mm 5 Remove the mounting bolts from the threaded holes 6 Move the rack away from the m...

Страница 67: ...f the washer is facing inward toward the system rack 3 Place the isolator bushing item 4 in illustration on page 49 inside the leveling foot with a washer between the isolator bushing and the floor pl...

Страница 68: ...bolts do the following 1 Obtain the service of a qualified structural engineer to determine the appropriate installation of the eyebolts 2 Consider the following before installing the eyebolts v Floor...

Страница 69: ...REF 1019 mm 64 6 mm 64 6 mm 100 5 mm 24 Inch Floor Tile Layout 4 Opening for Cables 24 in REF 96 in REF 4X Opening for Cables 654 8 mm 8 49 3 mm Eyebolt 654 8 mm 600 mm 23 6 Inch Floor Tile Layout 60...

Страница 70: ...enings in the floor panel and location of the rubber bushing holes so that they match the dimensions given in the following illustrations 654 8 mm 654 8 mm 4x 450 mm REF 8 x 49 3 mm Eyebolts 4X 75 mm...

Страница 71: ...disconnected and are not dangling around the frame The frame should be free to roll 3 The floor eyebolts should be already secured to the concrete floor Verify the height of the center of the floor ey...

Страница 72: ...used for a 9 1 2 inches to 11 3 4 inches raised floor The Long Turnbuckle Assembly part number 11P4756 is used for an 11 3 4 inches to 16 inches raised floor 6 Place the spacer inside the floor eyebo...

Страница 73: ...ng feet by tightening the lock nut 13 Insert the threaded rod into the inner hole of the leveler and the rubber bushing 14 Thread down the threaded rod until the tip of the rod is approximately 1 inch...

Страница 74: ...58 Eserver pSeries 690 Installation Guide...

Страница 75: ...igation area click Problem Determination 3 In the Contents area click Microcode Maintenance The User Authentication window opens 4 Enter the HMC system unit s serial number and the password provided b...

Страница 76: ...nnectors on it The cable is labeled ISA 8 Port Cable Serial cables can be connected from any of the ports on the 8 port expansion cable to the HMC1 ports on the managed systems If you are using a seco...

Страница 77: ...sync Adapter Line Connectors The 128 Port async adapter has two 15 pin D shell connectors on it The connector that is closest to the edge connector that plugs into the HMC is line 1 The RANs are cable...

Страница 78: ...00 0 100 AC To set the RAN node number do the following 1 Turn on the RAN and wait for the power on self test POST to complete 2 When P1 is displayed on the front panel seven segment LED display press...

Страница 79: ...rd have Possible values v 8 v 16 v 24 v 32 v 40 v 48 v 56 v 64 v 72 v 80 v 88 v 96 v 104 v 112 v 120 v 128 Board 1 How many ports 1 16 Answer Count the total number of enhanced RANs you are attaching...

Страница 80: ...async adapter perform the following 1 Move the rpm device package to the HMC 2 At the command prompt enter rpm i force epca 1 51 2 i386 rpm The device driver is installed as lib modules 2 4 9 12 misc...

Страница 81: ...og in to the HMC the HMC management window opens and the management environment is already selected Select Partition Management to see the list of managed systems This window is divided into the Navig...

Страница 82: ...Guide for additional information Verify that the installation is complete for each pSeries 690 that you have connected to the 8 port async adapter When you have finished the verification procedure go...

Страница 83: ...4 3 5 6 7 8 9 1 Hardware Management Console 5 6 Primary 7040 Model 61R Integrated Battery Feature IBF Optional for the Primary Power Subsystem Redundant 7040 Model 61R Integrated Battery Feature IBF...

Страница 84: ...cord of your components Component Serial Number pSeries 690 I O Drawer 1 I O Drawer 2 I O Drawer 3 I O Drawer 4 or Drawer 7 if installed I O Drawer 5 I O Drawer 6 I O Drawer 7 I O Drawer 8 68 Eserver...

Страница 85: ...r U1 13 U1 13 P1 V1 or U1 13 U1 13 P2 V3 or U1 13 U1 35 P1 V3 U1 35 P2 V3 U1 18 F1 U1 18 X1 U1 18 F2 U1 18 X2 U1 35 P1 F1 U1 35 P2 F1 U1 18 P1 M1 U1 18 P1 M3 U1 18 P1 M2 U1 18 P1 M4 U1 18 P1 M5 U1 18...

Страница 86: ...codes for the secondary rack These codes are used to identify the major functional units in the pSeries 690 systems REAR FRONT U2 17 P1 V5 U2 13 U2 13 U2 17 P2 V6 U2 9 U2 1 U2 1 U2 5 U2 5 U2 9 U2 19 U...

Страница 87: ...v U1 18 P1 C6 v U1 18 P1 C7 v U1 18 P1 C10 v U1 18 P1 C11 L3 VPD Card U1 18 P1 H2 1 MCM 2 installed U1 18 P1 C4 MCM 2 VPD Card U1 18 P1 H2 4 Memory U1 18 P1 M6 Memory Book v 4 GB v 8 GB v 16 GB v 32...

Страница 88: ...U1 18 P1 H2 6 Memory U1 18 P1 M1 Memory Book v 4 GB v 8 GB v 16 GB v 32 GB Memory U1 18 P1 M5 Memory Book v 4 GB v 8 GB v 16 GB v 32 GB L3 Modules v U1 18 P1 C5 v U1 18 P1 C9 v U1 18 P1 C13 v U1 18 P...

Страница 89: ...adapters are in the available state If any adapters are in defined state contact your next level of support v Run lspv and count the number of hdisks hard disks that appear in the system Verify that...

Страница 90: ...74 Eserver pSeries 690 Installation Guide...

Страница 91: ...es subsystem positioning and cabling for the pSeries 690 Operator Panel Cable and Diskette Drive Cable to the Media Subsystem Rear View 1 Primary I O Book 3 Diskette Drive Data Cable 2 Cable Connectin...

Страница 92: ...EIA 19 EIA 17 EIA 5 1 6 7 C3 C4 8 C1 Primary Rack 3 Third I O Subsystem C2 Secondary Rack 4 Fourth I O Subsystem C3 Blank Space 5 Fifth I O Subsystem C4 Blank Space 6 Sixth I O Subsystem 1 First I O...

Страница 93: ...ck 4B Four IBFs primary rack Position 4 C2 Primary I O Book Book 0 5 Fifth I O Subsystem C3 Secondary Rack 6 Sixth I O Subsystem 1 First I O Subsystem 7 Seventh I O Subsystem 2 Second I O Subsystem 2B...

Страница 94: ...rimary Rack 3 Third I O Subsystem C2 Secondary Rack 4 Fourth I O Subsystem 1 First I O Subsystem 4B Four IBFs 2 Second I O Subsystem Note The physical location shown for I O Subsystem 4 is populated o...

Страница 95: ...A0 C0 A1 C1 B0 0 0 0 0 0 0 0 0 1 1 1 4 3 5 6 7 1 1 1 1 1 B1 D1 D0 1 2 1 Primary Rack 5 First I O Subsystem 2 Primary I O Book 6 Fourth I O Subsystem 3 Third I O Subsystem 7 Secondary I O Book 4 Secon...

Страница 96: ...Shown Without IBFs C1 Primary Rack 5 Fifth I O Subsystem C2 Secondary Rack 6 Sixth I O Subsystem C3 Secondary I O Book Note RIO cabling to I O Subsystems 5 and 6 is the same for configurations with o...

Страница 97: ...ry Rack 4B Two IBFs maximum Position 4 C3 Third I O Book Book 3 5 Fifth I O Subsystem 1 First I O Subsystem 6 Sixth I O Subsystem 2 Second I O Subsystem 7 Seventh I O Subsystem 3 Third I O Subsystem 8...

Страница 98: ...ction to I O Book Book 0 2 Primary I O Book A1 Connection to I O Book Book 0 3 Third I O Subsystem B0 Connection to I O Book Book 0 4 Second I O Subsystem B1 Connection to I O Book Book 0 5 First I O...

Страница 99: ...O Subsystem C4 Secondary I O Book in Slot 2 A0 Connection to I O Book Book 2 1 First I O Subsystem A1 Connection to I O Book Book 2 2 Second I O Subsystem B0 Connection to I O Book Book 2 3 Third I O...

Страница 100: ...ixth I O Subsystem C3 Third I O Book Book 3 7 Seventh I O Subsystem 1 First O Subsystem 8 Eighth I O Subsystem 2 Second Subsystem C0 Connection to I O Book Book 3 3 Third I O Subsystem C1 Connection t...

Страница 101: ...SCSI Cable for Media Subsystem Rear Drives 2 Primary I O Book 6 SCSI Cable for Media Subsystem Front Drives 3 Power Cable for Media Subsystem Front Drives 7 Power Cable for Media Subsystem Rear Drive...

Страница 102: ...I O book in the managed system The following illustration shows the location of the serial ports on the back of the HMC and the HMC connectors located on the processor subsystem 1 Primary Rack 4 Prim...

Страница 103: ...tion This appendix provides information about the location and label colors of the pSeries 690 cables Power Cabling 1 Front Rear 3 17 18 19 20 21 22 23 24 25 26 27 28 29 30 31 32 33 34 35 2 6 10 8 12...

Страница 104: ...ripe 15 to 17 11P4303 1 I OB9 P00 to Media P02 16 to 18 11P4303 1 I OB9 P01 to Media P00 19 20 21 22 NA B35 BPDx P0x to I O Subsystem x RIO Cables and I O Power Cables on page 89 23 11P4462 1 B35 BPC...

Страница 105: ...mary rack DCA2 P01 11P4505 1 I O Subsystem 4 power cable primary DCA2 P00 11P4514 1 I O Subsystem 4 power cable secondary rack DCA1 P01 11P4515 1 I O Subsystem 4 power cable secondary rack DCA1 P00 11...

Страница 106: ...BPD1A P03 A05B DCA2 P01 BPD1A to I O Subsystem 2 Yellow W Stripes A35P BPD1B P03 A05B DCA2 P00 BPD1B to I O Subsystem 2 Yellow A35B BPD1A P04 A01B DCA1 P01 BPD1A to I O Subsystem 3 Green W Stripes A3...

Страница 107: ...2B P02 Z05B DCA1 P00 BPD2B to I O Subsystem 6 Purple A35B BPD2A P03 Z05B DCA2 P01 BPD2A to I O Subsystem 6 Purple W Stripes A35P BPD2B P03 Z05B DCA2 P00 BPD2B to I O Subsystem 6 Purple A35B BPD2A P06...

Страница 108: ...92 Eserver pSeries 690 Installation Guide...

Страница 109: ...on the HMC 3 Start the service processor menus 4 Set the system name 5 Enable Surveillance 6 Configure call in call out 7 Attach modems if necessary If modem attachment is not necessary proceed to ste...

Страница 110: ...System Power Control 3 Select Power On System When you are asked if you wish to continue powering on the system type Y 4 After the system firmware and operating system have initialized the server the...

Страница 111: ...he sound of a telephone being dialed This is your computer trying to page you If this test is successful call out is working correctly Serial Port Configuration To configure the serial port on an AIX...

Страница 112: ...96 Eserver pSeries 690 Installation Guide...

Страница 113: ...refer to RPQ8A1173 For clearance procedures go to Removing the Rack Top Frame for Clearance Through Doorways on page 100 For the reduced height procedure go to Preparing for Rack Top Frame Installatio...

Страница 114: ...on Ratchet 3 8 inches Square Drive Ratchet Accessories 3 8 inches Drive 6 inches Extension X2 8 inch reach required Drive Socket 3 8 inches 10mm Drive Ratchet 1 4 inches Drive Socket 5 16 inches 8mm T...

Страница 115: ...ver Part Number 44P0127 9 Part Number 11P3535 Hinge Part Number 2665525 Screw 2 Rear Cover Part Number 44P0107 10 Part Number 11P1096 Front Latch Part Number 54G2882 Screw 3 Part Number 11P4106 Hinge...

Страница 116: ...into the cover that lock it behind the left hand cover and these features must be clear before you can lift the cover from the frame Tilting the top of the cover away from the frame after the feature...

Страница 117: ...1 2 3 1 Jam Nut 3 Rack Base 2 Leveling Foot Appendix J Removing and Installing the Rack Top Frame 101...

Страница 118: ...ove the Bulk Power Controllers BPCs item 3 in the previous illustration as follows __ Step 1 Loosen the thumbscrew on each side of the BPC using the torque tool part number 6422789 __ Step 2 Pull the...

Страница 119: ...from the rack 5 Remove the frame extenders as follows a Remove the UEPO switch item 6 in the following illustration as follows 1 Unplug the cables 2 Remove the top and bottom screws b Remove the rear...

Страница 120: ...4 5 1 Top Extender 5 Front Extender 2 Left Extender 6 UEPO Switch 3 Right Extender 7 Rack Top Frame Left Side Cover 4 Rear Extender 8 Rack Top Frame Right Side Cover 104 Eserver pSeries 690 Installat...

Страница 121: ...losure 2 Hex Head Screw Locations a Remove the five hex head screws from the front BPE b Remove the five hex head screws from the rear BPE Install 2 shipping brackets part number 11P2923 on both the f...

Страница 122: ...llustration on page 106 at the middle left side of the rack top frame assembly Remove the screw then tilt the baffle toward the front of the rack top frame Note The foam and metal upright air baffle m...

Страница 123: ...installation do the following 1 Unpack the frame 2 Unpack the rack top frame 3 Use the jack screws to stablize and lift the rack off the floor a Loosen the jam nut on each leveling foot by turning the...

Страница 124: ...BPCs item 3 in the previous illustration as follows 1 Loosen the thumbscrew on each side of the BPC using the torque tool part number 6422789 2 Pull the BPC straight out from the Bulk Power Enclosure...

Страница 125: ...ve any front and rear bulk power fillers 5 To reduce the weight to the maximum two person limit do the following 2 3 4 1 Front and Rear Rack Top Frame Top Panels 4 Foam and Metal Air Baffle 2 Rack Top...

Страница 126: ...move the screw then tilt the baffle toward the front of the rack top frame Note The foam and metal upright air baffle must be reinstalled on the left side in their original location The foam baffle is...

Страница 127: ...Adjust the leveling feet downward as needed until the rack is level When the rack is level tighten the jam nuts against the base by turning the nut clockwise 1 2 3 1 Jam Nut 3 Rack Base 2 Rack Base 2...

Страница 128: ...height option RPQ8A1173 ship group 2 3 4 1 Rack Rack Top Frame 3 Top Frame Bolts 2 Rack Chassis 4 Rack Top Frame Cross Brace 112 Eserver pSeries 690 Installation Guide...

Страница 129: ...Top Frame Cross Brace 3 Left and Right BPE Rails 5 Insert and align the foam air baffle item 4 in the illustration on page 113 to the left side of the rack top frame securing it in place with a screw...

Страница 130: ...osure BPE b Tighten the thumbscrew on each side of the BPD using the torque tool pat number 6422789 c Repeat for the other BPDs There can be up to four BPDs with two in front and two in back 11 Instal...

Страница 131: ...frame side covers items 7 and 8 in the following illustration 15 Attach all removed cables to the BPD If an IBF exists also attach all removed cables for the BPC and the BPR For cabling instructions...

Страница 132: ...the frame extenders 1 8 7 2 3 4 5 1 Top Extender 5 Front Extender 2 Left Extender 6 UEPO Switch 3 Right Extender 7 Left Side Cover 4 Rear Extender 8 Right Side Cover 116 Eserver pSeries 690 Installat...

Страница 133: ...nst the top of the cover to compress the gasket to allow alignment with the tapped holes in the top of the frame 5 Install the 2 inside screws and washers part numbers 77G0599 and 1625437 6 Install th...

Страница 134: ...118 Eserver pSeries 690 Installation Guide...

Страница 135: ...ther 6 connecting 128 port adapter cables 64 8 port adapter cables 60 CPU configuration 69 D device records 69 diagnostics online loading 29 standalone loading 30 stopping 32 door installation 25 E en...

Страница 136: ...ental 39 safety vii O online diagnostics loading 29 online publications xiii operation hardware verifying 27 outlets 17 P parts information external cables 89 power cords 24 installation 19 routing 19...

Страница 137: ...t service processor 93 standalone diagnostics loading 30 stopping diagnostics 32 switch EPO 15 system configuration minimum 5 other 6 inventory 7 power connection 19 records updating 33 relocation vii...

Страница 138: ...122 Eserver pSeries 690 Installation Guide...

Страница 139: ...isfied Satisfied Neutral Dissatisfied Very Dissatisfied Accurate h h h h h Complete h h h h h Easy to find h h h h h Easy to understand h h h h h Well organized h h h h h Applicable to your tasks h h...

Страница 140: ...ESSEE Information Development Department H6DS 905 6C006 11501 Burnet Road Austin TX 78758 3493 _ _ _ _ _ _ _ _ _ _ _ _ _ _ _ _ _ _ _ _ _ _ _ _ _ _ _ _ _ _ _ _ _ _ _ _ _ _ _ _ _ _ _ _ _ _ _ _ _ _ _ _ _...

Страница 141: ......

Страница 142: ...IBMR Printed in U S A October 2002 SA38 0587 02...

Отзывы: