Creating Connections
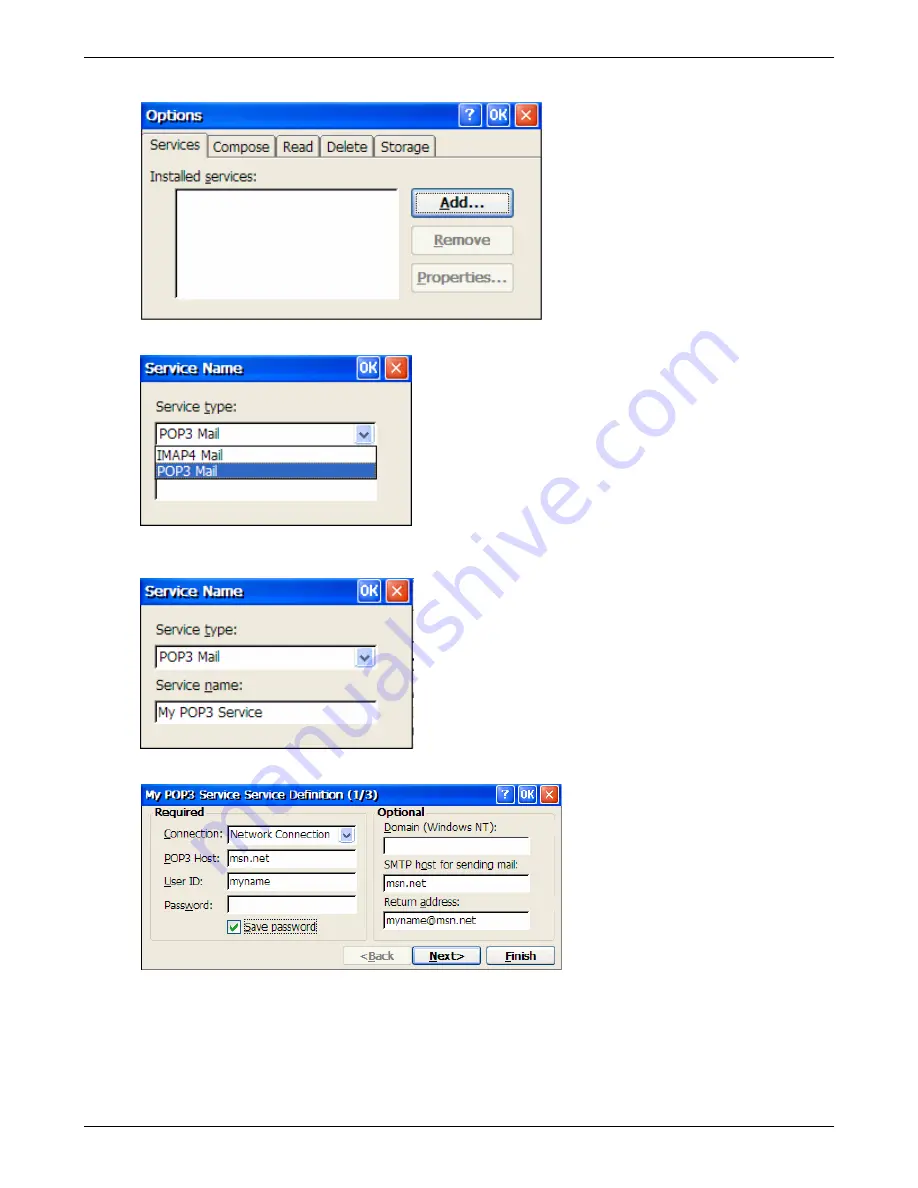
5. On the Options screen, click the
Add
button.
6. On the Service Name screen,
select the type
of e-mail server that you will be connecting to.
7. Also on the Service Name screen, enter a
name
you would like this service to appear as in the list
of
Installed services
listing on the Options screen. Click
OK
.
8. On the Service Definition screen, enter the following information. Click
Next
> when done.
Connection:
Select
Network Connection
from the drop down list.
POP3 Host:
Enter the name of your e-mail server that you will use to send an receive messages.
IMAP4 Host:
Enter the name of your e-mail server that you will use to send an receive messages.
User ID:
Enter the user name or mailbox ID you will use to login into your e-mail server.
Password:
Enter the password. For security purposes, the password will not be displayed.
Thin Client User’s Guide
45
Содержание TC5000
Страница 1: ...TC5000 Thin Client User s Guide ...
Страница 67: ...Using Connections Thin Client User s Guide 67 ...
Страница 103: ...Advanced Configuration Regional Settings Thin Client User s Guide 103 ...
Страница 107: ...Advanced Configuration Thin Client User s Guide 107 ...
Страница 108: ...Advanced Configuration Thin Client User s Guide 108 ...
Страница 110: ...Advanced Configuration Thin Client User s Guide 110 ...
Страница 112: ...Advanced Configuration Thin Client User s Guide 112 ...
Страница 114: ...Advanced Configuration Thin Client User s Guide 114 ...
Страница 116: ...Advanced Configuration Thin Client User s Guide 116 ...


