


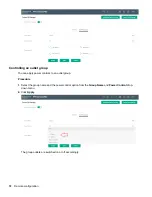


Adding a user role
Procedure
1.
On the User Settings page, click
Add Role
in the top right corner.
2.
Enter a new role name and description, and set the administrator privileges, if required.
3.
Click
Save
.
The new role is displayed in the
Roles
list.
Modifying users and roles
Procedure
1.
Select
User Administration
>
Users
.
2.
Click the
Edit
button next to the user/role you want to modify.
NOTE:
All roles can be edited except for the default Administrator.
3.
Update the user profile or role.
4.
Click
Save
.
Deleting a user profile
Procedure
1.
Select
User Administration
>
Users
.
2.
Find the user name or role you want to delete.
3.
Click the red
X
next to the user or role to delete.
NOTE:
You cannot delete the default Administrator user.
4.
Click
Delete
.
Configuring LDAP
IMPORTANT:
LDAP and RADIUS cannot be configured at the same time.
LDAP configuration can be set to access the
Active Directory
.
Procedure
1.
On the
User Settings
screen, click the edit icon next to LDAP configuration.
2.
Configure LDAP to access the
Active Directory
(AD) by choosing one of the following:
•
Open LDAP
•
Microsoft Active Directory
3.
Enter the following information:
58
Remote configuration
Содержание HPE G2 Series
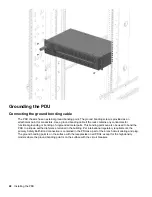
Страница 16: ...3 Secure the tie wrap 16 Introduction ...
Страница 20: ...20 Introduction ...
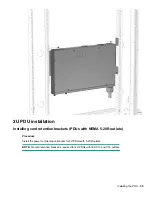
Страница 23: ...Installing the PDU 23 ...
Страница 25: ... Outlets facing the back of the rack Installing the PDU 25 ...
Страница 26: ... Outlets facing the front of the rack 26 Installing the PDU ...
Страница 28: ... Two mid height PDUs with outlets facing towards the center of the rack 28 Installing the PDU ...
Страница 29: ... Four half height PDUs with outlets facing towards the center of the rack Installing the PDU 29 ...
Страница 31: ... Half height Installing the PDU 31 ...
Страница 34: ...2 Place the locking tape directly above the unit on the rack PDU mounting bracket 34 Installing the PDU ...
Страница 35: ...Installing the PDU 35 ...
Страница 37: ...2 Install the PDU in the rack frame Installing the PDU 37 ...
Страница 47: ...3 Install the PDU Installing the PDU 47 ...
Страница 49: ...Installing the PDU 49 ...
Страница 64: ...Web menu options Menu Illustration Overview Alarms 64 Remote configuration ...
Страница 65: ...Menu Illustration Help Table Continued Remote configuration 65 ...
Страница 66: ...Menu Illustration Language 66 Remote configuration ...
Страница 67: ...Menu Illustration Logs Remote configuration 67 ...
Страница 68: ...Menu Illustration Settings 68 Remote configuration ...
Страница 84: ...84 Remote configuration ...
Страница 92: ...92 Configuring local access ...
Страница 95: ...LED state Description Green red orange blinking Upgrading Off In USB mode OLED menu structure Local display 95 ...
Страница 99: ...Local display 99 ...
Страница 101: ...Local display 101 ...
Страница 107: ...Local display 107 ...
Страница 120: ...120 Connecting and configuring optional hardware ...
Страница 157: ...2 Pull out the Network Management Module from the PDU 3 Insert the new Network Management Module Appendix 157 ...
Страница 158: ...4 Align the Network Management Module and tighten the captive nuts by turning them clockwise 158 Appendix ...
Страница 160: ...3 Connect the ribbon cable to the replacement Network Management Module and the PDU 160 Appendix ...
Страница 161: ...4 Insert the replacement Network Management Module into the PDU and tighten the two screws Appendix 161 ...


