background image

A

dding

Data

to

the

Signal

List

T

able

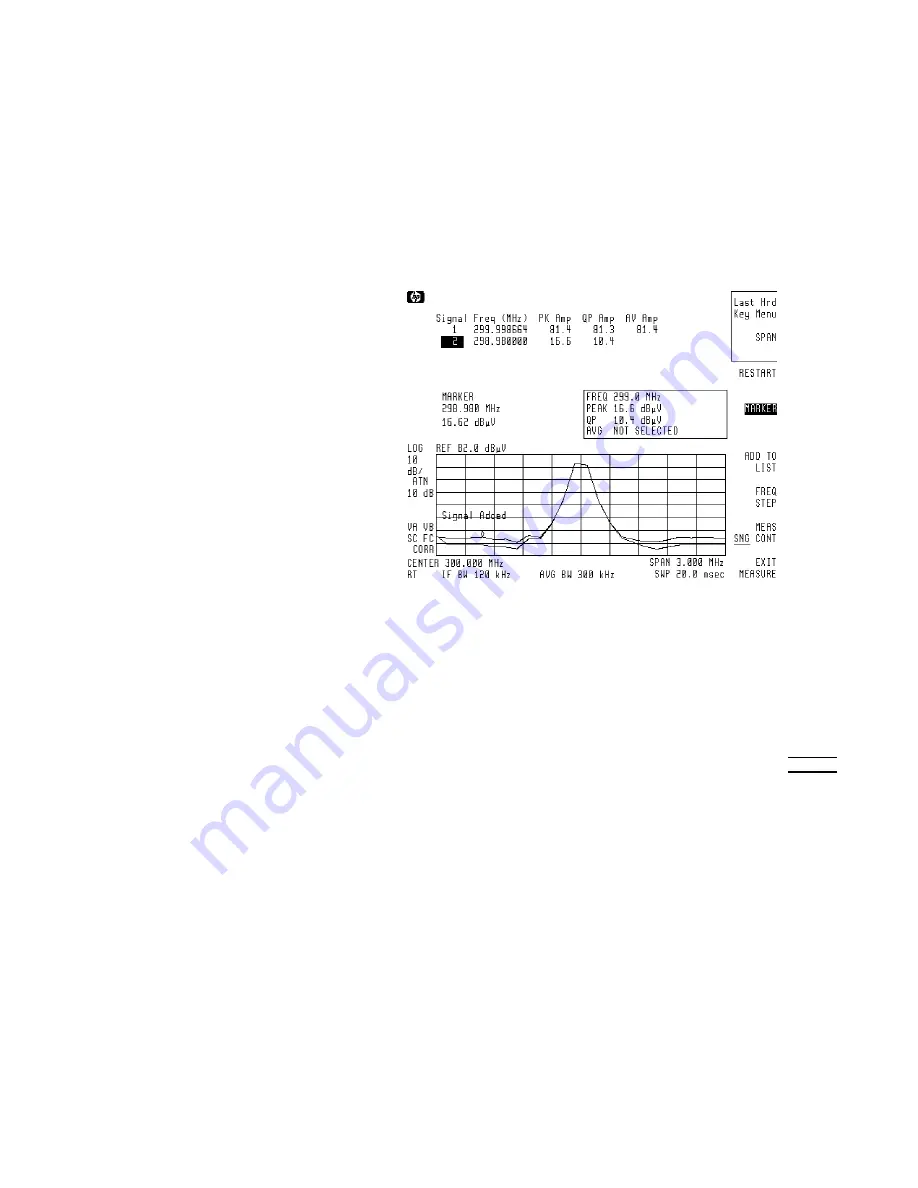
The

results

of

the

stepped

measurement

can

be

added

to

the

signal

list

table

.

See

Chapter

4

for

more

information

on

the

signal

list

table

.

If

you

wish

to

add

the

results

of

the

stepped

measurement

to

the

signal

list

table

,

press:

NNNNNNNNNNNNNNNNNNNNNNNNNNNNNNNNNNN

ADD

TO

LIST

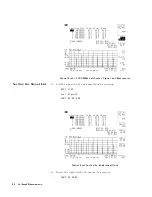
Data

A

dded

to

the

Signal

List

T

able

The

new

data

now

appears

in

the

signal

list.

Changing

the

Frequency

Step

The

default

step

size

is

equal

to

one

IF

bandwidth.

T

o

change

the

default

step

size

,

press:

N

NNNNNNNNNNNNNNNNNNNNNNNNNNNN

FREQ

STEP

:

:

:

:

:

:

:

:

:

:

:

:

:

:

:

:

:

:

:

:

:

:

:

:

:

:

:

:

:

:

:

:

:

:

:

:

:

:

:

:

:

:

:

:

:

:

0.5

4

(ENTER)

5

Restarting

and

Stopping

the

Measurement

T

o

start

and

stop

a

stepped

measurement:

1.

Start

the

measurement

by

pressing:

NNNNNNNNNNNNNNNNNNNNNNN

RESTART

2.

When

the

measurement

reaches

300.2

MHz,

press:

NNNNNNNNNNNNNN

STOP

Stepped

Measurements

5-5

Содержание 85422E

Страница 1: ...uct information on the Agilent Test Measurement website www tm agilent com HP References in this Manual This manual may contain references to HP or Hewlett Packard Please note that Hewlett Packard s former test and measurement semiconductor products and chemical analysis businesses are now part of Agilent Technologies We have made no changes to this manual copy In other documentation to reduce pot...

Страница 2: ...User s Guide EMI Receiver Series HP 8542E HP 8546A EMI Receiver HP 85422E HP 85462A Receiver RF Section ABCDE HP Part No 5962 5081 Printed in USA August 1994 ...

Страница 3: ...r a particular purpose Hewlett Packard shall not be liable for errors contained herein or for incidental or consequential damages in connection with the furnishing performance or use of this material c Copyright Hewlett Packard Company 1994 All Rights Reserved Reproduction adaptation or translation without prior written permission is prohibited except as allowed under the copyright laws 1400 Fount...

Страница 4: ...Hewlett Packard shall pay shipping charges to return the product to Buyer However Buyer shall pay all shipping charges duties and taxes for products returned to Hewlett Packard from another country Hewlett Packard warrants that its software and rmware designated by Hewlett Packard for use with an instrument will execute its programming instructions when properly installed on that instrument Hewlet...

Страница 5: ...maintain the instrument in a safe condition Safety Notes The following safety notes are used throughout this manual Familiarize yourself with each of the notes and its meaning before operating this instrument WARNING Warning denotes a hazard It calls attention to a procedure which if not correctly performed or adhered to could result in injury or loss of life Do not proceed beyond a warning note u...

Страница 6: ...d supplied with this instrument Failure to ensure adequate earth grounding by not using this cord may cause instrument damage Only clean the instrument cabinet using a damp cloth x L The instruction documentation symbol The product is marked with this symbol when it is necessary for the user to refer to the instructions in the documentation CE The CE mark is a registered trademark of the European ...

Страница 7: ...r instrument verifying instrument operation and customer support User s Guide describes instrument features and how to make measurements with your EMI receiver or receiver RF section Reference provides speci cations and characteristics menu maps error messages and key descriptions Programmer s Guide provides information on remote control instrument con guration creating programs and parameters for...

Страница 8: ... Chapter 2 1 Improving Accuracy 2 1 When is Self Calibration Needed 2 2 Warm Up Time 2 2 Calibrating the EMI Receiver 2 3 Using NNNNNNNNNNNNNNNNNNNNNNNNNNNNN CAL FETCH 2 3 Verifying the Receiver s Calibration 2 3 Using NNNNNNNNNNNNNNNNNNNNNNN CAL ALL 2 4 Using NNNNNNNNNNNNNNNNNNNNNNNNNNNNN CAL STORE 2 5 Interrupting calibration 2 5 Using the AutoCal Function 2 6 Setting the Receiver s Clock 2 6 Se...

Страница 9: ...ude Correction Factor File from a Disk 3 11 Activating the Windows Display Format 3 12 Making a Measurement 3 14 Tuning the Receiver 3 14 Using the Marker to Tune the Receiver 3 15 Using the Measure at Marker Function 3 16 Creating a Report 3 19 Con guring a Printer 3 19 Con guring and Generating a Report 3 20 4 List Based Measurements Adding Signals to the List 4 3 Viewing the Signal List 4 5 Sor...

Страница 10: ...ting and Listening to an AM or FM Signal 6 36 7 Making Other Measurements What You ll Learn in This Chapter 7 1 Stimulus Response Measurements 7 2 What Are Stimulus Response Measurements 7 2 Using the Receiver With the Internal Tracking Generator 7 2 Stepping Through the Measurement 7 3 Tracking Generator Unleveled Condition 7 7 Measuring Amplitude Modulation with the Fast Fourier Transform Functi...

Страница 11: ...Trace 11 4 Recalling a Trace 11 6 Saving and Recalling Data from Internal Memory 11 9 Saving a State 11 9 Recalling a State 11 9 Saving a Trace 11 10 Recalling a Trace 11 10 Protecting Data from Being Overwritten 11 11 How to Output Data 11 12 Con guring a Printer 11 12 Con guring and Generating a Report 11 13 12 Additional Features What You ll Learn in This Chapter 12 1 Signal Analyzer Emulation ...

Страница 12: ... On 14 2 If the RF Filter Section Does Not Seem to be Working 14 2 If the EMI Receiver Cannot Communicate Via HP IB 14 2 Veri cation of Proper Operation 14 2 If the RF lter section Does Not Power O 14 2 Error Messages 14 2 Additional Support Services 14 3 CompuServe 14 3 FAX Support Line 14 4 Returning the EMI Receiver for Service 14 5 Package the EMI receiver for shipment 14 5 Index Contents 5 ...

Страница 13: ...ld 6 17 6 12 Placing a Marker on the CAL OUT Signal 6 18 6 13 Using the Marker Delta Function 6 19 6 14 Frequency and Amplitude Di erences 6 20 6 15 Using the Delta Meas Function 6 21 6 16 Low Level Signal 6 23 6 17 Using 0 dB Attenuation 6 24 6 18 Decreasing IF bandwidth 6 25 6 19 Decreasing Averaging Bandwidth 6 27 6 20 Using the Video Averaging Function 6 29 6 21 Set Up for Obtaining Two Signal...

Страница 14: ...7 13 Using 3rd Ord Meas Function 7 19 12 1 External Keyboard Template 12 8 Contents 7 ...

Страница 15: ...nternal Memory and Floppy Disk Operations 11 3 11 2 Save Functions Using a Floppy Disk 11 7 11 3 Recall Functions Using a Floppy Disk 11 8 11 4 Summary of Save and Recall Operations Internal Memory 11 11 14 1 Hewlett Packard Sales and Service O ces 14 6 Contents 8 ...

Страница 16: ...ainted with the front panel and rear panel features Learn about screen annotation Get acquainted with the menus and softkeys Learn about the disk drive Learn about the receiver battery Note For complete con guration and installation information refer to the EMI Receiver Series Installation and Veri cation Manual Introducing the EMI Receiver Figure 1 1 EMI Receiver Getting Started 1 1 ...

Страница 17: ...sists of two parts the receiver RF section and the RF lter section The two units are connected together via several cables on the front and rear panels to form a single instrument All control for both units is handled by the receiver RF section whether manually from the front panel or automatically through the interface bus For precompliance and diagnostic EMI applications which do not require a f...

Страница 18: ...ument to stabilize for best measurement results Note The instrument continues to draw power when it is plugged into the ac power source even if the line power switch is o 2 Disk drive reads from or writes to a 3 5 inch oppy disk in MS DOS or LIF format initialized LIF disk is not 1 44 MByte 3 DEMODulation control block includes an 4ON OFF5 key for turning the demodulator on and o a 4SELECT5 key to...

Страница 19: ...mplitude and keep a signal at the marker position in the center of the screen 10 MEASUREMENT CONTROL functions access special function menus and self calibration routines 11 ANALYSIS CONTROL functions access menus that adjust the resolution bandwidth adjust the sweep time store and manipulate trace data and control the instrument display 12 CTRL functions a ect the state of the entire receiver The...

Страница 20: ...he RF OUTPUT is connected to the receiver RF section RF INPUT 18 INPUT 2 is a signal input for the receiver that sweeps from 20 MHz to 2 9 GHz from 1 GHz to 6 5 GHz for an HP 8546A only or the full band in bypass mode 19 ALC INPUT provides a connection to the tracking generator leveling circuitry in the receiver RF section from the RF lter section The receiver uses the tracking generator for perfo...

Страница 21: ...receiver defaults to the nearest allowable value Knob The knob allows continuous change of functions such as center frequency reference level and marker position It also changes the values of many functions that only change in increments Clockwise rotation of the knob increases values For continuous changes the extent of alteration is determined by the size of the measurement range the speed at wh...

Страница 22: ... of sequence values will not occur when using these keys HOLD Key The HOLD key deactivates functions This key is designated as either the 4 ENTER 5 key in the data entry area on the receiver front panel or as a softkey in the 4DISPLAY5 menu The active function readout is blanked indicating no entry will be made inadvertently when using the knob step keys or numeric keypad Pressing a function key r...

Страница 23: ...s output is normally terminated with an attached load 9 AUX INTERFACE provides a nine pin D subminiature connector for control of external devices for example HP 85460A via the HP 85462A CAUTION Turn o the receiver before connecting the AUX INTERFACE connector to a device Failure to do so may result in loss of factory correction constants Do not exceed the current limits for the 5 V supply when us...

Страница 24: ... of the RF lter section NORMAL mode is selected for EMI receiver operation TEST mode is selected when performing service and diagnostic tests via the SERVICE BUS 21 LINE VOLTAGE SELECTOR adapts the RF lter section to the power source Refer to the EMI Receiver Series Installation and Veri cation Manual for instructions on selecting the correct setting 22 LINE power module is the input for the line ...

Страница 25: ...the primary annotation areas that may be displayed when using your receiver Figure 1 4 shows the display in normal operating mode Figure 1 5 shows the display when using windows Figure 1 4 EMC Screen Annotation Normal Operating Mode 1 10 Getting Started ...

Страница 26: ...nnotation Using Windows Receiver RF Section Annotation The instrument preset conditions used in this manual are those of an HP 8542E or an HP 8546A EMI receiver When using either an HP 85422E or an HP 85462A receiver RF section operators will note discrepancies in reference level and sweep time when comparing the illustrations given in this manual to the displays presented on the instrument screen...

Страница 27: ... softkey s function on or o To turn the function on press the softkey so that ON is underlined To turn the function o press the softkey so that OFF is underlined An ON or OFF softkey function will be indicated throughout this manual as NNNNNNNNNNNNNNNNNNNNNNNNNNNNNNNNNNNNNNNNNNNN ANTENNA ON OFF ON A function with AUTO and MAN in the label can either be auto coupled or have its value manually chang...

Страница 28: ...s may be performed using the disk drive Format a disk Create a le Di erentiate between the di erent types of les when cataloged Save and recall instrument setups Save and recall lists of signal data including frequency and peak quasi peak and average amplitudes Save and recall limit lines Save and recall amplitude correction factors Save and recall instrument traces Save bitmap les images of displ...

Страница 29: ... period for battery replacement has elapsed see Returning the EMI Receiver for Service in the EMI Receiver Series Installation and Veri cation manual If you wish to replace the battery yourself you can purchase the service documentation that provides all necessary test and maintenance information The battery is soldered onto the receiver s processor board Service documentation may be ordered throu...

Страница 30: ...n this menu NNNNNNNNNNNNNNNNNNNNNNNNNNNNNNNNNNN More 1 of 3 provides access to additional self calibration functions The self calibration routines provide correction factors for internal circuitry The application of the correction factors is required to meet frequency and amplitude speci cations When the correction factors are applied to internal circuitry the message CORR corrected is displayed o...

Страница 31: ...retrieve the calibration data prior to making subsequent measurements The amplitude drift is normally less than the calibration uncertainty Keep the receiver turned on between measurements If the input signal for EXT REF IN changes run the frequency and amplitude self calibration routines Amplitude calibration is required to improve IF centering If accurate self calibration is temporarily needed i...

Страница 32: ...NNNNNNNNNNNNNNNNNNNNNNNNNNNN CAL FETCH If the data is not valid when the calibration data is retrieved from memory using the cal fetch function one or both of the following messages will be displayed INPUT 1 Data Not valid CAL INPUT 1 required INPUT 2 Data Not valid CAL INPUT 2 required Verifying the Receiver s Calibration 1 To verify the amplitude calibration data press 4CAL CHECK5 2 If the data ...

Страница 33: ...ing all of the speci cations at all frequencies the calibration will be completed and one of the following messages will be displayed CAL ALL done INPUT 1 Failed INPUT 2 Passed CAL ALL done INPUT 1 Passed INPUT 2 Failed CAL ALL done INPUT 1 Failed INPUT 2 Failed If the receiver encounters an error that will not allow the calibration to be completed messages such as the following will be displayed ...

Страница 34: ... be displayed Note In the following messages CAL 85422 Stored is displayed if you are calibrating an HP 8542E CAL 85462 Stored CAL INPUT 1 Not stored INPUT 2 Stored CAL 85462 Stored CAL INPUT 1 Stored INPUT 2 Not stored CAL 85462 Stored CAL INPUT 1 Not stored INPUT 2 Not stored If one of these messages is displayed it means either some of the calibration data is not valid or some of the data did n...

Страница 35: ...ormat then press 4 ENTER 5 to terminate the entry 2 To set the date press NNNNNNNNNNNNNNNNNNNNNNNNNN SET DATE Use the numeric keys to enter the date in an YYMMDD format then press 4 ENTER 5 to terminate the entry Setting AutoCal Time 1 To set the time at which you wish to have the automatic calibration performed press 4CALIBRATE5 NNNNNNNNNNNNNNNNNNNNNNNNNNNNNNNNNNN Cal At Time NNNNNNNNNNNNNNNNNNNN...

Страница 36: ...NNNNNNNNNNNNNNNNNNNNNNNNNNNNNN More 1 of 3 NNNNNNNNNNNNNNNNNNNNNNNNNNNNN CAL 85462 It will take approximately 10 minutes to complete the HP 85462A calibration When the calibration is complete press the following keys NNNNNNNNNNNNNNNNNNNNNNNNNNNNN CAL STORE NNNNNNNNNNNNNNNNNNNNNNNNNNNNNNNNNNN More 1 of 3 NNNNNNNNNNNNNNNNNNNNNNNNNNNNNNNNNNN CAL INPUT 1 or NNNNNNNNNNNNNNNNNNNNNNNNNNNNNNNNNNN CAL INPU...

Страница 37: ...eiver input the message TG SIGNAL NOT FOUND is brie y displayed The tracking generator self calibration routine lasts approximately two minutes 3 To prevent the internal adjustment data from being lost when the receiver is turned o press NNNNNNNNNNNNNNNNNNNNNNNNNNNNN CAL STORE Performing the YIG Tuned Filter Self Calibration Routine For an HP 8546A HP 85462A only The following procedure can be use...

Страница 38: ...f calibration routines are used the frequency calibration should be performed before the amplitude calibration unless the frequency data is known to be accurate 3 The frequency calibration takes approximately two minutes It adjusts the frequency sweep time and span accuracy To start the frequency self calibration procedure press NNNNNNNNNNNNNNNNNNNNNNNNNN CAL FREQ When the frequency calibration is...

Страница 39: ...ORRECT ON OFF function When OFF is underlined most amplitude correction factors and some frequency correction factors are not used 6 To calibrate the tracking generator perform the procedure under Performing the Tracking Generator Self Calibration Routine 7 If you have an HP 85462A calibrate the YIG tuned lter by performing the procedure under Performing the YIG Tuned Filter Self Calibration Routi...

Страница 40: ...e ned con gurations from a disk Loading a limit line from a disk Loading an amplitude correction factor le from a disk Activating the windows display format Saving a setup to disk Making a Measurement Using the TEST Key Tuning the receiver Using a marker to tune the receiver and mark a signal Making a measurement saving the data in the list and viewing the list Creating a Report Using the OUTPUT K...

Страница 41: ... include displaying limit lines activating amplitude correction factors and opening the measurement windows The rst level of menus accessed by pressing the 4SETUP5 key provide standard and user de ned con gurations The second and third levels allow you to modify the standard con gurations and use limit lines and amplitude correction factors Using Standard Con gurations The EMI receiver provides fo...

Страница 42: ... Set the receiver to a known state by pressing 4PRESET5 4SETUP5 NNNNNNNNNNNNNNNNNNNNNNNNNNNNNNNNNNNNNNNNNN 200 MHz01 GHz 4INPUT5 NNNNNNNNNNNNNNNNNNNNNNNNNNNNNNNNNNNNNNNNNNNNNNN VIEW CAL ON OFF ON Modifying Start and Stop Frequencies 2 To change the start frequency press 4FREQUENCY5 NNNNNNNNNNNNNNNNNNNNNNNNNNNNNNNN START FREQ 150 4MHz5 3 To change the stop frequency press NNNNNNNNNNNNNNNNNNNNNNNNNN...

Страница 43: ... to the default setting press NNNNNNNNNNNNNNNNNNNNNNNNNNNNNNNNNNNNNNNNNNNNNNN AVG BW AUTO MAN AUTO Selecting the Active Detector The EMI receiver can scan any one of the three available detectors The currently active detector is indicated onscreen in the upper right hand corner as the ACTV DET Refer to Figure 3 1 The default detector of the receiver is the peak detector The peak detector scans the...

Страница 44: ...NNNNNNNNNNNNNNNNNNNNNNNNNNNN More 1 of 3 NNNNNNNNNNNNNNNNNNNNNNNNNNNNNNNN Inst Setup NNNNNNNNNNNNNNNNNNNNNNNNNNNNNNNNNNNNNNNNNNNNNNNNNN Measure Detector 13 Locate the NNNNNNNNNNNNNNNNNNNNNNNNNNNNNNNNNNNNNNNNNNNNNNNNNNNNN DETECTOR PK QP AV softkey Notice each of the detector labels are underlined This indicates they will all be measured Press the softkey Notice some detectors are not underlined and...

Страница 45: ...discharge time constants The total dwell time cannot be set below the required minimum value Controlling the Preampli er The preampli er can be controlled from both the 4PREAMP5 key and the NNNNNNNNNNNNNNNNNNNNNNNNNNNNNNNNNNNNNNNNN PREAMP ON OFF softkey located under the 4SETUP5 key A message appears at top of the display to indicate the preampli er is on Refer to Figure 3 2 16 To turn the preampl...

Страница 46: ...anged the autoranging function will remove any corrective actions that were taken earlier then autorange for the new conditions A message appears at the top of the display when autoranging is on Refer to Figure 3 2 19 To activate autoranging using the front panel key press 4AUTORANGE5 Press this key again to turn autoranging o 20 The following procedure can also be used to activate autoranging 4SE...

Страница 47: ...ILE Using Limit Lines Two limit lines with margins can be displayed on the EMI receiver These limit lines can be used to visually determine whether displayed signals meet the appropriate limits Margins are set relative to each of the limit lines and are useful when taking into account any uncertainties that can exist in the entire measurement system If you wish to provide a margin of safety when t...

Страница 48: ...ET5 4SETUP5 NNNNNNNNNNNNNNNNNNNNNNNNNNNNNNNNNNNNNNNNN 200 MHz 1 GHz 4AUTORANGE5 2 Access the limit line menu by pressing 4SETUP5 NNNNNNNNNNNNNNNNNNNNNNNNNNNNNNNNNNN More 1 of 3 NNNNNNNNNNNNNNNNNNNNNNNNNNNNNNNNNNN Limit Lines 3 Insert the Limit Lines and Antenna Factor Library Disk into the disk drive Load the EN55022 Class A Radiated 10 m limit le from the disk by pressing NNNNNNNNNNNNNNNNNNNNNNNN...

Страница 49: ...g measurements The corrections are made real time as the data is displayed onscreen The EMI receiver allows three types of amplitude correction factors to be applied to the input signals Antenna Factors Conversion factors relating eld strength to measured voltage Cable Factors Conversion factors to correct for cable insertion loss Other Factors Correction factors to account for the e ects of any o...

Страница 50: ...NNNNNNNNNNNNNNNNNNNNNNNNNNNNNNN Correctn Factors 3 Insert the Limit Lines and Antenna Factor Library Disk into the disk drive 4 Load the HP 11966D periodic antenna 200 MHz 1 GHz le from the disk by pressing NNNNNNNNNNNNNNNNNNNNNNNNNNNNNNNNNNNNNNNNNNNNNNN Antenna Factors NNNNNNNNNNNNNNNNNNNNNNNNNNNNNNNNNNNNNNNNNNNN RECALL ANTENNA 5 Highlight LOG_PERD ANT using the step keys or knob 6 To load the le...

Страница 51: ...ach window is simpli ed Use the 4ZOOM5 key to expand the active display to full screen A complete description of the window state is provided when in this full screen mode Press the 4ZOOM5 key again to return to the windows display mode 1 Before activating the windows display format set the receiver to a known state by pressing 4PRESET5 4SETUP5 NNNNNNNNNNNNNNNNNNNNNNNNNNNNNNNNNNNNNNNNNN 200 MHz01 ...

Страница 52: ...ion of the active window state is provided when in the full screen mode Press the 4ZOOM5 key again to return to the windows display mode 6 To turn the windows mode o press 4CTRL5 NNNNNNNNNNNNNNNNNNNNNNNNNNNNNNNNNNN WINDOWS OFF Making Compliance Measurements 3 13 ...

Страница 53: ...ue using the step keys or knob the units are entered automatically by the receiver When the knob is used to enter the frequency two tuning rates are available slow and fast 3 To change the rate at which the receiver tunes when using the knob press NNNNNNNNNNNNNNNNNNNNNNNNNNNNNNNNNNNNNNNNN TUNE SLO FAST FAST The slow rate is the default rate It is calculated by the receiver and is based on the scan...

Страница 54: ...indow The frequency span is 80 MHz 5 Select the marker tune mode by pressing 4TEST5 NNNNNNNNNNNNNNNNNNNNNNNNNNNNNNNNNNNNNNNNNNNNNNN MARKER TUNE SPN TUNE 6 Rotate the knob clockwise until the marker reaches the right side of the window As you continue to rotate the knob the receiver changes frequencies The zone marker is also moving in the upper overview window indicating the frequency range being ...

Страница 55: ...ch detector can be adjusted using the dwell time function Refer to the Customizing Standard Settings section earlier in this chapter for more information The following example shows how to use the measure at marker function use the marker box store signals in the list view signals in the list 1 Set the receiver to a known state by pressing 4PRESET5 2 Turn on the internal calibrator signal to use a...

Страница 56: ...s NNNNNNNNNNNNNNNNNNNNNNNNNNNNNNNNNNNNNNNNNNNN MEASURE AT MKR 10 When the receiver displays the measured values press NNNNNNNNNNNNNNNNNNNNNNNNNNNNNNNNNNN ADD TO LIST 11 Change the displayed span by pressing 4SPAN5 10 4MHz5 12 View the signals entered into the list by pressing 4TEST5 NNNNNNNNNNNNNNNNNNNNNNNNNNNNNNNNNNN More 1 of 3 NNNNNNNNNNNNNNNNNNNNNNNNNNNNNNNNNNNNNNNNNNNNNNN SIG LIST ON OFF ON U...

Страница 57: ...If using the Measure at Marker function to measure a pulsed signal with a repetition frequency of less than 5 Hz set the sweep time to greater than or equal to the inverse of the pulse repetition frequency For example to measure a 1 Hz CISPR pulse set the sweep time to 1 second or greater prior to using the Measure at Marker function Strong adjacent signals can a ect measurement accuracy The measu...

Страница 58: ...s per page color or monochrome output The con guration information is used when printing with either the 4COPY5 key or the OUTPUT REPORT softkey located on the 4OUTPUT5 key menu The following procedure con gures the receiver to print to an HP ThinkJet printer 1 Access the printer con guration menu by pressing 4CONFIG5 2 To use a ThinkJet printer press NNNNNNNNNNNNNNNNNNNNNNNNNNNNNNNNNNNNNN Print C...

Страница 59: ...a point and the limit lines for any of the detectors Elect to indicate which of the list entries have been marked refer to Chapter 4 for more information Print the current correction factors used 4 To modify which detector values are printed to the screen press NNNNNNNNNNNNNNNNNNNNNNNNNNNNNNNNNNNNNNNNNNNNNNNNNNNNN SHOW DET PK QP AV The detectors that will be displayed are underlined defaults are P...

Страница 60: ...NNNNNNNNNNNNNNNNNNNNNNNNNNNNNNNNNNNNN Previous Menu 10 To add user notes to the report press NNNNNNNNNNNNNNNNNNNNNNNNNNNNNNNNNNNNNNNNN EDIT ANNOTATN Annotation is entered with a keyboard The maximum number of ASCII characters allowed in the annotation is 1024 For more information on connecting and using the keyboard refer to Chapter 12 11 To clear any existing annotation press NNNNNNNNNNNNNNNNNNNN...

Страница 61: ......

Страница 62: ...he signal list is displayed in the upper half of the display screen the lower half of the display screen is the active window with a live trace Furthermore as each signal in the list is selected the frequency of the signal is used to tune the active window If the frequency is already on screen just the marker is moved otherwise the tune frequency is changed For the purpose of this measurement exam...

Страница 63: ...NNNNNNNNNNNNNNNNN VIEW CAL ON OFF ON Note When using the receiver RF section by itself refer to Receiver RF Section Annotation in Chapter 1 of this manual 300 MHz Calibrator Signal 3 Set the receiver stop frequency to 2 9 GHz in order to view additional harmonic signals by pressing 4FREQUENCY5 NNNNNNNNNNNNNNNNNNNNNNNNNNNNN STOP FREQ 2 9 4GHz5 4 2 List Based Measurements ...

Страница 64: ...brator signal by pressing 4PEAK SEARCH5 Adding Signals to the List 5 Measure the peak quasi peak and average detectors for this signal peak by pressing 4TEST5 NNNNNNNNNNNNNNNNNNNNNNNNNNNNNNNNNNNNNNNNNNNN MEASURE AT MKR wait for results to be displayed List Based Measurements 4 3 ...

Страница 65: ... by pressing NNNNNNNNNNNNNNNNNNNNNNNNNNNNNNNNNNN ADD TO LIST 7 Step to the rst harmonic signal take a measurement and add this result to the signal list by using the following sequence 4 5 positions marker on rst harmonic signal NNNNNNNNNNNNNNNNNNNNNNNNNNNNNNNNNNNNNNNNNNNN MEASURE AT MKR wait for results to be displayed NNNNNNNNNNNNNNNNNNNNNNNNNNNNNNNNNNN ADD TO LIST 4 4 List Based Measurements ...

Страница 66: ...nals until all signals have been measured and added to the signal list Viewing the Signal List 9 Display the signal list that was created by the 300 MHz calibrator signal and its harmonics measured above by pressing NNNNNNNNNNNNNNNNNNNNNNNNNNNNNNNNNNN More 1 of 3 NNNNNNNNNNNNNNNNNNNNNNNNNNNNNNNNNNNNNNNNNNNNNNN SIG LIST ON OFF ON displays the signal list List Based Measurements 4 5 ...

Страница 67: ...ressing NNNNNNNNNNNNNNNNNNNNNNNNNNNNN EDIT LIST NNNNNNNNNNNNNNNNNNNNNNNNNNNNNNNNNNNNNN Sort Signals NNNNNNNNNNNNNNNNNNNNNNNNNNNNNNNNNNNNNNNNNNNN SORT BY PK AMP Signal List Sorted by Peak Amplitude 11 Resort the signal list by frequency by pressing NNNNNNNNNNNNNNNNNNNNNNNNNNNNNNNNNNNNNN SORT BY FREQ 4 6 List Based Measurements ...

Страница 68: ...NNNNNNNNNNNNNNNNNNNN DELETE SIGNAL once the message If you are sure press key again to delete signal will appear Pressing NNNNNNNNNNNNNNNNNNNNNNNNNNNNNNNNNNNNNNNNN DELETE SIGNAL a second time deletes the data Last Harmonic Signal Deleted 13 Notice that after the signal has been deleted the marker and signal number are decreased by one In order to add the last harmonic signal back to the signal lis...

Страница 69: ...r deletion by pressing NNNNNNNNNNNNNNNNNNNNNNNNNNNNNNNNNNN More 1 of 3 NNNNNNNNNNNNNNNNNNNNNNNNNNNNN EDIT LIST NNNNNNNNNNNNNNNNNNNNNNNNNNNNNNNNNNNNNNNNNNNN Signal Marking Enter signal number 2 and press 4ENTER5 NNNNNNNNNNNNNNNNNNNNNNNNNNNNNNNNNNN MARK SIGNAL Signal Marking 4 8 List Based Measurements ...

Страница 70: ...vious Menu NNNNNNNNNNNNNNNNNNNNNNNNNNNNNNNNNNNNNNNNNNNN Delete Signals NNNNNNNNNNNNNNNNNNNNNNNNNNNNNNNNNNNNNNNNN DELETE MARKED NNNNNNNNNNNNNNNNNNNNNNNNNNNNNNNNNNNNNNNNN DELETE MARKED Marked Signals Deleted and List Reordered Notice that remaining signals are renumbered sequentially Remeasuring Signals 17 Remeasure the remaining signals on the list by pressing NNNNNNNNNNNNNNNNNNNNNNNNNNNNNNNNNNNNNN...

Страница 71: ... was saved by inspecting the le name date and time stamp 18 To save the current signal list press 4TEST5 NNNNNNNNNNNNNNNNNNNNNNNNNNNNNNNNNNN More 1 of 3 NNNNNNNNNNNNNNNNNNNNNNNNNNNNNNNNNNNNNNNNN Save Rcl List NNNNNNNNNNNNNNNNNNNNNNNNNNNNN SAVE LIST Enter register number 5 and press 4ENTER5 Note Signal lists and associated annotation can only be saved to a disk Refer to Chapter 11 for more informat...

Страница 72: ...al list which remains unchanged Any annotation for the signal list created using an external keyboard is also loaded from the le any existing annotation is replaced Graphing Signal Lists 21 To show a linear graphical representation of the signals in the signal list press NNNNNNNNNNNNNNNNNNNNNNNNNNNNNNNNNNNNNNNNNNNN SAVE LIN GRAPH Signals Plotted on Linear Frequency Scale List Based Measurements 4 ...

Страница 73: ...al Lists Graphs Note Signal list graphs can only be saved to a disk 23 To save the displayed log signal list graph to a oppy disk Enter the register number 8 and press 4ENTER5 The saving process takes several minutes The le on disk is a Windows bitmap BMP accepted by most Windows applications which read graphic images Note The Register message is not saved to the BMP le 4 12 List Based Measurement...

Страница 74: ...alibrator signal and its harmonics by pressing 4INPUT5 NNNNNNNNNNNNNNNNNNNNNNNNNNNNNNNNNNNNNNNNNNNNNNNNNN VIEW CAL ON OFF ON 3 To perform a stepped measurement with a center frequency of 300 MHz and a span of 3 MHz press 4FREQUENCY5 NNNNNNNNNNNNNNNNNNNNNNNNNNNNNNNNNNNNNNNNNNNNNNNNNN CENTER FREQUENCY 300 4MHz5 4SPAN5 3 4MHz5 4AMPLITUDE5 4 5 moves the signal trace to the top of the display 4TEST5 NN...

Страница 75: ...play The traces are displayed as follows Yellow Peak detector amplitude Blue Quasi peak detector amplitude Magenta Average detector amplitude 4 When the measurements are complete press NNNNNNNNNNNNNNNNNNNNNNNNNNNNNNNNNNNNNN EXIT MEASURE Note When EXIT MEASURE is pressed the measurement is stopped and all data is lost Be sure to save the data by adding it to the signal list table prior to pressing ...

Страница 76: ...NNNNNNNNNNNNNNNNNNNNNNNNNNNNNNNNNNNNNNNNNNNNNNNN DETECTOR PK QP AV PK QP NNNNNNNNNNNNNNNNNNNNNNNNNNNNNNNNNNNNNNNNN QP DWELL TIME 2 4sec5 2 To view an onscreen display of the signal list and make a stepped measurement press 4TEST5 NNNNNNNNNNNNNNNNNNNNNNNNNNNNNNNNNNN More 1 of 3 NNNNNNNNNNNNNNNNNNNNNNNNNNNNNNNNNNNNNNNNNNNNNNN SIG LIST ON OFF ON NNNNNNNNNNNNNNNNNNNNNNNNNNNNNNNNNNN More 2 of 3 NNNNNNN...

Страница 77: ...r example peak and quasi peak When the measurement is complete the marker function is the active function Use the keypad step keys or knob to move the marker along the trace The frequency and amplitude values of the two traces at the marker are displayed in the marker box 5 4 Stepped Measurements ...

Страница 78: ...DD TO LIST Data Added to the Signal List Table The new data now appears in the signal list Changing the Frequency Step The default step size is equal to one IF bandwidth To change the default step size press NNNNNNNNNNNNNNNNNNNNNNNNNNNNN FREQ STEP 0 5 4 ENTER 5 Restarting and Stopping the Measurement To start and stop a stepped measurement 1 Start the measurement by pressing NNNNNNNNNNNNNNNNNNNNNN...

Страница 79: ... press NNNNNNNNNNNNNNNNNNNNNNNNNNNNNNNNNNNNNNNNN MEAS SNG CONT CONT 5 To restart the measurement press NNNNNNNNNNNNNNNNNNNNNNN RESTART Note The MEAS SNG CONT function is always active Executing the function during a measurement will not corrupt the measurement 6 When the measurements are complete press NNNNNNNNNNNNNNNNNNNNNNNNNNNNNNNNNNNNNN EXIT MEASURE Note When EXIT MEASURE is pressed the measur...

Страница 80: ...ion This function can be used whenever a logarithmic display spanning several decades would be more informative than a linear display The following gures show the two display options Using a Logarithmic Step Size Note When using a logarithmic step size the frequency step is speci ed as a percentage of frequency The default step size equals three percent Using a Linear Step Size Stepped Measurement...

Страница 81: ......

Страница 82: ...using the IF bandwidth function Increasing the frequency readout resolution using the marker counter Decreasing the frequency span using the marker track function Peaking signal amplitude using the preselector peak function Tracking unstable signals using marker track and the maximum hold and minimum hold functions Comparing signals using delta markers Measuring low level signals using attenuation...

Страница 83: ...ther equal amplitude signals can be and still be distinguished from each other The IFBW function selects the IF lter setting Generally to resolve two signals of equal amplitude the IF bandwidth must be less than or equal to the frequency separation of the two signals If the bandwidth is equal to the separation a dip of approximately 3 dB is seen between the peaks of the two equal signals and it is...

Страница 84: ...ld be approximately 87 dB V 020 dBm 3 Set the receiver to a known state by pressing 4PRESET5 4FREQUENCY5 NNNNNNNNNNNNNNNNNNNNNNNNNNNNNNNNNNN CENTER FREQ 300 4MHz5 4SPAN5 2 4MHz5 4AMPLITUDE5 NNNNNNNNNNNNNNNNNNNNNNN REF LVL 82 4 dB V5 A single signal peak is visible 4 Since the IF bandwidth must be less than or equal to the frequency separation of the two signals an IF bandwidth of 30 kHz or less mu...

Страница 85: ... IF bandwidth is decreased resolution of the individual signals is improved and the sweep time is increased For fastest measurement times use the widest possible resolution bandwidth Since the IF bandwidth has been changed from the coupled value a mark appears next to IF BW in the lower left corner of the screen indicating that the IF bandwidth is uncoupled 6 4 Making EMI Diagnostic Measurements ...

Страница 86: ...arger signal To view the smaller signal you must select an IF bandwidth such that k is less than a See Figure 6 3 Figure 6 3 IF Bandwidth for Resolving Small Signals The separation between the two signals must be greater than half the lter width of the larger signal at the amplitude level of the smaller signal The following example resolves two input signals with a frequency separation of 100 kHz ...

Страница 87: ... NNNNNNNNNNNNNNNNNNNNNNNNNNNNNNNNNNNNNNNNNNNNNNNNNNNN MARKER REF LVL If a 30 kHz lter is used the 60 dB bandwidth will be 450 kHz Since the half bandwidth 225 kHz is wider than the frequency separation the signals will not be resolved See Figure 6 4 To determine resolution capability for intermediate values of amplitude level di erences consider the lter skirts between the 3 dB and 60 dB points to...

Страница 88: ...10 4kHz5 If a 10 kHz lter with a typical shape factor of 15 1 is used the lter will have a bandwidth of 150 kHz at the 60 dB point The half bandwidth 75 kHz is narrower than the frequency separation so the input signals will be resolved Figure 6 5 Signal Resolution with a 10 kHz IF Bandwidth Making EMI Diagnostic Measurements 6 7 ...

Страница 89: ...lowing example increases the resolution and accuracy of the frequency readout on the signal of interest 1 Set the receiver to a known state by pressing 4PRESET5 4INPUT5 NNNNNNNNNNNNNNNNNNNNNNNNNNNNNNNNNNNNNNNNNNNNNNN VIEW CAL ON OFF ON 4FREQUENCY5 NNNNNNNNNNNNNNNNNNNNNNNNNNNNNNNNNNN CENTER FREQ 300 4MHz5 4SPAN5 3 4MHz5 2 Place a marker on the signal of interest by pressing 4PEAK SEARCH5 4MKR 5 3 T...

Страница 90: ...played in the upper right corner of the screen The resolution can be set from 1 Hz to 100 kHz Figure 6 6 Using the Marker Counter 5 The marker counter remains on until turned o Turn o the marker counter by pressing 4MARKER FUNCTION5 NNNNNNNNNNNNNNNNNNNNNNNNNNNNNNNNNNNNNNNNNNNNNNN MK COUNT ON OFF OFF or 4MKR5 NNNNNNNNNNNNNNNNNNNNNNNNNNNNNNNNNNNNNN MKR 1 ON OFF OFF Making EMI Diagnostic Measurements...

Страница 91: ...NNNNNNNNNNNNNNNNNNNNNNNNNNNNNN MK TRACK ON OFF ON Because the marker track function automatically maintains the signal at the center of the screen you can reduce the span quickly for a closer look If the signal drifts o of the screen as you decrease the span use a wider frequency span 3 Decrease the span by pressing 4SPAN5 2 4MHz5 The span decreases in steps as automatic zoom is completed See Figu...

Страница 92: ...NNNNNNNNNNNNNNNNNNNNNN PRESEL PEAK maximizes the peak response of the signal of interest but may degrade the frequency response at other frequencies Use NNNNNNNNNNNNNNNNNNNNNNNNNNNNNNNNNNNNNNNNNNNN PRESEL DEFAULT or 4PRESET5 to clear preselector peak values before measuring a signal at another frequency NNNNNNNNNNNNNNNNNNNNNNNNNNNNNNNNNNNNNNNNNNNN PRESEL DEFAULT provides the best atness for a full...

Страница 93: ...by pressing 4AMPLITUDE5 NNNNNNNNNNNNNNNNNNNNNNNNNNNNNNNNNNN Presel Peak The message peaking is displayed while the routine is working Figure 6 8 Peaking Signal Amplitude Using Preselector Peak 6 12 Making EMI Diagnostic Measurements ...

Страница 94: ...ter frequency of the receiver is changed If you choose to use the marker track function when changing center frequency check to ensure the signal found by the tracking function is the correct signal Using the Marker Track Function In this example you will use the marker track function to keep a drifting signal in the center of the display and monitor its change This example requires a modulated si...

Страница 95: ... MK TRACK ON OFF ON The marker readout indicates the change in frequency and amplitude as the signal drifts See Figure 6 9 Figure 6 9 Using Marker Tracking to Track an Unstable Signal The receiver can measure the short term and long term stability of a source The maximum amplitude level and the frequency drift of an input signal trace can be displayed and held by using the maximum hold function Th...

Страница 96: ...and o 4BW5 NNNNNNNNNNNNNNNNNNNNNNNNNNNNNNNNNNNNNNNNNNNN IF BW AUTO MAN 10 4kHz5 3 Determine the signal peak by pressing 4PEAK SEARCH5 Adjust the reference level under 4Amplitude5 so the signal is within two divisions of the top of the display 4 Adjust the span by pressing 4SPAN5 NNNNNNNNNNNNNNNNNNNNNNNNNNNNN SPAN ZOOM 500 4kHz5 Notice the signal has remained in the center of the display 5 Turn o t...

Страница 97: ...e MA SB SC indicates trace A is in maximum hold mode trace B and trace C are in store blank mode 7 Select trace B by pressing 4TRACE5 NNNNNNNNNNNNNNNNNNNNNNNNNNNNNNNNNNN TRACE A B C B 8 Place trace B in clear write mode by pressing NNNNNNNNNNNNNNNNNNNNNNNNNNNNNNNNNNNNNNNNN CLEAR WRITE B Trace B displays the current measurement results as it sweeps Trace A remains in maximum hold mode showing the f...

Страница 98: ...0 Display the minimum amplitude of the signal by pressing NNNNNNNNNNNNNNNNNNNNNNNNNNNNNNNN MIN HOLD C Figure 6 11 Viewing an Unstable Signal using Max and Min Hold Making EMI Diagnostic Measurements 6 17 ...

Страница 99: ...en 1 Set the receiver to a known state by pressing 4PRESET5 4INPUT5 NNNNNNNNNNNNNNNNNNNNNNNNNNNNNNNNNNN VIEW CAL ON ON The calibrator signal and its harmonics appear on the display 2 Place a marker at the highest peak on the display by pressing 4PEAK SEARCH5 Figure 6 12 Placing a Marker on the CAL OUT Signal 3 Activate a second marker at the position of the rst marker by pressing NNNNNNNNNNNNNNNNN...

Страница 100: ...ow span and narrow bandwidth are necessary to measure the low level harmonics 1 Set the receiver to a known state by pressing 4PRESET5 4INPUT5 NNNNNNNNNNNNNNNNNNNNNNNNNNNNNNNNNNN VIEW CAL ON ON 4FREQUENCY5 NNNNNNNNNNNNNNNNNNNNNNNNNNNNNNNNNNN CENTER FREQ 300 4MHz5 4SPAN5 10 4MHz5 2 Place a marker on the peak by pressing 4PEAK SEARCH5 3 Identify the position of the rst marker by pressing NNNNNNNNNNN...

Страница 101: ...screen indicates the amplitude and frequency di erence between the two markers See Figure 6 14 Figure 6 14 Frequency and Amplitude Di erences Turn the markers o by pressing 4MKR5 NNNNNNNNNNNNNNNNNNNNNNNNNNNNNNNNNNN More 1 of 2 NNNNNNNNNNNNNNNNNNNNNNNNNNNNNNNNNNNNNNNNNNNN MARKER ALL OFF 6 20 Making EMI Diagnostic Measurements ...

Страница 102: ...INPUT5 NNNNNNNNNNNNNNNNNNNNNNNNNNNNNNNNNNNNNNNNNNNNNNN VIEW CAL ON OFF ON 4MEAS USER5 NNNNNNNNNNNNNNNNNNNNNNNNNNNNNNNNNNN More 1 of 2 NNNNNNNNNNNNNNNNNNNNNNNNNNNNNNNN DELTA MEAS The frequency and amplitude di erences are displayed in the upper left corner of the display The softkeys under 4PEAK SEARCH5 also appear on the screen Figure 6 15 Using the Delta Meas Function Making EMI Diagnostic Measur...

Страница 103: ...ttenuation If a signal is very close to the noise oor reducing input attenuation brings the signal out of the noise In this example reducing the attenuation to 0 dB maximizes signal power in the receiver Note The total power of all input signals at the receiver input must not exceed the maximum power level for the receiver 1 Connect an antenna to the receiver input then press 4PRESET5 2 Reduce the...

Страница 104: ...NNNNNNNNNNNNNNNNNNNNNNNNNNNNNNNNNNNNN ATTEN AUTO MAN Press the step up key 4 5 twice to select 30 dB attenuation Increasing the attenuation moves the noise oor closer to the signal A mark appears next to the ATT annotation at the side of the display indicating the attenuation is no longer coupled to other receiver settings Making EMI Diagnostic Measurements 6 23 ...

Страница 105: ...vironment contains a large signal which falls within the bandwidth of the front end lter section If this occurs increase the input attenuation as needed to turn o the indicator after you have completed this example Before connecting other signals to the receiver input increase the RF attenuation to protect the input mixer press NNNNNNNNNNNNNNNNNNNNNNNNNNNNNNNNNNNNNNNNNNNN ATTEN AUTO MAN AUTO or 4A...

Страница 106: ...NNNNNNNNNNNNNNNNNNNNNNN IF BW AUTO MAN 10 4kHz5 The low level signal appears more clearly because the noise level is reduced Refer to Figure 6 18 Figure 6 18 Decreasing IF bandwidth A mark appears next to the RES BW annotation at the lower left corner of the screen indicating the resolution bandwidth is uncoupled As the IF bandwidth is reduced the sweep time is increased to maintain receiver calib...

Страница 107: ... averaging bandwidth function measure the amplitude of a low level signal 1 As in the previous examples connect an antenna to the receiver input Set the receiver to view a low level signal 2 Reduce the IF bandwidth by pressing 4BW5 NNNNNNNNNNNNNNNNNNNNNNNNNNNNNNNNNNNNNNNNNNNNNNN IF BW AUTO MAN 30 4kHz5 3 Reduce the averaging bandwidth by pressing NNNNNNNNNNNNNNNNNNNNNNNNNNNNNNNNNNNNNNNNNNNNNNN AVG...

Страница 108: ...In this example a signal level very close to the noise oor will be made more visible using video averaging Video averaging is a digital process in which each trace point is averaged with the previous trace point average Selecting video averaging changes the detection mode from peak to sample The result is a sudden drop in the displayed noise level The sample mode displays the instantaneous value o...

Страница 109: ...NNNNNNNNNNNNNNNNNNNNNNN IF BW AUTO MAN 30 4kHz5 2 Connect an antenna to Input 2 of the receiver and position a low level signal on the screen 3 Initiate the video averaging routine by pressing 4TRACE5 NNNNNNNNNNNNNNNNNNNNNNNNNNNNNNNNNNN More 1 of 3 NNNNNNNNNNNNNNNNNNNNNNNNNNNNNNNNNNNNNNNNNNNN VID AVG ON OFF ON As the averaging routine smooths the trace low level signals become more visible VID AVG...

Страница 110: ...ncy or reference level will restart the sampling The sampling will also restart if video averaging is turned o and then on again Once the set number of sweeps has been completed the receiver continues to provide a running average based on this set number Figure 6 20 Using the Video Averaging Function Making EMI Diagnostic Measurements 6 29 ...

Страница 111: ...ntains both a large ambient signal and a low level DUT emission the large signal may trigger the receiver overload indicator when the receiver sensitivity is set to view the small signal While the receiver is in overload as it scans through the large signal it may not be in overload as it scans through the small signal The presence or absence of the overload depends on the frequency spacing betwee...

Страница 112: ...NNNNNNNNNNNNN MARKER 1 Note the uctuations in the delta marker amplitude displayed in the active function area When the signal is near the noise oor the noise contributions will cause uctuation in the marker value This could be interpreted as overload induced error when NNNNNNNNNNNNNNNNNNNNNNNNNNNNNNNNNNNNNNNNNNNNNNN LINEARITY CHECK is activated To reduce the uctuation decrease the averaging bandw...

Страница 113: ... by more than 1 dB the receiver is in compression In this example the delta marker readings remain the same and a valid measurement can be made because the 305 MHz signal is not being a ected by the 300 MHz signal Figure 6 22 Using Linearity Check to Detect Compression 6 32 Making EMI Diagnostic Measurements ...

Страница 114: ...level of an actual input signal will not 1 Connect two signal generators to the input of the receiver as shown in Figure 6 23 Set one signal to 300 Mhz 92 dB V 015 dBm and the other to 305 MHz 57 dB V 050 dBm Increase the amplitude of the 305 MHz signal if it is masked by the noise level of the 300 MHz source Note These levels were intentionally chosen to overdrive the receiver and generate third ...

Страница 115: ...nob to place the marker on the 295 MHz signal Center the signal on the display and decrease the span by pressing 4MKR 5 NNNNNNNNNNNNNNNNNNNNNNNNNNNN MKR CF 4SPAN5 5 4MHz5 4 Reduce the noise induced uctuations by pressing 4BW5 NNNNNNNNNNNNNNNNNNNNNNNNNNNNNNNNNNNNNNNNNNNNNNNNNN AVG BW AUTO MAN 1 4kHz5 5 Observe the marker delta amplitude as you press 4PEAK SEARCH5 NNNNNNNNNNNNNNNNNNNNNNNNNN MARKER 1...

Страница 116: ...Figure 6 25 Using Linearity Check to Identify Distortion Products Making EMI Diagnostic Measurements 6 35 ...

Страница 117: ...n on by pressing 4ON OFF5 Located in the DEMOD area of the front panel 4SELECT5 NNNNNNNNNNNNNNNNNNNNNNNNNNNNNNNNNNN DEMOD AM FM FM Use the front panel volume control to control the speaker s volume 5 The signal at the marker is demodulated for the duration of the dwell time Use the step keys knob or data keys to change the dwell time To change the dwell time to two seconds press 4SELECT5 NNNNNNNNN...

Страница 118: ...ication focuses on di erent features The procedures covered in this chapter are listed below Stimulus response measurements Measuring amplitude modulation using FFT 3 dB and 6 dB bandwidth measurements 99 power bandwidth measurements Percent AM modulation measurements Amplitude and frequency di erence measurements 3rd order measurements Making Other Measurements 7 1 ...

Страница 119: ...ous to a single channel scalar network analyzer A narrow band system has a wide dynamic measurement range but the tracking generator s output frequency must be made to precisely track the receiver s input frequency This wide dynamic range will be illustrated in the following example Figure 7 1 shows the block diagram of a receiver and tracking generator system Figure 7 1 Receiver Tracking Generato...

Страница 120: ...st Setup 3 Set the receiver to a known state by pressing 4PRESET5 4FREQUENCY5 NNNNNNNNNNNNNNNNNNNNNNNNNNNNNNNNNNN CENTER FREQ 321 4 4MHz5 4SPAN5 500 4MHz5 4AMPLITUDE5 102 4 dB V5 4 Activate the tracking generator and turn the power on by pressing 4TRK GEN5 NNNNNNNNNNNNNNNNNNNNNNNNNNNNNNNNNNNNNNNNNNNN SRC PWR ON OFF ON CAUTION Excessive signal input may damage the DUT Do not exceed the maximum powe...

Страница 121: ...resistance of the DUT can determine the fastest rate at which the receiver can be swept To determine whether the receiver is sweeping too fast slow the sweep time and note whether there is a frequency or amplitude shift of the trace Continue to slow the sweep time until there is no longer a frequency or amplitude shift 6 Decrease the resolution bandwidth to increase sensitivity and narrow the aver...

Страница 122: ...NNNNNNNNNNNN NORMLIZE POSITION The display line marks the normalized reference position or the position where 0 dB insertion loss transmission measurements or 0 dB return loss re ection measurements will normally reside Using the knob results in a change in the position of the normalized trace within the range of the graticule Set the level so it is one graticule below the top of the display Norma...

Страница 123: ...adout displays the rejection of the lter at 321 4 MHz refer to Figure 7 4 Figure 7 4 Normalized Trace 10 Measure the rejection of the lter relative to the passband by pressing 4MKR5 NNNNNNNNNNNNNNNNN MKR 1 30 4MHz5 The Marker 1 amplitude readout displays the rejection at a 30 MHz frequency o set 7 6 Making Other Measurements ...

Страница 124: ...h The unleveled condition is likely to occur if the true frequency range exceeds the tracking generator frequency speci cation especially the low frequency speci cation The true frequency range being swept may be signi cantly di erent than the start or stop frequency annotations indicate depending on other receiver settings especially the span see Chapter 1 of the Reference Guide for your instrume...

Страница 125: ...NNNNNNNNNNNNNNNNNNNNNNNN FFT MEAS is pressed the function sets sample detection mode and takes a sweep to obtain a sample of the input signal Then the receiver executes a series of computations on the time data to produce the frequency domain results Note After the FFT function is used the markers are still in FFT mode for use in evaluating data Turn o the markers before attempting to use the mark...

Страница 126: ... the display by pressing NNNNNNNNNNNNNNNNNNNNNNN REF LVL Use the step keys or knob to adjust the signal The signal must be below the reference level 7 Turn frequency scan o by pressing 4TEST5 NNNNNNNNNNNNNNNNNNNNNNNNNNNNNNNNNNNNNNNNNNNNNNNNNN FREQ SCAN ON OFF OFF 8 Refer to Figure 7 5 which shows maximum modulation frequency fm in Hertz versus sweep time Ts in seconds Set the sweep time less than ...

Страница 127: ...sweep time according to the gure for a right edge graticule limit of 250 Hz select 800 ms by pressing 4SWEEP5 800 4ms5 9 To save the current receiver settings in instrument state 2 press 4SAVE5 NNNNNNNNNNNNNNNNNNNNNNNNNNNNNNNNNNNNNNNNN SAVE INTERNAL NNNNNNNNNNNNNNNNNNNNNNNNNNNNNNNNNNNNNNNNNNNNNN STATE INTRNL 2 4ENTER5 If you wish to repeat the measurement retrieve the receiver settings by pressing...

Страница 128: ...xis The left edge of the graticule represents 0 Hz relative to the carrier The right edge of the graticule represents the maximum FFT frequency calculated In Figure 7 6 the maximum FFT frequency is 200 divided by the sweep time 250 Hz The amplitude relationships between the carrier sidebands and distortion components are the same as they would be if displayed using swept tuned operation in log mod...

Страница 129: ...ing the test 13 To repeat the test clear the screen data by pressing 4TRACE5 NNNNNNNNNNNNNNNNNNNNNNNNNNNNNNNNNNNNNNNNN CLEAR WRITE A 14 Recall the instrument state by pressing 4RECALL5 NNNNNNNNNNNNNNNNNNNNNNNNNNNNNNNNNNNNNNNNNNNNNN INTRNL STATE 2 4 ENTER 5 15 Continue the measurement from list item 10 7 12 Making Other Measurements ...

Страница 130: ...g 4PRESET5 4INPUT5 NNNNNNNNNNNNNNNNNNNNNNNNNNNNNNNNNNNNNNNNNNNNNNN VIEW CAL ON OFF ON 4FREQUENCY5 NNNNNNNNNNNNNNNNNNNNNNNNNNNNNNNNNNN CENTER FREQ 300 4MHz5 4SPAN5 2 4MHz5 2 Perform a 3 dB bandwidth measurement by pressing 4MEAS USER5 NNNNNNNNNNNNNNNNNNNNNNNNNNNNNNNNNNN 3 dB POINTS 3 Perform a 6 dB bandwidth measurement by pressing 4MEAS USER5 NNNNNNNNNNNNNNNNNNNNNNNNNNNNNNNNNNN 6 dB POINTS The val...

Страница 131: ... to a known state by pressing 4PRESET5 4INPUT5 NNNNNNNNNNNNNNNNNNNNNNNNNNNNNNNNNNNNNNNNNNNNNNN VIEW CAL ON OFF ON 4FREQUENCY5 NNNNNNNNNNNNNNNNNNNNNNNNNNNNNNNNNNN CENTER FREQ 300 4MHz5 4SPAN5 2 4MHz5 3 Measure the 99 power bandwidth by pressing 4MEAS USER5 NNNNNNNNNNNNNNNNNNNNNNNNNNNNNNNNNNN More 1 of 2 NNNNNNNNNNNNNNNNNNNNNNNNNNNNNNNN 99 PWR BW The value is given in the active function block Figur...

Страница 132: ...O MAN 3 4kHz5 Note the corner signal and the sidebands 3 Measure the percent amplitude modulation by pressing 4MEAS USER5 NNNNNNNNNNNNNNNNNNNNNNNNNNNNNNNNNNN More 1 of 2 NNNNNNNNNNNNNN AM The percent of amplitude modulation is displayed in the active function block Note The IF bandwidth must be set so the sidebands are displayed and the maximum amplitude excursion between displayed signals must be...

Страница 133: ...nt is made each time a button is pressed The markers may be turned o after a measurement is made by pressing 4MKR5 NNNNNNNNNNNNNNNNNNNNNNNNNNNNNNNNNNNNNNNNNNNNNNN MARKER 1 ON OFF OFF 1 Set the receiver to a known state by pressing 4PRESET5 4INPUT5 NNNNNNNNNNNNNNNNNNNNNNNNNNNNNNNNNNNNNNNNNNNNNNN VIEW CAL ON OFF ON 4FREQUENCY5 NNNNNNNNNNNNNN STOP 700 4MHz5 2 Measure the di erence between the two hig...

Страница 134: ...ak and the noise oor press 4MEAS USER5 NNNNNNNNNNNNNNNNNNNNNNNNNNNNNNNNNNN More 1 of 2 NNNNNNNNNNNNNNNNNNNNNNNNNNNNNNNN PK PK MEAS The value is displayed in the active function block Figure 7 11 Using the Pk Pk Function Making Other Measurements 7 17 ...

Страница 135: ...ceiver through an ampli er with the appropriate frequency range Refer to Figure 7 12 Set one source to 300 MHz and 80 dB V 027 dBm and the other source to 301 MHz and 80 dB V 027 dBm CAUTION You may need to vary the source powers and or frequencies depending on the available test ampli er Use su cient input attenuation or su ciently small signals to prevent damage to the input of the receiver 2 Se...

Страница 136: ...s by pressing 4MEAS USER5 NNNNNNNNNNNNNNNNNNNNNNNNNNNNNNNNNNN More 1 of 2 NNNNNNNNNNNNNNNNNNNNNNNNNNNNNNNNNNNNNN 3rd ORD MEAS The value is displayed in the active function block Figure 7 13 Using 3rd Ord Meas Function Making Other Measurements 7 19 ...

Страница 137: ......

Страница 138: ...r the limit line or the margin whichever is lowest Failures are indicated both onscreen and over the HP IB bus When performing limit testing with two limit lines and their associated margins the receiver automatically tests to the lowest of the four Limit lines are constructed from a table of frequency and amplitude coordinate pairs Limit line segments are created by connecting these points Everyt...

Страница 139: ...NNNNN EMI RECEIVER 3 Display the 300 MHz calibrator signal and its harmonics by pressing 4INPUT5 NNNNNNNNNNNNNNNNNNNNNNNNNNNNNNNNNNNNNNNNNNNNNNN VIEW CAL ON OFF ON 4 Set the center frequency and span by pressing 4FREQUENCY5 NNNNNNNNNNNNNNNNNNNNNNNNNNNNNNNNNNN CENTER FREQ 300 4MHz5 4SPAN5 500 4MHz5 4 ENTER 5 to disable the active function area 5 To access the limit line menus press 4SETUP5 NNNNNNNN...

Страница 140: ...ing o if it is on but does not clear an existing limit line table Note You can create limit lines using either logarithmic or linear frequency and amplitude scales The choice depends upon the limit line that you want to create 7 To select the linear frequency and logarithmic amplitude scales press NNNNNNNNNNNNNNNNNNNNNNN Limit 1 NNNNNNNNNNNNNNNNNNNNNNNNNNNNNNNN EDIT LIMIT NNNNNNNNNNNNNNNNNNNNNNNNN...

Страница 141: ...are entered The new coordinate will be listed last until the frequency amplitude and type selections have been entered Once a frequency amplitude and type selection have been entered the coordinate will be sorted into the limit line table according to its frequency 9 To enter the second coordinate press NNNNNNNNNNNNNNNNNNNNNNNNNNNNNNNNNNN SELECT FREQ 100 4MHz5 NNNNNNNNNNNNNNNNNNNNNNNNNNNNNNNNNNNNN...

Страница 142: ... OFF ON Note When using the receiver RF section by itself refer to Receiver RF Section Annotation in Chapter 1 of this manual Completed Limit Line The message FAIL LIMIT 1 is displayed because the calibration signal exceeds the limit line 13 Turn the 300 MHz calibrator signal o by pressing 4INPUT5 NNNNNNNNNNNNNNNNNNNNNNNNNNNNNNNNNNNNNNNNNNNNNNN VIEW CAL ON OFF OFF The message PASS LIMIT is display...

Страница 143: ... SELECT FREQ 400 4MHz5 NNNNNNNNNNNNNNNNNNNNNNNNNNNNNNNNNNNNNNNNNNNNNNN SELECT AMPLITUD 57 4dB V5 NNNNNNNNNNNNNNNNN SLOPE Editing an Existing Limit Line Table 2 To change the amplitude of segment number six from 57 dB V m to 102 dB V m select the segment to be edited by pressing NNNNNNNNNNNNNNNNNNNNNNNNNNNNNNNNNNNNNNNNNNNN SELECT SEGMENT 3 Use the step keys number keys or the knob to select row num...

Страница 144: ...De ning a Limit Margin To set a 03 dB limit line margin press NNNNNNNNNNNNNNNNNNNNNNNNNNNNNNNNNNNNNNNNNNNNNNN MARGIN 1 ON OFF ON 3 4dB5 Signal Failing the Limit Line Margin Note If the margin is displayed limit line testing is applied to the margin not the actual limit line The limit and margin displays are independent Limit line testing must have either or both limit or margin displays ON In line...

Страница 145: ...st Saving or Recalling Limit Line Tables Saving a Limit Line Table 1 Insert a formatted blank disk in the oppy drive 2 To save the current limit line table press 4SAVE5 3 To enter a pre x press NNNNNNNNNNNNNNNNNNNNNNNNNNNNNNNNNNNNNNNNN Change Prefix 4 To clear an existing pre x press NNNNNNNNNNNNNNNNNNNNNNNNNNNNNNNNNNNNNNNNNNNN YZ_ Spc Clear NNNNNNNNNNNNNNNNN Clear 5 Enter the pre x DEMO by pressi...

Страница 146: ... They must be preset to the desired state before using this function Only the register number can be entered Recalling a Limit Line Table 1 To recall limit line tables from the disk press 4RECALL5 NNNNNNNNNNNNNNNNNNNNNNNNNNNNNNNNNNN Recall Disk NNNNNNNNNNNNNNNNNNNNNNNNNNNNNNNNNNNNNNNNN RECALL LIMITS 2 Use the step keys or knob to scroll through the displayed menu When the desired le is highlighted...

Страница 147: ... the name of the desired le If using a DOS disk the name will be prefix register number LIM If using a LIF disk the name will be lprefix_register number The limit line information you saved earlier will be displayed as DEMO1 LIM or lDEMO_1 if using LIF format Refer to Chapter 11 for more information on saving and recalling and outputting data 3 When you are nished viewing the catalog press NNNNNNN...

Страница 148: ...NNNNN SIGNAL ANALYSIS 3 Display the 300 MHz calibrator signal and its harmonics by pressing 4INPUT5 NNNNNNNNNNNNNNNNNNNNNNNNNNNNNNNNNNNNNNNNNNNNNNN VIEW CAL ON OFF ON 4 Set the center frequency and span by pressing 4FREQUENCY5 NNNNNNNNNNNNNNNNNNNNNNNNNNNNNNNNNNN CENTER FREQ 300 MHz 4SPAN5 500 MHz 4 ENTER 5 to disable the active function area 5 To access the limit line menus press 4SETUP5 NNNNNNNNN...

Страница 149: ...NNNNNNNNNNNNNNNNNNNNNNNNNNNN More 1 of 2 NNNNNNNNNNNNNNNNNNNNNNNNNNNNNNNNNNNNNN PURGE LIMITS NNNNNNNNNNNNNNNNNNNNNNNNNNNNNNNNNNNNNN PURGE LIMITS NNNNNNNNNNNNNNNNNNNNNNNNNNNNNNNN EDIT UPPER After pressing NNNNNNNNNNNNNNNNNNNNNNNNNNNNNNNNNNNNNN PURGE LIMITS once the message If you are sure press key again to purge data will appear Pressing NNNNNNNNNNNNNNNNNNNNNNNNNNNNNNNNNNNNNN PURGE LIMITS a second...

Страница 150: ...e according to its frequency Set the beginning or the rst limit line segment to 50 MHz with an amplitude of 47 dB V m by pressing NNNNNNNNNNNNNNNNNNNNNNNNNNNNNNNNNNN SELECT FREQ 50 4MHz5 NNNNNNNNNNNNNNNNNNNNNNNNNNNNNNNNNNNNNNNNNNNNNNN SELECT AMPLITUD 47 4dB V5 NNNNNNNNNNNNNN FLAT Note The coordinates for the second point must be entered before the rst limit line segment will be displayed Set the b...

Страница 151: ...NNNNN More 1 of 2 NNNNNNNNNNNNNNNNNNNNNNNNNNNNN EDIT DONE To turn limit testing on press NNNNNNNNNNNNNNNNNNNNNNNNNNNNNNNNNNNNNNNNNNNNNNN LMT TEST ON OFF ON The message FAIL UPPER is displayed because the calibration signal exceeds the limit line Note When on the limit test function tests to the de ned limits even if they are not displayed Signal Exceeding the Limit Line Turn o the 300 MHz calibrat...

Страница 152: ... One amplitude component representing an upper limit line segment is speci ed for each frequency or time component NNNNNNNNNNNNNNNNNNNNNNNNNNNNNNNN Edit Lower Accesses the lower limit line table One amplitude component representing a lower limit line segment is speci ed for each frequency or time component NNNNNNNNNNNNNNNNNNNNNNNNNNNNNNNNNNN Edit Up Low Accesses the upper lower limit line table fo...

Страница 153: ...NNNNNN LMT DISP Y N AUTO N the limit line is not displayed If NNNNNNNNNNNNNNNNNNNNNNNNNNNNNNNNNNNNNNNNNNNNNNNNNNNNN LMT DISP Y N AUTO Y the limit line is displayed Pressing NNNNNNNNNNNNNNNNNNNNNNNNNNNNNNNNNNNNNNNNNNNNNNNNNNNNN LMT DISP Y N AUTO AUTO sets the limit line display to match the limit line test function When AUTO is selected the limit lines are only displayed when NNNNNNNNNNNNNNNNNNNNNN...

Страница 154: ...ENCY5 NNNNNNNNNNNNNNNNNNNNNNNNNNNNNNNN START FREQ 300 4MHz5 NNNNNNNNNNNNNNNNNNNNNNNNNNNNN STOP FREQ 1 4GHz5 Note The EMI receiver must be calibrated in order to use amplitude correction If CORR is not displayed on the screen you should perform a calibration Refer to Calibrating the EMI Receiver in Chapter 2 for more information 2 To create edit or view the amplitude correction factors for antennas...

Страница 155: ...omatically becomes the active function When the amplitude is entered the correction point is incremented and the frequency selection automatically becomes the active function This speeds up data entry when you want to enter several coordinates 3 To select an antenna amplitude correction factor of 0 dB at 300 MHz press NNNNNNNNNNNNNNNNNNNNNNNNNNNNNNNNNNN SELECT FREQ 300 4MHz5 NNNNNNNNNNNNNNNNNNNNNN...

Страница 156: ... In this case it would be possible for the total number of actual points to exceed eighty The onscreen indicator displays the number of remaining memory locations The amplitude correction factor applied to the lowest selected frequency is also applied to all frequencies below the lowest selected frequency The amplitude correction factor applied to the highest selected frequency is also applied to ...

Страница 157: ...n in Chapter 1 of this manual Conversion Factors De ned with a Log Frequency Scale Note Logarithmic frequency scale corrections are linearly interpolated between correction points with respect to the logarithm of the frequency These correction points become straight lines on a log frequency scale The interpolation is computed as y f yi 1 0 yi fi 1 0 fi log f 0fi yi Linear frequency scale correctio...

Страница 158: ... LIN NNNNNNNNNNNNNNNNNNNNNNNNNNNNNNNNNNN More 2 of 2 NNNNNNNNNNNNNNNNNNNNNNNNNNNNN EDIT DONE Conversion Factors De ned with a Linear Frequency Scale 8 To add an additional frequency coordinate at 500 MHz and 0 dB press NNNNNNNNNNNNNNNNNNNNNNNNNNNNNNNNNNNNNN EDIT ANTENNA NNNNNNNNNNNNNNNNNNNNNNNNNNNNNNNNNNN SELECT FREQ 500 4MHz5 NNNNNNNNNNNNNNNNNNNNNNNNNNNNNNNNNNNNNNNNNNNNNNN SELECT AMPLITUD 0 4dB5 ...

Страница 159: ...g to CURRENT PREFIX2 ANT nCURRENT PREFIX_2 if using LIF format is displayed When the message disappears the antenna amplitude correction data has been saved on disk Activating Amplitude Correction To turn amplitude corrections on press 4SETUP5 NNNNNNNNNNNNNNNNNNNNNNNNNNNNNNNNNNN More 1 of 3 NNNNNNNNNNNNNNNNNNNNNNNNNNNNNNNNNNNNNNNNNNNNNNNNNN Correctn Factors NNNNNNNNNNNNNNNNNNNNNNNNNNNNNNNNNNNNNNNN...

Страница 160: ...ALL OTHER Note The SAVE softkeys save the current amplitude correction factors to a disk The amplitude correction factors can only be saved to a disk 2 To save the correction factors press NNNNNNNNNNNNNNNNNNNNNNNNNNNNNNNNNNNNNN SAVE ANTENNA NNNNNNNNNNNNNNNNNNNNNNNNNNNNNNNN SAVE CABLE or NNNNNNNNNNNNNNNNNNNNNNNNNNNNNNNN SAVE OTHER 3 To save the information press A register number 4 ENTER 5 The mess...

Страница 161: ......

Страница 162: ...ew window that is displayed in the applications window To look at di erent portions of the overview window move the zone markers using the zone center and zone span softkeys The instrument state of the active window can be changed without a ecting the state of the inactive window The state of the active window will be used as the state of the instrument for sweeping and updating trace data For the...

Страница 163: ...NNNNNNNNNNNNNNNNNNNNNNN Stop Freq 2 9 4GHz5 Note When using the receiver RF section by itself refer to Receiver RF Section Annotation in Chapter 1 of this manual 300 MHz Calibrator Signal with Harmonics 4 Activate the windows function by pressing 4CTRL5 The active window is outlined with a bold line 10 2 Windows ...

Страница 164: ...one markers to the rst signal to the right of the current zone by pressing NNNNNNNNNNNNNNNNNNNNNNNNNNNNNNNNNNNNNNNNN ZONE PK RIGHT The zone is centered around the new signal Zone Markers Moved to the Right of the Current Span Windows 10 3 ...

Страница 165: ...NNNNNNNN ZONE PK LEFT The zone is centered around the new signal 7 Increase the zone span to include three signals by pressing NNNNNNNNNNNNNNNNNNNNNNNNNNNNN ZONE SPAN 4 5 4 5 4 5 Zone Span Increased to Include Three Signals 8 View a full sized display of the applications window by pressing 4ZOOM5 10 4 Windows ...

Страница 166: ... Display of the Applications Window 9 View and activate a full sized display of the overview window by pressing 4NEXT5 The applications window is now active Full Sized Display of the Overview Window Windows 10 5 ...

Страница 167: ...FF Windows Display Mode O 12 To turn on the windows format again with the current display as the new overview window press 4CTRL5 A new applications window will be generated based on the zone in the overview window Note Markers can be used in both windows but they must be turned on in each window The current limit lines are common to both windows 10 6 Windows ...

Страница 168: ... For example data is stored in internal memory as an item on the oppy disk data is stored as a DOS le or a logical interchange le LIF Using a Floppy Disk Formatting the Disk Use a 3 5 inch double sided oppy disk If this is a new oppy disk it must be formatted before use The disk can be formatted on a computer or on the EMI receiver using the following procedure Note Before formatting your oppy dis...

Страница 169: ...iptor automatically supplied DOS Filenames A DOS lename is de ned as prefix register file type descriptor for example PREFIX3 SIG The lename excluding the extension cannot exceed eight characters The le type descriptor is a three letter extension such as SIG for a signal list LIF Filenames A LIF lename is de ned as file type descriptor prefix_register number for example tPREFIX_3 The lename cannot...

Страница 170: ...FFFFFFFFFFFFFFFFFFFFFFFFFF CABLE DISK FFFFFFFFFFFFFFFFFFFFFFFFFFFFFFFFF OTHER DISK FFFFFFFFFFFFFFFFFFFFFFFFFFFFFFFFFFFFFF DISPLAY DISK FFFFFFFFFFFFFFFFFFFFFFFFFFFFFFFFF Trace Disk FFFFFFFFFFFFFFFFFFFFFFFFFFFFF DELETE FILE FFFFFFFFFFFFFFFFFFFFFFFF LOAD FILE 1 Speci es types of data that can be stored by using normal front panel operation 2 When cataloging internal memory FFFFFFFFFFFFFFFFFFFFFFFF LO...

Страница 171: ...NNNNNNNNNNNNNNNNNNNNNNNNNNNN YZ_ Spc Clr NNNNNNNNNNNNNNNNN Clear or Use the backspace key to erase the existing pre x Saving a Trace 3 Set the receiver to a known state by pressing 4PRESET5 4INPUT5 NNNNNNNNNNNNNNNNNNNNNNNNNNNNNNNNNNNNNNNNNNNNNNN VIEW CAL ON OFF ON 4 Enter a screen title by pressing 4DISPLAY5 NNNNNNNNNNNNNNNNNNNNNNNNNNNNNNNNNNNNNN Change Title NNNNNNNNNNNNNNNNNNNN STUVWX NNNNN S NN...

Страница 172: ...isk NNNNNNNNNNNNNNNNNNNNNNNNNNNNNNNNNNN More 1 of 2 NNNNNNNNNNNNNNNNNNNNNNNNNNNNNNNNNNNNNNNN Trace Disk NNNNNNNNNNNNNNNNNNNNNNN TRACE A 7 REGISTER and PREFIX are displayed on the screen Use the numeric keypad to enter register number 5 by pressing 5 4 ENTER 5 The message Saving to FILENAME is displayed The trace data has now been saved to the disk Note If the NNNNNNNNNNNNNNNNNNNNNNNNNNNNNNNNNNNNNN...

Страница 173: ...lay by pressing 4SPAN5 3 4MHz5 The current trace trace A is displayed in yellow The recalled trace data trace B is displayed in blue Note Recalled trace data includes the instrument state The following items can be saved and recalled Save Recall Setup yes yes List yes yes Limits yes yes Antenna yes yes Cable yes yes Other yes yes Display yes no Trace yes yes Table 11 2 and Table 11 3 list the oper...

Страница 174: ...gister Pre x register 8 characters 4SAVE5 FFFFFFFFFFFFFFFFFFFFFFFF Save Disk FFFFFFFFFFFFFFFFFFFFFFFFFFFFF More 1 of 2 FFFFFFFFFFFFFFFFFFFFFFFFFFFFFFFFF CABLE DISK register 4 ENTER 5 save other No current pre x register OTH o current pre x register Pre x register 8 characters 4SAVE5 FFFFFFFFFFFFFFFFFFFFFFFF Save Disk FFFFFFFFFFFFFFFFFFFFFFFFFFFFF More 1 of 2 FFFFFFFFFFFFFFFFFFFFFFFFFFFFFFFFF OTHER...

Страница 175: ...T n desired lename 4RECALL5 FFFFFFFFFFFFFFFFFFFFFFFFFFFFF Recall Disk FFFFFFFFFFFFFFFFFFFFFFFFFFFFFFFFFFFF RECALL ANTENNA Highlight desired lename FFFFFFFFFFFFFFFFFFFFFFFF LOAD FILE recall cable no desired lename CBL c desired lename 4RECALL5 FFFFFFFFFFFFFFFFFFFFFFFFFFFFF Recall Disk FFFFFFFFFFFFFFFFFFFFFFFFFFFFF More 1 of 2 FFFFFFFFFFFFFFFFFFFFFFFFFFFFFFF RECALL CABLE Highlight desired lename FFF...

Страница 176: ...y Saving a State 1 Preset the instrument to a known state by pressing 4PRESET5 2 Activate the 300 MHz calibrator signal by pressing 4INPUT5 NNNNNNNNNNNNNNNNNNNNNNNNNNNNNNNNNNNNNNNNNNNNNNN VIEW CAL ON OFF ON 3 Save this instrument state by pressing 4SAVE5 4 Select internal memory as the mass storage device by pressing NNNNNNNNNNNNNNNNNNNNNNNNNNNNNNNNNNNNNNNNN Save Internal 5 Save data in register 5...

Страница 177: ...sing 4PRESET5 2 Set up the trace data to be stored and press 4SAVE5 NNNNNNNNNNNNNNNNNNNNNNNNNNNNNNNNNNNNNNNNN Save Internal NNNNNNNNNNNNNNNNNNNNNNNNNNNNNNNNNNNNNNNNNNNNNNNNNNNN Trace Internal NNNNNNNNNNNNNNNNNNNNNNN TRACE A 5 4 ENTER 5 REGISTER and MAX REG are displayed on the screen The Number after MAX REG indicates the maximum register number that can be entered for trace storage in internal me...

Страница 178: ... B or FFFFFFFFFFFFFFFFFFF TRACE C register number 4 ENTER 5 recall trace Yes 0 to MAX REG 4RECALL5 FFFFFFFFFFFFFFFFFFFFFFFFFFFFFFFFFFFFFFFFFFFFF Recall Internal FFFFFFFFFFFFFFFFFFFFFFFFFFFFFFFFFFFFFFFFFFF Internal Trace FFFFFFFFFFFFFFFFFFF TRACE A FFFFFFFFFFFFFFFFFFF TRACE B or FFFFFFFFFFFFFFFFFFF TRACE C register number 4 ENTER 5 save limit line table Yes2 0 to MAX REG 4SAVE5 FFFFFFFFFFFFFFFFFFFF...

Страница 179: ...eiver must be con gured correctly to operate with a speci c printer type Con guration options include printer type HP IB address of the printer number of plots per page color or monochrome output The con guration information is used when printing with either the 4COPY5 key or the OUTPUT REPORTS softkey located on the 4OUTPUT5 key menu The following procedure con gures the reciever to print to an H...

Страница 180: ...NNNN LOG ON OFF ON NNNNNNNNNNNNNNNNNNNNNNNNNNNNNNNN LIN ON OFF ON NNNNNNNNNNNNNNNNNNNNNNNNNNNNNNNNNNN LIST ON OFF ON NNNNNNNNNNNNNNNNNNNNNNNNNNNNNNNNNNNNNNNNNNNNNNN SETTINGS ON OFF ON Note The ANNOTATN ON OFF function in the Display menu does not turn user annotation on and o It is used to turn on and o onscreen annotation such as the instrument settings marker box title line softkeys and so forth...

Страница 181: ...7 To display the total current correction factor used for the data point displayed press NNNNNNNNNNNNNNNNNNNNNNNNNNNNNNNNNNNNNNNNNNNNNNN SHOW COR ON OFF ON 8 To display the mark in the report press NNNNNNNNNNNNNNNNNNNNNNNNNNNNNNNNNNNNNNNNNNNNNNN SHOW MRK ON OFF ON Note When the maximum number of columns exceeds the maximum number of characters available across a page in portrait orientation the re...

Страница 182: ...XIT EDIT 13 Verify the printer is connected to the receiver then output the report by pressing NNNNNNNNNNNNNNNNNNNNNNNNNNNNNNNNNNNNNNNNN OUTPUT REPORT 14 To halt the operation at any time during the output cycle press NNNNNNNNNNNNNNNNN ABORT The receiver will nish any graphs currently in process before aborting the output cycle Saving Recalling and Outputting Data 11 15 ...

Страница 183: ......

Страница 184: ...gramming command and screen titles Signal Analyzer Emulation The HP 8542E HP 8546A EMI receiver can be con gured to emulate signal analyzer operation When in signal analysis mode The HP 85420E HP 85460A RF lter section is bypassed IF bandwidths are coupled to span In receiver mode the IF bandwidth is selected based on center frequency Limit lines operate di erently Refer to Chapter 8 for more info...

Страница 185: ... narrowband and broadband FM signals NNNNNNNNNNNNNNNNNNNNNNNNNNNNNNNN DWELL TIME Sets the length of time the demodulator is on at the marker when scanning a frequency range greater than 0 Hz Tracking Generator The tracking generator is a frequency source that automatically tracks the receiver s tuned input frequency This source is useful when characterizing two port devices such as lters ampli ers...

Страница 186: ...or output frequency to the tuned frequency of the receiver The alignment is most critical when using narrow IF bandwidths 30 kHz Use the numeric keys step keys or knob to adjust the alignment NNNNNNNNNNNNNNNNNNNNNNNNNNNNNNNNNNNNNNNNNNNN PWR SWP ON OFF Varies the output power of the tracking generator over the span default is o 0 dB maximum is 15 dB This feature is useful when measuring the compres...

Страница 187: ...DUT NNNNNNNNNNNNNNNNNNNNNNNNNNNNNNNNNNN ALC INT EXT The tracking generator is leveled internally default When done manually an external signal can be connected to the ALC INPUT NNNNNNNNNNNNNNNNNNNNNNNNNNNNNNNNNNNNNNNNNNNNNNNNNN SWP CPLG SR RECV Changes sweep time default is no delay in stimulus response mode to account for the response time of a DUT This is useful when testing devices such as lter...

Страница 188: ...RD KEY MENU key perform the following procedure Press 4SETUP5 NNNNNNNNNNNNNNNNNNNNNNNNNNNNNNNNNNN More 1 of 3 NNNNNNNNNNNNNNNNNNNNNNNNNNNNNNNN Inst Setup NNNNNNNNNNNNNNNNNNNNNNNNNNNNNNNNNNNNNNNNNNNNNNNNNN Measure Detector 4TEST5 NNNNNNNNNNNNNNNNNNNNNNNNNNNNNNNNNNN More 1 of 3 NNNNNNNNNNNNNNNNNNNNNNNNNNNNN EDIT LIST NNNNNNNNNNNNNNNNNNNNNNNNNNNNNNNNNNNNNN Sort Signals 2 To jump back to the lowest le...

Страница 189: ...er de nable softkey you selected is now labeled EDIT LIMIT Note The user de nable softkeys are not a ected by pressing instrument preset switching line power on o recalling a setup from a disk Resetting To reset a user de nable softkey to the default setting press 4CONFIG5 NNNNNNNNNNNNNNNNNNNNNNNNNNNNNNNNNNN More 1 of 3 NNNNNNNNNNNNNNNNNNNNNNNNNNNNNNNNNNNNNNNNNNNNNNNNNN Dispose User Mem NNNNNNNNNN...

Страница 190: ...e to do so may result in loss of factory calibration data Static discharges of greater than 3 kV to metallic portions of the connector housing on the keyboard during operation may cause the instrument to reset Plug the keyboard into the EXT KEYBOARD input located on the rear panel of the EMI receiver Use the LINE switch to turn on power to the EMI receiver The external keyboard is now ready to be ...

Страница 191: ...o edit including the command line the title and the pre x 2 The onscreen softkeys can be accessed by pressing the appropriate function key 4F15 through 4F85 3 SETUP 4F95 duplicates the front panel 4SETUP5 key 4 TEST 4F105 duplicates the front panel 4TEST5 key 5 OUTPUT 4F115 duplicates the front panel 4OUTPUT5 key 6 Recall Current Title Keyboard Entry Line 4F125 moves the currently displayed title ...

Страница 192: ...o clear any existing annotation On the front panel press 4OUTPUT5 On the external keyboard press NNNNNNNNNNNNNNNNNNNNNNNNNNNNNNNNNNNNNNNNN EDIT ANNOTATN 4F75 NNNNNNNNNNNNNNNNNNNNNNNNNNNNNNNNNNNNNNNNNNNN CLEAR ANNOTATN 4F35 NNNNNNNNNNNNNNNNNNNNNNNNNNNNN EXIT EDIT 4F85 3 Use the external keyboard to enter the following message This is an annotation editor It can be used to record information about t...

Страница 193: ... 1 Select the Title function by pressing NNNNNNNNNNNNNNNNNNNN EDITOR 4Esc5 until the on screen message Keyboard Entry Title ashes on the screen 2 Use the external keyboard to enter This is a title When you are nished entering the pre x press 4Enter5 The new title will move from the Keyboard Entry line to the Title line 3 To edit an existing Title line move the current title to the Keboard Enty lin...

Страница 194: ... enter JOY When you are nished entering the pre x press 4Enter5 To view the new pre x press 4SAVE5 NNNNNNNNNNNNNNNNNNNNNNNNNNNNNNNNNNNNNNNNN Change Prefix The message Prefix JOY is displayed in the active function area of the screen 3 When you are nished viewing the pre x press NNNNNNNNNNNNNNNNNNNNNNNNNNNNNNNNNNN More 1 of 2 NNNNNNNNNNNNNNNNNNNNNNNNNNNNN EDIT DONE Additional Features 12 11 ...

Страница 195: ......

Страница 196: ...slow YTO tuning This message may appear if the instrument is using default correction factors If this message appears constantly perform the self calibration routine to try to eliminate this message LOCK OFF appears brie y during the self calibration routine during instrument preset or when the frequency value is changed this is normal and does not indicate a problem U and H ADC 2V FAIL Indicates ...

Страница 197: ...rs press 4FREQUENCY5 NNNNNNNNNNNNNNNNNNNNNNNNNNNNNNNNNNN CENTER FREQ 037 4Hz5 4CALIBRATE 5 NNNNNNNNNNNNNNNNNNNNNNNNNNNNNNNNNNN More 1 of 3 NNNNNNNNNNNNNNNNNNNNNNNNNNNNNNNNNNN More 2 of 3 NNNNNNNNNNNNNNNNNNNNNNNNNNNNNNNNNNNNNNNNNNNNNNNNNN DEFAULT CAL DATA and perform the self calibration routine again H CAL NBW 200 Hz notch amp failed Indicates that the 200 Hz IF bandwidth is not the correct shape ...

Страница 198: ...NNNNNNNNNNNNNN CAL YTF routine again U and H CAL ZERO FAIL The instrument could not set up the tuning sensitivity of the main coil If this message appears press 4FREQUENCY5 NNNNNNNNNNNNNNNNNNNNNNNNNNNNNNNNNNN CENTER FREQ 037 4Hz5 4CALIBRATE5 NNNNNNNNNNNNNNNNNNNNNNNNNNNNNNNNNNN More 1 of 3 NNNNNNNNNNNNNNNNNNNNNNNNNNNNNNNNNNN More 2 of 3 NNNNNNNNNNNNNNNNNNNNNNNNNNNNNNNNNNNNNNNNNNNNNNNNNN DEFAULT CAL...

Страница 199: ...le U Duplicate le name PROTECT is on Reported if the user attempts to overwrite a previously existing le with PROTECT status set to ON the default state Use a di erent le name purge the le or turn o the PROTECT feature U End of le or bu er found Reported if an attempt is made to read or write beyond the current le or directory is made Also reported if an attempt is made to add les to a directory t...

Страница 200: ... le name conventions too many characters illegal character in le name and so on Improper le type Reported in the event that an operation appropriate for a data le is attempted on a directory Check the contents of the disk using the catalog function U Improper value or out of range Indicates an internal error in computing the amount of data to read from the disk or an invalid parameter This may ind...

Страница 201: ...n for the AMPCOR programming command for more information U INVALID ENTER FORMAT The enter format is not valid See the appropriate programming command description to determine the correct format U INVALID le name NOT FOUND Indicates that the speci ed le could not be loaded into internal memory or purged from memory because the le name cannot be found U INVALID FILENAME Indicates the speci ed le na...

Страница 202: ...nge of trace elements is larger that ending trace element When specifying a trace range the starting element must be less than the ending element For example TRA 2 300 is legal but TRA 300 2 is not U INVALID REGISTER NUMBER The speci ed trace register number is invalid U INVALID RS 232 ADRS OPERATION An RS 232 operation was aborted due to an invalid operation U INVALID SAVE REG Data has not been s...

Страница 203: ...Hz U Mass storage hardware failure Indicates a failure of the oppy disk controller or a failure in communications between the main processor and the oppy disk controller Try turning the instrument o wait a few seconds then turn the instrument on again If the condition persists contact your HP representative H Mass storage medium over ow Reported when a disk has no more room available to write data...

Страница 204: ... front panel keys and the remote I O port Attempt the operation again U OVEN COLD Indicates that the EMI receiver has been powered up for less than 5 minutes The actual temperature of the precision frequency oven is not measured M PARAMETER ERROR The speci ed parameter is not recognized by the instrument See the appropriate programming command description to determine the correct parameters U PASS...

Страница 205: ...ctor is connected to the EXT REF IN connector or when using an external reference that an external 10 MHz reference source of su cient amplitude is connected to the EXT REF IN connector U and H Require 1 signal PEAK EXCURSION above THRESHOLD Indicates that the N dB PTS routine cannot locate a signal that is high enough to measure The signal must be greater than the peak excursion above the thresho...

Страница 206: ...SA Limits not allowed in RCVR mode This error is encountered when an attempt is made to enable limit line display limit margin display or limit testing of limits de ned in Signal Analysis mode when the instrument is operating in Receiver mode To correct the problem either delete the limits or switch to Signal Analysis mode U SAMPLE FAIL Indicates the sample detector has failed H SIGNAL CLIPPED Ind...

Страница 207: ... icting disk operations invoked from the front panel keys and the remote I O port or it may indicate that the disk is corrupt After pressing the HOLD key 4 ENTER 5 on the front panel retry the operation If the operation fails again check the disk using the catalog function U Too many signal with valid N dB points Indicates the N dB PTS function has located two or more signals that have amplitudes ...

Страница 208: ... U Wildcards not allowed An attempt was made to use the wildcard matching character on an operation that requires a speci c le name For example an attempt to load from a le name that contains a wildcard character Try the operation using a speci c le name U Write protected Indicates that a write operation was attempted on a disk that is write protected Move the write protect tab on the oppy disk to...

Страница 209: ...r report and advise your local HP representative Press PRESET to resume operation When a nonrecoverable error message is displayed the instrument will only respond to the front panel COPY and PRESET keys If you have a printer con gured and connected to the instrument and if no remote controller is currently connected to the I O port through which the printer is connected you can generate a hardcop...

Страница 210: ...If nonrecoverable system errors occur regularly contact your HP representative Error Messages 13 15 ...

Страница 211: ......

Страница 212: ...to service your EMI receiver after warranty expiration Call your HP Sales and Service O ce for full details If you want to service the EMI receiver yourself after warranty expiration contact your HP Sales and Service O ce to obtain the most current test and maintenance information Calling HP Sales and Service O ces Sales and service o ces are located around the world to provide complete support fo...

Страница 213: ...ed Verify that the rear panel sweep ramp and high sweep cables are properly connected If the EMI Receiver Cannot Communicate Via HP IB Verify that the proper HP IB address has been set Verify that there are no equipment address con icts Check that the other equipment and cables are connected properly and operating correctly Verify that the HP IB cable is connected to the receiver RF section and no...

Страница 214: ...ory usage credit to CompuServe A private User ID and Password A complimentary subscription to CompuServe s monthly computing publication CompuServe Magazine To take advantage of the CompuServe Free Introductory Membership o er call one of the telephone numbers below and ask for Representative Number 999 Country Toll Free Direct Argentina 54 01 372 7883 Australia 008 023 158 61 2 410 4555 Canada 1 ...

Страница 215: ...d a detailed description about the problem Note All items on the fax cover sheet must be completed in order to expedite your response Any incomplete item may delay your response Simply copy the fax cover sheet ll out the requested information include any additional information sheets and fax the sheet s to HP EMC Support at 707 577 4200 Depending on the complexity of the problem you should receive...

Страница 216: ...s packaging materials They do not adequately cushion the instrument or prevent it from shifting in the carton Styrene pellets cause equipment damage by generating static electricity and by lodging in the fan 2 Use the original packaging materials or strong shipping containers that are made of double walled corrugated cardboard with 159 kg 350 lb bursting strength The cartons must be both large eno...

Страница 217: ...Canada Berner Strasse 117 1217 Meyrin 2 Geneva Zone D Activite De Courtaboeuf 6000 Frankfurt 56 Switzerland F 91947 Les Ulis Cedex West Germany 41 22 780 8111 France 49 69 500006 0 33 1 69 82 60 60 Great Britain Hewlett Packard Ltd Eskdale Road Winnersh Triangle Wokingham Berkshire RF11 5DZ England 44 734 696622 INTERCON FIELD OPERATIONS Headquarters Australia Canada Hewlett Packard Company Hewlet...

Страница 218: ...Customer Support 14 7 ...

Страница 219: ......

Страница 220: ... 5 amplitude and frequency di erence measuring 7 16 amplitude correction activating 9 6 saving and recalling 9 7 tables creating 9 1 tables editing 9 6 AMPLITUDE front panel key 1 4 amplitude modulation measuring with the FFT function 7 8 analysis control functions 1 4 annotation screen 1 10 autocal 2 6 autoranging 3 7 AUX IF connector 1 8 AUX INTERFACE connector receiver RF section 1 8 RF lter se...

Страница 221: ...difying 3 6 frequencies modifying 3 3 generating a report 3 20 11 13 loading amplitude correction factors from disk 3 11 loading con gurations from disk 3 8 making 3 14 measure at marker 3 5 preampli er controlling 3 6 receiver tuning 3 14 receiver tuning using marker 3 15 reference level modifying 3 3 setting up 3 2 standard con gurations 3 2 using limit lines 3 8 using measure at marker 3 16 Com...

Страница 222: ...ls hidden by large signals 6 5 disk catalog viewing 8 10 drive 1 3 formatting 1 13 11 1 loading amplitude correction factors from disk 3 11 loading limit lines 3 9 loading user de ned con gurations 3 8 tasks 1 13 DISPLAY VIDEO OUT connectors 1 8 distortion testing 6 30 DOS lenames 11 2 dwell times 3 6 5 3 modifying 3 6 E editing amplitude correction tables 9 6 receiver limit lines 8 2 8 6 signal a...

Страница 223: ...1 12 keys 1 3 G GATE connectors 1 8 generating a report 3 20 11 13 graphing signal lists 4 11 H hardware error messages 13 1 HIGH SWEEP connector receiver RF section 1 8 RF lter section 1 9 HOLD key 1 7 I IF bandwidth function 6 2 modifying 3 4 reducing 6 25 impulse noise measurement 6 27 increase frequency readout resolution 6 8 informational messages 13 1 input attenuation modifying 3 3 reducing...

Страница 224: ...alyzer format 8 15 limit margin receiver 8 7 line power input 1 9 service switch 1 9 switch 1 3 voltage selector 1 9 linearity check using 6 30 6 33 linear step 5 7 listening to an AM of FM signal 6 36 loading amplitude correction factors from disk 3 11 user de ned con gurations from disk 3 8 logarithmic step 5 7 LO OUTPUT connector 1 8 low level signals reducing attenuation 6 22 reducing averagin...

Страница 225: ...erable errors 13 14 normalization 7 5 O on o switch 1 3 output data 11 12 OUTPUT front panel key 1 4 3 2 overview mode activating 10 5 overview of menu and softkeys 1 12 overwrite protection 11 11 P package receiver 14 5 packing material 14 5 partial calibration 2 7 peaking signal amplitude 6 11 percent AM modulation measuring 7 15 PHONES connector 1 3 PK PK MEAS 7 16 power bandwidth measuring 7 1...

Страница 226: ...g signals 4 9 report con guring 11 13 creating 11 12 generating 11 13 reports con guring 3 20 creating 3 19 generating 3 20 resolving signals 6 5 RF INPUT connector 1 5 OUT connector 1 5 OVERLOAD LED 1 5 RPG knob 1 6 S sales and service o ces 14 6 SAVE front panel key 1 4 saving amplitude correction 9 7 receiver limit line table 8 8 signal lists 4 10 state internal 11 9 trace 11 4 trace internal 1...

Страница 227: ...marking 4 8 remeasuring 4 9 saving and recalling 4 10 sorting 4 6 table 5 5 viewing 4 5 small signals measuring in presence of large ambient 6 30 softkey conventions 1 12 descriptions 1 4 label 1 3 user de nable 12 5 sorting signal lists 4 6 SPAN front panel key 1 4 SPAN ZOOM 6 13 SRC PWR ON OFF softkey 7 3 standard con gurations 3 2 customizing 3 3 start and stop frequency modifying 3 3 state fun...

Страница 228: ...on 7 5 stimulus response 7 2 unleveled condition 7 7 tracking unstable signals 6 13 troubleshooting 14 2 U unleveled condition tracking generator 7 7 user created error messages 13 1 user de nable softkeys 12 5 V video averaging 6 27 viewing disk catalog 8 10 receiver limit lines 8 2 signal analyzer limit lines 8 11 signal list 4 5 VOLTAGE SELECTOR 1 8 VOLUME control 1 3 W warm up time 2 2 windows...

Страница 229: ......

Отзывы: