


Heinzinger electronic GmbH
Phone: +49 (0) 8031 2458 0
www.heinzinger.com
Anton-Jakob-Str. 4, 83026 Rosenheim
Fax: + 49 (0) 8031 2458 58
Germany
Page 94
ERS COMPACT
► How to configure the PV table
1.
In the function generator menu swipe to find group
PV table (PS)
and tap it.
2.
Adjust the four parameters as required for the simulation.
3.
Do not forget to adjust the global limits for voltage and power in the
next screen. The voltage (U) setting is automatically set as high as
U
oc
and should not be lower, but can be higher.
4.
Proceed to the main function screen with
. Contrary to
other functions, the DC output is not automatically switched on,
because then the function would immediately. The function is only
started when the user switches the DC output on.
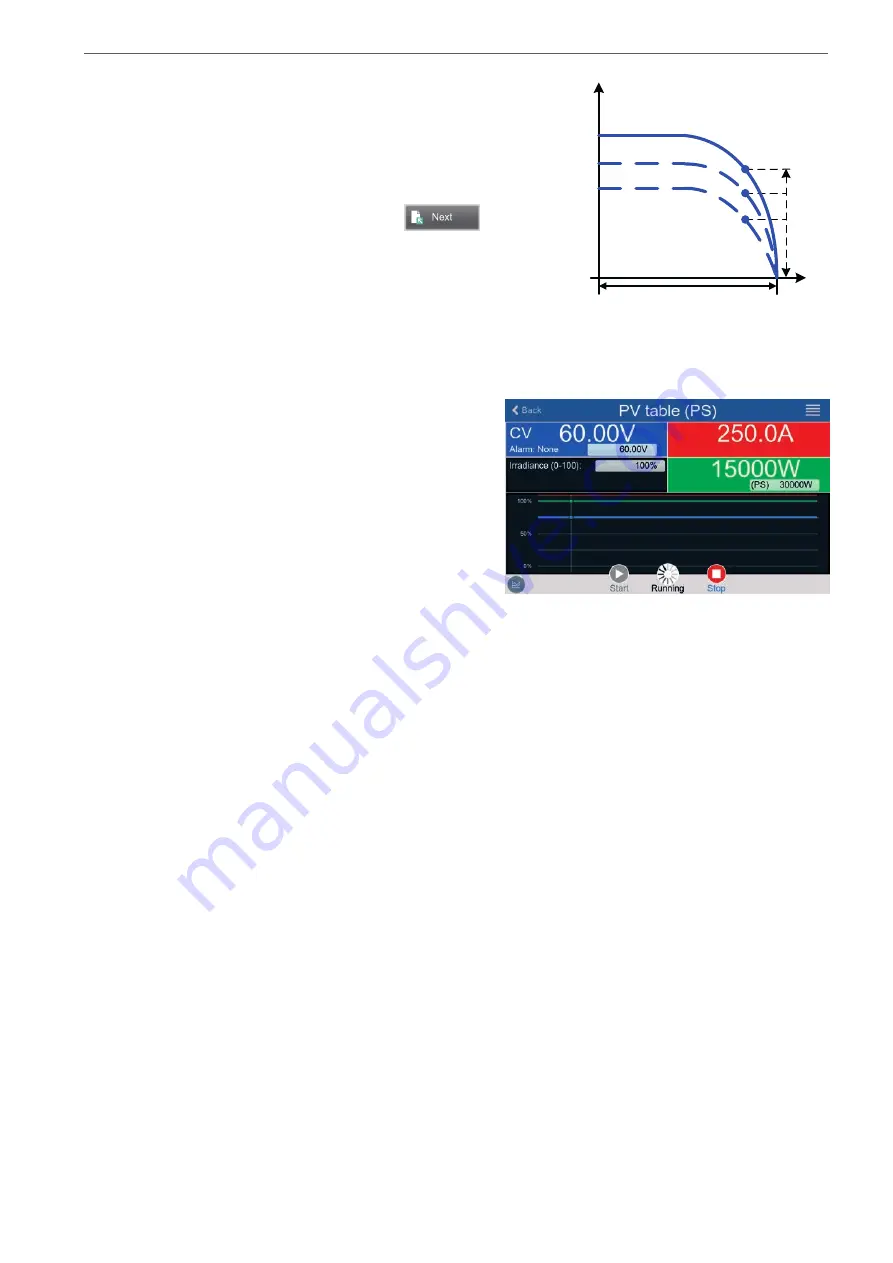
Irra
dianc
e
0
..10
0
%
U
I
Uoc
MPP
From the main function generator screen, you can go back to the first screen of PV table function and use a for
-
merly locked
Import/Export
action button to save the calculated table to a USB stick. In order to do so, follow the
on-screen instructions. The table can be used to analyze/visualize the values in Excel or similar tools.
►
How to work with the PV table function
1.
With an appropriate load connected, for example a solar
inverter, start the function.
2.
Adjust value
Irradiance
with any rotary knob or per
touch input between 100% (default) and 0%, in order
to reproduce different light situations for the simulated
panel. The actual values on the display indicate the
working point and can show whether the simulation has
arrived at the MPP or not.
3.
Stop the function run anytime by the stop button or by
switching off the DC output.