16
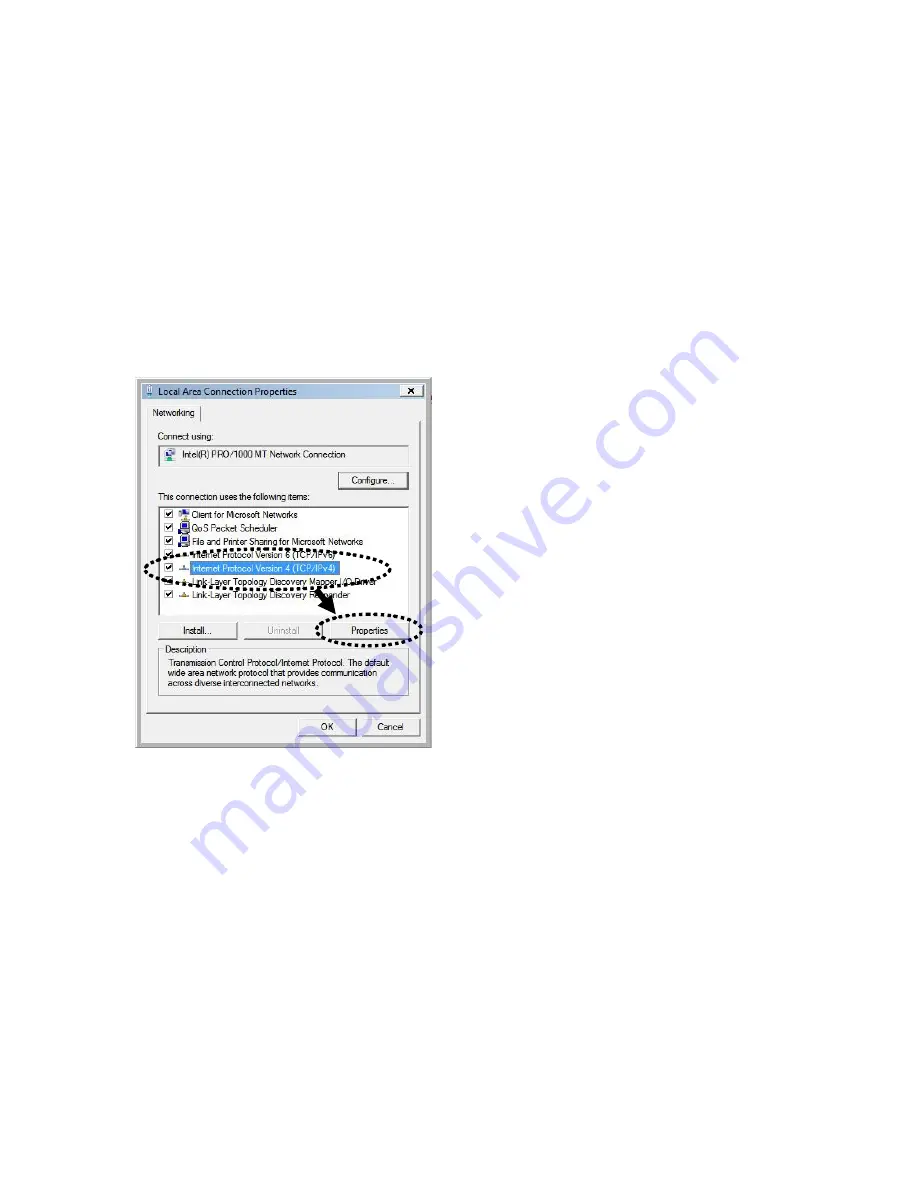
2-2-4 Windows Vista/7/8 IP Address Setup
1. Click ‘Start’ button (it should be located at lower-left corner of your computer), then
click control panel. Under
Network and Internet,
Click
View Network Status and Tasks
,
then click
Manage Network Connections/Change Adapter Settings
on the right hand
column.
Right-click
Local Area Network, then select ‘Properties’. Local Area
Connection Properties
window will appear, select ‘Internet Protocol Version 4 (TCP /
IPv4)’, and then click ‘Properties’
2. Select ‘Obtain an IP address automatically’ and ‘Obtain DNS server address
automatically’, then click ‘OK’.
Содержание HW9ACM
Страница 18: ...11...
Страница 20: ...13...
Страница 22: ...15...
Страница 24: ...17...
Страница 27: ...20 Look for Hawking_HW9ACM then select to connect...
Страница 32: ...25 2 3 1 Setup Procedure for Repeater Step 1 Choose Extender Mode...
Страница 35: ...28 Step 6 Congratulations You have completed the setup of the HW9ACM Click Finish for the device to reboot...
Страница 36: ...29 2 3 2 Setup Procedure for Router...
Страница 37: ...30 Step 1 Choose Router Mode Step 2 Choose your Time Zone This is used for system and security logs Click Next...
Страница 41: ...34 2 3 3 Setup Procedure for Access Point Step 1 Choose Access Point Mode Step 2 Choose your settings...
Страница 46: ...39 2 3 4 Setup Procedure Bridge Step 1 Choose Bridge Mode...
Страница 47: ...40 Step 2 Enter in your bridge settings 1 3 4 2...
Страница 50: ...43 2 3 5 Setup procedure for Bridge Point to Point Step 1 Choose Bridge Point to Point Mode...
Страница 51: ...44 Step 2 Enter your Bridge Point to Point settings...
Страница 55: ...48...
Страница 56: ...49 2 3 6 Setup procedure for Bridge Point to Multi Point Step 1 Choose Bridge Point to Multi Point Mode...
Страница 57: ...50...
Страница 62: ...55 2 3 7 Setup Procedure for Bridge WDS Step 1 Choose Bridge WDS Mode...
Страница 63: ...56...
Страница 116: ...109 point to reboot...
Страница 162: ...155 NOTE Information displayed here may vary...


