157
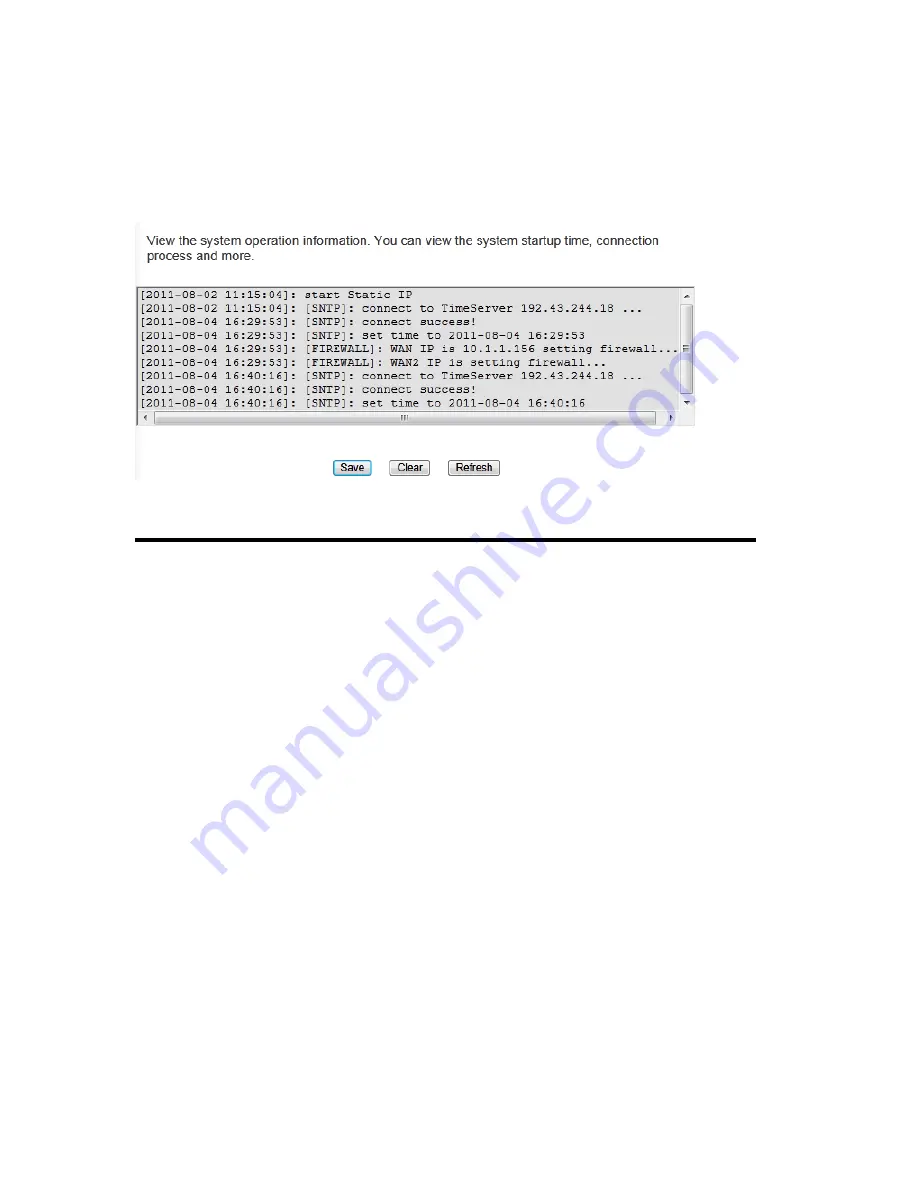
Please click ‘Security Log’ menu on the left of web management interface, and the
following message will be displayed on your web browser:
Save (1):
Save current event log to a text file.
Clear (2):
Delete all event logs displayed here.
Refresh (3):
Refresh the event log display.
4-1-6 Active DHCP client list
If you’re using the DHCP server function of this access point, you can use this function to
check all active DHCP leases issued by this access point.
Please click ‘Status’ menu at the top of web management interface, and then click ‘Active
DHCP Client’ on the left hand column.
1
2
3
Содержание HW9ACM
Страница 18: ...11...
Страница 20: ...13...
Страница 22: ...15...
Страница 24: ...17...
Страница 27: ...20 Look for Hawking_HW9ACM then select to connect...
Страница 32: ...25 2 3 1 Setup Procedure for Repeater Step 1 Choose Extender Mode...
Страница 35: ...28 Step 6 Congratulations You have completed the setup of the HW9ACM Click Finish for the device to reboot...
Страница 36: ...29 2 3 2 Setup Procedure for Router...
Страница 37: ...30 Step 1 Choose Router Mode Step 2 Choose your Time Zone This is used for system and security logs Click Next...
Страница 41: ...34 2 3 3 Setup Procedure for Access Point Step 1 Choose Access Point Mode Step 2 Choose your settings...
Страница 46: ...39 2 3 4 Setup Procedure Bridge Step 1 Choose Bridge Mode...
Страница 47: ...40 Step 2 Enter in your bridge settings 1 3 4 2...
Страница 50: ...43 2 3 5 Setup procedure for Bridge Point to Point Step 1 Choose Bridge Point to Point Mode...
Страница 51: ...44 Step 2 Enter your Bridge Point to Point settings...
Страница 55: ...48...
Страница 56: ...49 2 3 6 Setup procedure for Bridge Point to Multi Point Step 1 Choose Bridge Point to Multi Point Mode...
Страница 57: ...50...
Страница 62: ...55 2 3 7 Setup Procedure for Bridge WDS Step 1 Choose Bridge WDS Mode...
Страница 63: ...56...
Страница 116: ...109 point to reboot...
Страница 162: ...155 NOTE Information displayed here may vary...


