85
a.
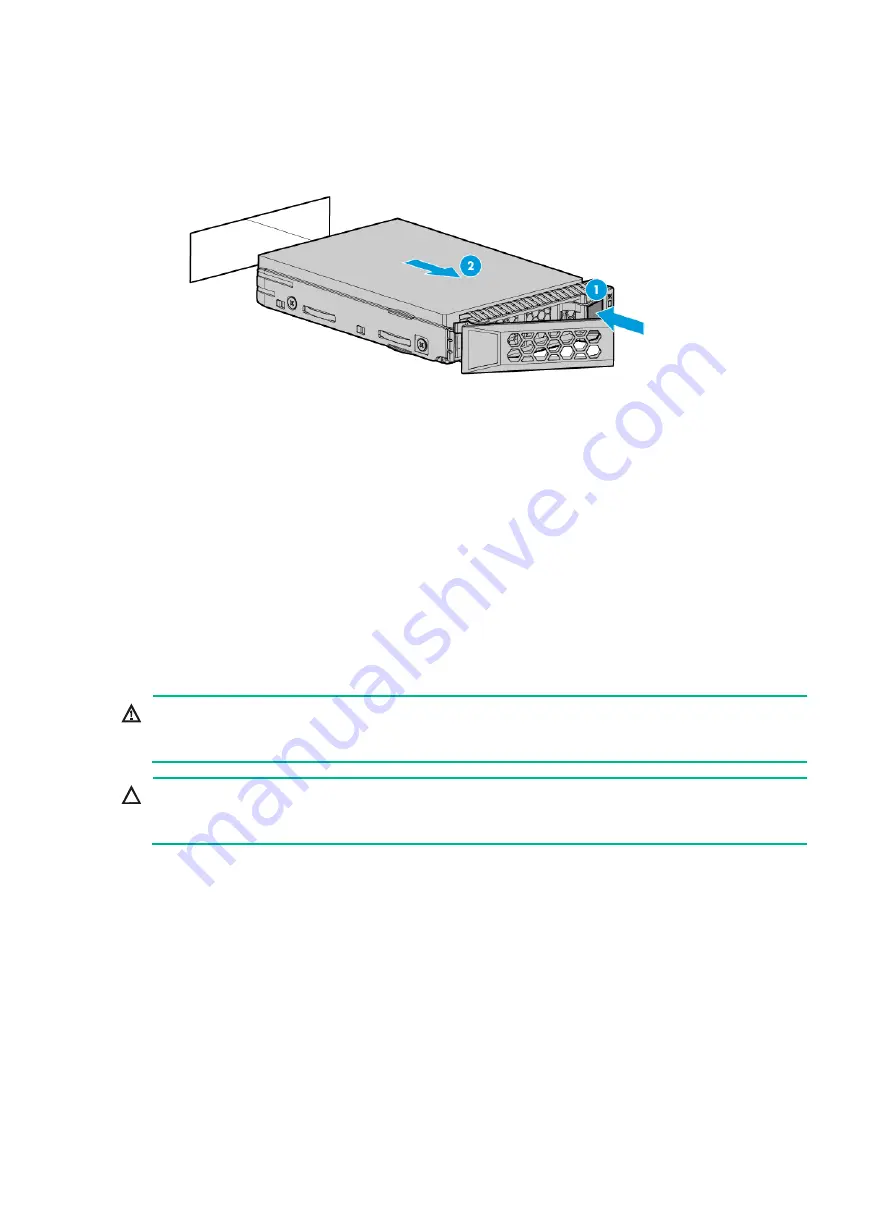
Press the button on the drive panel to release the locking lever, as shown by callout 1
in
.
b.
Hold the locking lever and pull the drive out of the slot, as shown by callout 2 in
Figure 116 Removing a drive
4.
Install a new drive. For more information, see "
."
5.
Install the removed security bezel, if any. For more information, see "
6.
Configure RAID settings as needed.
Verifying the replacement
Use one of the following methods to verify that the drive has been replaced correctly:
•
Log in to the HDM or UIS manager to verify the drive properties (including capacity). For more
information, see HDM online help or UIS manager online help.
•
Observe the drive LEDs to verify that the drive is operating correctly. For more information
about drive LEDs, see "Drive LEDs."
Replacing the access panel
WARNING!
To avoid bodily injury from hot surfaces, allow the server and its internal modules to cool before
touching them.
CAUTION:
To avoid thermal damage to the server, do not operate the server for long periods with the access
panel open or uninstalled.
If you are to replace a hot-swappable component in the chassis and sufficient space is available for
replacement, you can replace the access panel without powering off the server or removing the
server from the rack. The following procedure is provided based on the assumption that no sufficient
space is available for replacement.
Removing the access panel
1.
Power off the server. For more information, see "
2.
Remove the server from the rack. For more information, see "
Removing the server from a rack
."
3.
Remove the access panel:
a.
If the locking lever on the access panel is locked, use a T15 Torx screwdriver to unlock the
lever, as shown by callout 1 in
.


