


Preliminary Device Description HG G-19600ZA | English, Revision 02 | Date: 13.03.2018
22
Chapter 6 – Software
6
Software
6.1 Switch-On Behavior
Directly after switch-on all 5 LEDs are lit. The boot loader then waits for 5 seconds if a soft-
ware update is to be carried out. Afterwards the sensor switches to its normal operating
mode.
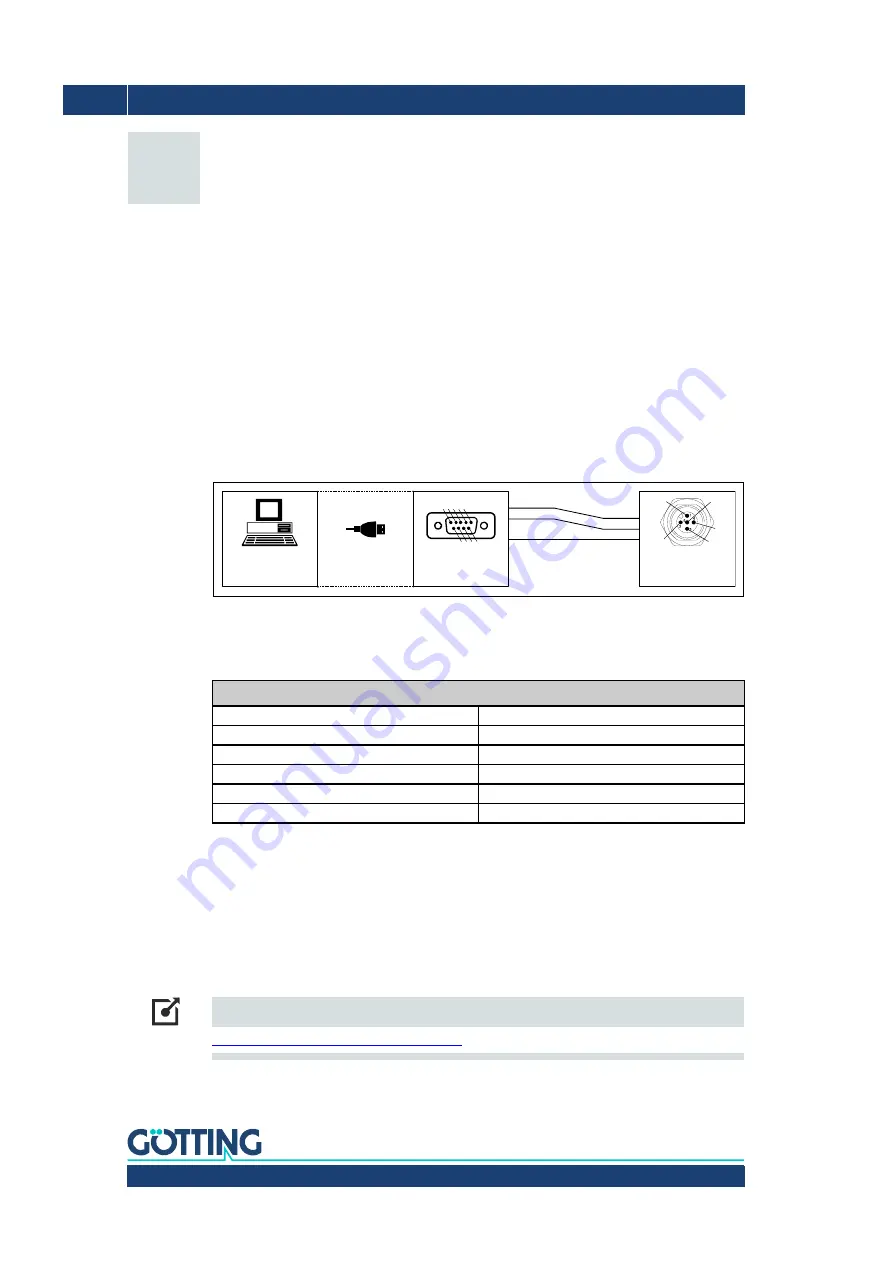
6.2 Connection to a PC via the Serial Interface
The sensor has a serial interface included in the 5 pin ST 1 (s. 5.2.1 on page 20). This inter-
face can be used for its diagnosis, configuration or a software update. A PC with a serial RS
232 interface is needed. For PCs that don‘t have a serial interface a USB to RS 232 adapter
can be ordered from electronics retailers.
Figure 14
Connection example: Connection with the serial interface of a computer
The sensor‘s serial interface has the following communication settings. Those have to be
configured in the terminal program on the PS (see below).
6.3 Terminal Program
Every terminal program compatible with the transmission parameters shown above can be
used, examples are HyperTerminal® or Tera Term®. HyperTerminal has been included in
earlier versions of Microsoft® Windows®. Additionally it can be downloaded from the fol-
lowing address:
Link
https://www.hilgraeve.com/hyperterminal/
Setting
Bits per second
115200
Data bits
8
Parity
None
Stop bits
1
Flow control
None
Terminal emulation
ANSI
Table 9
Transmission parameters of the serial RS 232 interface
USB-Serial
Adapter (optional)
Serial
interface
All other pins:
Do not connect
ST 1
Magnet sensor
Computer (e.g. PC
or Laptop)
1
1
RxD
TxD
GND
RxD
TxD
GND
2
3
4
5
1
2
3
4
5
1
2
3
4
5
6
7
8
9
6
2
7
3
8
4
9
5


