Section 4 • Repair Procedures
4 - 24
GR-20J • GR-26J
Part No. 227656
September 2016
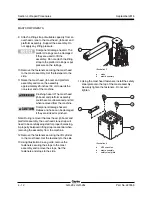
MAST COMPONENTS
4-2
Lift Cylinder
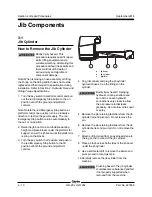
How to Remove the Lift Cylinder
Bodily injury hazard. This
procedure requires specific repair
skills, lifting equipment and a
suitable workshop. Attempting this
procedure without these skills and
tools could result in death or
serious injury and significant
component damage.
Note: When removing a hose assembly or fitting,
the O-ring on the fitting and/or hose end must be
replaced and then torqued to specification during
installation. Refer to Section 2,
Hydraulic Hose and
Fitting Torque Specifications.
Note: Perform this procedure with the machine on
a firm, level surface that is free of obstructions, and
the machine in stowed position.
1 Block the wheels at the non-steer end of the
machine.
2 Open and remove the turntable covers of the
machine.
3 Center a lifting jack under the drive chassis at
the steer end of the machine.
4 Raise the steer end of the machine
approximately 10 inches / 25 cm to access the
nut at the bottom of the lift cylinder.
5 Place blocks under the chassis for support.
Lower the machine onto the blocks.
Crushing hazard. The chassis
could fall if not properly supported.
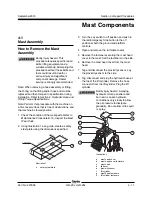
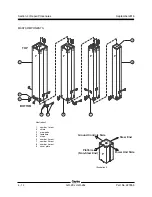
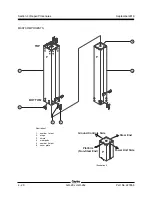
a
mast head cover
b
mast head cover fasteners
c
mast head
d
jib boom
e
proximity sensor
f
lift cylinder
g
mast head fasteners
h
lift cylinder fasteners
6 Remove the nut securing the bottom of the lift
cylinder to the chassis. Set it to the side.
7 Raise the machine slightly. Remove the blocks
from under the chassis and lower the machine
onto the ground. Remove the jack.
8 Remove the fasteners securing the mast head
cover to the mast. Remove the mast head
cover. Set the mast head cover and fasteners
to the side.
9 Tag and disconnect the proximity sensor. Lay
the proximity sensor to the side.
a
c
e
d
g
f
b
h
Содержание GR-26J
Страница 12: ...September2016 GR 20J GR 26J Part No 227656 This page intentionally left blank ...
Страница 75: ...Section 4 Repair Procedures Part No 227656 GR 20J GR 26J 4 29 September2016 This page intentionally left blank ...
Страница 109: ...Section 6 Schematics Part No 227656 GR 20J GR 26J 6 3 September2016 ECM Pin out Legend ...
Страница 118: ...Section 6 Schematics 6 12 GR 20J GR 26J Part No 227656 September2016 This page intentionally left blank ...

