Section 3 • Scheduled Maintenance Procedures
Part No. 227656
GR-20J • GR-26J
3 - 11
September 2016
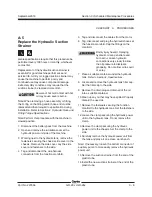
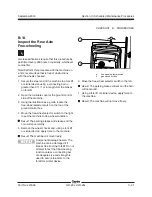
4 Turn the key switch to off position and push in
the red Emergency Stop button to the off
position at the ground control.
5 Tag and disconnect the cables from the ground
terminal of the battery.
6 Remove the fasteners securing the rear chassis
cover to the chassis at the non-steer end of the
machine. Remove the chassis cover. Lay the
cover and fasteners to the side.
7 Inspect the drive motors connections for burnt,
chafed, pinched cables and loose connections.
8 Install the rear chassis cover at the non-steer
end of the machine and securely install the
fasteners.
9 Install the cables onto the ground terminal of the
battery, and securely tighten.
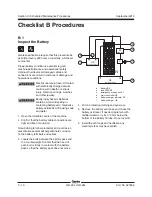
10 Inspect the battery pack for burnt, chafed and
pinched cables.
11 Inspect the following areas for burnt, chafed,
corroded and loose wires:
• Ground control panel
• Battery charger
• Hydraulic power unit
12 Turn the key switch to ground control and pull
out the red Emergency Stop button to the on
position at the ground control.
Note: Rotate the red Emergency Stop button at
platform control one quarter turn in a clockwise
direction to restore the power supply. The red
Emergency Stop button returns automatically to
the out, or on position.
CHECKLIST
B
PROCEDURES
B-2
Inspect the Electrical Wiring
Genie specifications require that this procedure be
performed every 250 hours or quarterly, whichever
comes first.
Maintaining electrical wiring in good condition is
essential to safe operation and good machine
performance. Failure to find and replace burnt,
chafed, corroded or pinched wires could result in
unsafe operating conditions and may cause
component damage.
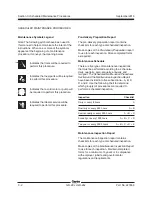
Electrocution/burn hazard. Contact
with electrically charged circuits
could result in death or serious
injury. Remove all rings, watches
and other jewelry.
1 Open and remove the turntable covers from the
machine.
2 Turn the key switch to ground control and pull
out the red Emergency Stop button to the on
position at both the ground and platform
controls.
Note: Rotate the red Emergency Stop button at
platform control one quarter turn in a clockwise
direction to restore the power supply. The red
Emergency Stop button returns automatically to
the out, or on position.
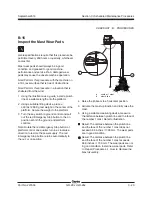
3 Raise the jib boom until the platform is
approximately 8 feet / 2.4 m from the ground.
Содержание GR-26J
Страница 12: ...September2016 GR 20J GR 26J Part No 227656 This page intentionally left blank ...
Страница 75: ...Section 4 Repair Procedures Part No 227656 GR 20J GR 26J 4 29 September2016 This page intentionally left blank ...
Страница 109: ...Section 6 Schematics Part No 227656 GR 20J GR 26J 6 3 September2016 ECM Pin out Legend ...
Страница 118: ...Section 6 Schematics 6 12 GR 20J GR 26J Part No 227656 September2016 This page intentionally left blank ...

