Section 4 • Repair Procedures
Part No. 227656
GR-20J • GR-26J
4 - 7
September 2016
Platform Components
2-1
Platform
How to Remove the Platform
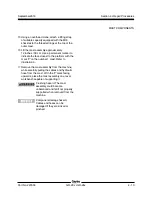
1 Push in the red Emergency Stop button to the
off position at both the ground and platform
controls.
2 Disconnect the battery pack from the machine.
3 Remove the fasteners securing the top plate
assembly to the platform control box.
4 Tag and disconnect the wire harness
connectors from the platform controls circuit
boards.
Electrocution/burn hazard. Contact
with electrically charged circuits
could result in death or serious
injury. Remove all rings, watches
and other jewelry.
Component damage hazard.
Electrostatic discharge (ESD) can
damage printed circuit board
components. Maintain firm contact
with a metal part of the machine
that is grounded at all times when
handling printed circuit boards OR
use a grounded wrist strap.
5 Tag and disconnect the wire harness
connectors from the joystick. Set the top plate
assembly to the side.
6 Remove the fasteners securing the bottom plate
assembly to the platform control box. Lay the
bottom plate assembly and fasteners to the
side.
7 Remove the fasteners securing the outlet
mounting plate to the platform. Set the
mounting plate assembly and fasteners to the
side.
8 Attach a lifting strap of suitable capacity from an
overhead crane to the bottom of the platform.
Support the platform. Do not apply any lifting
pressure.
Component damage hazard. The
platform railings can be damaged
if they are used to lift the platform.
Do not attach the lifting strap to
the platform railings or put
pressure on the railings.
9 Remove the platform mounting pins retaining
fasteners. Set the fasteners to the side.
10 Remove the pins securing the platform to the jib
boom.
11 Remove the platform from the machine.
Crushing hazard. The platform
could become unbalanced and fall
when removed from the machine.
Use caution when removing the
platform from the machine.
Note: During platform removal, the overhead crane
strap will need to be carefully adjusted for proper
balancing.
Содержание GR-26J
Страница 12: ...September2016 GR 20J GR 26J Part No 227656 This page intentionally left blank ...
Страница 75: ...Section 4 Repair Procedures Part No 227656 GR 20J GR 26J 4 29 September2016 This page intentionally left blank ...
Страница 109: ...Section 6 Schematics Part No 227656 GR 20J GR 26J 6 3 September2016 ECM Pin out Legend ...
Страница 118: ...Section 6 Schematics 6 12 GR 20J GR 26J Part No 227656 September2016 This page intentionally left blank ...

