Section 4 • Repair Procedures
4 - 4
GR-20J • GR-26J
Part No. 227656
September 2016
PLATFORM CONTROLS
How to Activate or Deactivate the
Flashing Beacon
(if equipped)
The Flashing Beacon is installed to alert operators
and ground personnel of machine proximity and
motion. The Flashing Beacon is installed on the
ground control side of the mast.
1 Turn the key switch to platform control and pull
out the red Emergency Stop button to the on
position at both the ground and platform
controls.
Note: Rotate the red Emergency Stop button at
platform control one quarter turn in a clockwise
direction to restore the power supply. The red
Emergency Stop button returns automatically to
the out, or on position.
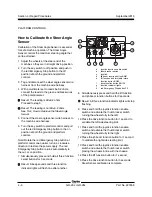
2 Simultaneously press and hold all three function
buttons for 3 seconds.
Result: A beep sounds and three function
indicator lights will flash one after another.
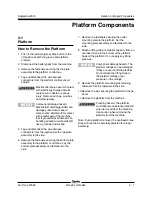
3 Simultaneously press and hold the drive
function and lift function buttons for 3 seconds.
Result: All three function indicator lights will stop
flashing.
4 Briefly press and release the lift function button
to turn the flashing beacon on or off.
Result: The lift indicator light will be on if the
flashing beacon is activated.It will be off if the
flashing beacon is deactivated.
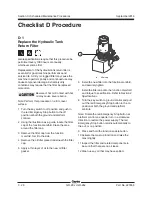
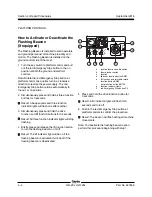
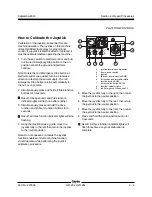
a
joystick function enable switch
b
thumb rocker switch
c
joystick
d
jib boom function button BN97
e
lift function and turntable rotate
function button BN63
f
drive function button BN130
g
function indicator lights
h
red Emergency Stop button P2
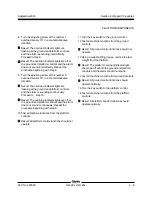
5 Press and hold the drive function button for
3 seconds.
Result: All 3 indicator lights will flash for 3
seconds and turn off.
6 Push in the red Emergency Stop button at
platform controls to confirm the procedure.
Result: The beacon will flash during all machine
movements.
Note: To deactivate the flashing beacon option,
perform this procedure beginning with step 1.
d
h
e
f
g
a
b
c
Содержание GR-26J
Страница 12: ...September2016 GR 20J GR 26J Part No 227656 This page intentionally left blank ...
Страница 75: ...Section 4 Repair Procedures Part No 227656 GR 20J GR 26J 4 29 September2016 This page intentionally left blank ...
Страница 109: ...Section 6 Schematics Part No 227656 GR 20J GR 26J 6 3 September2016 ECM Pin out Legend ...
Страница 118: ...Section 6 Schematics 6 12 GR 20J GR 26J Part No 227656 September2016 This page intentionally left blank ...

