


Xedge Chassis Systems
Xedge 6160 Chassis
2-12
Xedge 6000 Hardware
032R440-000
Installation & Setup Guide
Issue 17
Desktop Installation
1. Install four supplied adhesive-backed feet to the embossed areas on the bottom of the chassis.
2. Ensure that the chassis is not positioned directly adjacent to another chassis. This can cause
warmed air to flow from one unit into the adjacent unit.
Rack/Cabinet Installation
1. Select the proper mounting bracket kit to fit your rack or cabinet:
•
For a 19-inch rack/cabinet, use mounting kit (P/N 010K349-001).
•
For a 23-inch rack/cabinet, use mounting kit (P/N 010K350-001).
2. Using the flathead screws provided, attach the four mounting brackets to the left and right
sides of the chassis: two brackets support the front of the chassis, two support the back.
3. Using two screws for each bracket, mount the chassis assembly to the rack or cabinet.
4. Install blank panels at empty front/rear slots as necessary.
5. When stacking an odd number of Xedge 6160 chassis in a rack/cabinet, you must add a filler
panel, as shown in
.
•
For a 19-inch rack/cabinet, use the filler panel supplied with your chassis.
•
For a 23-inch rack/cabinet, use filler panel (P/N 032C010-001).
Note
IMPORTANT! When mounting the chassis in a rack shared with other types of equipment, ensure that the
installation meets the cooling and air flow requirements of all equipment.
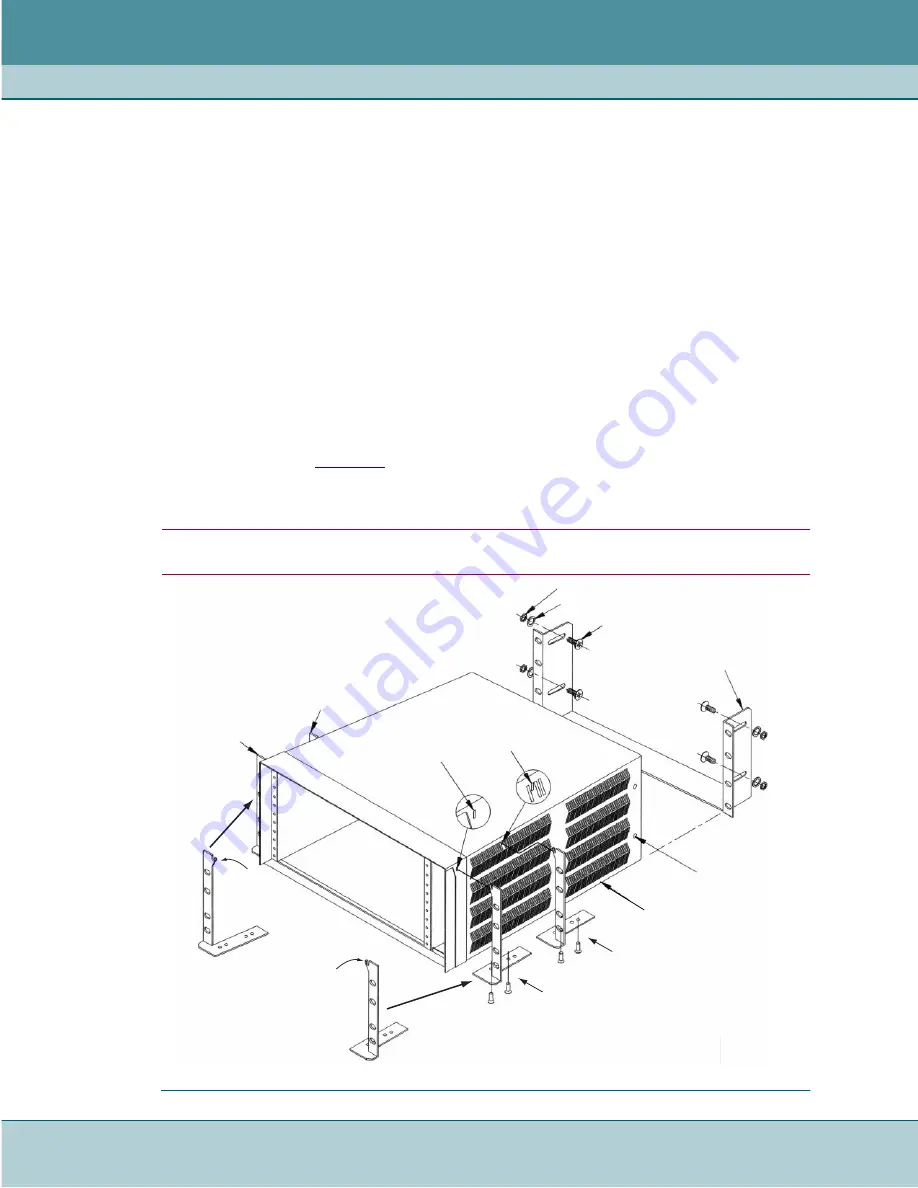
Figure 2-4
Xedge 6160 Chassis Mounting Options
NUT (4)
LOCK WASHER (4)
FLATHEAD SCREW (4)
(through chassis first)
REAR BRACKET
REAR
MOUNTING
HOLES
(2 each side)
ENCLOSURE
MID MOUNT POSITION
USE HOLES SHOWN
FRONT MOUNT POSITION
USE HOLES SHOWN
MID MOUNT
POSITION SLOT
FRONT MOUNT
POSITION SLOT
MID MOUNT
POSITION
FRONT MOUNT
POSITION
RIGHT
BRACKET (1)
LEFT
BRACKET (1)
HOOK
HOOK


