background image

User’s manual maps + more 

Media 

- 133 - 

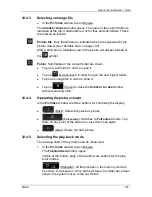
12.2.3 

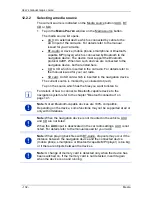
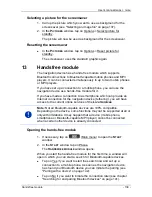
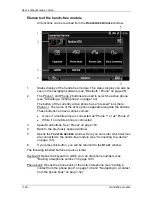
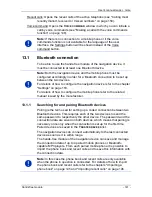
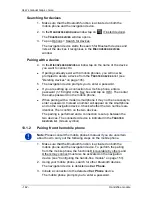
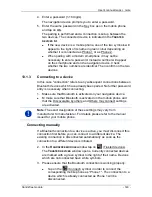
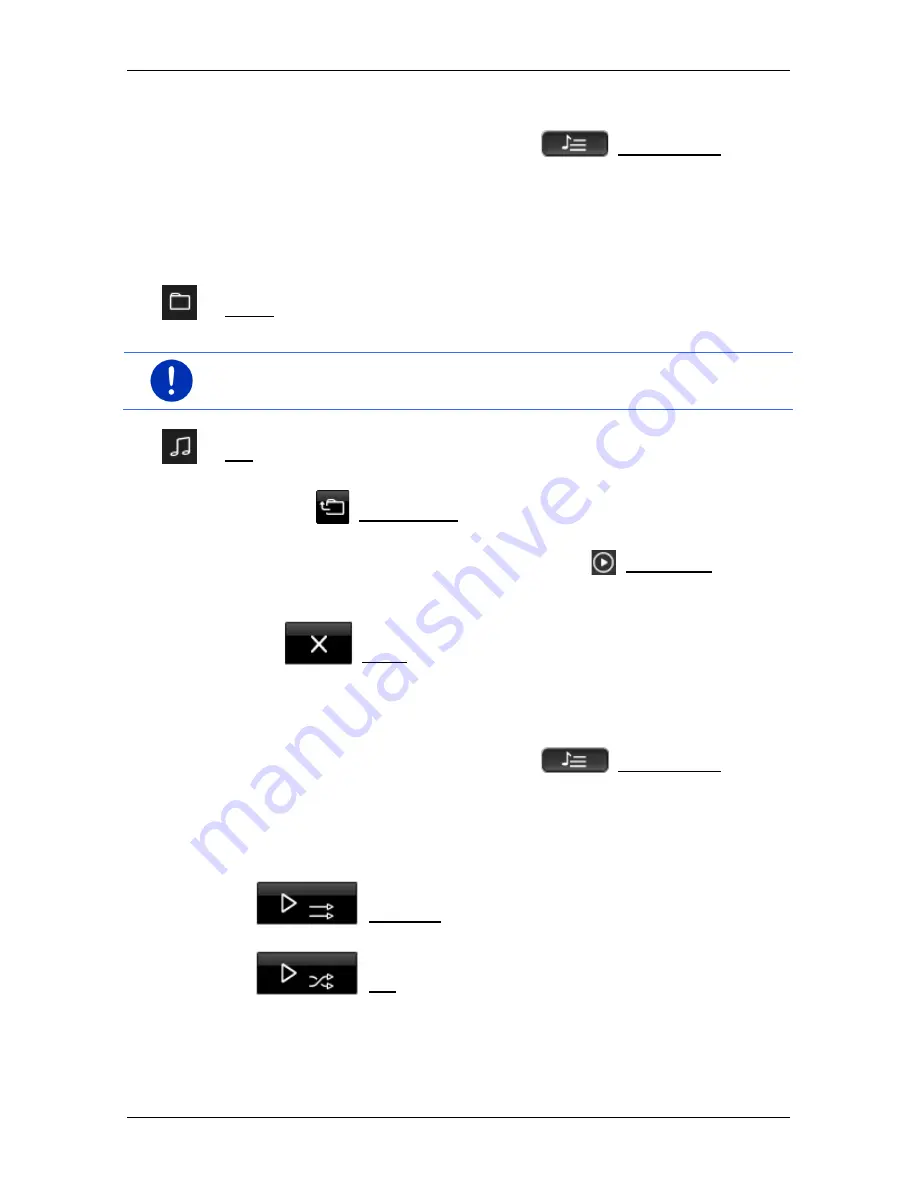
Selecting files for playing back 

► 

In the 

M

EDIA 

P

LAYER

 window tap on 

 (File manager). 

The 

F

ILE MANAGER

 window opens. 

At the top of the list is the name of the folder whose contents are now 
being shown. It is followed underneath in alphabetical order first by the 
sub-folders, then by the files in the current folder. These are marked as 
follows: 


Folder: Sub-folders of the current folder are shown. 

► 

Tap on a sub-folder in order to open it. 


Note:

 If the sub-folder has no playable audio files and no sub-folders, it 

cannot be opened. 


File: Only files which can be played back by the media player are 
shown (see "Supported audio files" on page 131). 

► 

Tap on 

 (Up one level) in order to open the next higher folder. 

► 

Tap on the name of a media file in order to select it for playing back. 
Alongside the name of the file appears the 

 (Current file) symbol 

and this file can be heard. The file will remain selected even if you 
open another folder. 

Tap on 

 (Close) in order to return to the 

M

EDIA 

P

LAYER

 window. 

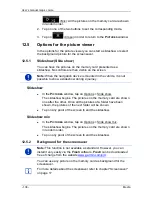
12.2.4 

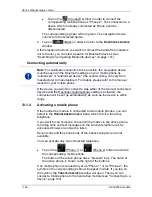
Selecting the play-back mode 

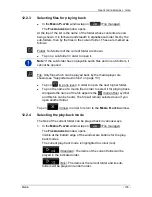
The files of the current folder can be played back in various ways. 

1.  In the 

M

EDIA 

P

LAYER

 window tap on 

 (File manager). 

The 

F

ILE MANAGER

 window opens. 

Visible at the bottom edge of the window are buttons for the play-
back modes. 

The current play-back mode is highlighted in colour (red). 

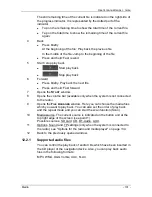
 (Standard): The items of the current folder will be 

played in the indicated order. 

 (Mix): The items of the current folder and its sub-

folders will be played in random order. 

Содержание maps plus more

Страница 1: ...November 2012 maps more User s manual English United Kingdom...

Страница 2: ...mbH Beethovenstrasse 1a b D 97080 W rzburg The information contained herein may be changed at any time without prior notification Neither this manual nor any parts thereof may be reproduced for any pu...

Страница 3: ...4 2 4 3 Memory card 15 2 5 Navigating with GPS 16 3 Switching the navigation device on and off 16 3 1 Device mounted in the vehicle 17 3 1 1 Switching on the device 17 3 1 2 Screensaver 17 3 1 3 Switc...

Страница 4: ...n about the destination 43 7 2 8 Favourites 44 7 2 9 Last destinations 45 7 2 10 Imported addresses from the phone book 45 7 2 11 Navigating home 46 7 2 12 Selecting destinations on the map 46 7 2 13...

Страница 5: ...route profile 80 10 1 5 Managing route profiles 80 10 2 MyPOIs 81 10 2 1 Creating your own destinations 82 10 2 2 Symbols for your own POIs 83 10 2 3 POI Import Importing your own POIs onto the navig...

Страница 6: ...lecting the period 112 11 1 3 Resetting the trip computer 112 11 2 Status 112 11 2 1 Opening the Status window 112 11 2 2 Configuring the Status window 112 11 3 Think Blue Trainer 113 11 3 1 Opening t...

Страница 7: ...r and pairing Bluetooth devices 141 13 1 2 Pairing from the mobile phone 142 13 1 3 Connecting to a device 143 13 1 4 Activating a mobile phone 144 13 1 5 Deleting devices 145 13 1 6 Importing a phone...

Страница 8: ...ts for using the Live services 156 14 3 Using the Live services 156 14 3 1 Using the smartphone s Internet connection 157 14 3 2 Weather service 157 14 3 3 Local search 158 14 3 4 Traffic information...

Страница 9: ...ents on the user interface Underlined and italics Names of control elements on the navigation device 1 1 2 Symbols The following symbols draw attention to specific passages of text Instructions and ti...

Страница 10: ...r respective owners All rights reserved except those explicitly granted If the registered trade marks used in this manual are not explicitly identified as such this does not imply that the name is not...

Страница 11: ...ice 1 Touch screen 2 On Off 3 Slot for microSD memory card 4 Microphone 5 Mini USB socket for USB cable mains adapter 2 3 Important safety information In your own interest please read the following sa...

Страница 12: ...cradle Caution Check that the cradle is secured and adjusted properly before each journey Note If you have not understood the spoken instructions or are unsure about what to do at the next junction yo...

Страница 13: ...the device through this cradle Radio traffic information is received via the antenna of the car radio The navigation device can be used to control the car radio and it receives vehicle data such as co...

Страница 14: ...on on page 11 Removing the cover In the middle of the dashboard is the opening for the cradle of the navigation device Remove the cover from over the opening in the dashboard Fitting the cradle 1 Plac...

Страница 15: ...he internal memory of the device Note If you purchase additional navigation maps they must be saved in the internal memory of the navigation device Navigation data on the memory card are not used The...

Страница 16: ...he device to calculate a route between a starting point and a destination Calculation of the current position and its representation on the map take place approximately once every second In other word...

Страница 17: ...switches on when you switch on the ignition Note The device also switches on when it is fitted in the vehicle while the ignition is already on If the navigation device was previously set to standby th...

Страница 18: ...ey 3 1 3 Switching the device to standby mode When you pull out the ignition key a message will appear shortly afterwards telling you that the device is being switched to standby mode Tap on Standby o...

Страница 19: ...ce will be switched to standby mode in several seconds Wait for the device to be switched to standby mode or tap on Standby 3 2 4 Switching off the device Press the On Off key and keep it pressed unti...

Страница 20: ...her window by tapping on the Main menu button Note If you have not used the navigation device for a long time the battery may be flat If you are using a plug in mains adapter or have connected your de...

Страница 21: ...tions more functions on page 59 4 Password lock You can protect your navigation system from unauthorised use by creating a password The password is always requested when the device is switched on and...

Страница 22: ...its 4 2 Cancelling password protection 1 In the NAVIGATION window tap on More functions Settings Options Password lock The ENTER PASSWORD window opens 2 Enter the currently valid password in the Enter...

Страница 23: ...The Record track symbol indicates that a track is being recorded at this moment For more information about tracks refer to chapter Tracks on page 83 Compass The Compass symbol is available only in the...

Страница 24: ...shown if you have selected No as the setting for Use Live services in the Live services settings see Configuring the Live services on page 160 The Live Services symbol indicates the availability of t...

Страница 25: ...ries The TMC symbol can display the following TMC reception states Tuning in red The TMC receiver is operational but cannot find a transmitter that is sending TCM signals There are no active traffic m...

Страница 26: ...ffic message announcement has finished the original audio source will be used again Tuning red The radio looks for a station which transmits traffic information Bluetooth Phone The navigation device h...

Страница 27: ...ry reason for the trip km total It is possible however to suppress the recording of the trip For a description of the logbook refer to the chapter Logbook on page 110 Media When the navigation device...

Страница 28: ...or the town of B rnau then simply type in the word BARNAU Special characters may be helpful however when naming saved destinations and routes 5 2 1 Special keys inserts a space deletes the character i...

Страница 29: ...h Latin special characters opens the keyboard with Cyrillic special characters opens the keyboard with Greek special characters As soon as you have entered a special character the letter keyboard reap...

Страница 30: ...a menu point to execute its function If you would like to quit the options list without selecting a function tap on the button you used to open the menu 6 Voice command Note The Voice command function...

Страница 31: ...ation instructions warnings and the media player are muted for as long as the navigation device expects to receive voice commands from you 6 3 Help Say only Help if you want to know which voice comman...

Страница 32: ...n the NAVIGATION window tap on More functions Settings General Volume of the assistant 2 Select the volume for the assistant Note For details of how to configure the navigation system refer to the cha...

Страница 33: ...use of poor GPS reception As soon as the navigation device has been switched on initialisation of the GPS receiver will begin The integrated GPS receiver is not initialised for the first time until th...

Страница 34: ...ions and addresses FAVOURITES All destinations that you have entered and then saved see Favourites on page 44 Three special destinations are also saved in the FAVOURITES list My address The address wh...

Страница 35: ...uated in a different country Then follow the instructions given by the navigation system You will be asked for the address data in this order City Street House number 3 Follow the instructions given b...

Страница 36: ...he destination address You can define the order in the NAVIGATION window at More functions Settings General Input mode for address data Please note however that the Street first order of entry is not...

Страница 37: ...w an address with the house number closest to the one entered The map opens in Preview mode The destination is indicated on the map For detailed information on how to start navigation please refer to...

Страница 38: ...etting 3 Enter the degree of longitude Use the corresponding buttons shown on the keyboard in order to enter the units degrees minutes seconds The E W button alongside the entry box indicates whether...

Страница 39: ...r on the map Note If you have created your own POIs they will be available under the MyPOIs category For more details about creating your own POIs refer to chapter MyPOIs on page 81 POI nearby POIs ne...

Страница 40: ...opens Indicated on the Activate MyRoutes button is whether several route suggestions are to be calculated Yes or not No Tap on Activate MyRoutes in order to change the setting 6 Tap on Start navigatio...

Страница 41: ...Tap on Parking in order to search for and navigate to a car park near your destination Tap on Parking Charging Charging near the destination in order to search for a charging station near the destinat...

Страница 42: ...be calculated Yes or not No Tap on Activate MyRoutes in order to change the setting Sometimes the destination cannot be found exactly because for example several restaurants with the same name exist i...

Страница 43: ...opens In the Direct access area you are shown the symbols of those POI categories that are available by direct access 2 Tap on the category from which you would like to select a POI A list opens It c...

Страница 44: ...n are indicated by the symbols Normal charging station or High speed charging station The home address is always indicated by a house even when it is also identified as a charging station Information...

Страница 45: ...a car park near your destination Tap on Parking Charging Charging near the destination in order to search for a charging station near the destination The map opens in Preview mode The destination is...

Страница 46: ...chapter Defining the home address on page 50 In the NAVIGATION window tap on Take me home If you have not yet entered your home address a dialog box will notify you of this Navigation starts The route...

Страница 47: ...etailed information refer to the chapter Map in Preview mode on page 63 Route profile The route is calculated on the basis of a route profile The current route profile is indicated at the top right ed...

Страница 48: ...is marked with MyRoute Note Even when the MyRoutes function is activated sometimes only one additional route or no additional routes at all can be calculated for a particular route No further suggest...

Страница 49: ...and navigation will begin Tap on Cancel The window in which you entered your destination will open again Your destination is saved in the LAST DESTINATIONS list Tap on Demo The route will be calculate...

Страница 50: ...the POI category Charging station when you search for POIs near your current position Tap on OK 7 3 2 Deleting a destination from the Favourites list 1 In the NAVIGATION window tap on My destinations...

Страница 51: ...ge your vehicle Normal charging station or High speed charging station or not No at the indicated destination If you save the destination as a charging option it will be considered as a possible charg...

Страница 52: ...nt position Tap on OK 7 3 4 Changing the home address You can define a different address as the home address at any time Proceed as follows 1 Delete your home address from the FAVOURITES list see Dele...

Страница 53: ...number 1 1 Tap on the Specify starting point box The STARTING POINT menu opens If you want to enter your current location as the starting point 2 Tap on the Current position menu item If you want to e...

Страница 54: ...for the starting point Tap on the route point that you want to edit The context menu contains the following buttons Route point up Moves the selected route point further to the front Example route poi...

Страница 55: ...in alphabetical order A symbol in front of the name indicates whether it is a route or a track If you want to load a route 2 Tap on the route that you want to load 3 Tap on Load route The ROUTES AND...

Страница 56: ...also possible simply to simulate navigation on a planned route Note GPS reception is not necessary for simulation If you have planned a multi leg route only the first leg will be simulated You have c...

Страница 57: ...refer to the chapter Route profiles on page 78 Note When you load routes which originate from a different provider than GARMIN it may be impossible for you to change the route profile of this route Tu...

Страница 58: ...ent route or a detour Alternative route Driving range warning The Driving range warning symbol will appear alongside the route under the following circumstances With the vehicle s current driving rang...

Страница 59: ...will be added as a route point see Tracks and multi leg routes on page 52 Block Opens a window in which you can block a section of the route lying ahead in order to calculate a route which avoids this...

Страница 60: ...Opens the MYREPORT window Here you can notify Garmin W rzburg about any changes to traffic monitoring systems and routing MyRoutes Opens the map in Preview mode You are provided with up to three diff...

Страница 61: ...name see Saving routes page 55 Saved routes and tracks Opens a window in which you can load a saved route or a track Settings Opens the SETTINGS window Here you can configure the navigation system see...

Страница 62: ...ttings Map display in order to see which maps are currently in use Here you can also select a different continent if the navigation device contains any maps of countries on other continents 9 2 Map in...

Страница 63: ...eed Map options in Standard mode Tap on Options A window with several buttons opens The most important functions for navigation can be reached via buttons with symbols Other functions are found by tap...

Страница 64: ...e reported obstructions are also indicated on the route The route which corresponds best to the selected route profile is marked with MyRoute If the MyRoutes function is not activated only one route i...

Страница 65: ...yed Tap on the Route profile button see the figure point 1 in order to select a different route profile To start the navigation tap on the button for the route see figure point 2 you want to use for t...

Страница 66: ...1 Navigation in Vehicle mode After the route was shown in Preview mode navigation was started The map opens in Navigation mode 1 If any information is available about the sign which you should follow...

Страница 67: ...ic information box opens if a reported traffic obstruction affects your route If a distance is indicated in the Traffic information box no detour route was calculated yet for the traffic obstruction i...

Страница 68: ...o see the estimated driving time instead Tap once again on the info box if you want to see the estimated time of arrival 13 If you are navigating a multi leg route you will see the remaining distance...

Страница 69: ...device is mounted in the vehicle You can regulate the volume on the radio when a navigation instruction is being announced Tap on the large arrow box see point 6 in the figure at the beginning of thi...

Страница 70: ...profile for the navigation These profiles can be identified by the Pedestrian symbol After the route was shown in Preview mode navigation was started You receive a route proposal which is calculated...

Страница 71: ...eception could be impaired 1 The scale of the map section shown is indicated here The length of the ruler corresponds to the distance indicated 2 The route which was calculated using the digitalised r...

Страница 72: ...route and would like a new route proposal 9 4 3 Navigation in Track mode This mode becomes active if you have planned a route with a track for the navigation see Tracks and multi leg routes on page 52...

Страница 73: ...l guide you first in Offroad mode to the nearest point of the digitalised road system From here the navigation then continues in Vehicle mode Navigation in Offroad mode works like navigation in Pedest...

Страница 74: ...le the name of the street under the cross hairs When you are driving the map does not change It is always orientated with north at the top Zoom Out The map section shown becomes larger but you will se...

Страница 75: ...rmin W rzburg about any changes to traffic monitoring systems and routing Interim destination Sets the selected point as interim destination The navigation system will first guide you to this interim...

Страница 76: ...only when the following conditions are fulfilled The navigation device is correctly inserted in its cradle The vehicle ignition is on GPS reception is good enough for positioning purposes 9 6 1 Showi...

Страница 77: ...ss Note The radius of action for the return trip can be shown only if the indicated home address is still reachable Define your personal charging station as the home address so that it can be consider...

Страница 78: ...tions 10 1 Route profiles Route profiles define the characteristics and special aspects of the different modes of transport which are to be taken into account when calculating routes For example a rou...

Страница 79: ...re are no Motorways and Use of toll roads settings 10 1 2 Basic profiles A basic profile is already defined for each speed profile Bicycle Pedestrian Lorry Motorbike Car The speed profile of a basic p...

Страница 80: ...naging route profiles User defined route profiles can be edited renamed and deleted Editing a route profile 1 Tap on Options Settings If the map is open in Standard mode tap on Options General Setting...

Страница 81: ...Tap on Save Note Basic profiles cannot be renamed Deleting a route profile 1 Tap on Options Settings If the map is open in Standard mode tap on Options General Settings 2 Tap on the Current route pro...

Страница 82: ...decimal sign Comma as list separator Latitude Begin the entry with a minus sign if you want to enter a southern degree of latitude The latitude must be entered as a decimal number with a dot as the de...

Страница 83: ...graphic files must be saved in the same folder as the files with the POIs The file name must be the same as the name of the category Example Destinations of the XYZ sub category are saved in the XYZ...

Страница 84: ...gain from there at any time Stopping the recording 1 Tap on Options Services Stop recording The recording is stopped The recorded route is saved in the SAVED ROUTES AND TRACKS list in KML data format...

Страница 85: ...our current position has been saved You will find it in the Favourites list as My vehicle This enables you to easily find the way back to your vehicle 3 Tap on OK The position of your vehicle is marke...

Страница 86: ...stination You have reached your destination Navigation has ended For some reason however you carry on driving perhaps because you were unable to find a place to stop Now you want to be guided back to...

Страница 87: ...about it You have the following options Tap on Interim destination in order to set the selected point as an interim destination The navigation system will first guide you to this interim destination...

Страница 88: ...show a list with more POIs in this category The POIS ON YOUR ROUTE list opens 1 Symbols of those categories in which POIs are available are shown at the top edge of the screen The symbol of the curren...

Страница 89: ...hich you want to navigate The selected destination will be inserted as an interim destination The system recalculates the route Navigation to the original destination will be continued after reaching...

Страница 90: ...r important destinations For nationally known sights a description will be read out as soon as the Sightseeing button appears Audio info for all destinations For all sights in the category a descripti...

Страница 91: ...eing read out Tap on Show on map in order to show the sight on the map Tap on Save destination in order to save the sight in the FAVOURITES list Tap on the picture of the sight to show it in full scre...

Страница 92: ...ded from your current position to the advised starting point of the sightseeing tour Navigation on the selected tour then begins Nearest You are guided from your current position to the most favourabl...

Страница 93: ...ories Petrol station Police station Hospital Pharmacy Tap on the corresponding button The nearest help point in the selected category will be indicated You are shown the name address phone number if k...

Страница 94: ...to avoid the leg e g if you have heard on the radio of a traffic jam affecting this section Note The block is valid only for the current navigation It no longer exists on a new navigation You are cur...

Страница 95: ...p on Options Route Turn by Turn list The TURN BY TURN LIST window opens 1 Schematic depiction of the next junction where you must make a turn 2 Distance to this junction 3 Route instruction and if ava...

Страница 96: ...g The low fuel warning is active when the map is opened in Standard mode or in Navigation mode It appears as soon as the reserve fuel tank indicator appears on the vehicle s instrument panel On CNG ve...

Страница 97: ...corresponding sensors are fitted to the vehicle Some vehicles have sensors only at the rear others can divide the space in front of or behind the vehicle into different numbers of zones Parking assis...

Страница 98: ...appears you will hear a continuous tone Tap on the screen to hide the parking assistance Caution It is possible that the distance from very narrow pointed or very low obstacles will not be correctly...

Страница 99: ...s not within range Consideration is given to all private charging stations Favourites as well as to the public charging stations recorded in the map Calculation of a Multi Stop route is offered in the...

Страница 100: ...nction is available only when GPS reception is good enough for positioning purposes the navigation device is correctly inserted in its cradle the vehicle ignition is on range warning was activated in...

Страница 101: ...this charging station next Tap on Calculate if you want to make a charging stop there The system calculates the route Navigation to the charging station is then started Navigation to the original dest...

Страница 102: ...s a normal charging station for all future navigation calculations Identifying favourites as charging stations You can mark any favourite as a charging station If required save your navigation destina...

Страница 103: ...GPS reception is good enough to determine the current position Multi Stop routes are routes with interim stops at fuelling stations with CNG pumps A Multi Stop route can be calculated in the followin...

Страница 104: ...ssumed to be the case if the distance to the destination or to the fuelling station with a CNG pump is more than 90 of the current range of the CNG tank Note The remaining driving range can be viewed...

Страница 105: ...traffic messaging If necessary it can change your route dynamically for example in order to avoid a traffic jam Note TMC is available free of charge in many European countries PremiumTMC promising a...

Страница 106: ...tting the button will not show a distance The traffic obstruction will be avoided automatically if this can justifiably shorten the trip If not the traffic information will be ignored Recalculate rout...

Страница 107: ...nformation about this message will open see Showing a single message in detail on page 109 Recalculate route On request The Traffic information button appears in green when there is no longer a traffi...

Страница 108: ...ly blocked by the obstruction or involves a considerable loss of time more than 30 minutes to pass through This can be the case for example when several lanes are blocked due to an accident Yellow The...

Страница 109: ...pen Reading out text messages is not possible in all languages however Tap on the Show on map button in order to view the section concerned on the map 10 18 4 TMC settings In the TRAFFIC INFORMATION w...

Страница 110: ...ble as a new entry The first time a trip is recorded the Logbook xls file will be created in the NAVIGON Logbook folder If you delete move or rename this file a new file will be created when you next...

Страница 111: ...unting the navigation device on page 14 The navigation device is correctly inserted in the cradle refer to Fitting the cradle on page 14 The vehicle ignition is on 11 1 Trip computer The trip computer...

Страница 112: ...the memory 2 of the multifunction display of the combination instrument It always begins anew when one of its maxim um values is exceeded For details please refer to your vehicle s operating manual 11...

Страница 113: ...Think Blue Trainer application offers functions which illustrates and evaluates your driving profile with regards to acceleration braking and shifting gears on vehicles with manual transmission These...

Страница 114: ...re drive with foresight to avoid large swings 2 The segments in the inside of the iris represent the development of your Blue Score for past periods Each segment stands for a period of several seconds...

Страница 115: ...or three different periods Av since start Indicates the average Blue Score since the beginning of the trip If you want to begin a new trip Since start reset the corresponding data of the Think Blue Tr...

Страница 116: ...e Think Blue Trainer application The Reset button opens a window which tells you that you can reset the trip data using the vehicle s controls see also Resetting the Think Blue Trainer application on...

Страница 117: ...d graphically Only periods in which the engine is running and the vehicle is moving are recorded A bar represents the average consumption per minute for each of the past 30 minutes driving Values beyo...

Страница 118: ...le so that you consume as little energy as possible from your vehicle s battery 1 If necessary tap on Main menu to open the START window 2 In the START window tap on Car info Think Blue Trainer The ST...

Страница 119: ...the screen is a button showing the name of the active application e manager Power flow or Energy recovery Tap on this button to open one of the non active applications 11 4 2 Power flow This applicati...

Страница 120: ...nary or coasting or the ignition is off No energy is being consumed or recovered recuperated 11 4 3 e manager This application can be used to plan for charging and air conditioning operations in accor...

Страница 121: ...sign a charging location to it see Defining the departure times on page 123 3 Activate the checkbox alongside the departure time which you want to use 4 When the departure time is activated see point...

Страница 122: ...the checkbox alongside this setting if you want the temperature in the vehicle to have already reached a certain value at the time of departure To define the temperature proceed as described in Set ai...

Страница 123: ...pping on the corresponding button 4 If you want to define the entered date as a serial date e g every Monday at 7 30h activate the Repeat button at the top right edge of the screen You can also select...

Страница 124: ...air conditioning system To ensure that the battery is not fully drained the air conditioning system will be switched off as soon as the battery charging status drops below a certain value This value i...

Страница 125: ...re time cannot be deleted You must first assign a different charging location to the departure time see Assigning a charging location on page 123 1 In the E MANAGER window tap on List to the right of...

Страница 126: ...rol the CD player in the car radio To play back audio files from a memory card in the navigation devvice To play back aduio files from a device connected via Bluetooth phone smartphone or Bluetooth ca...

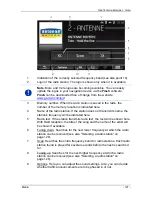
Страница 127: ...station s frequency will be indicated here 5 Radio text If the station transmits radio text the text will be shown here With DAB reception the title of the song and the name of the artist will be show...

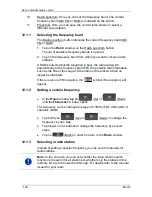
Страница 128: ...on such as the title of the song and the name of the artist will then no longer be indicated If there is also no FM reception the symbol No reception will appear 12 1 2 Setting a certain frequency In...

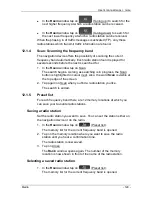
Страница 129: ...n is highlighted in colour red Also the word Scan is visible at the top edge of the screen 2 Tap again on Scan when you find a radio station you like The search is ended 12 1 5 Preset list For each fr...

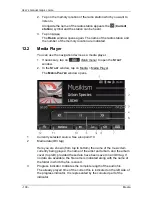
Страница 130: ...e START window tap on Media Media Player The MEDIA PLAYER window opens 1 Currently selected source See also point 10 2 Media data ID3 tag Here you are shown from top to bottom the name of the music it...

Страница 131: ...window 8 Opens the volume bar available only when the system is not connected to the radio 9 Opens the FILE MANAGER window Here you can choose the media files which you want to play back You can also...

Страница 132: ...urce is marked by a coloured dot red Tap on the source which has the files you want to listen to For details of how to connect a Bluetooth capable device to the navigation system refer to the chapter...

Страница 133: ...dio files on page 131 Tap on Up one level in order to open the next higher folder Tap on the name of a media file in order to select it for playing back Alongside the name of the file appears the Curr...

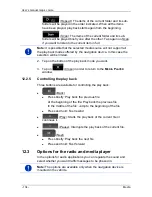
Страница 134: ...want 3 Tap on Close in order to return to the MEDIA PLAYER window 12 2 5 Controlling the play back Three buttons are available for controlling the play back Back Press briefly Play back the previous f...

Страница 135: ...messages is activated or not 2 Tap on the TP entry to select the alternative setting When TP is activated and traffic information is being transmitted a message window will appear Tap on Cancel if yo...

Страница 136: ...ume bar opens It contains three buttons for adjusting the volume Louder Quieter Volume on off 2 Tap on Volume again or wait a few seconds The volume bar closes 12 4 Pictures The navigation device can...

Страница 137: ...next higher folder Tap on an image file in order to show it Tap on Close to close the CURRENT FOLDER window without selecting a file 12 4 4 Operating the picture viewer In the PICTURES window are thr...

Страница 138: ...TURES window tap on Options Slide show The slideshow begins The pictures on the memory card are shown one after the other Once all the pictures of a folder have been shown the pictures of the next fol...

Страница 139: ...ide an Internet connection for the navigation device tethering you will have access to the current online services of the Live Services Note Not all Bluetooth capable devices are 100 compatible Depend...

Страница 140: ...ave various colours Green if a mobile phone is connected as Phone 1 or as Phone 2 White if no mobile phone is connected 3 Speed Call buttons See Preset on page 153 4 Back to the previously opened wind...

Страница 141: ...bile phone refer to the related manual issued by the manufacturer 13 1 1 Searching for and pairing Bluetooth devices Pairing is the term used for setting up a coded connection between two Bluetooth de...

Страница 142: ...n the mobile phone When pairing with a modern smartphone it may not be necessary to enter a password Instead a number will appear on the smartphone and on the navigation device Check whether the two n...

Страница 143: ...is necessary when connecting 1 Make sure that Bluetooth is activated on your navigation device M make sure that Bluetooth is activated on the mobile phone and that the Discoverable by others and Other...

Страница 144: ...as either of the two last connected devices and the Reconnect automatically setting is activated the connection will be set up automatically as soon as the device is within range 13 1 4 Activating a m...

Страница 145: ...ile phone is then only possible when the navigation device is connected to the mobile phone from which the phone book was imported As soon as you connect to a different phone or disconnect the connect...

Страница 146: ...that you will have to repeat the pairing routine in order to set up a connection with the device again For more details about the phone book refer to the chapter Calling a contact from the phone book...

Страница 147: ...y mobile phone When you receive a text message SMS a signal tone will sound and the INCOMING TEXT MESSAGE window will open The header line shows which connected telephone received the text message The...

Страница 148: ...ach number separately but you can say the numbers in blocks For example say nine four three three for the number block 9433 4 Wait for the numbers you said to appear Repeat steps 3 to 4 until the comp...

Страница 149: ...you want to use to make the call see Activating a mobile phone on page 144 2 Tap in the HANDSFREE MODULE window on the corresponding Speed Call button Note If the selected Speed Call button has not be...

Страница 150: ...e right of the entry indicate the type of call Missed calls Incoming calls Outgoing calls 2 Tap on the entry you want Note The RECENT CALLS list is available to the hands free module only for as long...

Страница 151: ...ers 3 Tap on Back in order to open the CALL IN PROGRESS window 13 5 3 Muting the microphone During the call you can mute the microphone so that you can talk to someone without the person on the other...

Страница 152: ...vigate You can also select addresses from the phone book in the navigation software to act as destinations For more details refer to the chapter Imported addresses from the phone book on page 45 13 6...

Страница 153: ...edit the existing name and number 5 Tap on OK Adopting a number from the phone book of the mobile phone 3 Tap on the From the phone book button This button is deactivated when there is no connection t...

Страница 154: ...matically Select whether the connection to the last connected phone is to be restored automatically Yes or No as soon it comes within range again Sort phone book by Select the column to be used for so...

Страница 155: ...ation of floating car data also helps to calculate the estimated time of arrival more exactly 14 1 Costs 14 1 1 Data traffic costs Use of the Live services causes data traffic Connecting to the Intern...

Страница 156: ...The smartphone is selected as an Internet access point see Using the smartphone s Internet connection on page 157 14 3 Using the Live services The Live services are seamlessly integrated in the naviga...

Страница 157: ...e Weather data for your current position This function is interesting above all when you want a weather forecast for the next few days In the NAVIGATION window tap on Live Weather service The WEATHER...

Страница 158: ...s Destination Add interim destination and then enter the town for which you want receive weather data Do not tap on Start navigation 2 Tap on Options Weather service The WEATHER SERVICE window opens Y...

Страница 159: ...list opens It contains the POIs which were found Shown alongside each POI is the average rating 1 star to 5 stars No star means that no rating was given yet 6 Tap on the name of the destination to whi...

Страница 160: ...for the traffic information Note If you stop using the Live services you will no longer receive any traffic information In this case set the Source of traffic information setting to radio stations se...

Страница 161: ...ON window and via the options in many windows of the navigation application Tap on Options Settings The SETTINGS window of the navigation application has several buttons Current route profile Navigati...

Страница 162: ...7 x 83 3 x 18 2 mm Weight 191 g Operating conditions Operating temperature 10 C to 70 C 14 F to 158 F Storage temperature 20 C to 60 C 4 F to 140 F Humidity 0 to 90 non precipitating CPU STM Cartesio...

Страница 163: ...CE AND AGREE TO ITS TERMS IF YOU DO NOT AGREE RETURN THE COMPLETE PRODUCT WITHIN 7 DAYS OF THE DATE YOU ACQUIRED IT IF PURCHASED NEW FOR A FULL REFUND TO THE DEALER FROM WHICH YOU PURCHASED THIS PRODU...

Страница 164: ...licensors and suppliers make no guarantees representations or warranties of any kind express or implied arising by law or otherwise including but not limited to content quality accuracy completeness e...

Страница 165: ...port from anywhere any part of the Data provided to you or any direct product thereof except in compliance with and with all licences and approvals required under applicable export laws rules and regu...

Страница 166: ...r transfer of the Product and accompanying documentation is subject to restrictions as set forth in DFARS 252 227 7014 a 1 JUN 1995 DOD commercial computer software definition DFARS 27 7202 1 DOD poli...

Страница 167: ...t for the navigation software to be reloaded 2 Insert the USB connector from the charger into the corresponding socket of the navigation device swiftly as far as it will go see Description of the navi...

Страница 168: ...ard is correctly inserted in the device 2 Press the On Off key and keep it pressed until the device switches off approx 5 seconds 3 Wait several seconds 4 Press the On Off key and keep it pressed unti...

Страница 169: ...Trip computer 111 Charging 99 101 Charging station 101 Compass 23 Configuration Live 160 Configuration 161 Connect 143 Consumption 117 Conventions followed in this manual 9 Coolant temperature 112 Cos...

Страница 170: ...Call in progress 150 Connect 143 Delete device 145 Dial number 149 Enter numerals 151 Hang up 151 Importing a phone book 145 Importing recent calls 146 Incoming call 147 Handsfree module Incoming text...

Страница 171: ...ic information 100 104 Muting 27 My destinations 34 MyPOIs 81 MyRoutes 48 57 N Navigation Block 94 95 MyRoutes 48 57 No GPS 49 59 Route profile 47 57 Start 47 57 Start navigation 48 58 Turn by Turn li...

Страница 172: ...ing point 53 Route profile 47 57 78 Routes Load 55 Manage 54 Route points 53 Route profile 57 Save 55 Show 56 Simulation 56 Start navigation 57 Routes Starting point 53 Turn by Turn list 57 Routes and...

Страница 173: ...alculate route 110 TMC 109 Traffic information 109 Tuning mode 109 TP Radio 135 Symbols 26 Track Load 55 Record track 23 84 Trade marks 10 Traffic information Multi Stop route 100 104 Preview TMC 106...

Отзывы: