SER
VICING
73
PULSE Installation, Commissioning and Servicing Manual - Revision 19
11.3 Obtaining Dispenser Logs
Agents may be required to obtain dispenser logs which are used to assist in the diagnosing of
dispenser issues or to locate details of specific sales or other events.
1. Safely remove the SD card.
2. Place the SD card in a computer.
3. Copy the entire contents.
4. Replace the SD card in the dispenser.
12
SERVICE MODE FUNCTIONS
For v1.20 see section 13.
The following Service Mode Functions are also performed during the commissioning of a
dispenser. Reference is made to this section in the Commissioning part of this manual.
Only one UI (User Interface Display) should be put into Service Mode at any given time. If
an attempt is made to put a second UI into Service Mode it will not respond until the first
UI is taken out of Service Mode.
See also Section 12.17
Manager Mode
which is provided to allow site owners/
managers to view and set a limited number of functions.
12.1 Entering Service Mode
Service Mode is accessed by holding down the
F
key for three seconds. The word
FILL
is displayed
in the Preset window and then disappears.
Enter the Service Mode password and press
F
again.
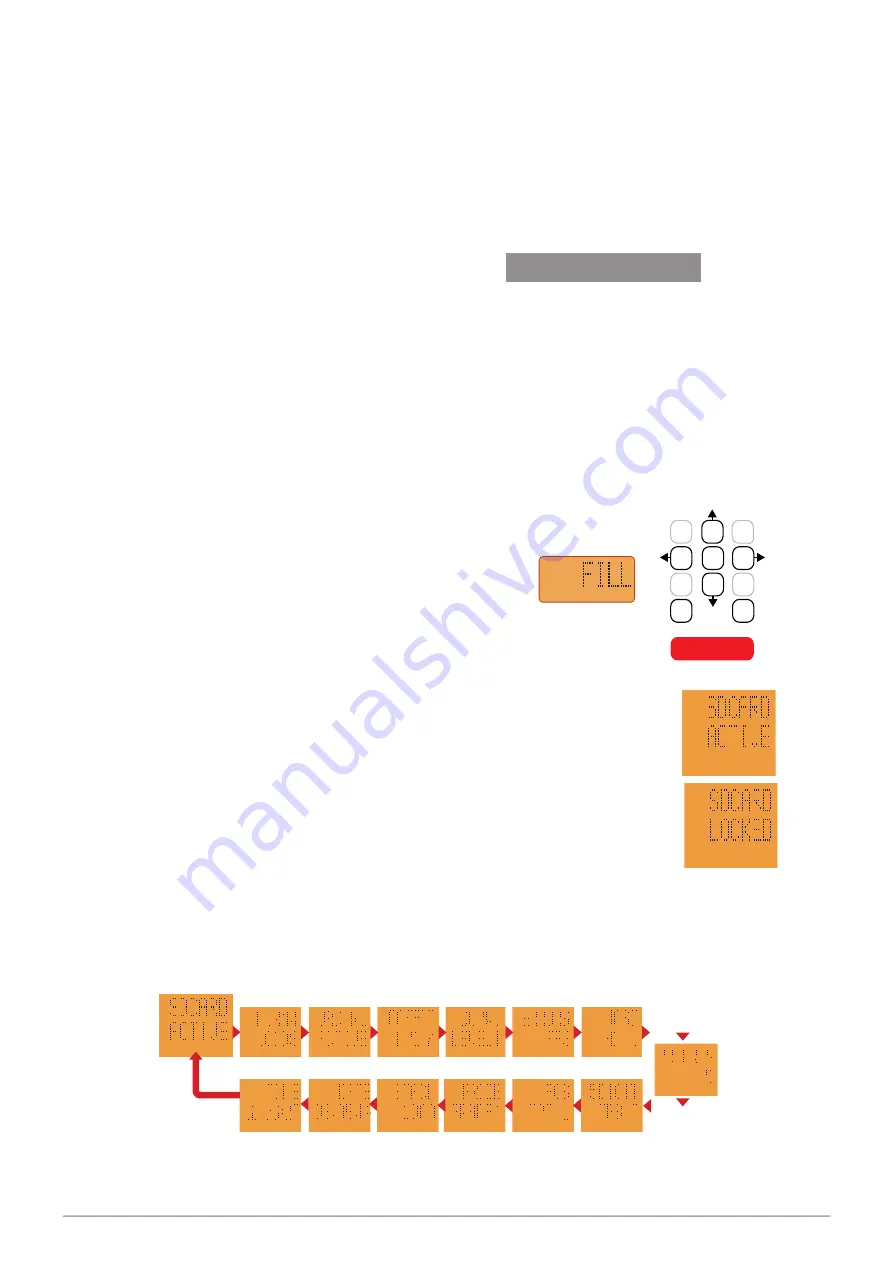
The screen will show
SDCARD ACTIVE
.
$
L
$
L
12.2 SD Card Setting
The SD Card can be set to
ACTIVE
or
LOCKED
by pressing the
5
key.
Only remove an SD Card when in the LOCKED mode.
12.3 Service Mode function screens
In Service Mode, the
2
and
8
keys initially serve as direction
keys and are used to navigate through to a particular function.
Keys
4
and
6
are also used to navigate within a function.
Figure 38� Order of Service Mode Screens
$
L
$
L
$
L
$
L
$
L
$
L
$
L
$
L
$
L
$
L
$
L
$
L
$
L
$
L
ST
1
2
3
4 5 6
7
8
9
C 0
FILL
STOP DELIVERY
PRESET
The figure below shows the order in which the various service mode function screens will
appear starting at SDCARD ACTIVE. When scrolling vertically or horizontally it is possible
to continue beyond the last option to the first option.
Shows only
when Gilbarco
Protocol in use
Version 1.11


