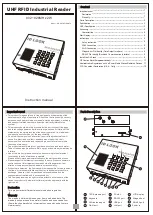
5. Installing and Wiring Components
1. Connect the Analog Output wires from the Analog Outputs 1, 2, 3, or 4 screw terminals on
the I/O Master terminal block to the Analog Inputs on the end device (RTU).
2. Connect a common Ground.
Note
: FreeWave recommends running a Ground wire from any I/O Master Ground screw terminal to
Ground on the RTU.
An Analog Output on the I/O Master that is outputting an I/O Slave’s Analog Input remains at the
last reported value if communication to that I/O Slave is lost.
5.1.7 Digital Outputs
The Digital Outputs on the I/O Master actively drives Low (0.4V) and High (4.0V).
1. Remove any RTU input pull-up resistor, if less than 10 KΩ.
2. Verify signal levels meet the RTU input requirements after connection to the RTU.
Warning!
The I/O Master Digital Outputs source about 4 mA. It is NOT designed to drive
relays or solenoids.
Complete these steps to connect the Digital Outputs on the I/O Master to the end device.
1. Connect the Digital Output wires from the Digital Output 1, 2 ,3, or 4 screw terminals on the
I/O Master terminal block to the Digital Inputs of the end device (RTU).
2. Connect a common Ground.
FreeWave Recommends
: Run a Ground wire from the I/O Master Ground screw terminal to Ground
on the RTU.
A Digital Output on the I/O Master that is outputting an I/O Slave’s Digital Input remains at the last
reported value if communication to that I/O Slave is lost.
5.1.8 Link Alarms
Complete these steps when connecting link alarms from the I/O Master to the end device.
1. Connect a wire from the Link Alarm 1 screw terminal to the Link Alarm screw terminal on
the RTU.
Link Alarm 1 is an alarm reflecting loss of communication on any path.
2. Connect a wire from the Link Alarm 2 screw terminal to the Link Alarm screw terminal on
the RTU.
Link Alarm 2 (CMD Alarm) indicates that a Digital Output or
Sensor Power
command was
not carried out due to an over-current fault.
Page 76 of 131
LUM0008AG Rev Sep-2015
This document is the property of FreeWave Technologies, Inc. and contains proprietary information owned by
FreeWave®. This document cannot be reproduced in whole or in part by any means without written permission from
FreeWave Technologies, Inc.
Содержание FGR2-IO-IOE
Страница 131: ......